

This lacy lid cover gives the bathroom a soft, vintage cottage look. A raised pink rose with three tiers of petals sits in the center, framed by a ring of wide cream petals. Around that, open pink chain mesh holds a circle of cream leaf appliqués, and a cream-and-pink scalloped border finishes the edge.
The palette is just two colors: a dusty blush pink and a warm cream. The rose, mesh and scallop outline are pink. The large petals, leaves, fans and final edging are cream.
The pattern uses US crochet terms. The finished cover measures 17″ (43.2 cm) across when laid flat. That covers a standard lid of about 14″ x 18″ (35.6 x 45.7 cm), with the border folding over the sides. An optional drawstring holds the cover in place.
You crochet the rose first, then keep working outward in rounds: the cream petal ring, the pink mesh, one solid single crochet round, and then the scalloped border. Finally, you make 16 small cream leaves and sew them onto the mesh.
Finished Size and Construction
- Finished size: 17″ (43.2 cm) across, blocked flat
- Skill level: Intermediate
- Terminology: US
- Yarn weight: DK / light (#3) cotton or cotton blend
- Hook: 3.5 mm (E-4)
- Number of pieces: 1 main round piece, plus 16 small leaf appliqués sewn on top
- Layout: one circular piece worked from the center out; the leaves sit in one ring
- Size before border: 14.5″ (36.8 cm) across after Round 16
- Border depth: 1.25″ (3.2 cm) all around
- Leaf size: 2.25″ x 1″ (5.7 x 2.5 cm)
Materials
Choose a mercerized or soft matte cotton. Cotton shows the stitches clearly, stands up to washing and helps the rose petals keep their shape. Avoid fuzzy yarns, because they blur the mesh.
- Color A, blush pink: about 120 g / 270 m (rose, mesh, Round 16, Border Round 2)
- Color B, cream: about 70 g / 158 m (petal ring, leaves, Border Rounds 1 and 3)
These amounts include about 15% extra for your test rounds and for differences in tension.
Tools:
- 3.5 mm (E-4) crochet hook
- Tapestry needle
- 4 locking stitch markers
- Scissors and a measuring tape
- Blocking mat, rust-proof pins and a spray bottle
- Optional: 60″ (152.4 cm) of 1/8″ (0.3 cm) cream satin ribbon, or a crocheted chain cord, for the drawstring
Abbreviations (US Terms)
- ch – chain
- sl st – slip stitch
- sc – single crochet
- hdc – half double crochet
- dc – double crochet
- tr – treble crochet
- sp – space
- st(s) – stitch(es)
- RS – right side
Special stitch – back post sc: Working from behind the piece, insert the hook around the post of the stitch you’re told to use, going from back to front to back. Yarn over, pull up a loop and finish as a regular sc. Each new rose layer is anchored this way, behind the petals in front of it.
Picot: Ch 3, sl st in the 3rd ch from the hook.
Gauge and Checkpoints
Gauge: 21 sc = 4″ (10.2 cm).
Use the rose as your gauge test. Work Rounds 1–6 and measure. These rounds are quick, and they tell you whether the whole cover will come out the right size.
Checkpoints (measured across, lightly pressed flat):
- After Round 6: 3.5″ (8.9 cm)
- After Round 9: 5.5″ (14.0 cm)
- After Round 12: 9″ (22.9 cm)
- After Round 15: 13.25″ (33.7 cm)
- After Round 16: 14.5″ (36.8 cm)
- After the border: 17″ (43.2 cm)
If the rose is too big, go down half a hook size. If it is too small, go up half a size. Being off by 1/4″ (0.6 cm) at the rose grows to more than 1″ (2.5 cm) at the edge, so fix it now. Chain mesh relaxes a little when blocked, so if you are between sizes, choose the smaller one.
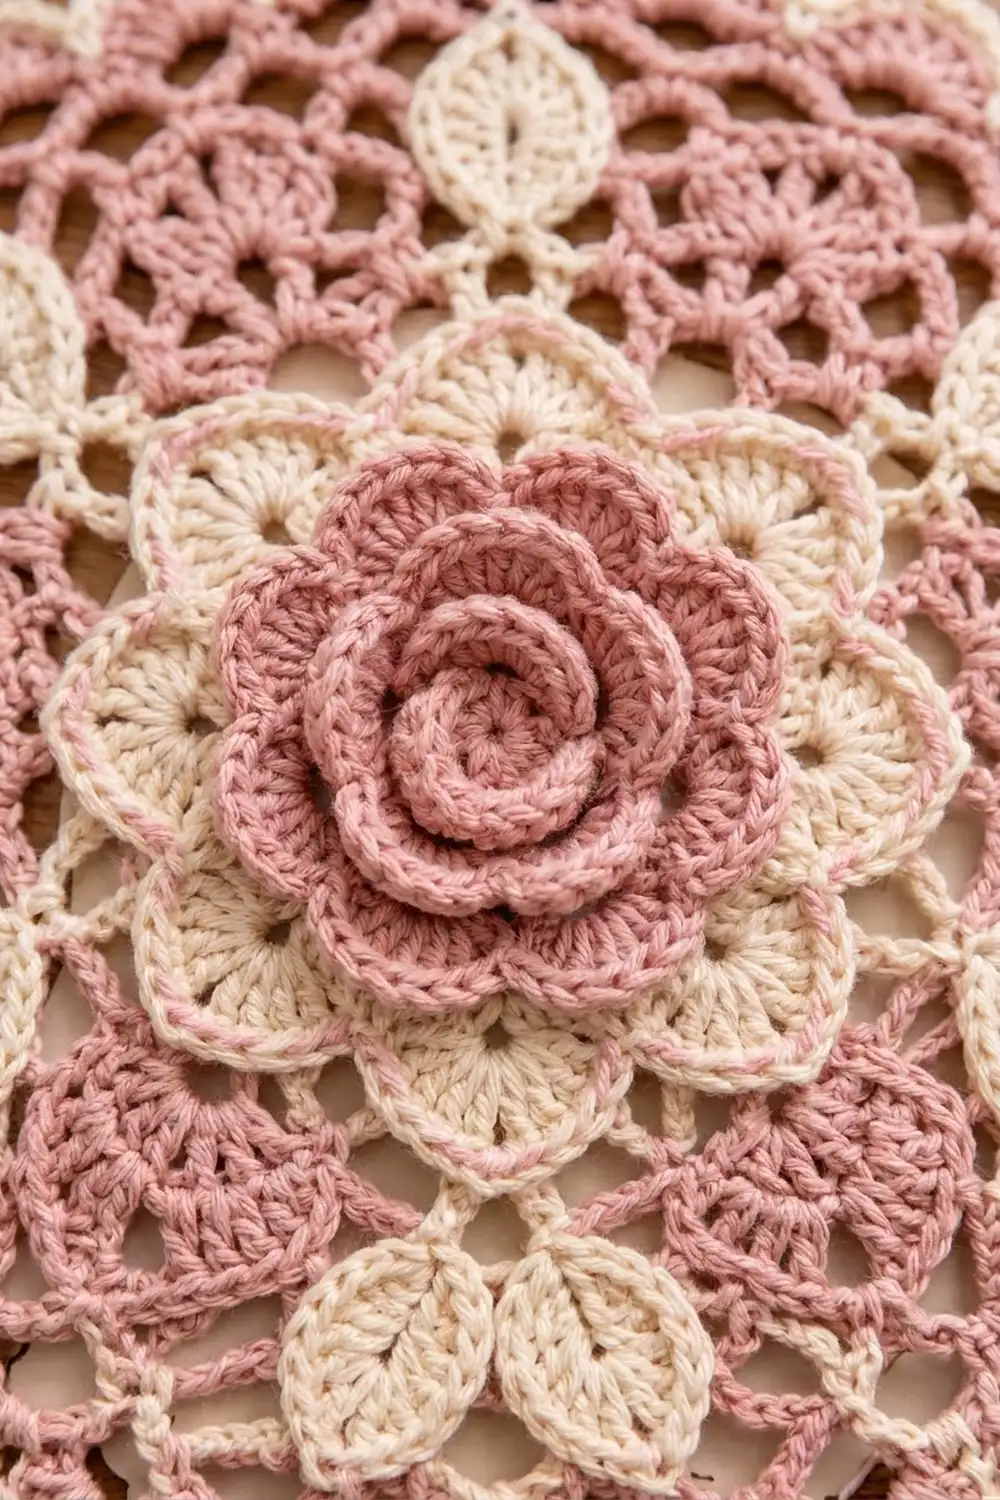
The Rose Center (Color A, pink)
Work every round with the RS facing, and do not turn.
Round 1: Ch 6 and sl st to the first ch to form a ring. Ch 5 (counts as dc + ch 2). Dc in the ring, ch 2; repeat from * 6 more times. Sl st to the 3rd ch of the beginning ch-5. (8 dc, 8 ch-2 sps)
Round 2 (first petal tier): In each ch-2 sp work (sc, hdc, 3 dc, hdc, sc). Sl st to the first sc. (8 petals of 7 sts = 56 sts)
Round 3: Fold the petals toward you. Ch 3, back post sc around the next dc of Round 1; repeat from * 7 more times. (8 ch-3 loops)
Round 4 (second tier): In each ch-3 loop work (sc, hdc, 5 dc, hdc, sc). Sl st to the first sc. (8 petals of 9 sts = 72 sts)
Round 5: Ch 5, back post sc around the next sc of Round 3; repeat from * 7 more times. (8 ch-5 loops)
Round 6 (third tier): In each ch-5 loop work (sc, hdc, 7 dc, hdc, sc). Sl st to the first sc and fasten off. (8 petals of 11 sts = 88 sts)
Checkpoint: 3.5″ (8.9 cm). You should see three stacked layers of pink petals, with each layer set behind the gaps of the layer in front of it.
Cream Petal Ring
Round 7 (B): Join cream with a back post sc around any sc of Round 5. Ch 6, back post sc around the next sc of Round 5; repeat from * 6 more times. Ch 6 and sl st to the first sc. (8 ch-6 loops)
Round 8 (B): In each ch-6 loop work (sc, hdc, 2 dc, 5 tr, 2 dc, hdc, sc). Sl st to the first sc and fasten off. (8 petals of 13 sts = 104 sts)
Round 9 (A): Join pink in the first sc of any petal. Ch 1, then sc in each st around. Sl st to the first sc. (104 sc)
This round gives each cream petal a fine pink outline. Checkpoint: 5.5″ (14.0 cm).
Pink Mesh (Color A)
In Round 9, each group of 13 sc sits on top of one Round 8 petal. In Rounds 12–15, finish each round by working the last sc as a sl st into the starting sl st.
Round 10: Sl st in the next 3 sts to reach the 4th st of the petal. Sc in this st, ch 5, skip 5 sts, sc in the next st (the 10th st of the petal), ch 5, skip 6 sts to reach the 4th st of the next petal; repeat from * around. Sl st to the first sc. (16 sc, 16 ch-5 loops)
Each repeat uses 1 + 5 + 1 + 6 = 13 sts, and 8 x 13 = 104.
Round 11 (increase): Sl st into the first loop. Ch 5, sc in the next sc, ch 5, sc in the next ch-5 loop; repeat from * around. On the last repeat, replace the final sc with a sl st into the first loop. (32 ch-5 loops)
Round 12: Sl st to the center of the first loop. Ch 5, sc in the next loop; repeat from * around. (32 ch-5 loops) Checkpoint: 9″ (22.9 cm).
Round 13: Sl st to the center of the first loop. Ch 6, sc in the next loop; repeat from * around. (32 ch-6 loops)
Round 14 (increase): Sl st to the center of the first loop. Ch 6, sc in the next loop, ch 6, sc in the next loop, ch 6, sc in the same loop; repeat from * 15 more times. (16 repeats x 3 loops = 48 ch-6 loops)
Round 15: Sl st to the center of the first loop. Ch 6, sc in the next loop; repeat from * around. (48 ch-6 loops) Checkpoint: 13.25″ (33.7 cm).
Round 16 (solid round): Sl st into the first loop. Ch 1, then work 5 sc in each ch-6 loop around. Sl st to the first sc and fasten off. (48 loops x 5 sc = 240 sc)
This solid round is the base for the border. Checkpoint: 14.5″ (36.8 cm), give or take 1/4″ (0.6 cm).
Leaf Appliqués (Color B, make 16)
Ch 10.
Round 1: Working into the chain, sc in the 2nd ch from the hook, hdc in the next ch, dc in each of the next 2 chs, tr in the next ch, dc in each of the next 2 chs, hdc in the next ch, and 3 sc in the last ch. Turn the piece and work along the underside of the chain: hdc in the next ch, dc in each of the next 2 chs, tr in the next ch, dc in each of the next 2 chs, hdc in the next ch, and sc in the last ch. Sl st to the first sc. (8 + 3 + 8 = 19 sts)
Fasten off, leaving an 8″ (20.3 cm) tail for sewing. The base chain forms the center vein. Each leaf measures about 2.25″ x 1″ (5.7 x 2.5 cm).
Placement: Lay the cover RS up. Center one leaf over every second loop of Round 12, with the point facing outward toward Round 15. The base of each leaf should just touch the pink outline of Round 9. That gives 2 leaves per cream petal, 16 in all. Pin every leaf first. Then use the tail to whipstitch around each leaf’s edge through the mesh underneath. Keep the stitches small and loose so the mesh stays flat.
Border
Border gauge: Each scallop uses 8 sts of Round 16, and 240 ÷ 8 = 30 scallops. Each finished scallop is about 1.75″ (4.4 cm) wide along the outer edge.
Border Round 1 (B, fans): Join cream in any sc of Round 16. Sc in this st, skip 3 sts, 9 dc in the next st, skip 3 sts, then move to the next st; repeat from * 29 more times. Sl st to the first sc. (30 sc + 270 dc = 300 sts; 30 fans)
Each repeat uses 1 + 3 + 1 + 3 = 8 sts, and 30 x 8 = 240.
Border Round 2 (A, open outline): Join pink in any sc. Sc in the sc, dc in the first dc of the fan, (ch 1, dc in the next dc) 8 times; repeat from * around. Sl st to the first sc. (Each repeat: 1 sc + 9 dc + 8 ch-1 sps. Total: 30 sc, 270 dc, 240 ch-1 sps.)
Border Round 3 (B, picot edging): Join cream in any sc. Sl st in the sc, (sc in the next dc, sc in the next ch-1 sp) 4 times, sc in the next dc, picot, (sc in the next ch-1 sp, sc in the next dc) 4 times; repeat from * around. Sl st to the first sl st and fasten off. (Each repeat: 1 sl st + 17 sc + 1 picot. Total: 30 sl st, 510 sc, 30 picots.)
Each picot sits on the 5th dc of its fan, at the center of the scallop.
Why the math works: Round 16 has 240 sts, which divides evenly into 30 repeats of 8. Each fan spreads 9 dc from a single stitch. That lets the edge grow from about 45.5″ (115.6 cm) around to about 53.4″ (135.6 cm) around and still lie flat. Rounds 2 and 3 work exactly one stitch into each stitch or space of the round before, so the number of scallops never changes. The border adds 1.25″ (3.2 cm) on each side: 14.5″ + 2.5″ = 17″ (36.8 cm + 6.4 cm = 43.2 cm).
Optional drawstring: Weave the ribbon or chain cord over and under the 30 sc of Border Round 1. Put the cover on the lid, pull the cord until the border fits snugly under the rim, and tie it underneath.
Final Blocking
- Weave in all ends through stitches of the same color.
- Soak the cover in cool water for 10 minutes, then press out the water with a towel. Don’t wring it.
- Lay it RS up on the mat and mark a 17″ (43.2 cm) circle with pins.
- Pin each scallop’s picot to the circle, working in opposite pairs so the cover stays round.
- Smooth the mesh so the loops open evenly, then pin the tip of each leaf.
- Shape the rose by hand, cupping the petals forward. Don’t pin them flat.
- Mist lightly and let the cover dry completely.
Final Quality-Control Checklist
- The rose has 3 tiers of 8 petals, all standing forward.
- There are 8 cream petals, each outlined in pink.
- The mesh is even, with no twisted loops.
- All 16 leaves are evenly spaced, point outward and lie flat.
- Round 16 has exactly 240 sc.
- There are 30 scallops, each with a centered picot.
- The blocked cover measures 17″ (43.2 cm) across, give or take 1/2″ (1.3 cm).
- All ends are woven in and hidden.
Troubleshooting
Rose petals flop backward: Make sure every anchor round is worked behind the petals.
The center bulges up: The petal tiers are too tight. Use a hook half a size larger for Rounds 2, 4 and 6.
The mesh ruffles: Your chains are too loose. Work 1 fewer ch per loop in Rounds 13–15.
The mesh cups: Your chains are too tight. Work 1 more ch per loop in Rounds 12–15.
The border ripples: Check that every fan has exactly 9 dc and that you skipped 3 sts on each side.
Leaves pucker the mesh: Take out the seams and resew them more loosely.
Care
Hand wash in cool water with a mild detergent, then dry flat and reshape the rose while it is damp. Don’t tumble dry.
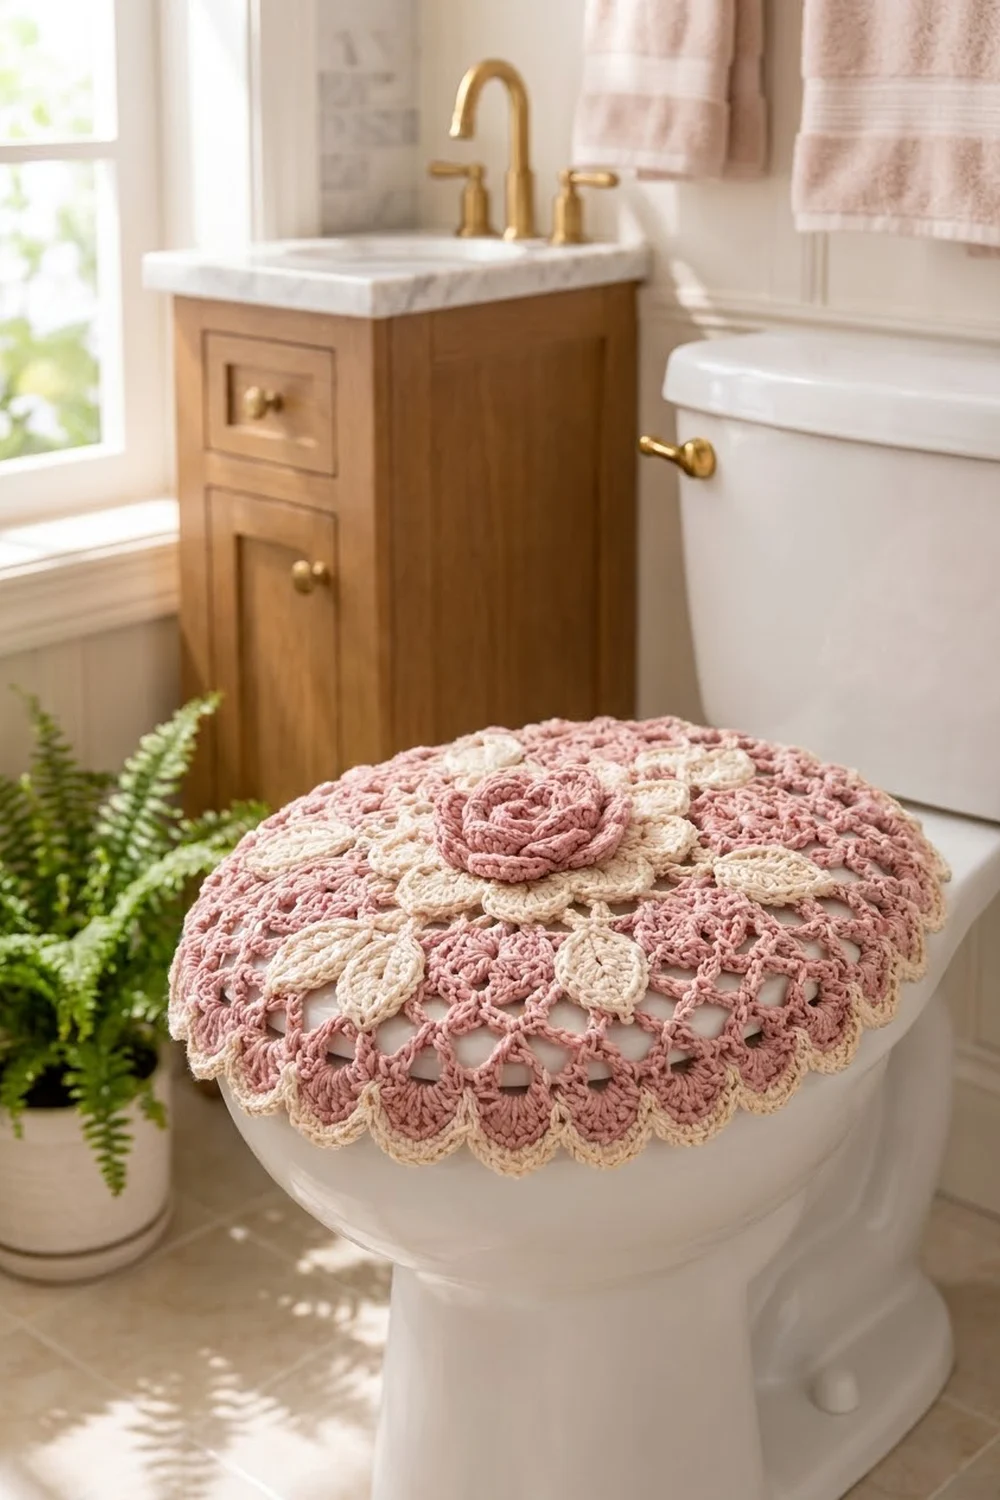
Final Notes
The cover’s fit comes down to a chain of measurements. The rose is 3.5″ (8.9 cm) across and the petal ring is 5.5″ (14.0 cm). The mesh grows through 9″ (22.9 cm) and 13.25″ (33.7 cm). Round 16 measures 14.5″ (36.8 cm) with 240 sc, and the 30-scallop border brings the cover to 17″ (43.2 cm). Check each stage as you go and the cover will fit your lid.
Happy crocheting!