

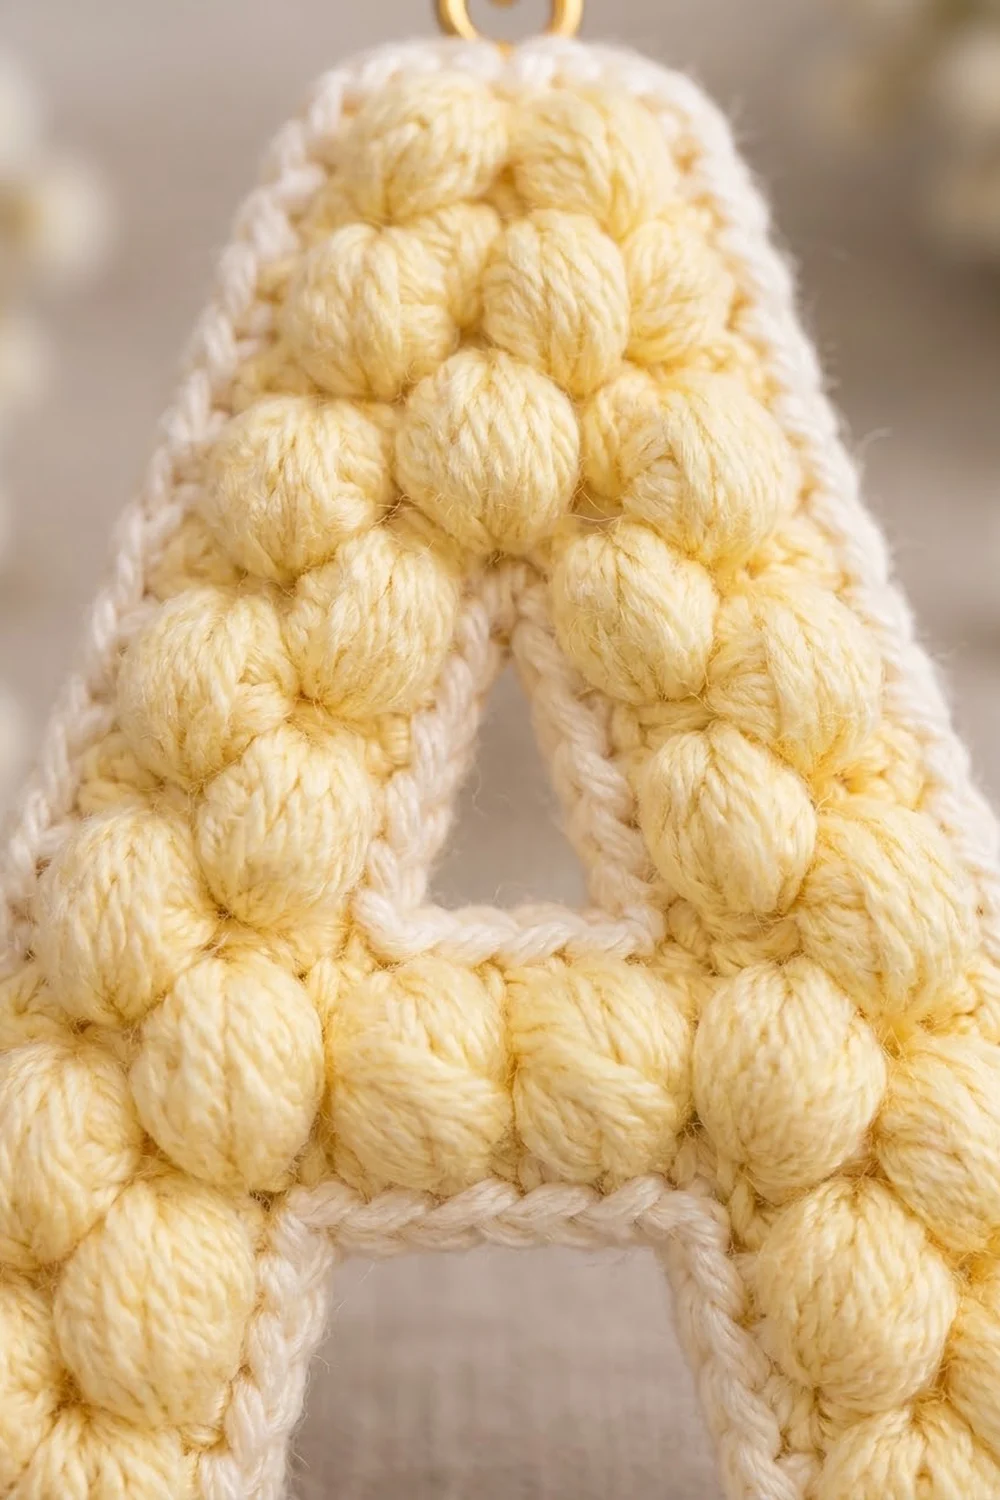
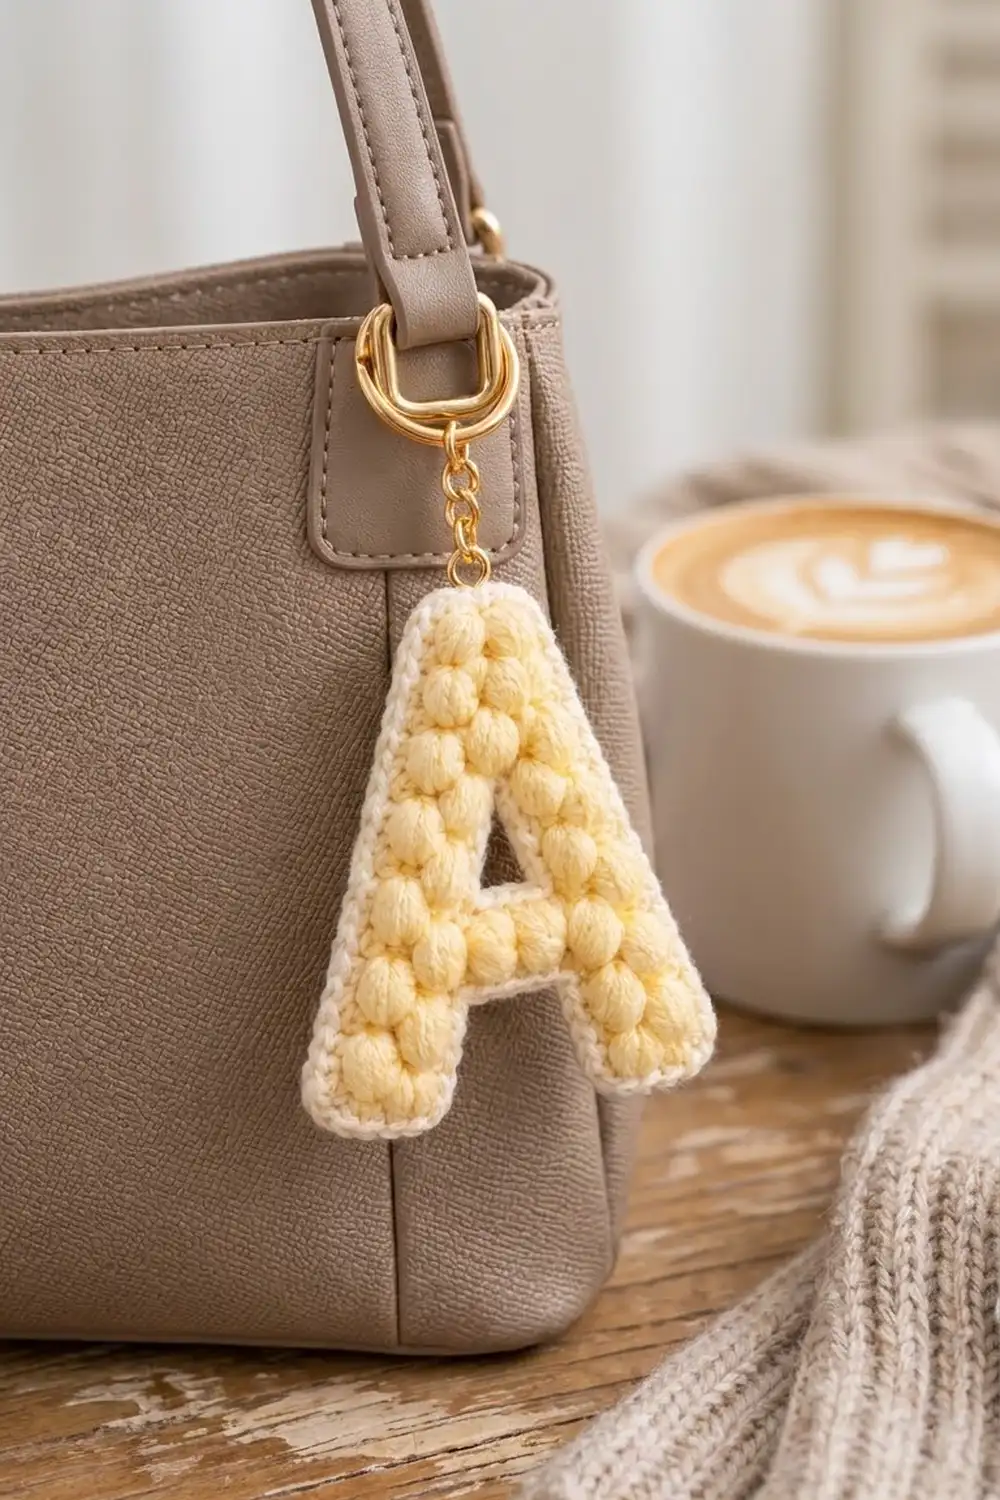
This little letter A is covered in soft butter-yellow puff stitches and outlined in cream, so it looks plump and squishy. It hangs from gold key-ring hardware and works as a bag charm, a monogram gift, or a keychain for your own keys.
The letter is made in one piece and worked flat in rows. Puff rows alternate with plain single crochet rows, and each puff row is offset by one stitch from the last, so the puffs sit in a staggered brick pattern. The pattern uses US crochet terms throughout.
The finished letter measures 3.2 in (8.1 cm) wide by 3.8 in (9.7 cm) tall including the border, not counting the hardware.
Construction overview: You make the two legs separately, then join them with a chain-1 bridge to form the crossbar. Next you split the work again into two narrow arms around the triangular hole, rejoin them above it, and shape the top. A single round of cream single crochet goes around the outside edge, and a second short round finishes the inside of the hole.
Finished Size and Construction
- Finished size: 3.2 in × 3.8 in (8.1 cm × 9.7 cm)
- Skill level: Easy-intermediate
- Terminology: US crochet terms
- Yarn weight: Light worsted / DK (#3)
- Hook: 3.5 mm (US E-4)
- Number of pieces: 1
- Layout: One letter, no joining
- Size before border: 2.8 in wide × 3.4 in tall (7.1 cm × 8.6 cm)
- Border depth: 0.2 in (0.5 cm), 1 round of sc
Materials
Pick a smooth cotton or cotton-blend DK yarn. Plied cotton gives clear, rounded puffs. Fuzzy or brushed yarns hide the puff shapes and make the border harder to keep crisp.
- Butter yellow (main color): about 10 g / 25 m (27 yd)
- Cream (border): about 5 g / 12 m (13 yd)
Both quantities include a margin for a gauge swatch and weaving in ends.
Tools:
– 3.5 mm (US E-4) crochet hook
– Tapestry needle
– Scissors
– Stitch markers (2–3)
– 1 gold jump ring, 8 mm (0.3 in)
– 1 short gold chain, about 1 in (2.5 cm)
– 1 gold split key ring, 25 mm (1 in)
– 2 pairs of jewelry pliers
– Ruler or tape measure
– Pins and a spray bottle for blocking
Abbreviations (US Terms)
- ch – chain
- sc – single crochet
- sc2tog – single crochet 2 together (decrease)
- sl st – slip stitch
- st(s) – stitch(es)
- sk – skip
- RS / WS – right side / wrong side
Special stitch – Puff: (Yarn over, insert hook in the stitch, yarn over, pull up a loop) 3 times, giving 7 loops on the hook. Yarn over and pull through all 7 loops, then ch 1 to close. The closing ch does not count as a stitch. On the next row, work into the top of the puff, not into the closing ch.
Gauge and Checkpoints
Gauge in the puff pattern: 6 sts and 5 rows = 1 in (2.5 cm), so 12 sts and 10 rows = 2 in (5.1 cm).
The letter is small, so it works as its own test piece. Make the first leg and measure it before going on.
Checkpoints:
– After Row 4 of one leg: 7 sts wide = 1.2 in (3.0 cm); 4 rows tall = 0.8 in (2.0 cm).
– After Row 5 (joined): 13 sts = 2.2 in (5.6 cm) across.
– After Row 8: 11 sts = 1.8 in (4.6 cm) across; total height 1.6 in (4.1 cm).
– After Row 17: height 3.4 in (8.6 cm); base span 2.8 in (7.1 cm).
– After border: 3.2 in × 3.8 in (8.1 cm × 9.7 cm).
If your leg is too wide (more than 1.3 in / 3.3 cm), go down to a 3.25 mm hook. If it is too narrow (less than 1.1 in / 2.8 cm), go up to a 3.75 mm hook. If only the height is off, check your puffs: pull up each loop to the same height, about 0.25 in (0.6 cm).
Letter Body
Stitch position map: The bottom of the letter is 17 sts wide. Seen from the RS, positions 1–17 run from left to right. The legs sit at 1–7 and 11–17, with a 3-st gap (0.5 in / 1.3 cm) between them. Each WS row takes 1 st off both outer edges, which gives the slanted sides of the A.
Right Leg (make first)
Use the butter yellow yarn.
Row 1 (WS): Ch 8, sc in 2nd ch from hook and in each ch across, turn. (7 sts)
Row 2 (RS): Ch 1, sc in first st, (puff in next st, sc in next st) 3 times, turn. (7 sts: 3 puffs, 4 sc)
Row 3 (WS, shift row): You start at the inner edge. Ch 1, 2 sc in first st, sc in next 4 sts, sc2tog, turn. (7 sts) This moves the leg one stitch toward the center.
Row 4 (RS): Ch 1, sc in first st, (puff in next st, sc in next st) 3 times. (7 sts: 3 puffs) Fasten off and leave a 4 in (10.2 cm) tail.
Left Leg (keep yarn attached)
Rows 1–2: Work as for the Right Leg. (7 sts)
Row 3 (WS, shift row): You start at the outer edge. Ch 1, sc2tog, sc in next 4 sts, 2 sc in last st, turn. (7 sts)
Row 4 (RS): Ch 1, sc in first st, (puff in next st, sc in next st) 3 times, turn. (7 sts) You are now at the outer edge of the Left Leg.
Lay both legs side by side with the RS facing up and the Left Leg on the left. After the shift rows, the gap between them is 1 st wide.
Crossbar
Row 5 (WS, joining row): Ch 1, sc2tog, sc in next 5 sts of Left Leg (6 sts), ch 1 to bridge the gap. Then, starting at the inner edge of the Right Leg, sc in next 5 sts, sc2tog over the last 2 sts (6 sts), turn.
Total: 6 + 1 ch + 6 = 13 sts. The ch-1 counts as a stitch.
Row 6 (RS): Ch 1, sc in first st, (puff in next st, sc in next st) 6 times, turn. The sc in the middle goes into the ch-1. (13 sts: 6 puffs)
Row 7 (WS): Ch 1, sc2tog, sc in next 9 sts, sc2tog, turn. (11 sts)
Row 8 (RS): Ch 1, sc in first st, (puff in next st, sc in next st) 5 times, turn. (11 sts: 5 puffs)
Arms Around the Triangular Hole
Left Arm, Row 9 (WS): Ch 1, sc2tog, sc in next 2 sts, turn. (3 sts) Leave the remaining 7 sts unworked.
Row 10 (RS): Ch 1, sc in first st, puff in next st, sc in last st, turn. (3 sts: 1 puff)
Row 11 (WS, shift row): Ch 1, sc2tog, 2 sc in last st. (3 sts) Fasten off.
Right Arm, Row 9 (WS): With the WS facing, skip the next 3 unworked sts of Row 8. These 3 sts form the bottom of the hole. Join the yellow yarn in the next st, sc in same st and next st, sc2tog, turn. (3 sts)
Row 10 (RS): Ch 1, sc in first st, puff in next st, sc in last st, turn. (3 sts)
Row 11 (WS, shift row): Ch 1, 2 sc in first st, sc2tog, turn. (3 sts)
Both arms have now moved one stitch inward, so the hole narrows from 3 sts to 1 st. This gives it the triangular shape.
Top
Row 12 (RS, joining row): Ch 1, sc in first st, puff in next st, sc in next st of the Right Arm, ch 1. Then sc in first st of the Left Arm, puff in next st, sc in last st, turn.
Total: 3 + 1 ch + 3 = 7 sts (2 puffs). The ch-1 closes the top of the hole.
Row 13 (WS): Ch 1, sc2tog, sc in next st, sc in ch-1, sc in next st, sc2tog, turn. (5 sts)
Row 14 (RS): Ch 1, sc in first st, (puff in next st, sc in next st) twice, turn. (5 sts: 2 puffs)
Row 15 (WS): Ch 1, sc in each st across, turn. (5 sts)
Row 16 (RS): Ch 1, sc in first st, (puff in next st, sc in next st) twice, turn. (5 sts: 2 puffs) These puffs sit directly above the Row 14 puffs, which builds up a rounded crown.
Row 17 (WS): Ch 1, sc2tog, sc in next st, sc2tog. (3 sts) Fasten off.
Puff total: 6 + 6 + 6 + 5 + 2 + 2 + 2 + 2 = 31 puffs.
Checkpoint: 2.8 in wide × 3.4 in tall (7.1 cm × 8.6 cm). Weave in all yellow tails along the WS row edges before you start the border.
Border
Border gauge: 6 sc = 1 in (2.5 cm), which matches the body’s stitch gauge.
Row-end rule: Work 1 sc in each row end. Work 2 sc in the ends of Rows 4, 8, 12, and 16. Puff rows are taller than sc rows, so these extra stitches keep the edge flat.
Outer Border Round
With the RS facing, join the cream yarn in the first free foundation loop at the outer corner of the Left Leg. Work counterclockwise around the letter. Each count below includes that side’s corner stitches.
- Bottom of Left Leg: 2 sc in first loop, sc in next 5 loops, 2 sc in last loop. (9 sc)
- Inner edge of Left Leg (Rows 1–4): 1 sc in each row end, 2 sc in Row 4 end. (5 sc)
- Top of notch: 1 sc in the free loop of the Row 5 ch-1. (1 sc)
- Inner edge of Right Leg (Rows 4–1): 2 sc in Row 4 end, 1 sc in each remaining row end. (5 sc)
- Bottom of Right Leg: 2 sc in first loop, sc in next 5 loops, 2 sc in last loop. (9 sc)
- Right outer edge (Rows 1–17): 17 row ends + 4 extras. (21 sc)
- Top (Row 17): 2 sc in first st, sc in next st, 2 sc in last st. (5 sc)
- Left outer edge (Rows 17–1): 17 row ends + 4 extras. (21 sc)
Sl st to the first sc. Total: 9 + 5 + 1 + 5 + 9 + 21 + 5 + 21 = 76 sc. Fasten off.
Why the math works: Each outer edge runs 3.4 in (8.6 cm) up and moves 1.0 in (2.5 cm) sideways, so its slanted length is about 3.5 in (8.9 cm). At 6 sc per inch, 3.5 in needs 21 sc, which is exactly 17 row ends plus 4 extras. Each leg’s bottom has 7 stitches, 1.2 in (3.0 cm). The 2 extra corner sc let the yarn turn the corner without pulling.
Hole Border Round
With the RS facing, join the cream yarn in the first of the 3 skipped sts at the bottom of the hole.
- Bottom of hole: sc in each of the 3 skipped Row 8 sts. (3 sc)
- First side (Rows 9–11): 1 sc in each row end. (3 sc)
- Top: 1 sc in the free loop of the Row 12 ch-1. (1 sc)
- Second side (Rows 11–9): 1 sc in each row end. (3 sc)
Sl st to the first sc. Total: 10 sc. Fasten off and weave in the ends.
Checkpoint: 3.2 in × 3.8 in (8.1 cm × 9.7 cm).
Hardware
- Find the middle sc of the 5 top border stitches.
- Use pliers to twist the 8 mm jump ring open sideways. Don’t pull it apart.
- Pass the jump ring under both loops of that sc and through the end link of the chain, then twist it closed.
- Thread the split key ring onto the other end of the chain.
Final Blocking
- Lightly mist the letter with water until it is damp but not soaked.
- Lay it RS up on a foam mat or folded towel.
- Pat it into shape: 3.2 in (8.1 cm) across the base and 3.8 in (9.7 cm) tall.
- Pin only through the cream border so you don’t flatten the puffs.
- Use a pin tip to open the triangular hole and the notch between the legs.
- Pinch each puff gently to round it out.
- Let it dry completely before you attach the hardware or use it.
Don’t press it with an iron. Pressing flattens the puffs for good.
Final Quality-Control Checklist
- 31 puffs in total, set in a staggered brick pattern
- Both legs are 7 sts wide and slant inward evenly
- The notch is closed at the top by the Row 5 ch-1
- The hole has 3 sts at the bottom and narrows to a point
- Outer border has 76 sc; hole border has 10 sc
- The border lies flat with no ruffling or cupping
- Finished size is 3.2 in × 3.8 in (8.1 cm × 9.7 cm)
- The jump ring is closed tightly and goes through both loops of the sc
- All ends are woven in on the WS
Troubleshooting
The puffs look flat or uneven. Pull up every loop to the same height, about 0.25 in (0.6 cm). Hold the loops gently on the hook before you close the puff.
The legs lean the wrong way. Your shift-row decreases and increases have been swapped. The decrease always goes at the outer edge and the 2-sc increase at the inner edge.
The border ruffles. You have too many stitches on an edge. Drop the extra sc on Row 4 or Row 12, or use a 3.25 mm hook for the border.
The border cups or pulls the letter inward. Add 1 sc to the corner stitches, or crochet the border more loosely.
The hole closed up. Check that you skipped exactly 3 sts in Row 9 and closed Row 12 with the ch-1, not a stitch worked into the arm.
The letter curls. Block it again and let it dry flat under a light book. Put a towel between the book and the puffs.
Care
Hand wash in cool water with mild soap, gently press out the water in a towel, and dry flat. Take the metal hardware off first if it isn’t rust-proof.
Final Notes
The measurement chain works like this. A 7-st leg measures 1.2 in (3.0 cm). The joined crossbar is 13 sts, 2.2 in (5.6 cm). The body before the border is 2.8 in × 3.4 in (7.1 cm × 8.6 cm). A 0.2 in (0.5 cm) border on each side brings the letter to 3.2 in × 3.8 in (8.1 cm × 9.7 cm). If you check these numbers at each stage, your letter will match the finished size. You can use the same leg, shift, and puff methods to make other letters.
Happy crocheting!