

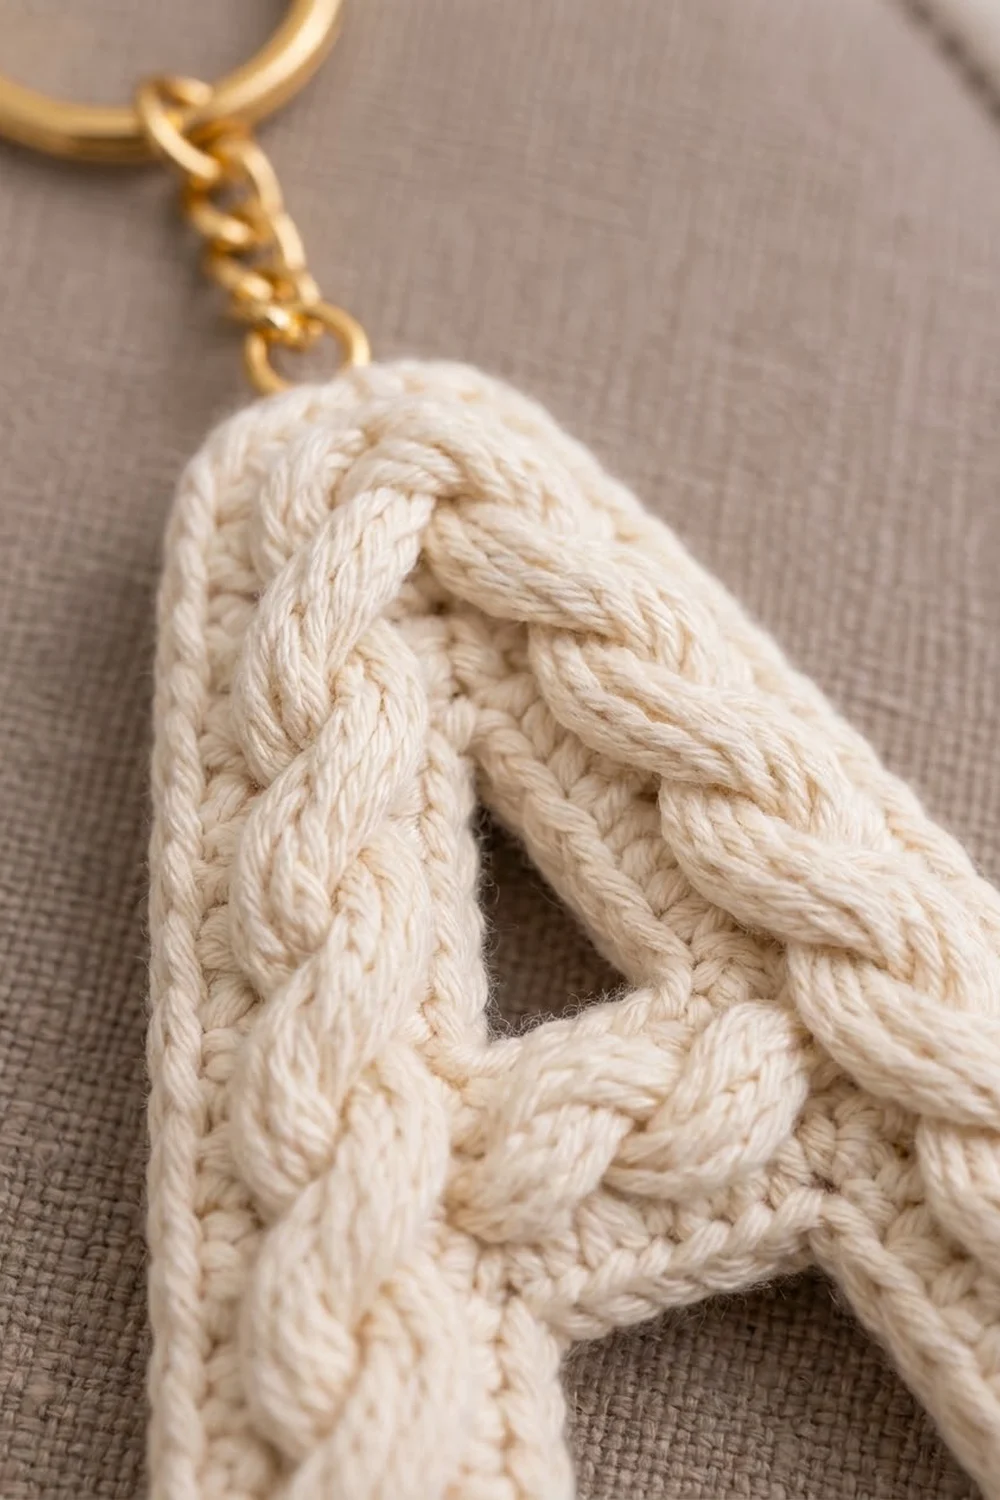
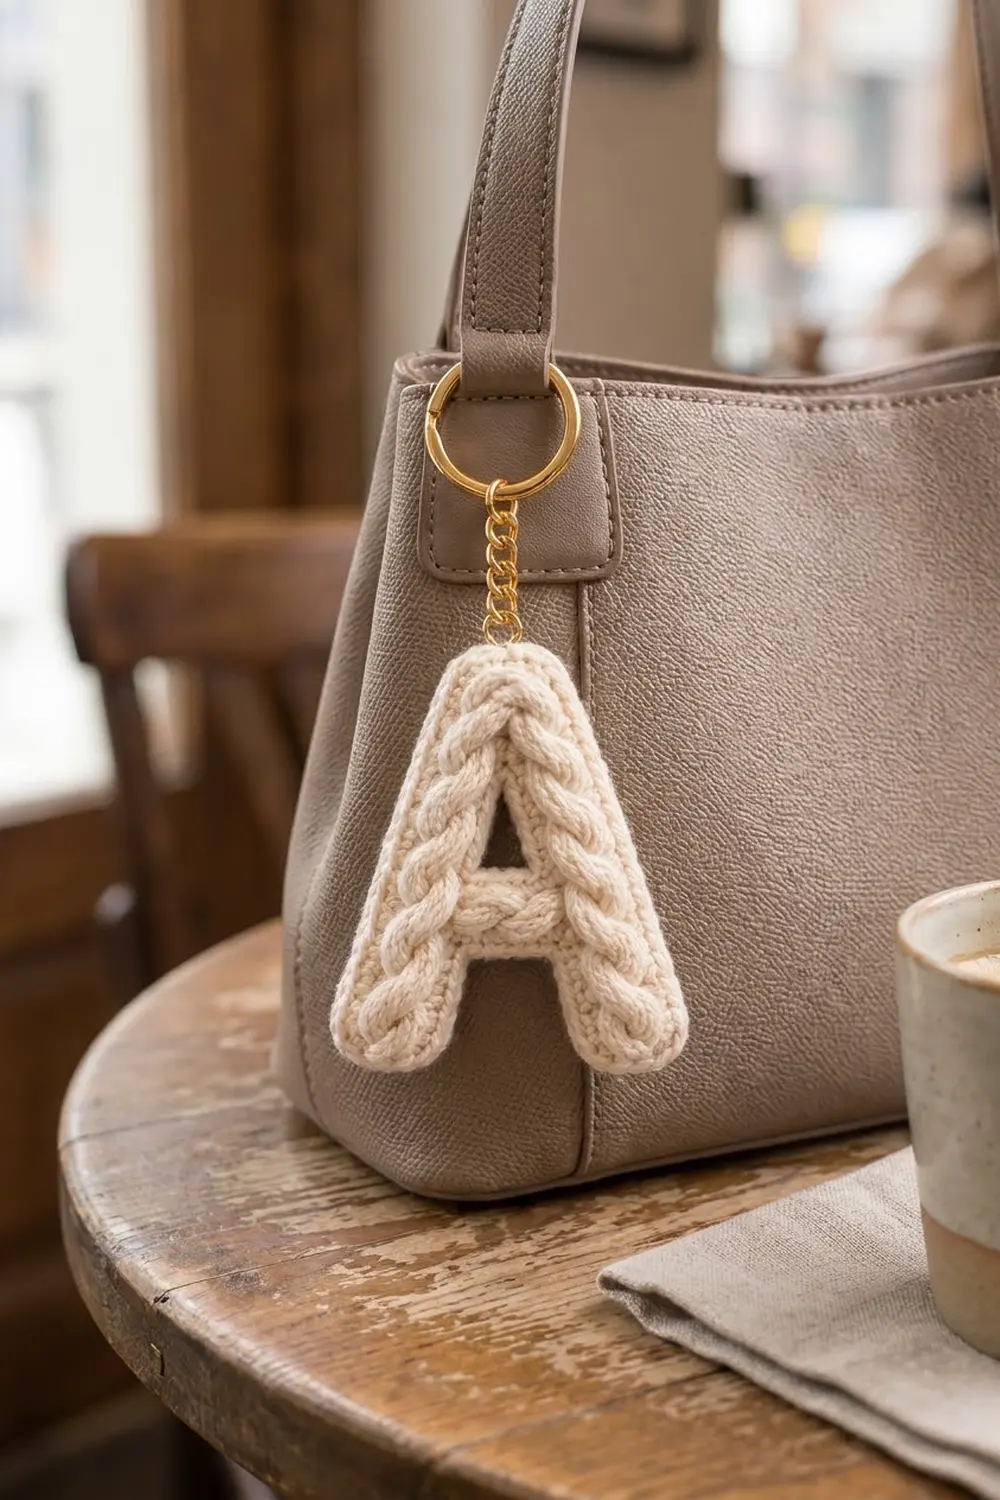
This letter A keychain is a small, padded initial covered in soft three-strand braids. Two braids run down the slanted legs and meet at the rounded top, and a short third braid lies across the crossbar. It looks like a carved cable, but each braid is a real plait made from crocheted strands.
The whole piece uses one creamy ivory cotton, so the texture is the main feature. With a gold split ring and a short curb chain, it works as a bag charm or a personalized gift.
The pattern uses US crochet terms. The finished letter is about 3.6 in (9.1 cm) tall and 3.1 in (7.9 cm) wide at the feet, not counting the hardware.
Construction is simple. You crochet two identical flat letter layers in rows of single crochet, then make nine short strands and plait them into three braids. Sew the braids onto the front layer, then join both layers with one round of single crochet. A slip-stitch round finishes the small window above the crossbar.
Finished Size and Construction
- Finished size: 3.6 in (9.1 cm) tall × 3.1 in (7.9 cm) wide at the base
- Skill level: Easy-intermediate
- Terminology: US crochet terms
- Yarn weight: Worsted (#4) cotton
- Hook: 3.5 mm (E-4)
- Number of pieces: 1 finished keychain (built from 2 letter layers + 3 braids)
- Layout: Single letter motif, no grid
- Letter layer size (before border): 3.3 in (8.4 cm) tall × 2.8 in (7.1 cm) wide
- Border depth: about 0.15 in (0.4 cm) per edge, one round
Materials
Yarn: Use a smooth worsted-weight cotton or cotton blend with clear stitch definition. Fuzzy or splitty yarn will blur the braids. A slightly plump, soft cotton gives the rounded strands.
- Cream / ivory: 15 g, about 30 m
This amount includes a margin of about 30% for the gauge swatch, tails, and re-braiding if needed.
Tools and notions:
- 3.5 mm (E-4) crochet hook
- Tapestry needle
- 2 stitch markers
- Small pinch of polyester fiberfill (optional, for light padding)
- 1 in (2.5 cm) gold split keyring with about 1 in (2.5 cm) of gold curb chain
- 1 gold jump ring, 6 mm
- 2 pairs of flat-nose pliers
- Scissors and a ruler
Abbreviations (US Terms)
- ch: chain
- sc: single crochet
- sc2tog: single crochet 2 together
- sl st: slip stitch
- st(s): stitch(es)
- RS / WS: right side / wrong side
Special technique: Shift Row. A shift row moves a leg 1 stitch toward the center of the letter without changing its stitch count. Work sc2tog at the outer edge (the side facing away from the other leg) and add 1 stitch at the inner edge (the side facing the other leg). The leg stays at 4 sts.
Gauge and Checkpoints
Gauge: 10 sc × 12 rows = 2 in (5.1 cm) square.
Make one letter layer and measure it before you start the second. Check at each stage:
- After Row 3: each leg is 0.8 in (2.0 cm) wide. With the legs laid 1.2 in (3.0 cm) apart, the outside span is 2.8 in (7.1 cm).
- After Row 9: the piece is 2.4 in (6.1 cm) wide and 1.5 in (3.8 cm) tall.
- After Row 18: the top section is 1.6 in (4.1 cm) wide.
- After Row 20: the layer is 3.3 in (8.4 cm) tall.
If your layer is too big, switch to a 3.25 mm hook. If it is too small, switch to a 3.75 mm hook. Keep the stitch counts the same, because the braids are sized to this layer.
Letter Layer (Make 2)
Both layers are identical. The ch 1 at the start of each row does not count as a stitch. Turn at the end of every row.
Legs (make 2 per layer)
Row 1 (RS): Ch 5, sc in 2nd ch from hook and in next 3 ch. (4 sts)
Rows 2–3: Ch 1, turn, sc in each st across. (4 sts)
Row 4 (Shift Row): Ch 1, turn.
- First leg: sc2tog, sc in next st, 2 sc in last st. (4 sts)
- Second leg: 2 sc in first st, sc in next st, sc2tog. (4 sts)
Lay both legs RS up with the feet level and 1.2 in (3.0 cm) apart. The increases must face each other. If one faces outward, rework that Row 4 the other way.
Rows 5–6: Ch 1, turn, sc in each st across. (4 sts)
Fasten off the first leg. Keep the second leg on the hook.
Crossbar
Row 7: Ch 1, turn. Sc in each of the 4 sts of the second leg, ch 4, then sc in each of the 4 sts of Row 6 on the first leg. Keep the RS of both legs facing the same way. (8 sc + 4 ch = 12 sts)
The Row 4 shift narrowed the inner gap from 6 sts to 4, so the 4 chains bridge it without stretching.
Row 8: Ch 1, turn, sc in each of 4 sc, sc in each of 4 ch, sc in each of 4 sc. (12 sts)
Row 9: Ch 1, turn, sc in each st across. (12 sts)
Upper Legs and Window
The upper legs are worked separately so they leave the triangular window between them. Each Row 10 is also a shift row.
First upper leg, Row 10: Ch 1, turn, sc2tog over sts 1–2, sc in sts 3, 4 and 5. (4 sts) Leave the other 7 sts unworked.
Rows 11–13: Ch 1, turn, sc in each st across. (4 sts) Fasten off.
Second upper leg, Row 10: Skip sts 6 and 7 of Row 9; they form the bottom of the window. Join yarn in st 12 at the far end. Ch 1, sc2tog over sts 12–11, then sc in sts 10, 9 and 8. (4 sts)
Rows 11–13: Ch 1, turn, sc in each st across. (4 sts) Do not fasten off. The yarn is now at the outer edge. Single crochet looks almost the same on both faces, so working this leg in the other direction won’t show.
Top
Row 14 (Join + Shift): Ch 1, turn. On the second upper leg: sc2tog, sc in next 2 sts, 2 sc in the last (inner) st. Without chaining, go straight into the inner-edge st of the first upper leg: 2 sc in that st, sc in next 2 sts, sc2tog. (8 sts)
The two inner increases close the 2-st gap, so the window ends in a point.
Rows 15–18: Ch 1, turn, sc in each st across. (8 sts)
Row 19: Ch 1, turn, sc2tog, sc in next 4 sts, sc2tog. (6 sts)
Row 20: Ch 1, turn, sc2tog, sc in next 2 sts, sc2tog. (4 sts) Fasten off and weave in the ends.
Span check: 14 sts at the feet (4 + 6 gap + 4), 12 at the crossbar, 10 at Row 10 (4 + 2 gap + 4), and 8 at the top. Each shift reduces the span by 1 st on each side. The window is about 0.4 in (1.0 cm) wide at its base and 0.7 in (1.8 cm) tall.
Make a second identical layer, and pick the neater one as the front.
Braids
Leg strand (make 6): Leave a 6 in (15.2 cm) tail and ch 21. Sc in 2nd ch from hook and in each ch across. (20 sts) Fasten off with a 6 in (15.2 cm) tail. Each strand is 4.0 in (10.2 cm) long, and the single row curls into a plump, rounded cord.
Crossbar strand (make 3): Leave a 6 in (15.2 cm) tail and ch 9. Sc in 2nd ch from hook and in each ch across. (8 sts) Fasten off with a 6 in (15.2 cm) tail. Each strand is 1.6 in (4.1 cm) long.
Plaiting:
- Lay 3 leg strands side by side, curled side up, and knot the starting tails together.
- Pin the knot down and braid snugly: right strand over center, left strand over center, repeat. Keep every strand curled side up.
- Knot the ending tails together.
- Measure. The braid should be about 3.2 in (8.1 cm) long, which is 80% of the strand length.
- Make the second leg braid the same way.
- Braid the 3 crossbar strands the same way. This braid should be about 1.3 in (3.3 cm) long.
If a braid is more than 0.2 in (0.5 cm) too long, braid it more tightly. If it is too short, braid it more loosely.
Sewing the Braids
Sew the braids to the front layer only, before joining, so no stitches show on the back. Whipstitch with a braid tail through the underside edges of the braid.
- Crossbar braid: Center it horizontally over Rows 7–9. At 1.3 in (3.3 cm), each end reaches the middle of a leg. Sew both long edges and bury the knots on the WS.
- Right leg braid: Start 0.2 in (0.5 cm) below the center of Row 20. Run it down the center of the right leg, over the end of the crossbar braid, and stop 0.2 in (0.5 cm) above the foot. Sew both edges.
- Left leg braid: Start at the same peak and lay its top end over the right braid’s top end so they merge into one rounded peak. Run it down the left leg over the other crossbar end and sew it in place.
Border
Border gauge: 1 sc per st and 1 sc per row end. The border adds about 0.15 in (0.4 cm) per edge.
Place the layers WS together with the front facing you and all edges lined up. For light padding, slip in a very thin, even wisp of fiberfill as you work. Work every stitch through both layers.
Round 1: Join yarn at the outer corner of the left foot and work counterclockwise:
- Left foot: In the free loops of the 4 foundation ch: 3 sc in first, sc in next 2, 3 sc in last. (8 sts)
- Left inner edge: 1 sc in each row end of Rows 1–6. (6 sts)
- Under crossbar: 1 sc in each of the 4 free ch loops of Row 7. (4 sts)
- Right inner edge: 1 sc in each row end of Rows 6–1. (6 sts)
- Right foot: 3 sc in first ch, sc in next 2, 3 sc in last. (8 sts)
- Right outer side: 1 sc in each row end of Rows 1–18. (18 sts)
- Top curve: 1 sc in each row end of Rows 19 and 20 (2 sts). Then 2 sc in first st of Row 20, sc in next 2, 2 sc in last st (6 sts). Then 1 sc in each row end of Rows 20 and 19 (2 sts). (10 sts)
- Left outer side: 1 sc in each row end of Rows 18–1. (18 sts)
Sl st to the first sc. (8 + 6 + 4 + 6 + 8 + 18 + 10 + 18 = 78 sts) Fasten off.
Window round: Through both layers, sl st in each of the 2 skipped sts of Row 9, then in each of the 4 row ends of Rows 10–13 on one side and the 4 row ends on the other side. (10 sl sts) Join and fasten off.
Why the math works: Each border stitch matches one existing stitch or row end, so no edge is stretched or crowded. Row ends here are slightly shorter than a stitch is wide, and working through two layers draws them snug, so 1 sc each keeps the edge flat. The only added stitches are at the corners: 2 extra at each outer foot corner and 1 extra at each end of Row 20. They round the corners without ruffling. The window uses slip stitches, so its 0.4 in (1.0 cm) opening doesn’t fill in.
Hardware: Open the jump ring with the pliers. Pass it through both layers at the center of the top curve, add the end link of the chain, and close the ring completely.
Final Blocking
- Lightly mist the letter. Don’t soak it.
- Lay it front up on a towel.
- Ease it to 3.6 in (9.1 cm) × 3.1 in (7.9 cm).
- Straighten the legs and level the crossbar. Round the braids with your fingertips.
- Pin only the feet and the top curve, never the braids.
- Let it dry completely, about 6 hours.
Final Quality-Control Checklist
- Letter measures 3.6 in (9.1 cm) × 3.1 in (7.9 cm).
- Each leg is about 1.1 in (2.8 cm) wide, including the border.
- The gap between the feet is about 0.9 in (2.3 cm).
- The window is open and centered above the crossbar.
- The leg braids meet in one smooth peak.
- The crossbar braid ends are hidden under the leg braids.
- No sewing shows on the back.
- The border has 78 sts and there are no gaps between the layers.
- The jump ring is fully closed.
Troubleshooting
Legs splay outward: A Row 4 shift was worked in reverse. Redo it so the increase faces the other leg.
Crossbar puckers: The chains in Row 7 are too tight. Chain more loosely.
Window closed up: You used sc around the window instead of sl st, or skipped the wrong stitches. Exactly 2 sts of Row 9 should stay unworked.
Braid looks flat: Some strands flipped over. Re-braid with every strand curled side up.
Letter cups: There is too much padding or the border is too tight. Remove some fiberfill or redo the border more loosely.
Layers don’t match: Count the rows. Both layers need exactly 20.
Care
Hand wash in cool water with mild soap, roll it in a towel, and dry it flat. Take off the metal hardware first if it isn’t tarnish-resistant.
Final Notes
All the sizes come from the gauge. At 10 sc × 12 rows = 2 in (5.1 cm), a 4-st leg is 0.8 in (2.0 cm) wide and a 20-row layer is 3.3 in (8.4 cm) tall. Three shifts narrow the span from 2.8 in (7.1 cm) to 1.6 in (4.1 cm). Strands of 4.0 in (10.2 cm) plait into 3.2 in (8.1 cm) braids that run from peak to foot. The 78-st border adds 0.15 in (0.4 cm) per edge, so the finished letter is 3.6 in (9.1 cm) × 3.1 in (7.9 cm).
Happy crocheting!