

This letter A keychain is small and sturdy, with a soft heirloom look. The front panel has a tapestry pattern of cream diamonds with dusty blue centers. The back is solid blue. A neat blue edging joins the two layers into one slightly cushioned charm.
The palette uses just two colors: a muted denim blue and a warm cream. The style sits between a folk motif and a modern bag charm. It hangs from a gold key ring and a short chain.
All instructions use US crochet terms. The finished letter measures about 3.25 in (8.3 cm) wide at the base and 3.9 in (9.9 cm) tall, not counting the hardware.
You crochet two identical letter-shaped panels in rows of single crochet. Each panel starts as two separate legs that join into a crossbar. It splits again around a small triangular opening, then joins and narrows to a rounded top. The front panel is worked in tapestry crochet and the back is plain blue. A single crochet round through both layers joins them.
Finished Size and Construction
- Finished size: 3.25 in (8.3 cm) wide x 3.9 in (9.9 cm) tall
- Skill level: Intermediate (tapestry color changes and shaping)
- Terminology: US
- Yarn weight: Sport (2), mercerized cotton
- Hook: 2.5 mm (US B-1 or C-2)
- Number of pieces: 2 panels (1 colorwork front, 1 solid back)
- Layout: front panel stacked on back panel, wrong sides together
- Panel size: 18 sts wide x 22 rows tall
- Size before border: 3 in (7.6 cm) x 3 2/3 in (9.3 cm)
- Border depth: 1/8 in (0.3 cm) on every edge, one round of sc
Materials
Choose a smooth, mercerized sport-weight cotton of about 155 m per 50 g. Cotton keeps the diamonds crisp, holds its shape on a key ring and stands up to handling. Avoid fuzzy or very stretchy yarns, because they blur the colorwork.
- Color A (dusty blue): 12 g, about 37 m
- Color B (cream): 5 g, about 16 m
Tools:
- 2.5 mm crochet hook
- Tapestry needle
- Scissors and stitch markers
- 1 gold split key ring, 1 in (2.5 cm)
- 1 gold chain, about 1.25 in (3.2 cm), with 2 jump rings (8 mm)
- Two pairs of small pliers
- Small pinch of polyester fiberfill (optional, for a cushioned feel)
The quantities include a margin of about 20 percent for swatching, carried strands and weaving in.
Abbreviations (US Terms)
- ch – chain
- sc – single crochet
- sc2tog – single crochet 2 together
- sl st – slip stitch
- st(s) – stitch(es)
- RS / WS – right side / wrong side
- A / B – Color A / Color B
Tapestry sc color change: work the last sc of the old color until 2 loops remain on the hook, yarn over with the new color and pull through. Lay the unused color along the top of the row and work over it, so it travels hidden inside the stitches. A color count such as “A2, B2, A2” means 2 sc in A, 2 sc in B, then 2 sc in A.
Shaping note: in shaping rows, the color count refers to the stitches you make. An sc2tog counts as 1 st, and “2 sc in one st” counts as 2 sts.
Gauge and Checkpoints
Gauge: 6 sc and 6 rows = 1 in (2.5 cm) in tapestry sc, carrying the second color.
Make a swatch of 12 sts x 12 rows, carrying both colors. It should measure 2 in (5.1 cm) square. Then make one leg of the front panel and measure it before going further, because the colorwork tightens the fabric slightly.
Checkpoints:
- Each leg after Row 12: 1 in (2.5 cm) wide x 2 in (5.1 cm) tall
- After Row 15: 2 1/3 in (5.9 cm) wide at the crossbar, 2.5 in (6.4 cm) tall
- After Row 18: top section 1 1/3 in (3.4 cm) wide
- Finished panel: 3 in (7.6 cm) wide at the base x 3 2/3 in (9.3 cm) tall
If your leg is wider than 1 in (2.5 cm), go down to a 2.25 mm hook. If it is narrower, go up to a 2.75 mm hook. Both panels must match, so use the same hook for the front and the back.
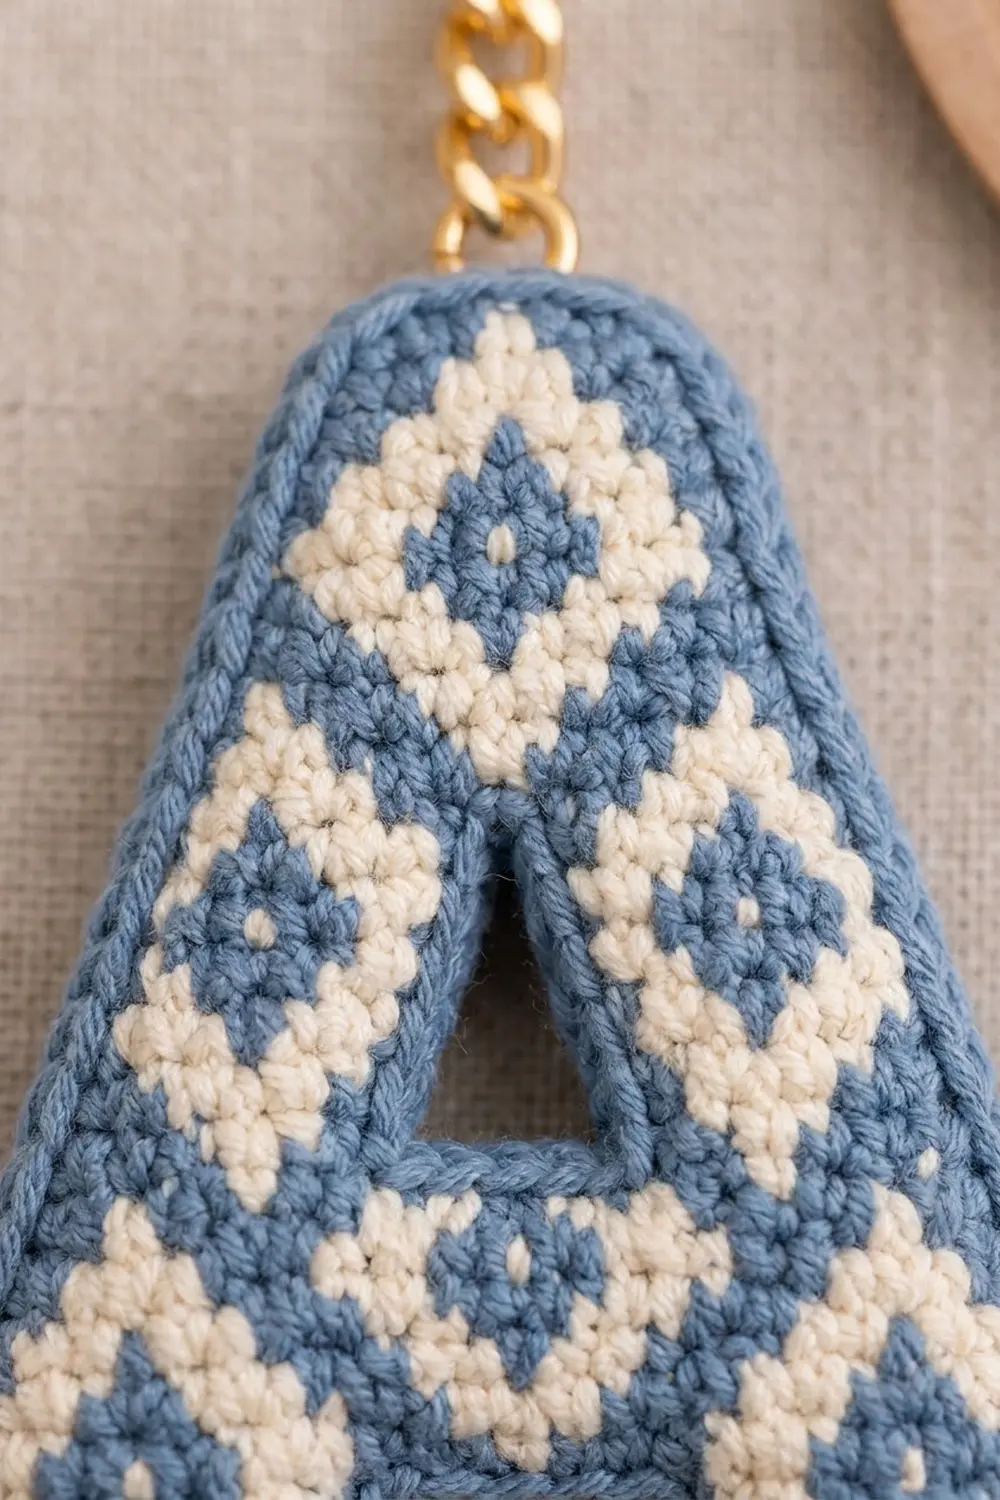
Front Panel (Tapestry Colorwork)
The panel fits on a grid 18 sts wide. The legs start at the two outer edges, 6 sts each, with a 6-st gap between them. They lean inward as you work up.
Legs (make 2)
Each leg repeats the same 6-row diamond twice. Odd rows run from the outer edge toward the inner edge. Even rows run from the inner edge back to the outer edge.
With A, ch 7.
Row 1 (RS): sc in 2nd ch from hook and in each ch across, working A2, B2, A2. Turn. (6 sts)
Row 2: ch 1 (does not count as a st here and throughout), A1, B4, A1. Turn. (6 sts)
Row 3: B2, A2, B2. Turn. (6 sts)
Row 4: B2, A2, B2. Turn. (6 sts)
Row 5 (lean row): sc2tog at the outer edge, sc 3, 2 sc in the last st (inner edge), working A1, B4, A1. Turn. (6 sts; the leg shifts 1 st inward)
Row 6: A2, B2, A2. Turn. (6 sts)
Rows 7–9: work the colors of Rows 1–3 again in plain sc: A2, B2, A2; then A1, B4, A1; then B2, A2, B2. Turn at the end of each row. (6 sts each)
Row 10 (lean row): 2 sc in the first st (inner edge), sc 3, sc2tog at the outer edge, working B2, A2, B2. Turn. (6 sts)
Row 11: A1, B4, A1. Turn. (6 sts)
Row 12: A2, B2, A2. (6 sts)
Each leg now holds two full cream diamonds with blue centers and has shifted 2 sts inward. Fasten off the first leg. Do not fasten off the second leg; your working loop is at its outer edge.
Crossbar
Lay the legs side by side, with the second leg on the side of your working loop. Tapestry sc looks almost the same on both faces, so flip the first leg if needed to make the two inner edges face each other. The gap between the legs is now 2 sts.
Row 13: sc across the second leg with A (6), ch 2 with B, then sc across the first leg with A (6), starting at its inner edge. Turn. (14 sts: 6 + 2 + 6)
Row 14: A5, B1, A2, B1, A5, working into each ch over the gap. Turn. (14 sts)
Row 15: A6, B2, A6. Do not turn yet. (14 sts)
The crossbar now shows a small cream diamond outline at its center.
Arms and Triangle Opening
The 4 center sts of Row 15 stay unworked to form the triangular opening.
Row 16 (first arm): turn, sc2tog at the outer edge, sc 3, working A1, B2, A1. Turn. (4 sts; leave the 4 center sts and the other 5 sts unworked)
Row 17 (first arm): 2 sc in the first st (inner edge), sc 1, sc2tog at the outer edge, working A1, B2, A1. (4 sts) Fasten off.
Row 16 (second arm): join A at the opposite outer edge of Row 15, ch 1, sc2tog, then sc 3 toward the opening, working A1, B2, A1. Turn. (4 sts)
Row 17 (second arm): 2 sc in the first st, sc 1, sc2tog, working A1, B2, A1. Turn. (4 sts; the working loop is at the outer edge)
The opening is 4 sts (2/3 in, 1.7 cm) wide at its base and 2 sts wide at Row 17, so it narrows into a triangle.
Top
Row 18 (joining row): across the second arm, sc2tog, sc 1, 2 sc in the last st; then across the first arm, 2 sc in the first st, sc 1, sc2tog. Work the colors A3, B2, A3. Turn. (8 sts: 4 + 4)
Row 19: A2, B1, A2, B1, A2. Turn. (8 sts)
Row 20: A2, B1, A2, B1, A2. Turn. (8 sts)
Row 21: sc2tog, sc 4, sc2tog, working A2, B2, A2. Turn. (6 sts)
Row 22: with A only, sc2tog, sc 2, sc2tog. (4 sts) Fasten off both colors, leaving a short A tail.
Rows 18–21 form the cream top diamond with its blue center, and Rows 21–22 round off the apex.
Make All Pieces
- Front panel: 1, colorwork as written (A and B)
- Back panel: 1, with exactly the same shaping and stitch counts, in A only. Carry a second strand of A inside the stitches, just as you carry B on the front. This gives the back the same thickness and gauge as the front.
Stacking order, from the viewer:
[ Front panel – A/B diamonds, RS out ]
[ optional thin layer of fiberfill   ]
[ Back panel – solid A, RS out       ]
Weave in all tails on both panels before joining. Block both panels lightly to the same 3 in x 3 2/3 in (7.6 x 9.3 cm) outline.
Joining
Hold the panels wrong sides together with all edges matching and the front facing you.
Opening round: join A in the first skipped st at the base of the triangle opening. Working through both layers, sc 4 across the base. Then work 1 sc in each of the 2 row-ends of Rows 16–17 on one side and 1 sc in each of the 2 row-ends on the other side. Sl st to the first sc. (8 sc) Fasten off.
Each stitch goes through matching stitches or matching row-ends on both panels: stitch 1 of the front with stitch 1 of the back, row-end 16 with row-end 16, and so on. The panels have identical counts, so nothing needs easing.
Keep the tension even and slightly relaxed. A tight join will pucker the corners and pull the opening shut.
Size checkpoint: the stacked panels should still lie flat at 3 in x 3 2/3 in (7.6 x 9.3 cm).
Border (Outer Joining Round)
Border gauge: 1 sc per st and 1 sc per row-end, which equals 6 sc per inch (2.5 cm) along every edge.
Join A at the outer corner of one leg base and work through both layers. Counts per side:
- Base of first leg: 3 sc in the corner st, sc 4, 3 sc in the next corner st (10 sc: 6 sts + 4 extra)
- Inner edge of first leg: 1 sc in each row-end of Rows 1–12 (12 sc)
- Under the crossbar: 1 sc in each of the 2 ch of Row 13 (2 sc)
- Inner edge of second leg: 1 sc in each row-end from Row 12 down to Row 1 (12 sc)
- Base of second leg: 3 sc in the corner st, sc 4, 3 sc in the next corner st (10 sc)
- Outer edge, second side: 1 sc in each row-end of Rows 1–22 (22 sc)
- Top: 2 sc in the first st, sc 2, 2 sc in the last st (6 sc: 4 sts + 2 extra)
- Outer edge, first side: 1 sc in each row-end from Row 22 down to Row 1 (22 sc)
If you are adding fiberfill, put it in when about 12 sts remain unworked. Add it in small tufts and push it into the top and crossbar with the back of the hook. Sl st to the first sc. (96 sc: 10 + 12 + 2 + 12 + 10 + 22 + 6 + 22)
Why the math works: the panel gauge is square, so 1 sc per row-end matches 1 sc per stitch, and the edges neither ruffle nor cup. The 3-sc corners turn the four outward-pointing base corners cleanly, and the 2-sc top corners round the apex. The two inward-pointing corners under the crossbar get no extra stitches, so they stay sharp. One round adds 1/8 in (0.3 cm) on each side. That takes the letter from 3 in x 3 2/3 in (7.6 x 9.3 cm) to 3.25 in x 3.9 in (8.3 x 9.9 cm).
Fasten off and weave the tail between the layers.
Hardware
Open one 8 mm jump ring with two pairs of pliers. Slip it through the center 2 sts of the top border, catching both layers. Attach one end of the chain and close the ring firmly. Connect the other end of the chain to the split key ring with the second jump ring.
Final Blocking
- Lightly mist the keychain with water until it is just damp.
- Lay it RS up on a blocking mat.
- Ease it to 3.25 in (8.3 cm) across the leg bases and 3.9 in (9.9 cm) tall.
- Straighten both legs so they lean evenly and the gap between them is symmetrical.
- Open the triangle with a fingertip so it sits centered above the crossbar.
- Pin only the outer border, not the colorwork.
- Let it dry completely, then remove the pins.
Final Quality-Control Checklist
- The front panel shows five cream diamonds with blue centers (two per leg and one at the top) plus the small crossbar motif
- Both panels have 18 sts across the base and 22 rows
- No carried strands show through on the front
- The opening round has 8 sc and the outer border has 96 sc
- Corners are crisp and edges lie flat
- Finished size is 3.25 in x 3.9 in (8.3 x 9.9 cm)
- Both jump rings are fully closed with no gap
Troubleshooting
Carried color peeks through: keep the carried strand slightly snug and lay it flat along the top of the row before you work over it.
Legs lean unevenly: check that each lean row has the sc2tog at the outer edge and the increase at the inner edge.
Panels don’t match: count the rows on both panels. The back panel also needs 22 rows and the same shaping.
Border ruffles: you are adding extra stitches. Use exactly 1 sc per row-end.
Border cups or pulls: use a hook 0.25 mm larger for the border round only.
Triangle closes up: work the opening round more loosely, then reblock with a fingertip in the gap.
Care
Hand wash in cool water with mild soap, press out the water in a towel and dry flat. Do not tumble dry, and do not iron over the colorwork.
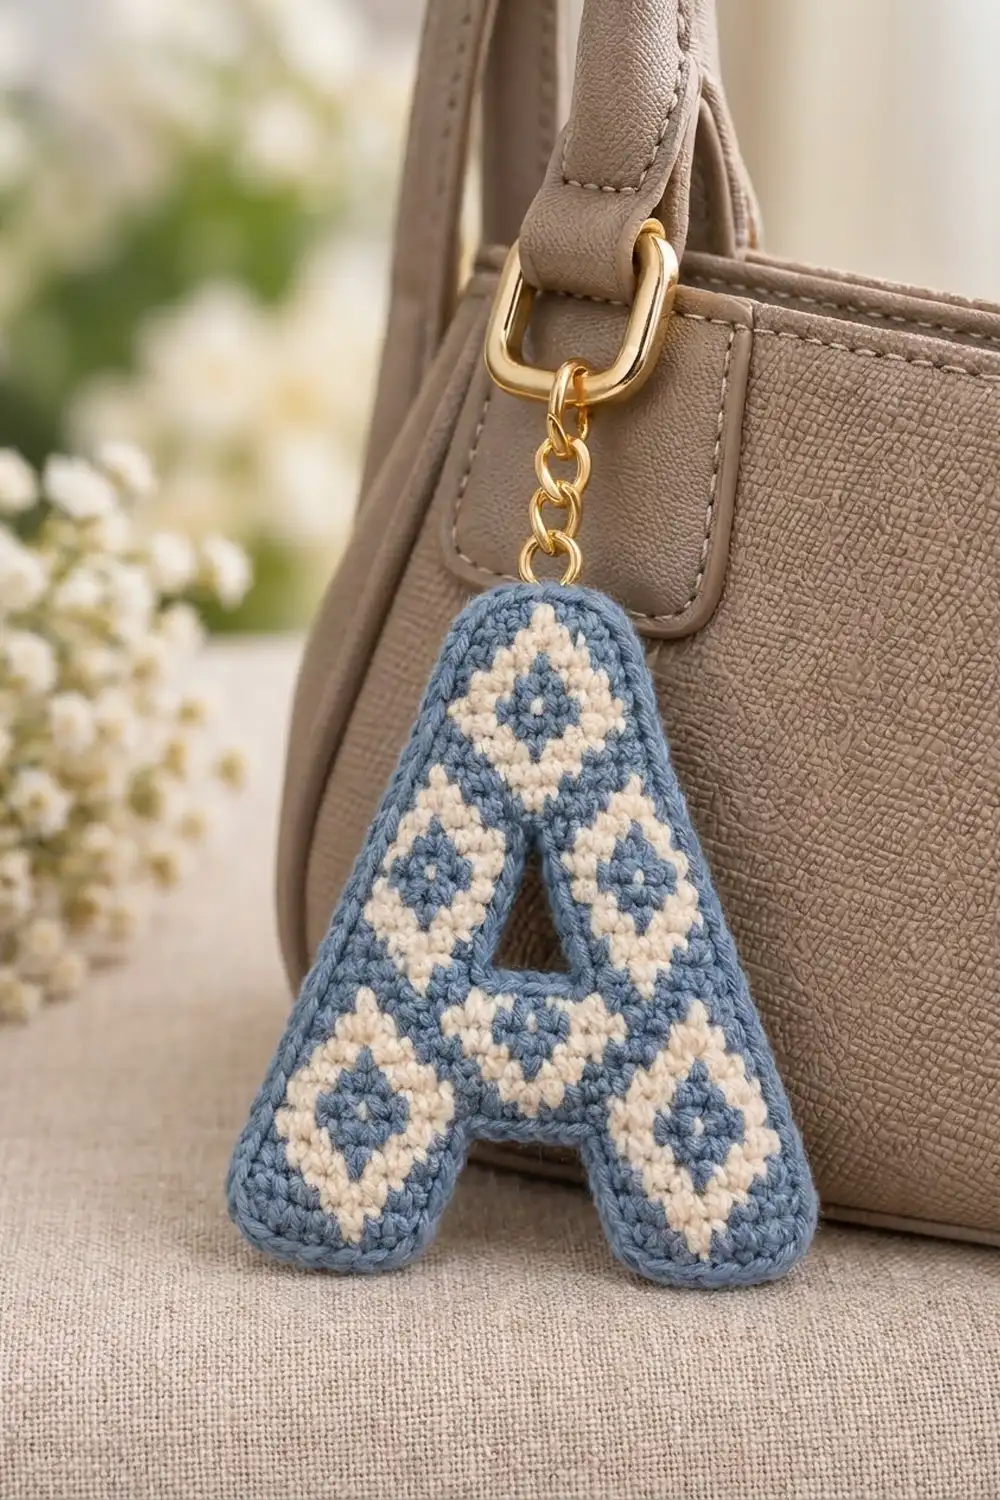
Final Notes
The measurements build on each other. A gauge of 6 sc and 6 rows per inch (2.5 cm) gives 6-st legs 1 in (2.5 cm) wide and a 14-st crossbar 2 1/3 in (5.9 cm) wide. The full 18-st by 22-row panel measures 3 in x 3 2/3 in (7.6 x 9.3 cm). Two matching panels plus one 96-sc border bring the letter to 3.25 in x 3.9 in (8.3 x 9.9 cm), ready for its gold ring and chain.
Happy crocheting!