

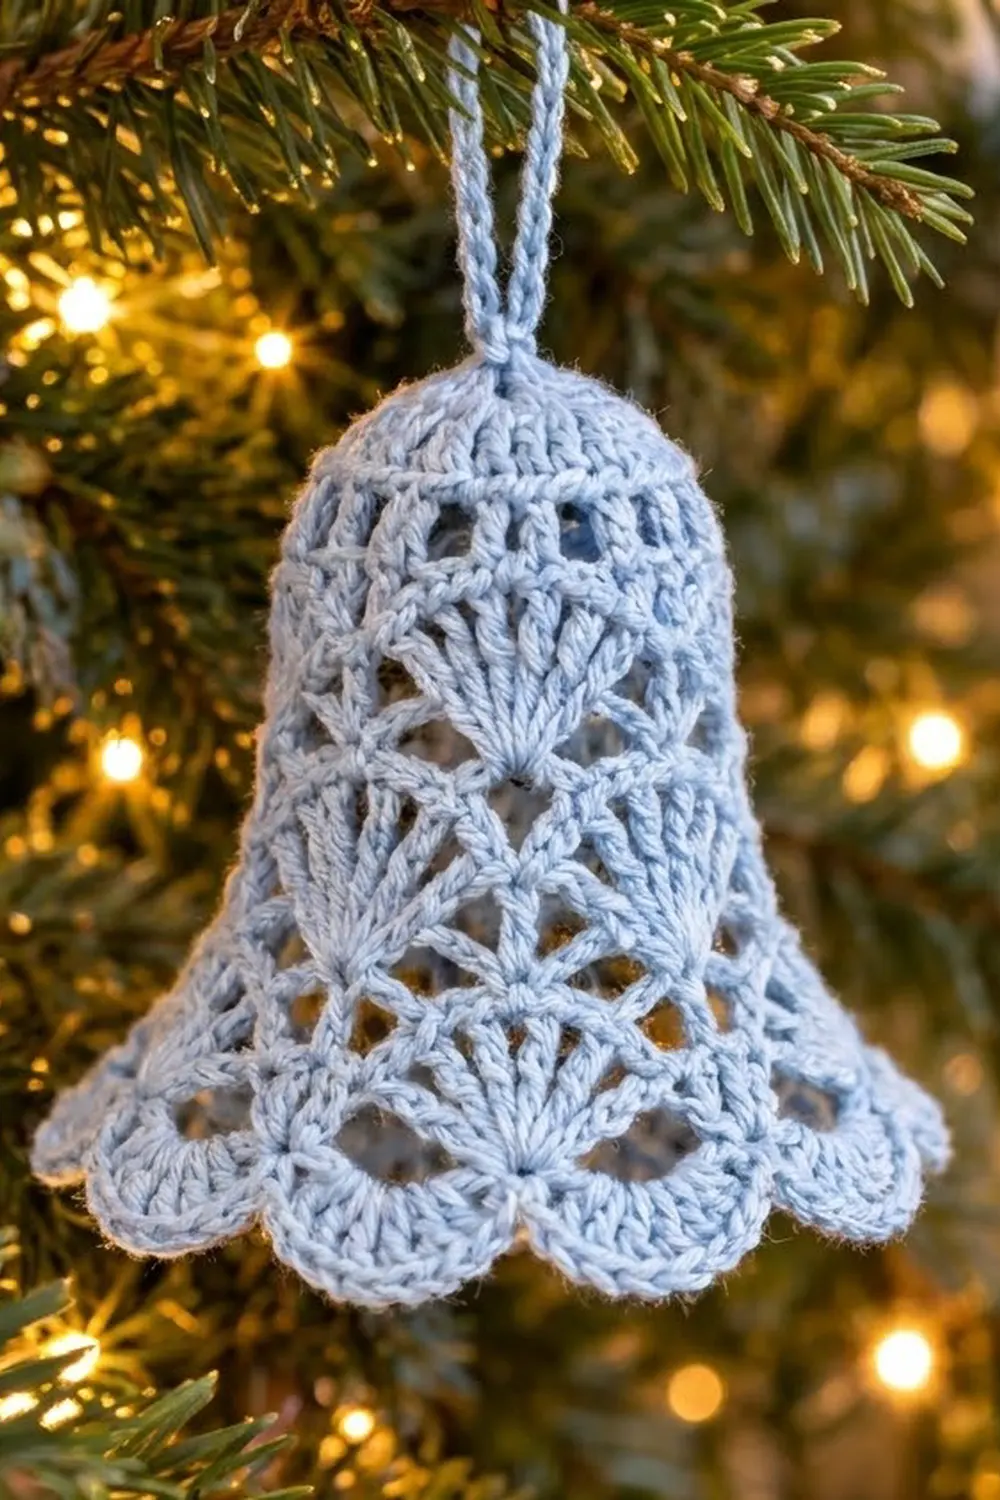
This Frosted Lace Bell is a small three-dimensional Christmas ornament worked in one soft shade of pale baby blue. It has a solid rounded crown, three tiers of staggered lace fans down the body and a gently flared hem with eight rounded scallops. A slim chain loop at the top lets it hang straight from a branch.
The style is classic heirloom lace in a slightly heavier cotton, so it works up quickly and holds its shape well after stiffening. Tree lights glow through the open fans, which gives the bell its frosted, delicate look.
The pattern uses US crochet terms. The finished bell is about 3.5 in (8.9 cm) tall from crown to hem, not counting the loop. It is about 3.75 in (9.5 cm) wide across the hem when flattened. The hanging loop adds about 1.5 in (3.8 cm).
The bell is one single piece worked top-down in joined rounds. You start with a magic ring and build a small solid crown. Then you alternate fan rounds and chain-loop rounds, so each tier of fans sits between the fans of the tier above. A scalloped single crochet edging finishes the hem. Light stiffening over a form sets the bell shape.
Finished Size and Construction
- Finished size: 3.5 in (8.9 cm) tall x 3.75 in (9.5 cm) wide at the hem, flattened
- Skill level: Easy-intermediate
- Terminology: US crochet terms
- Yarn weight: Fine (#2 / sport) mercerized cotton
- Hook: 2.5 mm (US B/1 to C/2)
- Number of pieces: 1 (single bell, no joining)
- Layout: Worked in the round, top-down, 8 pattern repeats around
- Piece size before border: 3.25 in (8.3 cm) tall x 3.5 in (8.9 cm) wide at the hem, flattened
- Border depth: 0.25 in (0.6 cm)
- Hanging loop: about 1.5 in (3.8 cm) tall
Materials
Choose a smooth mercerized cotton in fine (#2) or sport weight. Mercerized cotton gives crisp stitch definition, shows the fans clearly and takes starch well. Avoid fuzzy or very stretchy acrylics, because the lace will blur and the bell will not hold its flare.
- Pale baby blue: 12 g, about 40 m (one bell)
This amount includes a small safety margin. One bell uses about 8 to 9 g, so the extra covers your gauge test, the loop and weaving in ends.
Tools:
- 2.5 mm crochet hook
- Tapestry needle
- Small scissors
- 1 locking stitch marker
- Fabric stiffener or heavy spray starch
- A bell-shaped form (small plastic cup, shaped foil ball, or small inflated balloon)
- Plastic wrap and rust-proof pins
Abbreviations (US Terms)
- ch – chain
- sl st – slip stitch
- sc – single crochet
- dc – double crochet
- st(s) – stitch(es)
- sp – space
- MR – magic ring
- rep – repeat
Special stitches:
- V-stitch (V-st): (dc, ch 1, dc) in the same st.
- Fan: the stated number of dc worked into one ch-sp (5, 7 or 9 dc, depending on the round).
The beginning ch 3 always counts as the first dc. In Round 4, the beginning ch 4 counts as dc + ch 1.
Gauge and Checkpoints
Gauge is not critical for an ornament, but it controls the final height and flare. Always make one bell and measure it before you make a set.
Gauge: Rounds 1–2 = 1.25 in (3.2 cm) across, laid flat.
Checkpoints (measured flattened, crown to edge):
- After Round 3: a shallow cup about 1.5 in (3.8 cm) across.
- After Round 5: a small dome, 1.75 in (4.4 cm) tall and 2 in (5.1 cm) wide.
- After Round 7: 2.5 in (6.4 cm) tall and 2.75 in (7.0 cm) wide.
- After Round 9: 3.25 in (8.3 cm) tall and 3.5 in (8.9 cm) wide.
- After the border: 3.5 in (8.9 cm) tall and 3.75 in (9.5 cm) wide.
If your bell is too big, go down to a 2.25 mm hook or tighten your chain loops. If it is too small or too stiff, go up to a 2.75 mm hook. If only the hem doesn’t flare enough, the chain loops in Rounds 6 and 8 are probably too tight. Work those chains a little looser instead of changing the stitch counts.
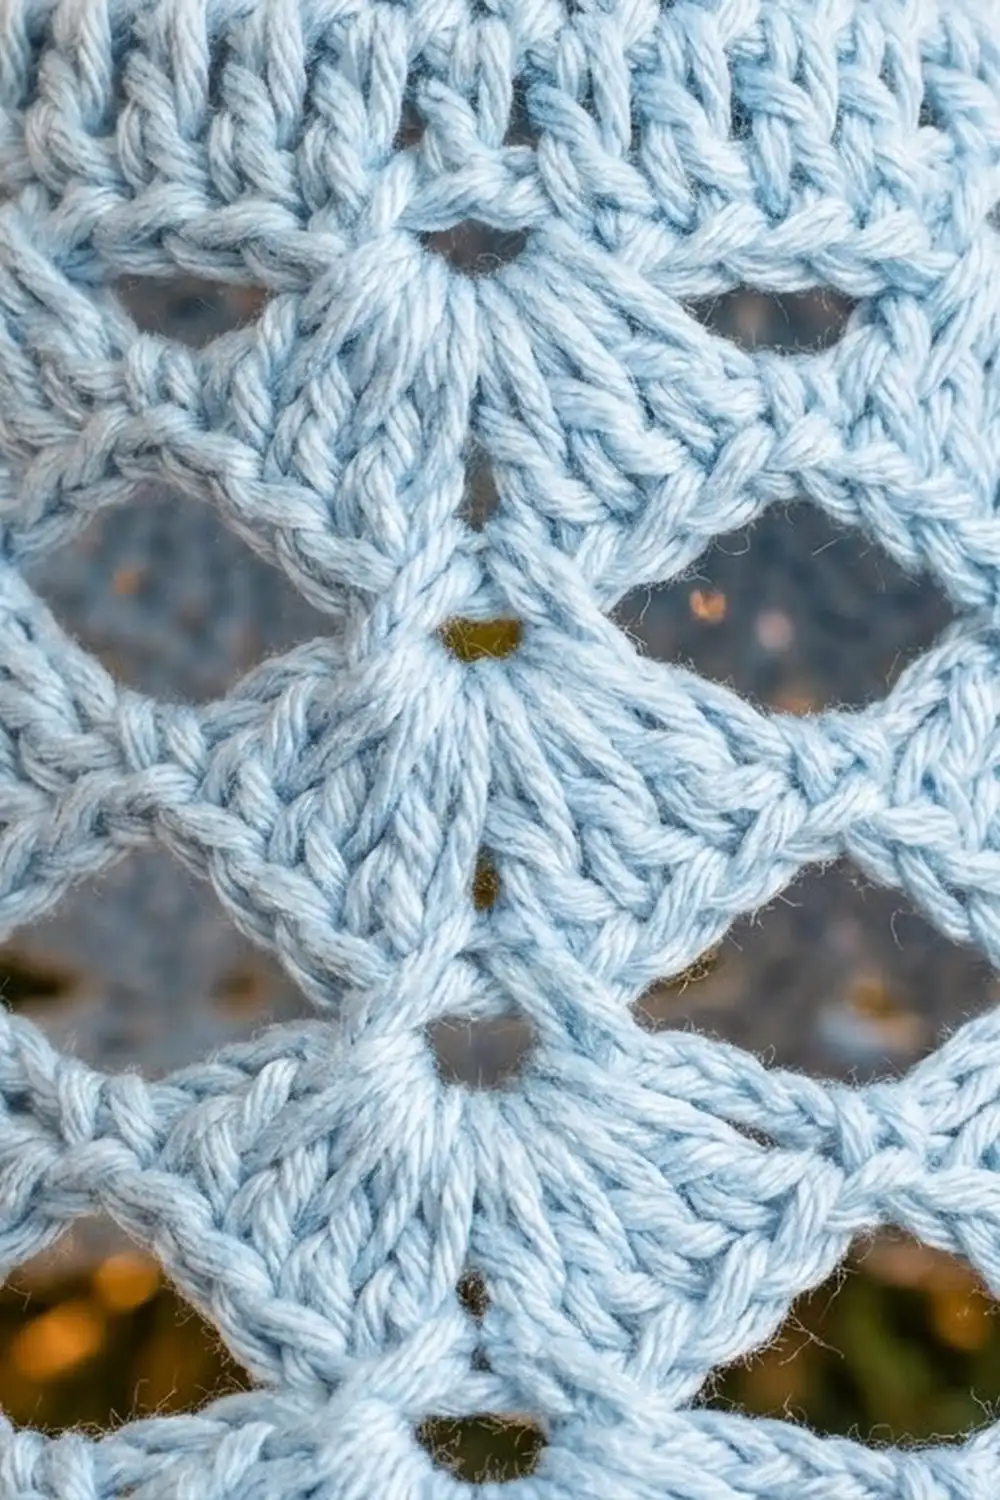
Bell Body
If the joins are hard to spot, place a stitch marker in the first stitch of each round. Join every round with a sl st to the top of the beginning ch.
Round 1: MR, ch 3 (counts as dc), 15 dc in ring; join to top of ch-3. Pull the ring tight. (16 dc)
Round 2: Ch 3, dc in same st, dc in next st; 2 dc in next st, dc in next st 7 times; join. (24 dc)
This is a growth round. 8 sts get 2 dc and 8 sts get 1 dc, for 16 + 8 = 24 dc.
Round 3: Ch 1, sc in each st around; join to first sc. (24 sc)
There are no increases here. Because the count stays at 24, the fabric stops lying flat and starts to curve down into the crown of the bell.
Round 4: Ch 4 (counts as dc + ch 1), dc in same st, ch 1, skip next 2 sts; V-st in next st, ch 1, skip next 2 sts 7 times; join to 3rd ch of beginning ch-4. (8 V-sts: 16 dc, 8 V-st ch-1 sps, 8 ch-1 sps between V-sts)
Each repeat uses 3 sts of Round 3 (1 worked, 2 skipped). Since 8 x 3 = 24, the round closes evenly. This round makes the first band of small openings below the solid crown.
Round 5 (small fans): Sl st into first V-st ch-1 sp, ch 3 (counts as dc), 4 dc in same sp, sc in next ch-1 sp (between V-sts); 5 dc in next V-st ch-1 sp, sc in next ch-1 sp 7 times; join to top of ch-3. (8 fans: 40 dc + 8 sc = 48 sts)
Checkpoint: the piece should now be a small dome, 1.75 in (4.4 cm) tall.
Round 6 (chain loops): Sl st in next 2 dc (you are now in the center dc of the first fan), ch 1, sc in same st, ch 5; sc in center (3rd) dc of next fan, ch 5 7 times; join to first sc. (8 sc + 8 ch-5 sps)
Each ch-5 loop runs from the center of one fan to the center of the next. Its middle sits right above the sc between two fans, which staggers the next tier.
Round 7 (medium fans): Sl st into first ch-5 sp, ch 3 (counts as dc), 6 dc in same sp, sc in next sc; 7 dc in next ch-5 sp, sc in next sc 7 times; join to top of ch-3. (8 fans: 56 dc + 8 sc = 64 sts)
The last sc of the round goes into the first sc of Round 6. Each fan now sits between two fans of Round 5, which creates the overlapping shell pattern on the body.
Checkpoint: 2.5 in (6.4 cm) tall and 2.75 in (7.0 cm) wide, flattened.
Round 8 (chain loops): Sl st in next 3 dc (center dc of first fan), ch 1, sc in same st, ch 6; sc in center (4th) dc of next fan, ch 6 7 times; join to first sc. (8 sc + 8 ch-6 sps)
The longer ch-6 loops give the hem the extra width it needs to flare.
Round 9 (scallop fans): Sl st into first ch-6 sp, ch 3 (counts as dc), 8 dc in same sp, sc in next sc; 9 dc in next ch-6 sp, sc in next sc 7 times; join to top of ch-3. (8 fans: 72 dc + 8 sc = 80 sts)
These large fans become the eight scallops of the hem. They sit between the fans of Round 7, continuing the staggered layout.
Checkpoint: 3.25 in (8.3 cm) tall and 3.5 in (8.9 cm) wide, flattened. This is your size before the border.
Do not fasten off. Continue straight into the border.
Border
The border is one round of sc that outlines each scallop and sharpens the dips between them.
Border gauge: 9 sc = about 1 in (2.5 cm) along the scallop edge. Border depth is 0.25 in (0.6 cm).
Border Round (trim round): Ch 1, sc in same st as join and in next 3 dc, 3 sc in next (5th) dc, sc in next 4 dc, sl st in next sc; sc in next 4 dc, 3 sc in next dc, sc in next 4 dc, sl st in next sc 7 times; join with sl st to first sc. Fasten off.
Count per scallop: (9 sc worked 1 per existing dc) + (2 extra sc at the scallop tip) = 11 sc, plus 1 sl st in the valley.
Round total: 8 scallops x 11 sc = 88 sc, plus 8 sl sts.
Why the math works: each Round 9 fan has exactly 9 dc, so 1 sc in each dc covers the fan with no gaps. The 3 sc in the center dc add 2 sts at the outer curve, the longest edge of the scallop, so the tip stays round instead of cupping. The sl st into each Round 9 sc pulls the valley in and keeps the scallops clearly separate. Nothing is added between scallops, so the hem stays 3.75 in (9.5 cm) wide when flattened.
Hanging Loop
Turn the bell right side up. Join yarn with a sl st at the center of the magic ring on the outside of the crown, or use the beginning tail if it is long enough. Ch 24, then sl st into the same spot on the crown. Fasten off and weave the tail down through the crown.
The 24-ch strand is about 3 in (7.6 cm) long, which folds into a 1.5 in (3.8 cm) loop. For a sturdier loop, work 1 sl st in each ch back down the chain before the final join.
Final Blocking
- Weave in all ends inside the crown. Split the plies so the ends don’t work loose.
- Prepare a form about 3.5 in (8.9 cm) tall that tapers from about 1.5 in (3.8 cm) at the top to about 3.5 in (8.9 cm) at the base. An upside-down small plastic cup padded with foil works well. Cover it with plastic wrap.
- Dilute the fabric stiffener as its label directs, or use heavy spray starch undiluted.
- Soak the bell, then gently squeeze out the excess. Do not wring.
- Slide the bell over the form so the crown sits snugly on top.
- Ease the fans into even columns. Check that each tier sits between the fans above it.
- Pin each of the 8 scallop tips outward so the hem flares evenly. Measure: the hem should be 3.75 in (9.5 cm) wide flattened and the height 3.5 in (8.9 cm).
- While the bell is still damp, open any clogged lace holes with a pin.
- Let it dry completely, at least 24 hours, before you remove it.
Final Quality-Control Checklist
- The crown is solid and smooth, with the magic ring pulled fully closed.
- Round 4 has 8 even V-sts.
- Each fan tier has 8 fans: 5 dc, then 7 dc, then 9 dc.
- Each tier of fans sits between the fans of the tier above.
- The border has 8 scallops of 11 sc, with a clear sl st valley between each.
- The height is 3.5 in (8.9 cm) and the hem is 3.75 in (9.5 cm) wide, flattened.
- The hanging loop is centered, so the bell hangs straight.
- All ends are woven in and can’t be seen from outside.
Troubleshooting
Crown lies flat instead of cupping: your Round 3 tension is loose, or you added stitches. Keep Round 3 at exactly 24 sc and work it a little tighter.
Bell is a tube with no flare: the chain loops in Rounds 6 and 8 are too tight. Rework them with looser chains. You can also add 1 ch to each loop (ch 6 and ch 7) and keep the dc counts the same.
Hem ruffles: the chains are too loose or the hook is too big. Tighten the chains or go down a hook size.
Fans stack instead of staggering: the sc in Round 6 or 8 went into the wrong dc. Recount: each sc must go into the exact center dc of its fan.
Bell hangs crooked: the loop is off-center. Remove it and reattach it through the magic ring.
Bell softens over time: starch it again and dry it on the form.
Care
Spot clean gently with cool water and mild soap, then stiffen again and dry on the form. Store the bells upright in a box with tissue so the scallops don’t get crushed.
Final Notes
The whole bell follows one simple measurement chain. Rounds 1–2 set the gauge at 1.25 in (3.2 cm). The 24-stitch crown curves into a dome 1.75 in (4.4 cm) tall by Round 5. The ch-5 loops and 7-dc fans bring it to 2.5 in (6.4 cm). The ch-6 loops and 9-dc fans take it to 3.25 in (8.3 cm) tall and 3.5 in (8.9 cm) wide. The 88-sc border adds the final 0.25 in (0.6 cm), for a finished bell of 3.5 in (8.9 cm) by 3.75 in (9.5 cm).
Check each stage against these numbers and every bell you make will match the first. Make one bell to test your gauge, then make a whole set for your tree.
Happy crocheting!