

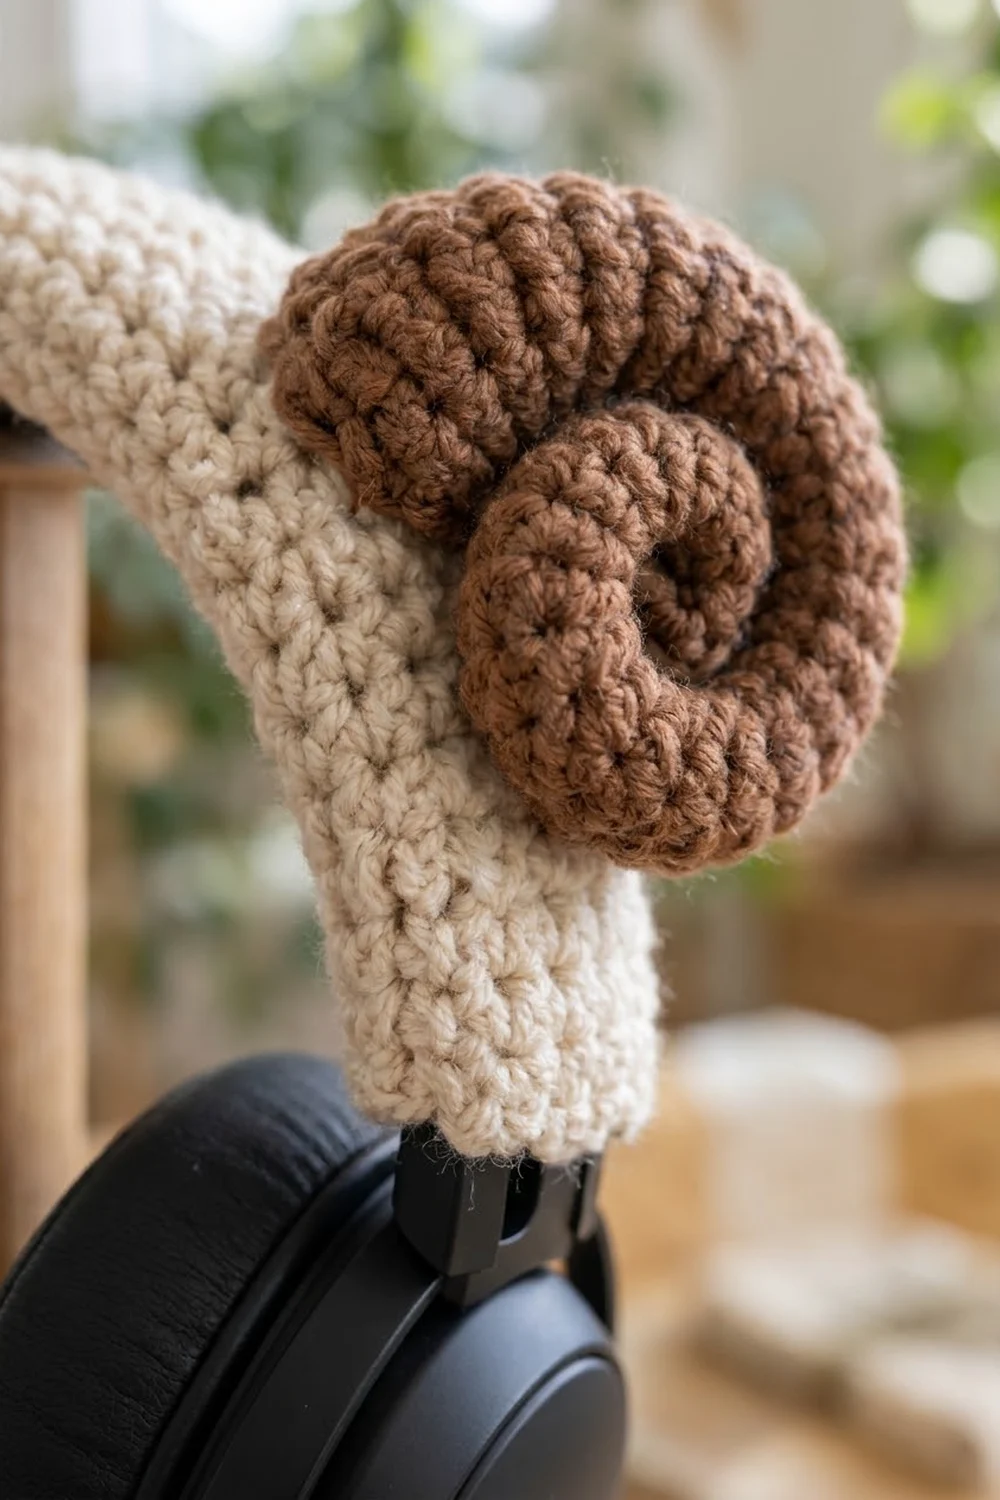
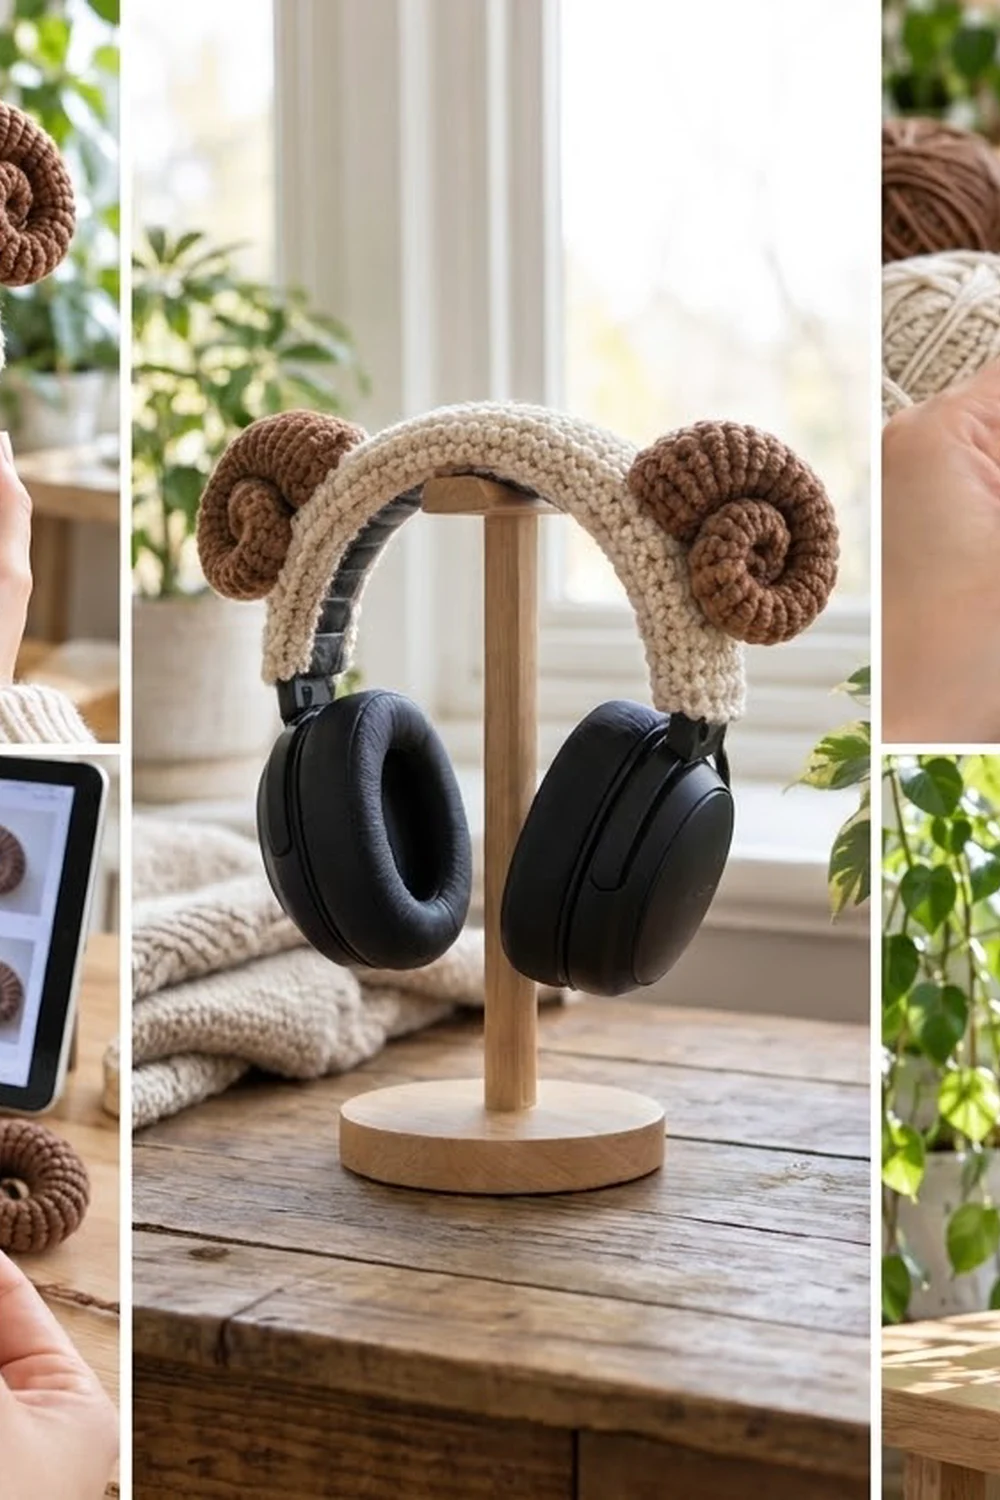
This headphone cover turns a plain set of over-ear headphones into a cozy little ram. A cream single crochet sleeve wraps the headband from hinge to hinge, and a chunky brown coiled horn sits near each end.
The look is soft and simple. The sleeve is a smooth, dense single crochet fabric in cream. The horns are a warm medium brown, worked in back-loop single crochet so each round leaves a fine ridge, like the growth rings on a real horn.
This pattern uses US crochet terms. After its border, the flat sleeve measures 4 in x 12.5 in (10.2 cm x 31.8 cm). It wraps into a tube about 4 in (10.2 cm) around. Each coiled horn is about 2.75 in (7.0 cm) across and 1 in (2.5 cm) deep.
You make three pieces: one flat sleeve worked in rows and then edged, and two tapered horn tubes worked in the round. Wrap the sleeve around the headband and whipstitch its long edges together on the underside. Then curl each horn and sew it to the outer face of the sleeve.
Finished Size and Construction
- Finished size: sleeve 4 in x 12.5 in (10.2 cm x 31.8 cm) flat; horns about 2.75 in (7.0 cm) across
- Skill level: Easy / Intermediate
- Terminology: US
- Yarn weight: worsted (#4)
- Hooks: 4.5 mm (US 7) for the sleeve, 3.5 mm (US E-4) for the horns
- Number of pieces: 3 (1 sleeve, 2 horns)
- Layout: sleeve wrapped around the headband, one horn near each end on the outer face
- Sleeve size before border: 3.5 in x 12 in (8.9 cm x 30.5 cm)
- Border depth: 1 round of sc, about 0.25 in (0.6 cm) on each edge
Materials
Use a smooth worsted yarn with good stitch definition. A cotton-acrylic blend works well because it stays firm on the headband and holds the horn coils in shape. Avoid fuzzy yarns, because they hide the ridges.
- Cream (sleeve): 50 g, about 90 m
- Medium brown (horns): 60 g, about 110 m
- 4.5 mm (US 7) crochet hook
- 3.5 mm (US E-4) crochet hook
- A small handful of polyester fiberfill
- Tapestry needle
- 4 locking stitch markers
- Scissors and a flexible tape measure
These amounts include a margin of about 20 percent for gauge swatches and long sewing tails.
Abbreviations (US Terms)
- ch – chain
- sc – single crochet
- inc – 2 sc in the same stitch
- BLO – back loop only
- sl st – slip stitch
- st(s) – stitch(es)
- rnd – round
- MR – magic ring
Special stitch – BLO sc: Put the hook under the back loop only of the stitch, then finish a normal sc. The unused front loops form a horizontal ridge on the outside of the horn.
Gauge and Checkpoints
Test one piece first. Make a small swatch of the sleeve fabric and the start of one horn before you commit to the full project.
- Sleeve gauge: 16 sc and 18 rows = 4 in (10.2 cm) with the 4.5 mm hook
- Horn gauge: 10 BLO sc and 11 rnds = 2 in (5.1 cm) with the 3.5 mm hook, worked in spiral rounds
Checkpoints:
- Sleeve Row 1: 14 sts, 3.5 in (8.9 cm) wide
- Sleeve Row 27: about 6 in (15.2 cm) long
- Sleeve Row 54: 12 in (30.5 cm) long
- Sleeve after border: 4 in x 12.5 in (10.2 cm x 31.8 cm)
- Horn Rnd 20: 18 sts; the tube is about 3.6 in (9.1 cm) long and 1.8 in (4.6 cm) wide when flattened
- Horn Rnd 40: about 7.25 in (18.4 cm) long before coiling
If your pieces are too big, go down one hook size. If they are too small, go up one hook size. On the sleeve, width matters most, because it has to match the circumference of your headband.
Measure your headphones first. Wrap the tape measure around the padded headband to get its circumference. Then measure along the outer curve from hinge to hinge. This pattern fits a band about 4 in (10.2 cm) around and 12.5 in (31.8 cm) long.
Each foundation chain you add or remove changes the width by about 0.25 in (0.6 cm). Each pair of rows you add or remove changes the length by about 0.5 in (1.3 cm).
Sleeve
Use cream and the 4.5 mm hook.
Foundation: Ch 15.
Row 1: Sc in the 2nd ch from the hook and in each ch across, turn. (14 sts)
Rows 2–54: Ch 1 (does not count as a st), sc in each st across, turn. (14 sts per row)
At Row 27, check that the piece is about 6 in (15.2 cm) long. At Row 54, it should measure 3.5 in x 12 in (8.9 cm x 30.5 cm). Do not fasten off. Go straight into the border.
If you change the length for a different band, keep the row count even so both short ends finish on the same side.
Horns (Make 2)
Use brown and the 3.5 mm hook. Work in continuous spiral rounds. Place a marker in the first st of each round and move it up as you go. From Rnd 2 onward, work every stitch BLO.
To make the horn curve, stack the increases. Every increase round starts with its 2 increases side by side, so the extra fabric builds up along one side of the tube. That side becomes the outer edge of the coil.
Rnd 1: 4 sc in MR, then pull it closed. (4 sts)
Rnd 2: Inc in each of the next 2 sts, sc in each of the next 2 sts. (6 sts)
Rnds 3–4: Sc in each st around. (6 sts)
Rnd 5: Inc in each of the next 2 sts, sc in each of the next 4 sts. (8 sts)
Rnds 6–7: Sc around. (8 sts)
Rnd 8: Inc in each of the next 2 sts, sc in each of the next 6 sts. (10 sts)
Rnds 9–10: Sc around. (10 sts)
Rnd 11: Inc in each of the next 2 sts, sc in each of the next 8 sts. (12 sts)
Stuff the tip lightly with small tufts of fiberfill. Keep stuffing as you go.
Rnds 12–13: Sc around. (12 sts)
Rnd 14: Inc in each of the next 2 sts, sc in each of the next 10 sts. (14 sts)
Rnds 15–16: Sc around. (14 sts)
Rnd 17: Inc in each of the next 2 sts, sc in each of the next 12 sts. (16 sts)
Rnds 18–19: Sc around. (16 sts)
Rnd 20: Inc in each of the next 2 sts, sc in each of the next 14 sts. (18 sts)
Checkpoint: The tube is about 3.6 in (9.1 cm) long and 1.8 in (4.6 cm) wide when flattened.
Rnds 21–40: Sc around. (18 sts)
Sl st in the next st and fasten off, leaving a 10 in (25.4 cm) tail for sewing. The horn should be about 7.25 in (18.4 cm) long. Stuff it firmly enough to hold a round shape but keep it soft enough to bend. Leave the base open.
Coiling the horn:
- Thread a 24 in (61.0 cm) length of brown yarn onto the needle. Start at the tip and run it along the inner side of the tube, opposite the stacked increases. Catch one front-loop ridge in every round up to Rnd 30.
- Pull gently. The tube curls toward the gathered side.
- Wind the tip inward into a spiral of about 1.5 turns, with the ridged outer edge facing out.
- Tack each turn to the one next to it with small stitches every 0.5 in (1.3 cm). Rnds 31–40 stay uncoiled and form the base that rises from the sleeve.
- Check that the coil is about 2.75 in (7.0 cm) across and 1 in (2.5 cm) deep. Secure the gathering yarn and weave it in.
Make the second horn the same way, but wind it in the opposite direction so the two horns mirror each other.
Make All Pieces
- Cream: 1 sleeve, 14 sts x 54 rows, plus the border round
- Brown: 2 horns, 40 rnds each, coiled as a mirrored pair
Layout (front view, with the sleeve on the band):
 [Horn L - coils left]                    [Horn R - coils right]
 [====== Sleeve 4 in x 12.5 in (10.2 cm x 31.8 cm) ======]
 |hinge|                                                  |hinge|
Each horn base sits 2 in (5.1 cm) in from the short end, centered on the outer face.
Joining
Work the border (next section) on the sleeve before you seam it. You join the pieces with the sleeve already on the headphones.
Sleeve seam:
- Lay the bordered sleeve over the headband with the right side out. The long edges should meet along the underside, on the side facing the ear cushions.
- After the border, each long edge has 58 sts, counting both corner center sts. Line up the corners on both edges.
- Use the 30 in (76.2 cm) cream tail. Whipstitch through the back loops, one st from each edge at a time, stitch to stitch, so all 58 sts on one edge meet all 58 on the other.
- Pull each stitch just until the edges meet. If it’s too loose, the seam gapes. If it’s too tight, the sleeve twists around the band.
- At each short end, close the sleeve around the hinge with 2–3 small tacking stitches.
Size check: The seamed sleeve should cover the band from hinge to hinge with no bare plastic showing. It should not slide when you flex the band.
Horns:
- Flatten each horn’s open base into a slight oval.
- Pin it to the outer face, 2 in (5.1 cm) from the short end, with the coil turned outward.
- Whipstitch all 18 base sts to the sleeve. Go through the sleeve fabric only, not through the seam.
- Tack the back of the coil to the sleeve with 2–3 hidden stitches so it doesn’t flop.
Border
Keep using cream on the sleeve. Start with the right side facing, right after Row 54.
Border gauge: 4 sts per in (2.54 cm), the same as the sleeve body.
Rnd 1: Ch 1. Work 3 sc in the first st (corner). Sc in each of the next 12 sts. Work 3 sc in the last st (corner). Turn the piece and work 1 sc in each row end down the long side (54 sts). Work 3 sc in the first foundation ch (corner). Sc in each of the next 12 ch. Work 3 sc in the last ch (corner). Work 1 sc in each row end up the second long side (54 sts). Join with a sl st to the first sc.
Counts:
- Each corner: 3 sts; the center st is the corner point
- Short sides: 12 sts between corners, 16 sts per side including both corner center sts
- Long sides: 54 sts between corners, 58 sts per side including both corner center sts
- Round total: 4 x 3 + 2 x 12 + 2 x 54 = 144 sts
Fasten off, leaving a 30 in (76.2 cm) tail for the seam.
Why the math works: Each short end had 14 sts. The 2 end sts become corners with 3 sts each, and the 12 middle sts get 1 sc each. That makes 12 + 2 x 3 = 18 sts, or 16 if you count only the corner center sts.
The long sides take exactly 1 sc per row end, so 54 rows give 54 sts. Both long sides end up with the same 58 sts, so the seam matches stitch for stitch with no easing.
The border adds about 0.25 in (0.6 cm) on every edge. The width grows from 3.5 in to 4 in (8.9 cm to 10.2 cm), and the length grows from 12 in to 12.5 in (30.5 cm to 31.8 cm).
Final Blocking
- Before seaming, pin the bordered sleeve flat to 4 in x 12.5 in (10.2 cm x 31.8 cm).
- Mist it with water, or hold a steam iron 1 in (2.5 cm) above it. Never press acrylic.
- Let it dry completely, then unpin it.
- After assembly, lightly mist the horns and squeeze each coil into a neat round shape.
- Let the finished cover dry on the headphones or on a stand so it sets to the curve of the band.
Final Quality-Control Checklist
- The sleeve has 14 sts in every row and exactly 54 rows.
- The border has 144 sts: 16 on each short side and 58 on each long side.
- The seam is on the underside and the edges meet with no gaps.
- Each horn has 18 sts at the base and 40 rnds in total.
- The stacked increases run along the outer edge of each coil.
- The horns mirror each other and sit 2 in (5.1 cm) from each end.
- No plastic shows between the sleeve ends and the hinges.
- All ends are woven in and hidden.
Troubleshooting
- The sleeve is too tight to close: Add 1 foundation ch for every 0.25 in (0.6 cm) you need, or go up a hook size.
- The seam gapes: Take the seam out and re-sew it with firmer tension, catching both loops instead of only the back loops.
- The sleeve is too long and bunches at the hinges: Remove 2 rows for every 0.5 in (1.3 cm) of extra length.
- The horn won’t curl: Pull the gathering yarn tighter. Check that it runs opposite the stacked increases.
- The horn is lumpy: Use smaller tufts of fiberfill and roll the tube between your palms.
- The ridges don’t show: Make sure you are working BLO, not under both loops.
- The horn droops: Add more tacking stitches between the back of the coil and the sleeve.
Care
Spot clean with a damp cloth and mild soap, then let the cover air dry on the headphones. If it needs a full wash, snip the seam, take off the sleeve and hand wash it in cold water.
Final Notes
Here is how the measurements fit together. The 14-st sleeve rows measure 3.5 in (8.9 cm) wide, and the 54 rows measure 12 in (30.5 cm) long. The 144-st border brings the sleeve to 4 in x 12.5 in (10.2 cm x 31.8 cm), with 58 matching sts on each long edge. That wraps a 4 in (10.2 cm) band from hinge to hinge. Two 40-rnd horns, each about 7.25 in (18.4 cm) long, coil to about 2.75 in (7.0 cm) across and finish the ram look.
Check your gauge, measure your headband before you start, and enjoy your new ram headphones.
Happy crocheting!