

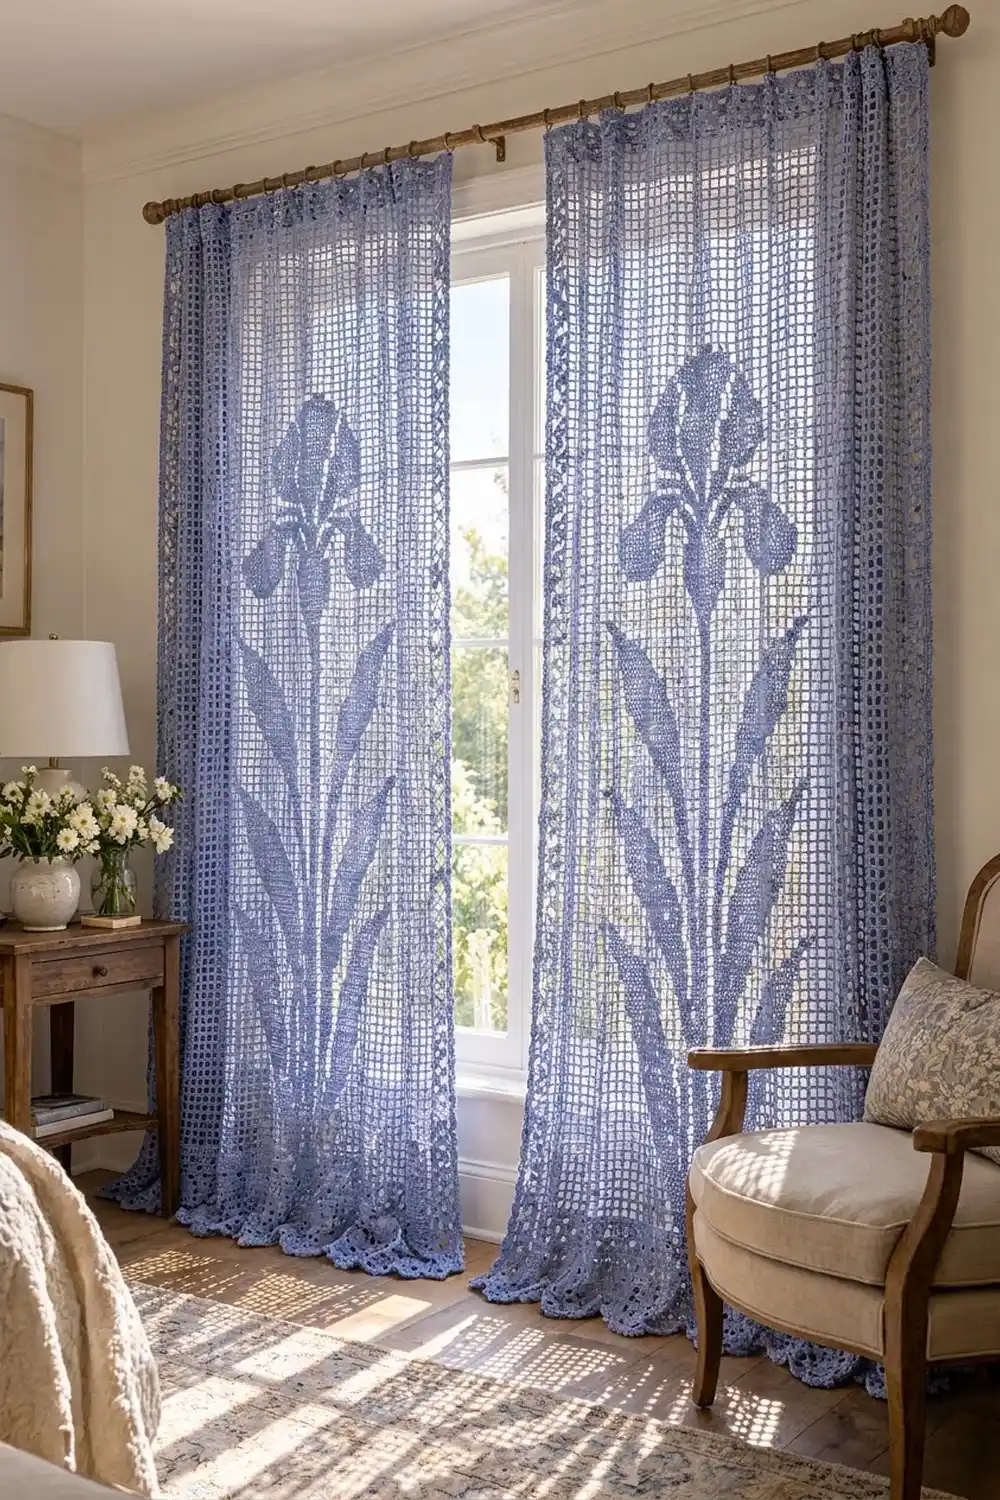
These filet curtain panels put one tall iris against an open grid of mesh, so the flower stands out clearly when light comes through the window. Each panel shows a full plant: a leafy base, a long stem, four sword leaves that fan outward, and a bloom with drooping falls and upright standards.
The whole design is one soft periwinkle blue cotton. With a single color there are no color changes; the picture comes entirely from filled blocks and open spaces. Solid side bands and a scalloped hem give the panels a vintage cottage look.
This pattern uses US crochet terms. Each finished panel measures 30.5 in (77.5 cm) wide by 81.75 in (207.6 cm) long, including the border.
Each panel is worked flat in rows from the bottom up as one rectangle of 75 squares by 200 rows. Then one round of single crochet goes around the panel, and a two-row scalloped hem is added along the bottom edge. Make two panels for a pair.
Finished Size and Construction
- Finished size (each panel): 30.5 in (77.5 cm) wide x 81.75 in (207.6 cm) long
- Skill level: Intermediate (filet basics, careful counting)
- Terminology: US crochet terms
- Yarn weight: #2 fine/sport mercerized cotton
- Hook: 2.75 mm (C-2)
- Number of pieces: 2 separate panels, not joined
- Layout: panels hang side by side on one rod
- Panel body size: 75 squares x 200 rows = 30 in (76.2 cm) x 80 in (203.2 cm)
- Size before border: 30 in x 80 in (76.2 cm x 203.2 cm)
- Border depth: 0.25 in (0.6 cm) on the sides and top; 1.5 in (3.8 cm) on the bottom hem
Materials
Use a smooth mercerized cotton. It gives crisp square spaces and sharp block edges, and it holds its shape while hanging. Avoid fuzzy or very stretchy yarns, which blur the motif and make long panels sag.
- Periwinkle blue cotton, #2 sport: 300 g / 930 m per panel; 600 g / 1,860 m for the pair (about 12 balls of 50 g / 155 m)
- 2.75 mm (C-2) crochet hook
- Tapestry needle
- Stitch markers (several, for marking every 10th row)
- Measuring tape
- Blocking mats or a clean floor area and rustproof pins
- Optional: light spray starch
- 16 curtain clip rings per panel
The yarn quantities include a margin of about 15% for the gauge swatch, small gauge differences and the weaving in of ends.
Abbreviations (US Terms)
- ch – chain
- sl st – slip stitch
- sc – single crochet
- dc – double crochet
- sk – skip
- sp – space
- st(s) – stitch(es)
- RS / WS – right side / wrong side
Filet square definitions. Every square is 3 sts wide. Neighboring squares share their edge dc, so a row of 75 squares has 226 sts (1 + 75 x 3).
- Block over a block: dc in next 2 dc, dc in next dc.
- Block over a space: 2 dc in ch-2 sp, dc in next dc.
- Space (over a block or a space): ch 2, sk 2 sts or the ch-2 sp, dc in next dc.
- Turning chain: ch 3 at the start of each row counts as the first dc. Work the last dc of each row into the top of the previous turning ch.
Gauge and Checkpoints
Gauge: 10 squares x 10 rows = 4 in (10.2 cm). One square is 0.4 in (1.0 cm) wide and tall.
Test swatch first. Ch 33. Row 1: dc in 4th ch from hook and in each ch across (31 sts = 10 blocks). Rows 2–10: ch 3, turn. Work 1 block, 8 spaces, 1 block. Fasten off, wet block lightly, and measure.
- Swatch too big (more than 4 in / 10.2 cm): go down to a 2.5 mm hook.
- Swatch too small: go up to a 3.0 mm hook.
- Width right but height wrong: change how tall you pull the dc loops before changing hooks. Square mesh only looks right when the width and height match.
Checkpoints while working (measured flat, unstretched):
- After Row 10: 4 in (10.2 cm) tall, 30 in (76.2 cm) wide
- After Row 50: 20 in (50.8 cm)
- After Row 100: 40 in (101.6 cm)
- After Row 150: 60 in (152.4 cm)
- After Row 200: 80 in (203.2 cm)
Place a marker every 10 rows so you can count rows and measure quickly.
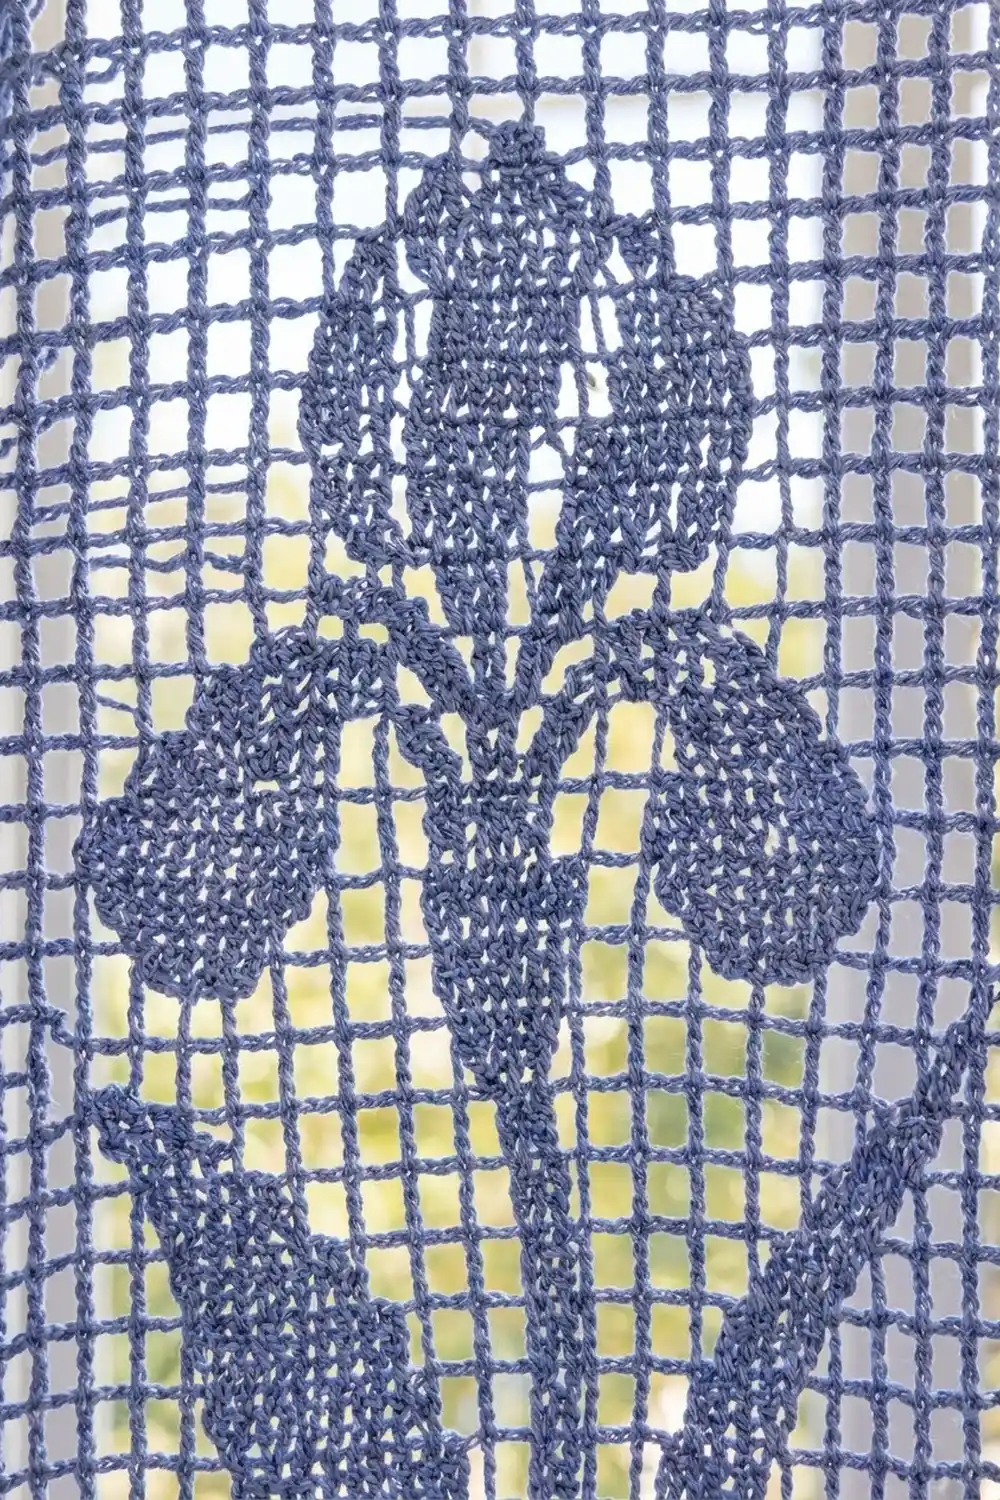
Panel Pattern
How to Read the Rows
Columns are numbered 1 to 75, and the center column is 38. The design is perfectly symmetric, so you can count from either edge on RS and WS rows alike.
Standing rule for Rows 3–198: columns 1–2 and 74–75 are always blocks. They form the solid side bands. Any column not listed for a row is a space.
Every row has 226 sts. The only thing that changes from row to row is the block count.
Foundation and Bottom Band
Row 1 (RS): Ch 228. Dc in 4th ch from hook (skipped ch count as first dc) and in each ch across. (226 sts = 75 blocks)
Row 2: Ch 3, turn. Work 75 blocks. (226 sts)
Rows 3–4: Ch 3, turn. Work 2 blocks, 71 spaces, 2 blocks. (4 blocks, 71 spaces)
Leaf Clump
Rows 5–10: Ch 3, turn. Blocks at columns 1–2, 30–46 and 74–75. (21 blocks, 54 spaces)
This gives a solid clump 17 squares wide and 6 rows tall. All the leaves and the stem grow out of it.
Stem and Sword Leaves (Rows 11–150)
Stem: columns 37–39 are blocks on every row from 11 to 150.
Outer leaves (2 blocks wide, step outward every 3 rows):
– Rows 11–13: columns 31–32 and 44–45
– In every new 3-row group, move each leaf 1 column outward. For example, Rows 14–16 use columns 30–31 and 45–46, and Rows 17–19 use 29–30 and 46–47.
– Rows 68–70 (the last group): columns 12–13 and 63–64
– Rows 71–73 (leaf tips): single blocks at columns 12 and 64
Inner leaves (2 blocks wide, step outward every 6 rows):
– Rows 11–16: columns 34–35 and 41–42
– In every new 6-row group, move each leaf 1 column outward. For example, Rows 17–22 use columns 33–34 and 42–43.
– Rows 95–100 (the last group): columns 20–21 and 55–56
– Rows 101–106 (leaf tips): single blocks at columns 20 and 56
Row 11 check: side bands 4 + stem 3 + inner leaves 4 + outer leaves 4 = 15 blocks, 60 spaces.
The outer leaves climb at a steep angle and the inner leaves at a gentler one, so the two pairs spread apart and never touch. At their start there is always at least one space column between them.
Rows 107–150: only the side bands and stem are blocks. (7 blocks, 68 spaces)
Iris Bloom (Rows 151–190)
- Rows 151–156 (base of the bloom): blocks at columns 36–40. (9 blocks)
- Rows 157–160 (fall tips): blocks at columns 28–33, 36–40 and 43–48. (21 blocks) The space columns 34–35 and 41–42 separate the hanging petal tips from the center.
- Rows 161–170 (main body of the falls): blocks at columns 26–50. (29 blocks, 46 spaces)
- Rows 171–174 (top of the falls): blocks at columns 29–47. (23 blocks)
- Rows 175–182 (all three standards): blocks at columns 30–32, 34–42 and 44–46. (19 blocks) The single space columns 33 and 43 outline the center standard.
- Rows 183–186 (center standard only): blocks at columns 34–42. (13 blocks)
- Rows 187–188: blocks at columns 36–40. (9 blocks)
- Row 189: blocks at columns 37–39. (7 blocks)
- Row 190 (tip): block at column 38. (5 blocks)
Top Band
Rows 191–198: 2 blocks, 71 spaces, 2 blocks.
Rows 199–200: 75 blocks. (226 sts) Do not fasten off.
Checkpoint: 30 in x 80 in (76.2 cm x 203.2 cm).
Make Both Panels
Make 2 panels in periwinkle blue (about 300 g / 930 m each). Both panels follow the same instructions. Because the iris is symmetric, they hang as a mirrored pair without any changes.
Layout on the rod (as seen from the room):
| Panel 1 | window | Panel 2 |
|  iris   |        |  iris   |
The panels are not sewn together. Each hangs on its own clip rings.
Border
Border gauge: sc along the edges matches the body, at 3 sts per square (0.4 in / 1.0 cm). Along the row ends, work 3 sc per dc row-end, because each row is one square tall.
Rnd 1 (RS, all around): Continue from Row 200. Ch 1. Work (sc, ch 2, sc) in the first st (corner), sc in the next 224 sts, and (sc, ch 2, sc) in the last st (corner). Work 3 sc in each of the 200 row-ends down the side. Work (sc, ch 2, sc) in the first foundation st, sc in the next 224 sts, and (sc, ch 2, sc) in the last foundation st. Work 3 sc in each row-end up the second side. Sl st to the first sc.
Per-side counts (each count includes that side’s 2 corner sc):
– Top: 1 + 224 + 1 = 226 sc
– Bottom: 1 + 224 + 1 = 226 sc
– Each side: 1 + 600 + 1 = 602 sc
– Round total: 1,656 sc plus 4 corner ch-2 sps
Fasten off. This round is the whole border on the sides and top, at 0.25 in (0.6 cm) deep.
Row 2 (bottom hem only): With RS facing, join yarn in the bottom-right corner ch-2 sp. Ch 1, sc in the first bottom sc, then [ch 5, sk 4 sc, sc in next sc] 45 times. The last sc lands on the 226th sc. (45 ch-5 loops)
Row 3: Turn. Ch 1, then [3 sc in next loop, 9 dc in next loop, 3 sc in next loop] 15 times. Sl st in the last sc of Row 2. Fasten off. (15 scallops, 225 sts)
Why the math works: The bottom has 226 sc, and 1 + (45 x 5) = 226, so the loops fit exactly from corner to corner. The 45 loops divide into 15 groups of 3, one group per scallop. Each scallop covers 15 sc, or 2 in (5.1 cm), and 15 scallops x 2 in = 30 in (76.2 cm), the full panel width. The side counts match the body too: 600 row-end sc at 3 sc per 0.4 in comes to the full 80 in (203.2 cm).
Final Blocking
- Weave in all ends along solid blocks so they stay hidden.
- Soak the panel in cool water for 15 minutes, then press the water out gently. Do not wring.
- Roll the panel in towels to remove extra water.
- Lay it flat on mats or a clean sheet on the floor.
- Pin the side bands straight to 30 in (76.2 cm) wide and the length to 80 in (203.2 cm), not counting the border.
- Pin each scallop into a rounded arch, 2 in (5.1 cm) wide.
- Check that the mesh squares are square, not stretched taller or wider.
- Mist with starch if you want a crisp drape. Let the panel dry completely.
- Attach 16 clip rings along the top edge: one at each corner and one every 2 in (5.1 cm) in between.
Final Quality-Control Checklist
- Each row has 226 sts and 75 squares.
- The side bands are 2 blocks wide on every row from 3 to 198.
- The stem runs straight up column 37–39 from Row 11 to Row 150.
- The four leaf tips end at Rows 73 and 106, mirrored left and right.
- The bloom is centered on column 38.
- Border Rnd 1 counts are 226 / 602 / 226 / 602.
- The hem has exactly 15 scallops.
- Each panel measures 30.5 in x 81.75 in (77.5 cm x 207.6 cm).
- Both panels match in length to within 0.5 in (1.3 cm).
Troubleshooting
- Panel getting narrower or wider: you have lost or added a stitch. Count 226 at each marker, and check that the last dc goes into the turning ch.
- Spaces look like rectangles: your height and width gauges differ. Adjust how tall you pull the dc loops, or wet block more firmly.
- Leaves look jagged in the wrong direction: a leaf was moved inward. Re-count from the side band.
- Hem ruffles: your dc are too loose. Use 8 dc per shell or go down a hook size for the hem rows only.
- Hem pulls in: your sc are too tight on Rnd 1. Rework it with a looser tension.
- Panels hang at different lengths: block the shorter panel to the longer length, or remove or add rows in the top mesh band (Rows 191–198).
Care
Hand wash in cool water with a mild soap. Lay flat or hang damp from the rod to dry, with no tumble drying. Re-block lightly as needed to keep the squares even.
Final Notes
The measurement chain is simple. A 0.4 in (1.0 cm) square gives a 4 in (10.2 cm) gauge swatch. Seventy-five squares across make 30 in (76.2 cm), and 200 rows make 80 in (203.2 cm). The sc round adds 0.25 in (0.6 cm) on three sides, and the scalloped hem adds 1.5 in (3.8 cm), for a finished panel of 30.5 in x 81.75 in (77.5 cm x 207.6 cm). If your swatch matches, every checkpoint and border count will fall into place.
Happy crocheting!