

This curtain panel is airy and botanical. Open filet mesh lets the daylight through, solid rails frame the design, and a single climbing vine of raised leaves runs up the center. The look is calm and garden-inspired, and it suits a sunroom, French doors, or any window where you want privacy without losing the light.
The sample uses one sage green sport-weight cotton. Working everything in a single color keeps the focus on texture: the grid, the stem, and the dimensional leaves with their raised veins.
This pattern uses US crochet terms. One finished panel is 32 in (81.3 cm) wide and hangs 81 in (205.7 cm) long. Make two for a pair.
The body is worked flat from the bottom up in filet mesh, finishing with a solid rod-pocket band. Next you add a scalloped border along the bottom and a single-crochet edging along each side. Then you surface-stitch the stem and sew on 39 separately made leaves per panel.
Finished Size and Construction
- Finished size (one panel): 32 in (81.3 cm) wide × 81 in (205.7 cm) hanging length
- Skill level: Intermediate (long project, simple repeats)
- Terminology: US crochet terms
- Yarn weight: Sport (2), cotton or cotton blend
- Hook: 3.5 mm (E-4)
- Number of pieces per panel: 1 mesh body + 39 leaf appliqués
- Layout across the body: edge rail, mesh band, rail, vine column, rail, mesh band, edge rail (56 filet squares)
- Leaf size: about 2.25 in (5.7 cm) long × 1.5 in (3.8 cm) wide
- Body size before border: 32 in (81.3 cm) × 81 in (205.7 cm) flat, including the 3 in (7.6 cm) rod band
- Border depth: 1.5 in (3.8 cm) bottom scallop border; the side edging is one single-crochet row
Materials
Pick a smooth, mercerized or matte cotton in sport weight, about 150 m per 50 g. Cotton gives crisp mesh, holds its blocked shape, and stands up to sunlight and washing better than acrylic. Avoid fuzzy yarns, which blur the grid.
Yarn:
– Sage green: 300 g (900 m) per panel; 600 g (1,800 m) for a pair
These quantities include a margin of about 20% for swatching, leaves, and variation in tension.
Tools:
– 3.5 mm (E-4) crochet hook
– Tapestry needle
– Locking stitch markers (at least 10)
– Measuring tape
– Rust-proof pins and a large blocking surface (foam mats or a bed covered with towels)
– Spray bottle
– Scissors
Abbreviations (US Terms)
- ch – chain
- sl st – slip stitch
- sc – single crochet
- hdc – half double crochet
- dc – double crochet
- tr – treble crochet
- sk – skip
- sp – space
- st(s) – stitch(es)
- RS / WS – right side / wrong side
Special stitches:
– Open square: ch 2, sk 2 sts (or the ch-2 sp), dc in next dc.
– Solid square: dc in next 2 sts (or 2 dc in the ch-2 sp), dc in next dc.
– Surface sl st: holding the yarn behind the fabric, insert the hook from front to back through the fabric, pull up a loop, and draw it through the loop on the hook.
Each square is 3 sts wide. A row is the beginning dc plus 3 sts for each square.
Gauge and Checkpoints
Gauge: 7 filet squares (21 sts) and 8 rows = 4 in (10.2 cm) after blocking.
Test swatch first: Ch 30.
Row 1: Dc in 4th ch from hook and in next 2 ch, [ch 2, sk 2 ch, dc in next ch] 7 times, dc in last 3 ch. (28 sts)
Rows 2–10: Ch 3 (counts as dc), turn, dc in next 3 dc, [ch 2, dc in next dc] 7 times, dc in next 2 dc, dc in top of turning ch.
Wet-block the swatch. The 7 open squares should measure 4 in (10.2 cm), and 8 rows should measure 4 in (10.2 cm).
Test one leaf too (see Leaf Appliqué). It should be about 2.25 in (5.7 cm) long.
If your swatch is too big: go down to a 3.25 mm hook. If it’s too small: go up to a 3.75 mm hook. A difference of 1 square per 4 in turns into about 4.5 in (11.4 cm) across the full panel, so don’t skip this step.
Checkpoints for the body:
– After Row 16: 8 in (20.3 cm) tall, 32 in (81.3 cm) wide
– After Row 80: 40 in (101.6 cm) tall
– After Row 156: 78 in (198.1 cm) tall
– After Row 162: 81 in (205.7 cm) tall
Measure lying flat without stretching. A tolerance of 0.25 in (0.6 cm) is fine, because blocking evens out small differences.
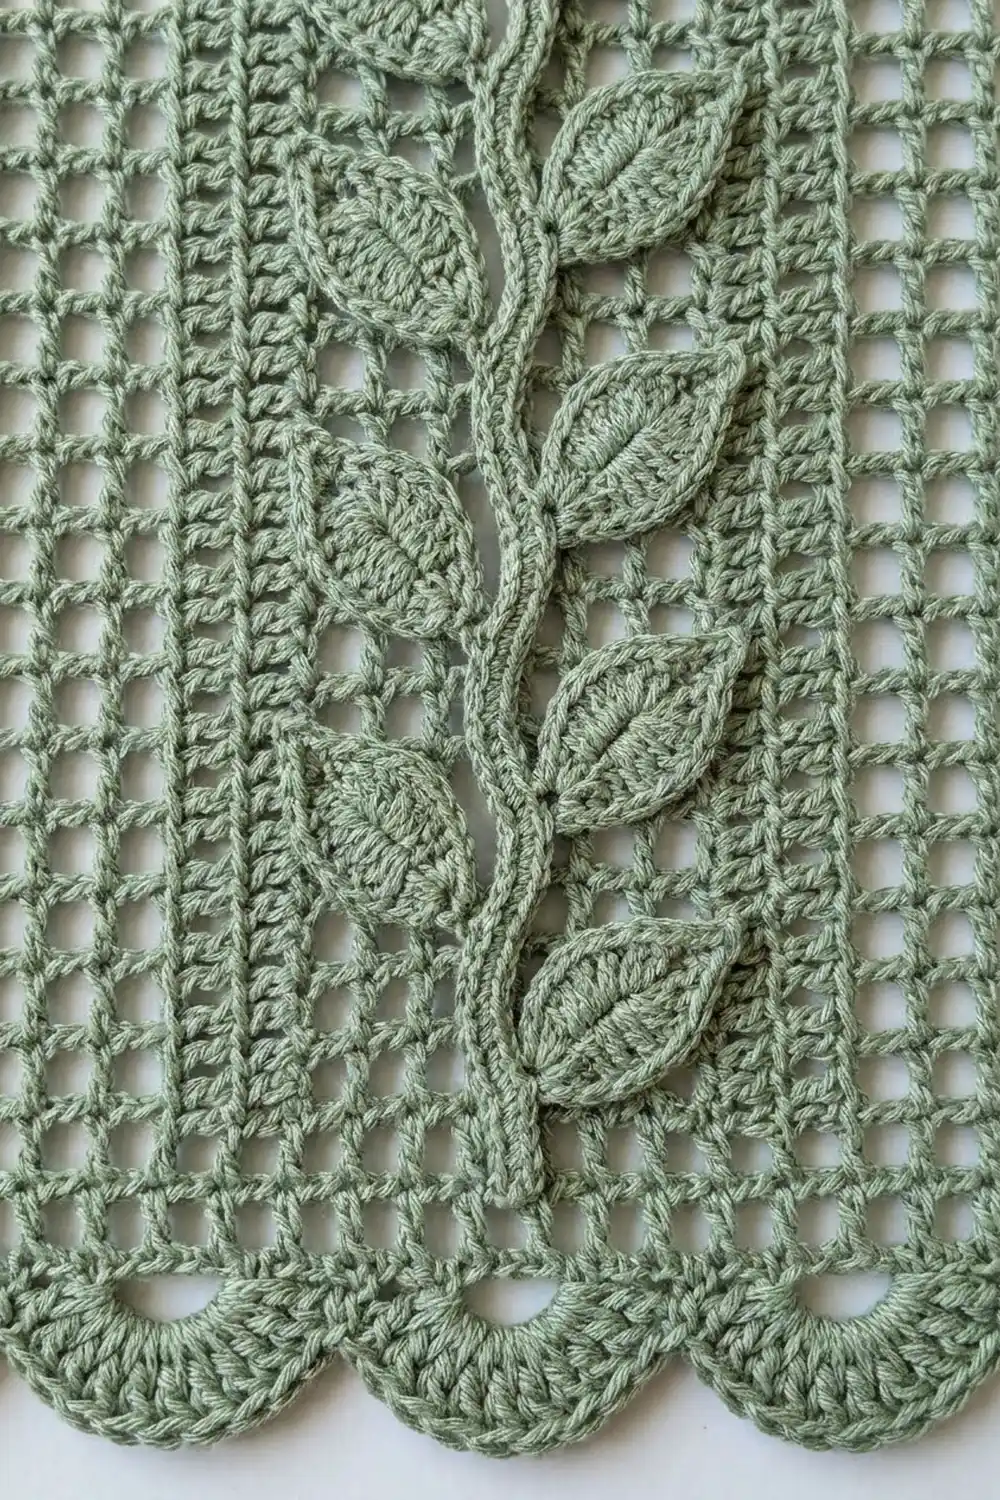
Panel Body
The panel is worked bottom to top. Every pattern row is symmetrical, so RS and WS rows read the same.
Foundation: Ch 171 loosely. If your chain is tight, use a hook one size larger for the chain only.
Row 1 (RS): Dc in 4th ch from hook (the 3 skipped ch count as the first dc) and in next 5 ch. This makes the edge rail: beginning dc + 2 solid squares.
[Ch 2, sk 2 ch, dc in next ch] 20 times for the first mesh band.
Dc in next 6 ch for the left rail.
[Ch 2, sk 2 ch, dc in next ch] 8 times for the vine column.
Dc in next 6 ch for the right rail.
[Ch 2, sk 2 ch, dc in next ch] 20 times for the second mesh band.
Dc in last 6 ch for the edge rail.
(169 sts: 73 dc + 48 ch-2 sps)
Chain check: 3 skipped + 6 + 60 + 6 + 24 + 6 + 60 + 6 = 171 ch.
Row 2: Ch 3 (counts as dc), turn. Dc in next 6 dc.
[Ch 2, sk ch-2 sp, dc in next dc] 20 times.
Dc in next 6 dc.
[Ch 2, sk ch-2 sp, dc in next dc] 8 times.
Dc in next 6 dc.
[Ch 2, sk ch-2 sp, dc in next dc] 20 times.
Dc in next 5 dc, dc in top of turning ch.
(169 sts)
Rows 3–156: Repeat Row 2. (169 sts in every row)
Every 20 rows, place a marker on the edge so you can count rows easily. At Row 156 the mesh section measures 78 in (198.1 cm).
Rod-Pocket Band
Row 157 (conversion row): Ch 3 (counts as dc), turn. Dc in each dc and 2 dc in each ch-2 sp across.
(169 sts = 73 dc worked 1-per-stitch + 96 dc worked 2 into each of 48 ch-2 sps; 0 sts added)
Rows 158–162: Ch 3 (counts as dc), turn, dc in each st across. (169 sts)
Don’t fasten off. Leave the yarn on a stitch marker, or fasten off and rejoin later for the side edging.
The body now measures 32 in (81.3 cm) × 81 in (205.7 cm) flat.
Leaf Appliqué
Each leaf is a pointed oval worked around both sides of a foundation chain. The chain becomes the spine for a raised vein.
Ch 11.
Round 1: Sc in 2nd ch from hook (the skipped ch is the tip). Work hdc, dc, dc, tr, tr, tr, dc, hdc, one in each of the next 8 ch… wait: work 1 each of sc (already made), hdc, dc, dc, tr, tr, tr, dc, hdc in the 9 ch from the 2nd ch to the 10th ch, then 3 sc in the last ch (the base).
Rotate and work along the free loops of the chain: hdc, dc, tr, tr, tr, dc, dc, hdc, sc, one in each of the next 9 ch.
In the skipped tip ch: (sc, ch 2, sc). Sl st to the first sc.
(21 sts along the sides and base + the tip group of 2 sc and a ch-2)
The tr groups sit near the base, so each leaf is widest in its lower third and narrows to a sharp ch-2 point.
Raised vein: Without cutting the yarn, work 9 surface sl sts along the center foundation line, from the tip to the base. Fasten off and leave a 12 in (30.5 cm) tail at the base for sewing.
The finished leaf measures about 2.25 in (5.7 cm) × 1.5 in (3.8 cm).
Make All Pieces
All pieces are sage green.
| Piece | Per panel | Pair total |
|---|---|---|
| Panel body | 1 | 2 |
| Leaf | 39 | 78 |
Layout across one panel (squares, left to right):
| Edge | Mesh band | Rail | Vine col | Rail | Mesh band | Edge |
|  2S  |    20O    |  2S  |  8O      |  2S  |    20O    |  2S  |
|1.1in |  11.4in   |1.1in | 4.6in    |1.1in |  11.4in   |1.1in |
S = solid square, O = open square; total 56 squares
In cm: edge rails and rails are 2.8 cm each, mesh bands are 29.0 cm each, and the vine column is 11.7 cm.
Leaf placement in the vine column (bottom to top):
Row 3   L   (leaf 1)
Row 7   R   (leaf 2)
Row 11  L   (leaf 3)
...       continue every 4 rows, alternating
Row 155 L   (leaf 39)
Leaf n sits at Row 4n − 1. Odd-numbered leaves go to the left and even-numbered leaves to the right.
Joining
The two panels are not joined to each other; they hang separately. “Joining” here means adding the stem and attaching the leaves.
Stem (surface slip stitch): Join yarn at the bottom of the vine column, at the base of the center dc (between squares 4 and 5 of the column).
Work 2 surface sl sts per mesh row, up the full 156 rows. (312 surface sl sts)
For Rows 1–4, keep the stem along the right edge of square 4. For Rows 5–8, shift it to the left edge of square 5. Keep alternating every 4 rows to make a soft wave about one square wide.
Keep the sl sts the same length as the rows. If they’re too tight, the column will pucker. Fasten off at the rod band.
Attaching leaves: Pin each leaf so its base touches the stem at the marked row, with the tip angled up and out at about 45°.
At that angle, a 2.25 in (5.7 cm) leaf reaches about 1.6 in (4.1 cm) sideways. That fits within the 2.3 in (5.8 cm) half-column, so no leaf crosses the rails.
Use the base tail to whipstitch around the outer sts of the leaf. Catch the leaf’s stitches to the mesh dc posts and chain bars only, never across an open hole.
Sew the lower two-thirds of each leaf firmly. Leave the last 0.5 in (1.3 cm) of the tip free so it lifts slightly for a three-dimensional look.
Tension: Sew snugly, but don’t pull the mesh out of square. Check the column from the front after every five leaves.
Size checkpoint: After all 39 leaves are attached, the vine column should still measure 4.6 in (11.7 cm) wide, and the panel should still lie flat at 32 in (81.3 cm).
Border
Border gauge: 21 sc = 4 in (10.2 cm), the same as the body stitch gauge.
Bottom Border Row 1 (RS): With the RS facing, join yarn in the first free loop of the foundation chain at the bottom right corner.
Ch 1, sc in each free loop across. (169 sc)
That is one sc per body st, including both corner sts, so the edge stays at 32 in (81.3 cm).
Bottom Border Row 2: Ch 1, turn, sc in first sc.
Sk 2 sc, 7 dc in next sc, sk 2 sc, sc in next sc, repeat from * to * across. (28 scallops; 169 sts used)
Why the math works: each scallop repeat uses 6 sts, and 1 + (6 × 28) = 169. The row starts and ends on a sc, so both corners are anchored. Each scallop is about 1.1 in (2.8 cm) wide, and the two border rows together are 1.5 in (3.8 cm) deep. Fasten off.
Side Edging (each long side): With the RS facing, join at the top corner of Row 162. Ch 1, then work down the side into row ends: 3 sc around the end post of each odd row and 2 sc around each even row.
(162 rows: 81 × 3 + 81 × 2 = 405 sc per side)
Stop at the foundation corner. Fasten off.
That works out to an average of 2.5 sc per 0.5 in (1.3 cm) row, which is 5 sc per inch. This is close to the 5.25 sc per inch stitch gauge, so the edge neither ruffles nor pulls in.
Repeat on the opposite side. (405 sc)
Final Blocking
- Weave in all ends along the solid rails, where they hide best.
- Soak the panel in cool water with a little wool wash for 15 minutes. Gently squeeze out the water; don’t wring it.
- Roll the panel in towels to remove excess water.
- Lay it flat on your blocking surface, RS up.
- Pin the corners to 32 in (81.3 cm) × 81 in (205.7 cm). If your surface is shorter than the panel, block it in two halves.
- Pin along the edges every 2 in (5.1 cm). Run a measuring tape along the rails to keep them straight.
- Pin each scallop into a rounded curve.
- Gently nudge the leaves flat, then lift the tips slightly.
- Let it dry completely, which usually takes 24–48 hours.
- Fold the rod band in half to the WS and whipstitch the top edge to the base of Row 157. This makes a 1.5 in (3.8 cm) casing for a rod up to 1 in (2.5 cm) thick.
Final Quality-Control Checklist
- [ ] Every pattern row has 169 sts: 73 dc and 48 ch-2 sps
- [ ] The rails line up vertically all the way up the panel
- [ ] The body measures 32 in (81.3 cm) × 81 in (205.7 cm) after blocking
- [ ] There are 28 scallops along the bottom, with a sc at each corner
- [ ] Each side has 405 sc of edging, lying flat
- [ ] The stem runs continuously through all 156 mesh rows
- [ ] There are 39 leaves, alternating sides, one every 4 rows
- [ ] No leaf crosses into a rail
- [ ] The rod casing is even and stitched securely
- [ ] Both panels in the pair match in length within 0.25 in (0.6 cm)
Troubleshooting
The panel is getting wider or narrower. Count the squares in the last row. Usually a turning chain was skipped or a dc was doubled at an edge. Rip back to the error.
The mesh squares look tall and narrow. Your ch-2s are too tight. Loosen them, or use 3 ch instead of 2 with the same hook.
The rails wander. You’ve worked a square in the wrong place. Compare each row against the layout grid.
The foundation edge pulls in. The chain was too tight. Work Bottom Border Row 1 loosely, or remake the chain with a larger hook.
The scallops ruffle. Work 6 dc per scallop instead of 7. The count of 28 repeats stays the same.
The stem puckers the vine column. The surface sl sts are too short. Remove them and rework them with longer loops.
A leaf is longer than 2.4 in (6.1 cm). Remake it with a 3.25 mm hook.
The two panels are different lengths. Re-block the longer panel with a little less vertical stretch, or the shorter one with a little more.
Care
Hand wash cool or machine wash on a gentle cycle inside a large mesh bag, then reshape and dry flat. Don’t hang the panel while it’s wet, or the weight of the water will stretch the mesh.
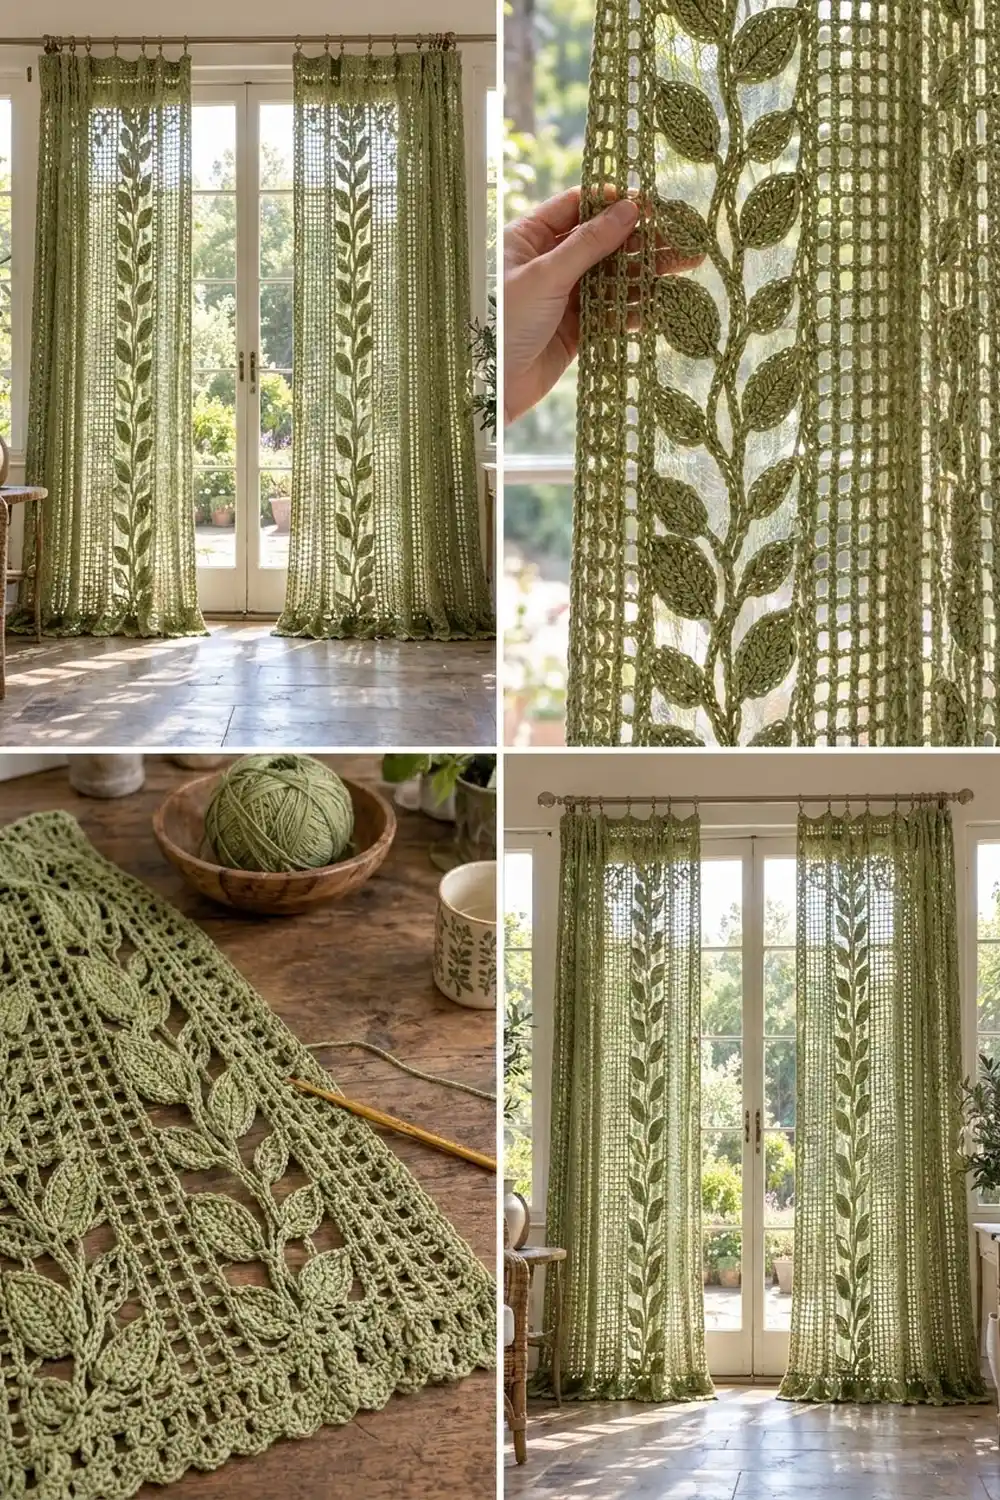
Final Notes
The whole design rests on one measurement chain:
– 7 squares and 8 rows = 4 in (10.2 cm)
– 56 squares (169 sts) = 32 in (81.3 cm)
– 156 mesh rows = 78 in (198.1 cm), plus a 6-row rod band of 3 in (7.6 cm) = 81 in (205.7 cm)
– The 1.5 in (3.8 cm) scallop border at the bottom makes up for the 1.5 in (3.8 cm) the casing folds away at the top, so the panel hangs at 81 in (205.7 cm)
– 39 leaves at 4-row intervals fill the vine column, and 405 sc per side finish the edges
Check your gauge on the swatch, confirm each checkpoint, and both panels of your pair will match.
Happy crocheting!