

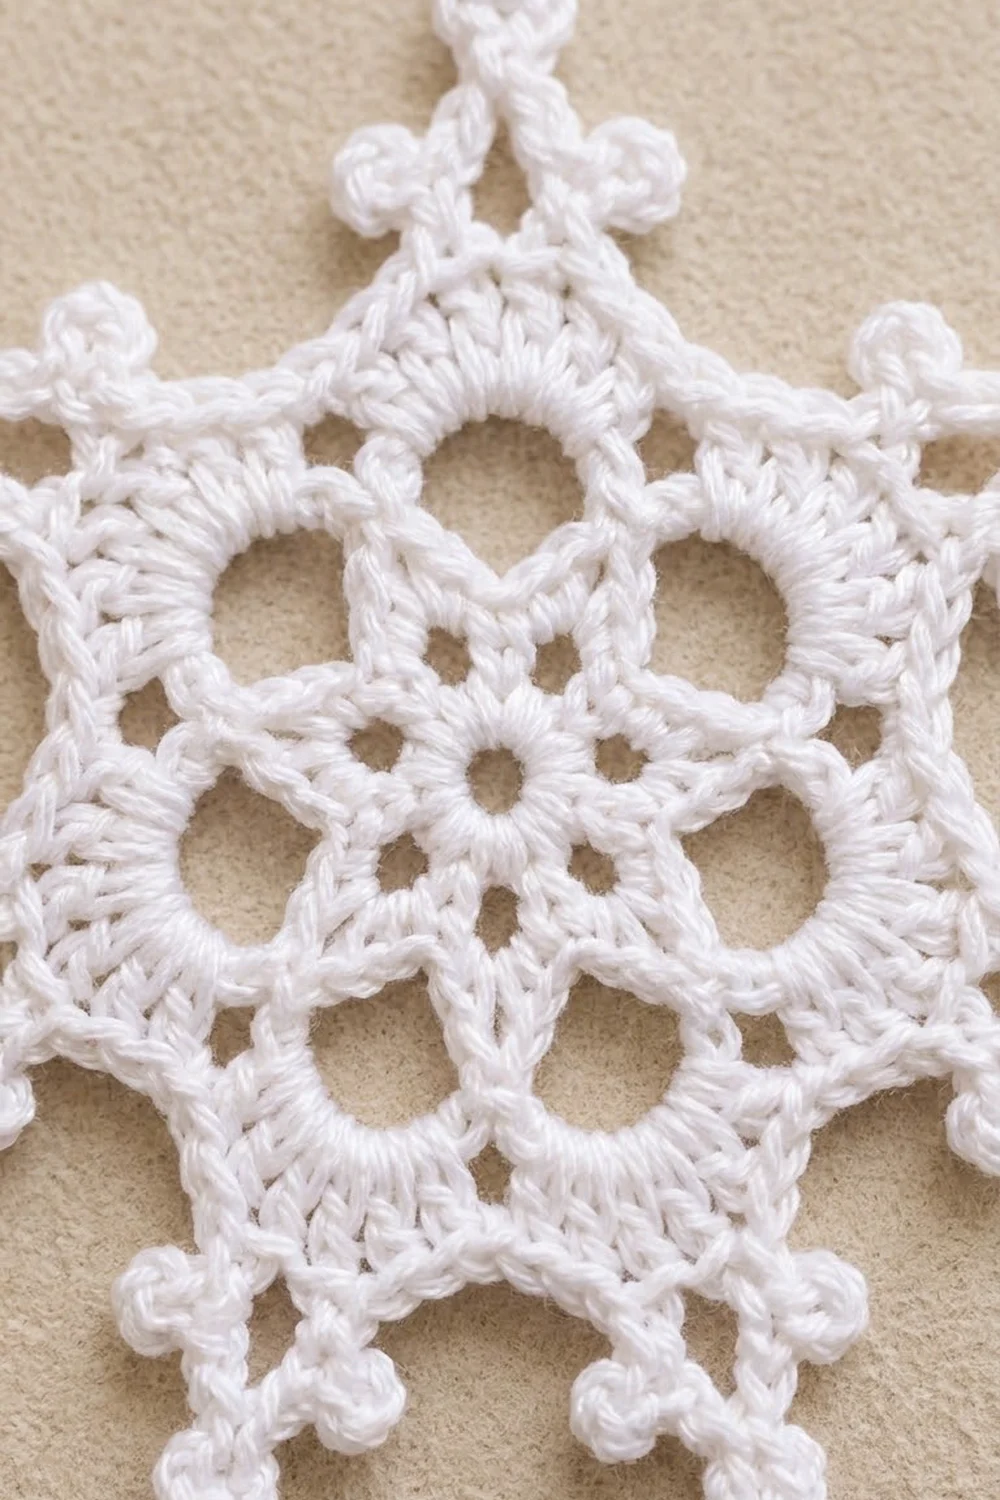
This snowflake is a crisp, six-pointed ornament made in bright white cotton thread. It has a solid center ring, six round “petal” openings, a smaller ring of openings between them, and six spikes, each finished with a three-picot tip. It looks delicate on the tree, but the stitches are dense enough to keep their shape year after year.
The design is a single piece worked in the round. Nothing gets joined or sewn, so it’s a good first lace snowflake if you’re comfortable with chains, single crochet, and double crochet. Picots are the only special technique.
The pattern uses US crochet terms. The blocked ornament measures 4 in (10.2 cm) from tip to tip, plus a hanging loop of about 2 in (5.1 cm).
Here is how it’s built. A ring of 12 double crochet forms the center, chain loops covered with single crochet make the six petals, and a second set of chain loops adds the smaller openings. A double-crochet round turns everything into a hexagon. The last round makes the spikes and picots, and works as the snowflake’s edging.
Finished Size and Construction
- Finished size: 4 in (10.2 cm) tip to tip, after blocking
- Skill level: Easy-intermediate
- Terminology: US crochet terms
- Yarn weight: Size 3 cotton crochet thread (similar to a fine fingering weight)
- Hook: 2.25 mm (US B-1)
- Number of pieces: 1
- Layout: One flat, six-pointed motif worked in the round
- Piece size: 4 in (10.2 cm) tip to tip
- Size before edging: a 2.5 in (6.4 cm) hexagon measured corner to corner, or about 2.2 in (5.6 cm) flat side to flat side
- Edging depth: each spike adds 0.75 in (1.9 cm) past the hexagon corner
Materials
Yarn advice: Use a smooth mercerized cotton thread in size 3. Mercerized cotton has a slight sheen, shows the picots clearly, and holds a stiffened shape well. Avoid fuzzy or very stretchy fibers, because they blur the round openings and won’t keep the spikes sharp.
- White: 10 g, about 45 m, per ornament
This amount includes a margin for a gauge swatch, the hanging loop, and weaving in ends. One finished snowflake uses about 6 g (about 27 m).
Tools:
– 2.25 mm (US B-1) crochet hook
– Small sharp scissors
– Fine tapestry needle that fits size 3 thread
– Blocking mat or foam board
– Rustproof pins, at least 12
– Spray bottle with water
– Fabric stiffener or a starch spray (optional, but recommended)
– Ruler or flexible tape measure
Abbreviations (US Terms)
- ch – chain
- sl st – slip stitch
- sc – single crochet
- hdc – half double crochet
- dc – double crochet
- tr – treble crochet
- sp – space
- st(s) – stitch(es)
- rnd – round
Special stitches:
- Picot: Ch 3, then sl st in the 3rd ch from the hook. This makes one small round bump.
- Picot trio: Make 3 picots in a row, then sl st into the chain right below the first picot. The three bumps pull together into a little cluster. This forms each spike tip.
Gauge and Checkpoints
Gauge isn’t critical for an ornament, but it decides the final size and how open the lace looks. Make one complete test snowflake before making a set.
Base gauge: Rnds 1–3 measure 1.75 in (4.4 cm) across, from the outer edge of one petal to the outer edge of the opposite petal.
Checkpoints:
– After Rnd 1: the center ring measures 0.5 in (1.3 cm) across.
– After Rnd 3: the petal ring measures 1.75 in (4.4 cm) across.
– After Rnd 5: the hexagon measures 2.5 in (6.4 cm) corner to corner.
– After Rnd 6 and blocking: the snowflake measures 4 in (10.2 cm) tip to tip.
If your piece is too big: Change to a 2 mm hook, or tighten the chain loops. Loose chains are the most common cause of an oversized snowflake.
If your piece is too small: Change to a 2.5 mm hook. If the petals cup instead of lying flat, the chain loops are too tight, so loosen your chains slightly.
Pattern
Round 1: Center Ring
Make a magic ring.
Ch 3 (counts as the first dc), then work 11 dc into the ring. Pull the ring closed, leaving a small hole in the center. Sl st into the top of the beginning ch-3 to join.
Stitch count: 12 dc.
Round 2: Petal Loops
Ch 1. Sc in the same st as the join.
Ch 7, skip the next dc, sc in the next dc. Repeat from * 4 more times.
Ch 7, skip the last dc, and sl st into the first sc to join.
Stitch count: 6 sc and 6 ch-7 loops.
Each loop is anchored on two sc with one skipped dc between them. That gap at the base is what lets the petal open into a round hole in the next round.
Round 3: Covered Petals
Sl st into the first ch-7 loop.
Ch 1. Work 11 sc into the same loop. Work 11 sc into each of the remaining 5 loops. Don’t work into the sc from Rnd 2, just pass over them. Sl st into the first sc to join.
Stitch count: 66 sc (11 sc per petal × 6 petals).
Pack the 11 sc evenly around each loop. The covered chain rounds out into a ring with a clear hole inside, which makes the six round petal openings. In each petal, the 6th sc sits at the outer tip and acts as the anchor for the next round.
Checkpoint: 1.75 in (4.4 cm) across. The petals should lie flat. If they ruffle, rework Rnd 2 with slightly shorter chains.
Round 4: Outer Openings
Sl st in each of the next 5 sc, which brings you to the 6th sc of the first petal.
Ch 1. Sc in that same 6th sc.
Ch 6, then sc in the 6th sc of the next petal. Repeat from * 4 more times.
Ch 6 and sl st into the first sc to join.
Stitch count: 6 sc and 6 ch-6 loops.
Each ch-6 loop bridges the gap between two petals. The small opening it leaves is the second ring of holes.
Round 5: Hexagon Band
This round changes the round shape into a hexagon. Each petal tip becomes a corner.
Ch 3 (counts as dc). Work (ch 2, dc) in the same sc. This is the first corner.
Work 8 dc into the next ch-6 loop.
(Dc, ch 2, dc) in the next sc for the corner, then 8 dc into the next ch-6 loop. Repeat from * 4 more times.
Sl st into the top of the beginning ch-3 to join.
Stitch count: 60 dc and 6 ch-2 corner spaces. That’s 6 repeats × (2 corner dc + 8 dc in the loop).
Per-side count: Between two ch-2 corners there are 10 dc. That’s 1 corner dc, 8 dc from the loop, and 1 corner dc. The 10 dc per side already include the dc on both sides of each corner.
Checkpoint: 2.5 in (6.4 cm) corner to corner. Each side should measure about 1.25 in (3.2 cm).
Edging: Spikes and Picots (Round 6)
Edging Gauge
On the hexagon, 10 sc cover one 1.25 in (3.2 cm) side, which is 8 sc per inch (2.5 cm). Each spike is built on a ch-8 and stands 0.75 in (1.9 cm) past the corner once blocked.
Round 6
Sl st into the first ch-2 corner space.
Spike (worked in each ch-2 corner):
1. Ch 1, then sc in the ch-2 sp. On repeats, start at “sc in the ch-2 sp.”
2. Ch 8.
3. Make a picot trio: (ch 3, sl st in the 3rd ch from the hook) 3 times. Then sl st into the 8th ch of the ch-8, the chain right below the first picot.
4. Work back down the remaining 7 chains: sc in each of the next 2 ch, hdc in each of the next 2 ch, dc in each of the next 2 ch, and tr in the last ch.
5. Sc in the same ch-2 corner sp.
Side (worked across the 10 dc to the next corner):
Sc in each of the next 3 dc, picot, sc in each of the next 4 dc, picot, sc in each of the next 3 dc.
Repeat the spike and the side 5 more times. The last side ends at the first corner. Sl st into the first sc to join. Fasten off, leaving a 6 in (15.2 cm) tail.
Stitch count per side: 3 + 4 + 3 = 10 sc plus 2 picots, with exactly one sc in each of the 10 dc.
Stitch count per spike: 2 sc in the corner space, plus 7 sts along the chain (2 sc, 2 hdc, 2 dc, 1 tr), plus a 3-picot trio.
Round total: 60 side sc, 12 side picots, 12 corner sc, 42 spike stitches, and 18 tip picots.
Why the Math Works
The hexagon has 10 dc per side, and the edging puts exactly one sc in each of them, so the sides don’t gain or lose stitches and stay flat. The 3–4–3 split puts the two side picots symmetrically, one near each spike’s base. All the shaping happens in the corner spaces. The spike’s stitches grow from sc at the tip to tr at the base, which gives each spike its tapered wedge shape.
Hanging Loop
Join the thread with a sl st at the base of any picot trio. Ch 20, which is about 3 in (7.6 cm). Sl st back into the same spot and fasten off. Weave in the end along the spike. The finished loop hangs about 2 in (5.1 cm) once doubled over the branch.
Final Blocking
- Weave in all ends through solid stitches. Avoid the picots and the chain loops.
- Soak the snowflake in cool water, or in diluted fabric stiffener. Press out the excess with a towel without wringing.
- Lay it flat on the blocking mat, right side up.
- Pin the center hole open with one pin, if you like.
- Pin each spike tip just below its picot trio so that the tips sit on a 4 in (10.2 cm) circle. Measure opposite tips across the center.
- Check that the spikes are evenly spaced, about 60 degrees apart. Use the mat grid as a guide.
- Use the tip of a pin to round out each petal opening and push the picots into shape.
- If you’re using spray starch, spray now and let it dry.
- Let it dry completely, usually 4–8 hours, before unpinning.
Final Quality-Control Checklist
- The center hole is small and closed evenly, with 12 dc around it.
- There are 6 round petal openings of equal size.
- There are 6 smaller openings between the petals.
- The hexagon has 6 even sides with 10 stitches each.
- There are 6 spikes, each with a three-picot tip.
- There are 2 side picots per side, 12 in total.
- It measures 4 in (10.2 cm) tip to tip after blocking.
- It lies flat with no cupping or ruffling.
- All ends are woven in and invisible.
- The hanging loop is secure and attached at a spike tip.
Troubleshooting
The petals ruffle or wave. The ch-7 loops are too long for your tension. Try ch 6 loops with 10 sc each in Rnd 3. Then put the Rnd 4 sc in the 5th sc of each petal, and the Rnd 5 counts stay the same.
The petals cup and won’t lie flat. The chains are too tight. Loosen them slightly or go up a hook size.
The spikes curl to one side. This is normal for spikes worked down a chain. Wet blocking with stiffener straightens them.
The picot trio looks loose or spread out. Pull the final sl st snug into the base chain so the three picots cluster.
The hexagon sides bow inward. Your 8 dc in each ch-6 loop may be too tight. Work them more loosely or use ch 7 loops in Rnd 4.
The snowflake comes out smaller than 4 in (10.2 cm). Go up to a 2.5 mm hook, or block more firmly to stretch the spikes.
Your stitch counts don’t match. Count each petal (11 sc) and each side (10 dc) before moving on. Most mistakes start in Rnd 3 or Rnd 5.
Care
Hand wash in cool water with mild soap, then reshape and pin flat to dry. Store the ornament flat between tissue paper so the spikes and picots keep their shape.
Final Notes
The measurements build round by round:
– Center ring (Rnd 1): 0.5 in (1.3 cm)
– Petal ring (Rnd 3): 1.75 in (4.4 cm)
– Hexagon (Rnd 5): 2.5 in (6.4 cm) corner to corner
– Finished snowflake (Rnd 6): 4 in (10.2 cm) tip to tip
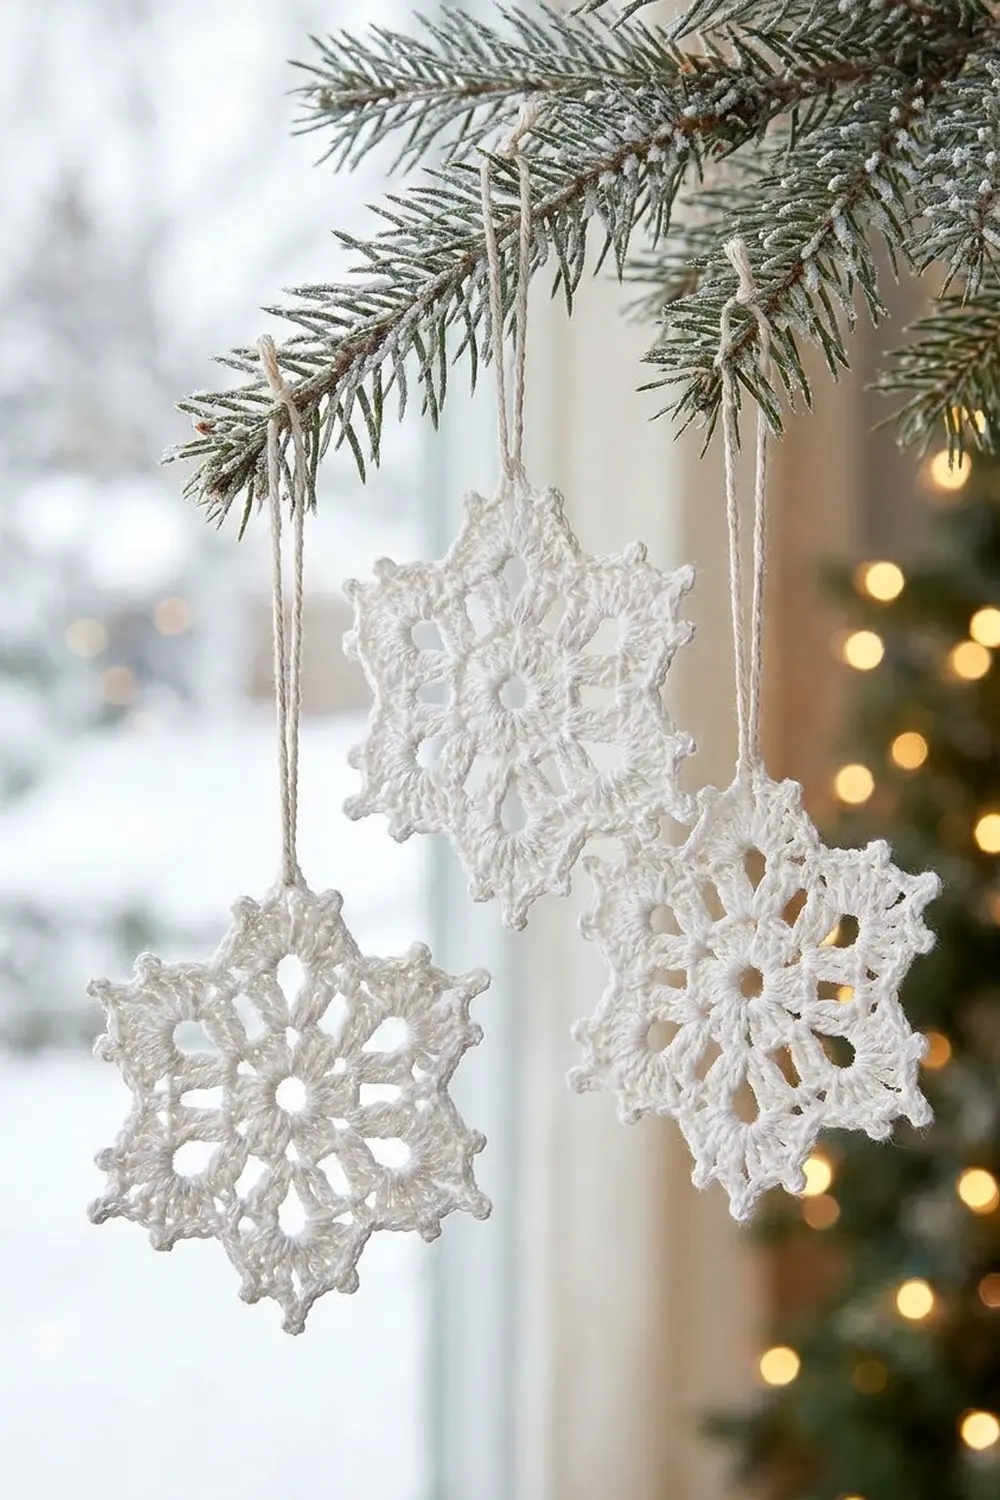
Check each stage before moving on, and the snowflake will come out the right size and lie flat. Make one, stiffen it, and you’ll have a frosty little star that lasts for many seasons.
Happy crocheting!