

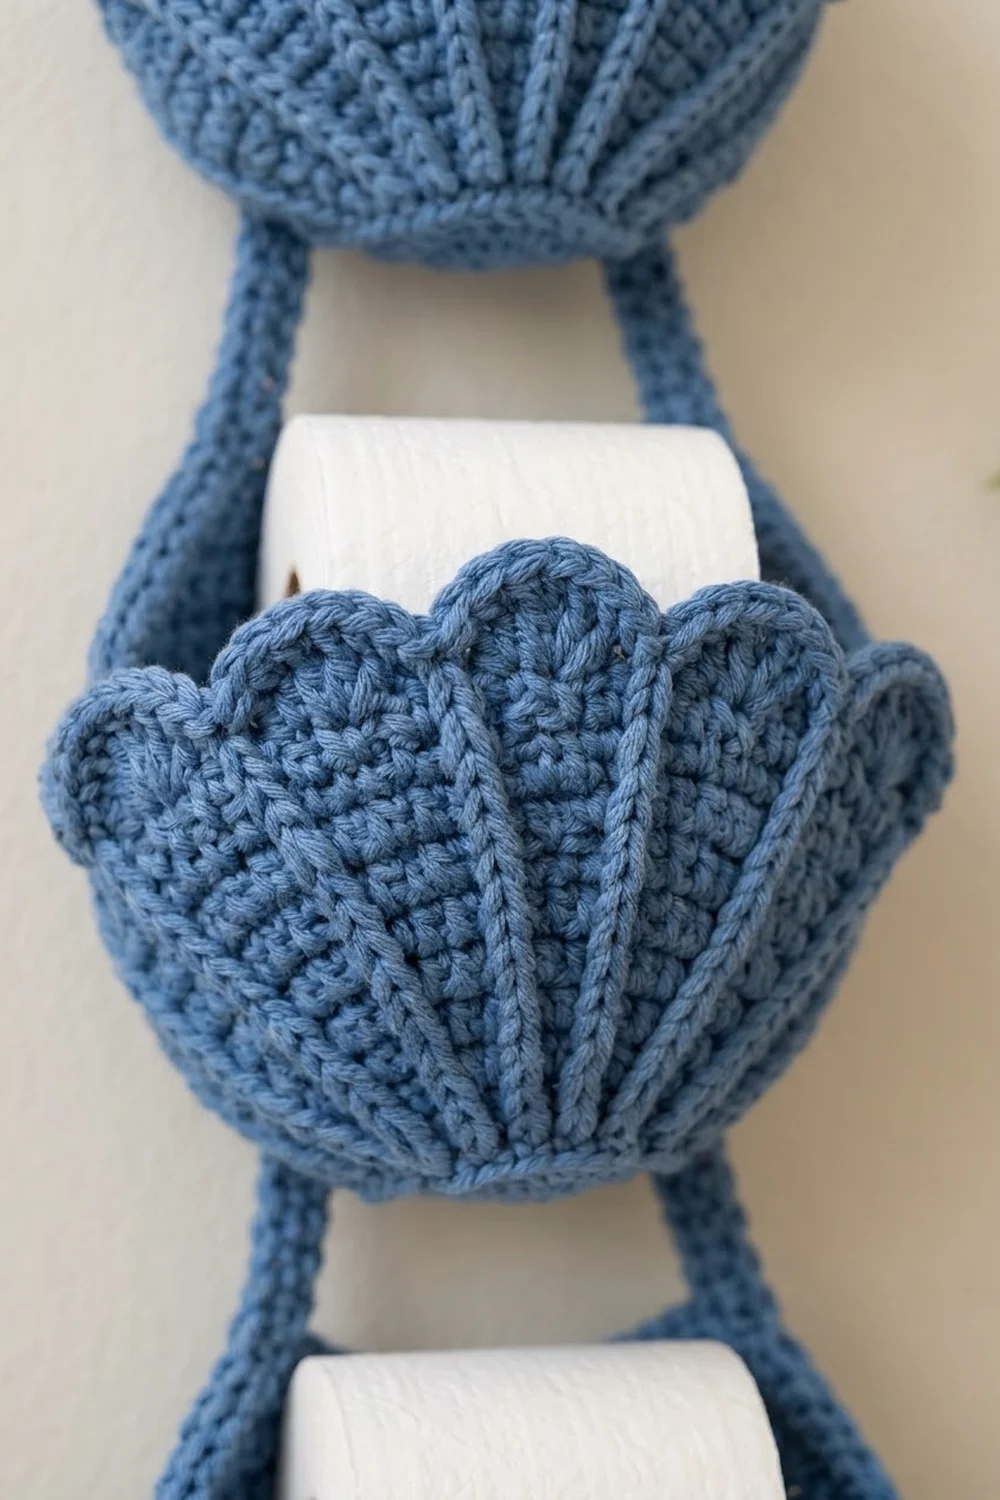
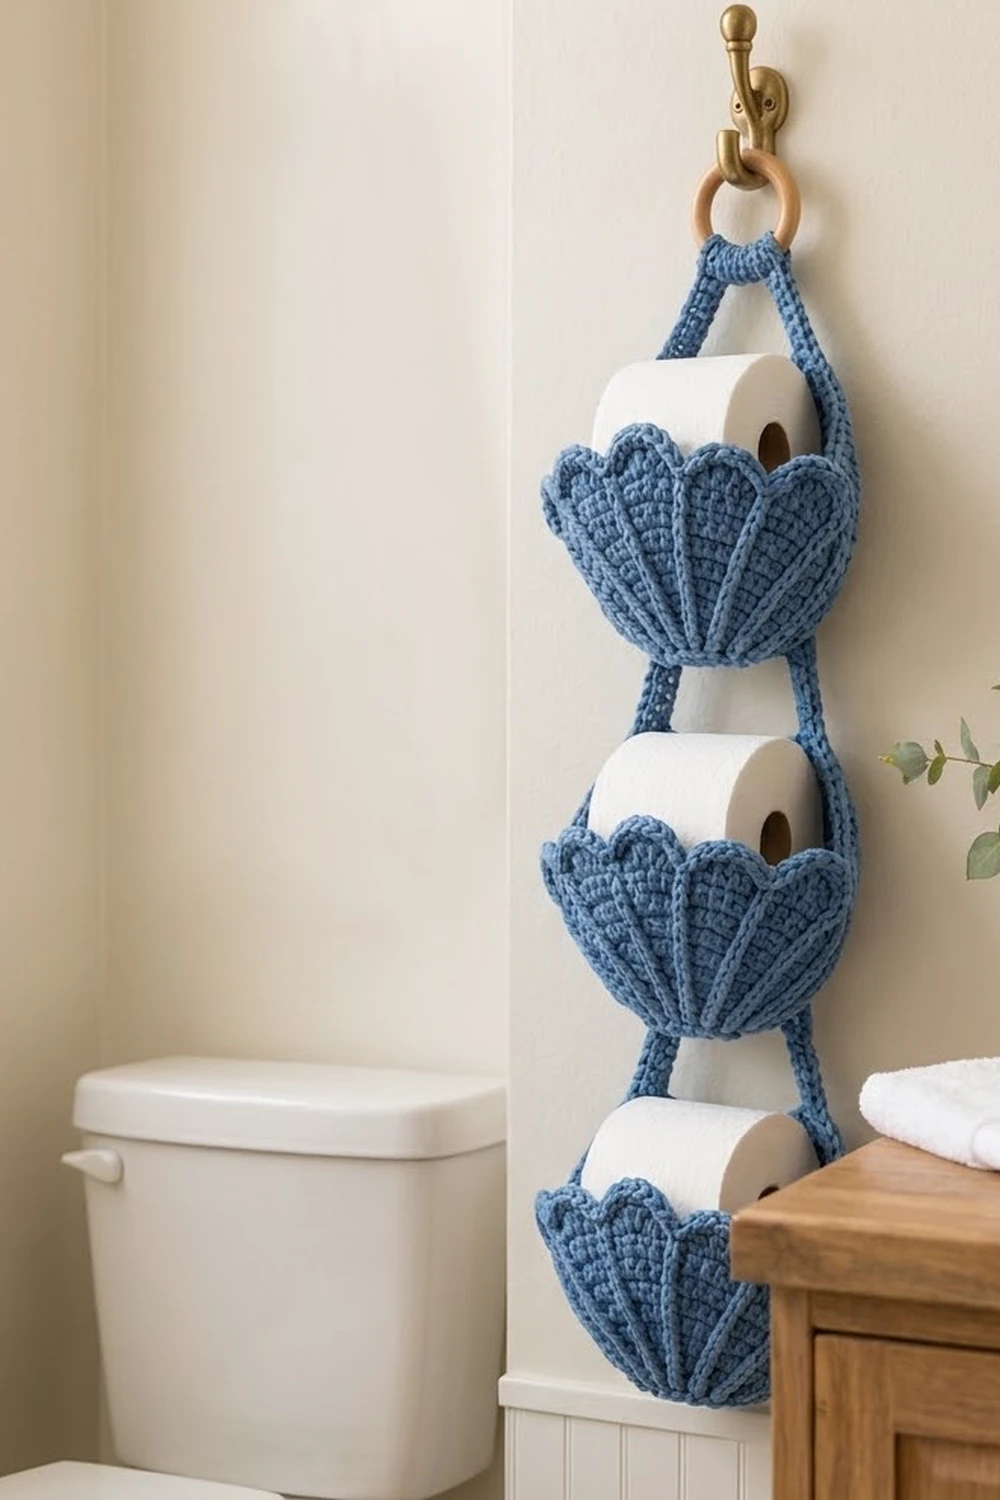
This hanging holder stores three toilet rolls in three stacked shell pockets. Each pocket has a fan of raised ribs across the front and a row of rounded scallops along the rim, so the whole piece looks like seashells climbing the wall.
The sample uses one color, a soft denim blue in worsted-weight cotton. Cotton holds its shape, handles bathroom humidity well and washes easily. One solid color lets the ribs and scallops show clearly.
The pattern uses US crochet terms. The finished holder is about 30.5 in (77.5 cm) long from the bottom of the ring to the lowest pocket. Each pocket is about 7 in (17.8 cm) wide at the rim and 4.5 in (11.4 cm) deep from front to back.
Each pocket starts as an oval base worked in rounds. The walls are then worked in rounds, and only the front grows, which makes the fan shape. A scallop round finishes the front. The back is then worked flat in rows into a tall panel that tapers to a strap. You join the three pockets with their straps, add a corded border to each back panel, and attach a wooden ring.
Finished Size and Construction
- Finished size: about 30.5 in (77.5 cm) long, not counting the ring
- Skill level: Intermediate
- Terminology: US crochet terms
- Yarn weight: Worsted (#4) cotton or cotton blend
- Hook: 5.0 mm (US H-8)
- Number of pieces: 3 pockets (A, B and C)
- Layout: 1 column of 3 pockets, with C at the top
- Piece size: back panel 6 in (15.2 cm) wide and 7.75 in (19.7 cm) tall, measured from the base ridge; front about 3.25 in (8.3 cm) tall
- Size before border: back panel 6 in (15.2 cm) wide
- Border depth: about 0.25 in (0.6 cm) per side, so the back panel ends up about 6.5 in (16.5 cm) wide
Materials
Yarn: Use a smooth, firmly twisted worsted cotton, about 190 m per 100 g. Avoid splitty or very soft yarns, because the ribs need crisp stitches to stand out.
- Denim Blue: 270 g (513 m)
These amounts include a margin of about 12%. The holder itself uses about 240 g (456 m).
Tools:
– 5.0 mm (US H-8) crochet hook
– Wooden ring, 3 in (7.6 cm) across
– Tapestry needle
– 4 locking stitch markers
– Measuring tape
– Scissors
– Rust-proof pins and a towel for blocking
Abbreviations (US Terms)
- ch – chain
- sl st – slip stitch
- sc – single crochet
- hdc – half double crochet
- dc – double crochet
- sc2tog – single crochet 2 together
- BLO – back loop only
- st(s) – stitch(es)
- RS – right side
- rev sc – reverse single crochet (crab stitch)
Special stitch – FPdc (front post double crochet): Yarn over. Insert the hook from front to back to front around the post of the stated stitch in the round below. Yarn over, pull up a loop, then (yarn over, pull through 2 loops) twice. Always skip the stitch behind an FPdc.
Rev sc: Work single crochet from left to right (right to left if you crochet left-handed). This makes a twisted, rope-like edge.
Gauge and Checkpoints
Gauge: 16 sc and 18 rows = 4 in (10.2 cm) in sc.
Make one full pocket before you start the others, because it works as your real swatch. Check these measurements along the way:
- After base Rnd 4: the oval measures about 5.25 in × 2 in (13.3 × 5.1 cm).
- After wall Rnd 16: the wall stands about 2.75 in (7.0 cm) above the BLO ridge. The 24 back stitches measure 6 in (15.2 cm) across when laid flat.
- After back Row 14: the panel measures 5.75 in (14.6 cm) from the BLO ridge.
- After back Row 23: the panel measures 7.75 in (19.7 cm) from the BLO ridge, and the top is 1.5 in (3.8 cm) wide.
If the pocket is too big: go down to a 4.5 mm hook. If it is too small: go up to a 5.5 mm hook. A tight pocket may not fit a standard roll, which is about 4.25 in (10.8 cm) across and 4 in (10.2 cm) wide.
Pocket (Make 3)
Work in joined rounds with the RS facing out, and do not turn. At the start of each round, ch 1; it does not count as a stitch. At the end of each round, join with a sl st to the first st.
Base
Ch 15.
Rnd 1: 3 sc in 2nd ch from hook, sc in next 12 ch, 3 sc in last ch. Turn the work so you can crochet along the other side of the foundation chain, then sc in next 12 ch. Join. (30 sts)
Rnd 2: 2 sc in each of next 3 sts, sc in next 12, 2 sc in each of next 3 sts, sc in next 12. Join. (36 sts)
Rnd 3: [Sc in next st, 2 sc in next st] 3 times, sc in next 12, [sc in next st, 2 sc in next st] 3 times, sc in next 12. Join. (42 sts)
Rnd 4: [Sc in next 2 sts, 2 sc in next st] 3 times, sc in next 12, [sc in next 2 sts, 2 sc in next st] 3 times, sc in next 12. Join. (48 sts)
The oval now has two straight sides of 12 sts each and two curved ends of 12 sts each.
Walls
Rnd 5 (turning ridge): Sc in BLO of each st around. Join. (48 sts)
Set up front and back: Lay the base flat and pick one straight side to be the front. The front is 24 sts: those 12 straight sts plus 6 sts from each curved end. Place a marker in the first front st and another in the last front st. The other 24 sts are the back. Sl st loosely across to the first front st. Every round from here starts at that st.
Rnd 6 (rib setup): Ch 1. FPdc around next st, sc in next 3 sts; repeat from * 5 more times for 6 sections, then sc in each of the 24 back sts. Join. (48 sts: front 24, back 24)
In every following round, work each FPdc around the FPdc in the round below.
Rnd 7 (growth round): FPdc, sc in next 2, 2 sc in next; repeat 5 more times, then sc in 24 back sts. (54 sts: front 30, back 24)
Rnd 8: FPdc, sc in next 4; repeat 5 more times, then sc in 24 back sts. (54 sts)
Rnd 9 (growth round): FPdc, sc in next 3, 2 sc in next; repeat 5 more times, then sc in 24 back sts. (60 sts: front 36, back 24)
Rnd 10: FPdc, sc in next 5; repeat 5 more times, then sc in 24 back sts. (60 sts)
Rnd 11 (growth round): FPdc, sc in next 4, 2 sc in next; repeat 5 more times, then sc in 24 back sts. (66 sts: front 42, back 24)
Rnd 12: FPdc, sc in next 6; repeat 5 more times, then sc in 24 back sts. (66 sts)
Rnd 13 (growth round): FPdc, sc in next 5, 2 sc in next; repeat 5 more times, then sc in 24 back sts. (72 sts: front 48, back 24)
Rnds 14–16: FPdc, sc in next 7; repeat 5 more times, then sc in 24 back sts. (72 sts each round)
Because the stitches between the ribs increase on every growth round, the 6 ribs spread apart into a fan. The back stays at 24 sts, so it rises straight up.
Scallop Edge (front only)
Rnd 17 (trim round): Sl st in top of the first FPdc. Skip next sc, hdc in next sc, dc in next sc, 3 dc in next sc, dc in next sc, hdc in next sc, skip next sc, sl st in top of next FPdc. Repeat from * 5 more times. On the last repeat there is no 7th FPdc, so make the final sl st in the first back st instead.
Count: 6 sl sts (1 per rib) + 42 scallop sts (7 per section, worked over that section’s 7 sc) = 48 sts on the front. This gives 6 scallops, and each one starts and ends at a rib.
Back Panel
Work in rows across the 24 back sts only.
Row 1: Ch 1. Do not turn. Sc in the same st as the last sl st and in each of the next 23 back sts. Turn. (24 sts)
Rows 2–14: Ch 1, sc across. Turn. (24 sts)
Rows 15–23 (taper): Ch 1, sc2tog, sc to the last 2 sts, sc2tog. Turn.
The counts are 22, 20, 18, 16, 14, 12, 10, 8 and 6 sts at Row 23.
Strap
Pockets A and B (short connectors): Rows 24–33: ch 1, sc in 6 sts, turn. That is 10 rows, about 2.25 in (5.7 cm) long. Fasten off and leave a 12 in (30.5 cm) tail for sewing.
Pocket C (hanging strap): Rows 24–47: ch 1, sc in 6 sts, turn. That is 24 rows, about 5.25 in (13.3 cm) long. Fasten off and leave a 12 in (30.5 cm) tail.
Make All Pieces
All pieces are Denim Blue.
- Pocket A (bottom): 1 pocket with a short connector, about 75 g (143 m)
- Pocket B (middle): 1 pocket with a short connector, about 75 g (143 m)
- Pocket C (top): 1 pocket with the long hanging strap, about 80 g (152 m)
- Borders and sewing: about 10 g (19 m)
Layout (1 column):
        [ wooden ring ]
              |
     C strap (16 rows visible)
              |
     [ Pocket C – top ]
              |
   A/B connector: B's strap (8 rows visible)
              |
     [ Pocket B – middle ]
              |
   A's strap (8 rows visible)
              |
     [ Pocket A – bottom ]
Each connector belongs to the pocket below it and runs upward to the pocket above.
Joining
Method: whipstitch with the yarn tail, working through both layers.
- Lay Pocket B face down. Center Pocket A’s connector on B’s outer back wall so that 9 back sts are free on each side of it.
- Overlap the top 2 connector rows (Rows 32–33) onto B’s back wall at wall Rnds 6–7.
- Whipstitch the 6 sts of Row 33 to the 6 center back sts of Rnd 7, matching one stitch to one stitch. Then whipstitch the 2 row-ends on each side of the overlap to the wall.
- Join Pocket B’s connector to Pocket C in the same way.
Tension: Pull each stitch just snug enough to close the gap. If you pull harder, the back wall will pucker.
Size checkpoint: about 8 rows, or 1.75 in (4.4 cm), of connector should show between a panel top and the base of the pocket above. The distance from one base to the next should be about 9.5 in (24.1 cm).
Ring: Wait until the border is finished before attaching the ring (see Border).
Border
The border makes the raised cord along each side edge of every back panel.
Border gauge: 1 sc per row-end. Sc rows are about 0.22 in (0.6 cm) tall, and a sc is about 0.25 in (0.6 cm) wide. That means 1 sc per row-end packs the stitches about 12% closer than normal, which keeps the edge firm instead of ruffled.
Work each side separately, with the inside of the back panel (the face that shows above the roll) facing you.
Pockets A and B, right edge:
- Row 1: Join at the corner where back Row 1 meets the scallop edge. Sc in each row-end from Row 1 to Row 31. (31 sc: 14 straight + 9 taper + 8 connector)
- Row 2: Ch 1. Do not turn. Rev sc in each sc. (31 sts) Fasten off.
Pockets A and B, left edge: Join at Row 31 and work down to Row 1, using the same 2 rows. (31 sts each row)
Stop at Row 31. Rows 32–33 are sewn under the pocket above, so they are already hidden.
Pocket C, both edges: Work Rows 1–35 of the back panel and strap the same way. (35 sc, then 35 rev sc per side: 14 + 9 + 12)
Why the math works: each sc stands in exactly one row-end. On the taper rows, the sc2tog shifts the edge inward, but each row still has exactly one row-end, so the count stays at 1 per row. Nothing is added at the corners because each edge is a single straight run. Since no extra stitches are added, the panel cannot flare out.
Attach the ring: Pass Pocket C’s Rows 36–47 through the ring from front to back. Fold the strap down behind itself and whipstitch Row 47 across the back of Row 36, matching 6 sts to 6 sts. The visible strap above the panel is about 3.5 in (8.9 cm).
Final Blocking
- Dampen the holder evenly with cool water and gently squeeze out the extra water in a towel.
- Put a rolled hand towel or a dry toilet roll wrapped in plastic into each pocket to shape it.
- Lay the holder flat on a towel with the front facing up.
- Pin each back panel to 6.5 in (16.5 cm) wide, border included.
- Ease the scallops into even curves with your fingers, and pin the tip of each scallop.
- Pinch each rib so it stands up straight.
- Let it dry completely, which takes 24–48 hours, then check the total length: 30.5 in (77.5 cm).
Final Quality-Control Checklist
- Every pocket has 6 ribs and 6 scallops, and each scallop sits between two ribs.
- The back panels are 6.5 in (16.5 cm) wide after the border.
- Each connector shows about 1.75 in (4.4 cm).
- All three pockets hang centered, one above the other.
- The ring strap is sewn through both layers.
- All tails are woven in at least 2 in (5.1 cm) and hidden inside the pockets.
- A standard roll slides in and out without stretching the rim.
Troubleshooting
- The front ruffles: your growth-round increases are too loose. Go down a hook size for Rnds 7–17.
- The ribs lean sideways: work each FPdc around the FPdc directly below it, and always skip the stitch behind it.
- The back panel curls: check that you have 24 sts in Rows 1–14. Steam the panel flat after blocking.
- The scallops are uneven: count the 7 sc between ribs before you work Rnd 17.
- The pocket is too tight for a roll: add one more 2-row repeat to Rnds 14–16, so the front grows to 54 sts and the total to 78 sts.
- The pockets tilt when hung: re-center the connectors so that 9 back sts are free on each side.
Care
Machine wash cold on a gentle cycle inside a laundry bag, then reshape the holder and lay it flat to dry. Avoid hot tumble drying, because it can shrink the cotton and soften the ribs.
Final Notes
Each measurement leads to the next. The 16-stitch gauge gives a 5.25 × 2 in (13.3 × 5.1 cm) base. The base supports a 72-stitch rim with a 24-stitch back panel that is 6 in (15.2 cm) wide. That panel rises to 7.75 in (19.7 cm) and tapers to a 6-stitch strap. Three pockets spaced 9.5 in (24.1 cm) apart, plus the ring strap, give a holder about 30.5 in (77.5 cm) long.
Happy crocheting!