

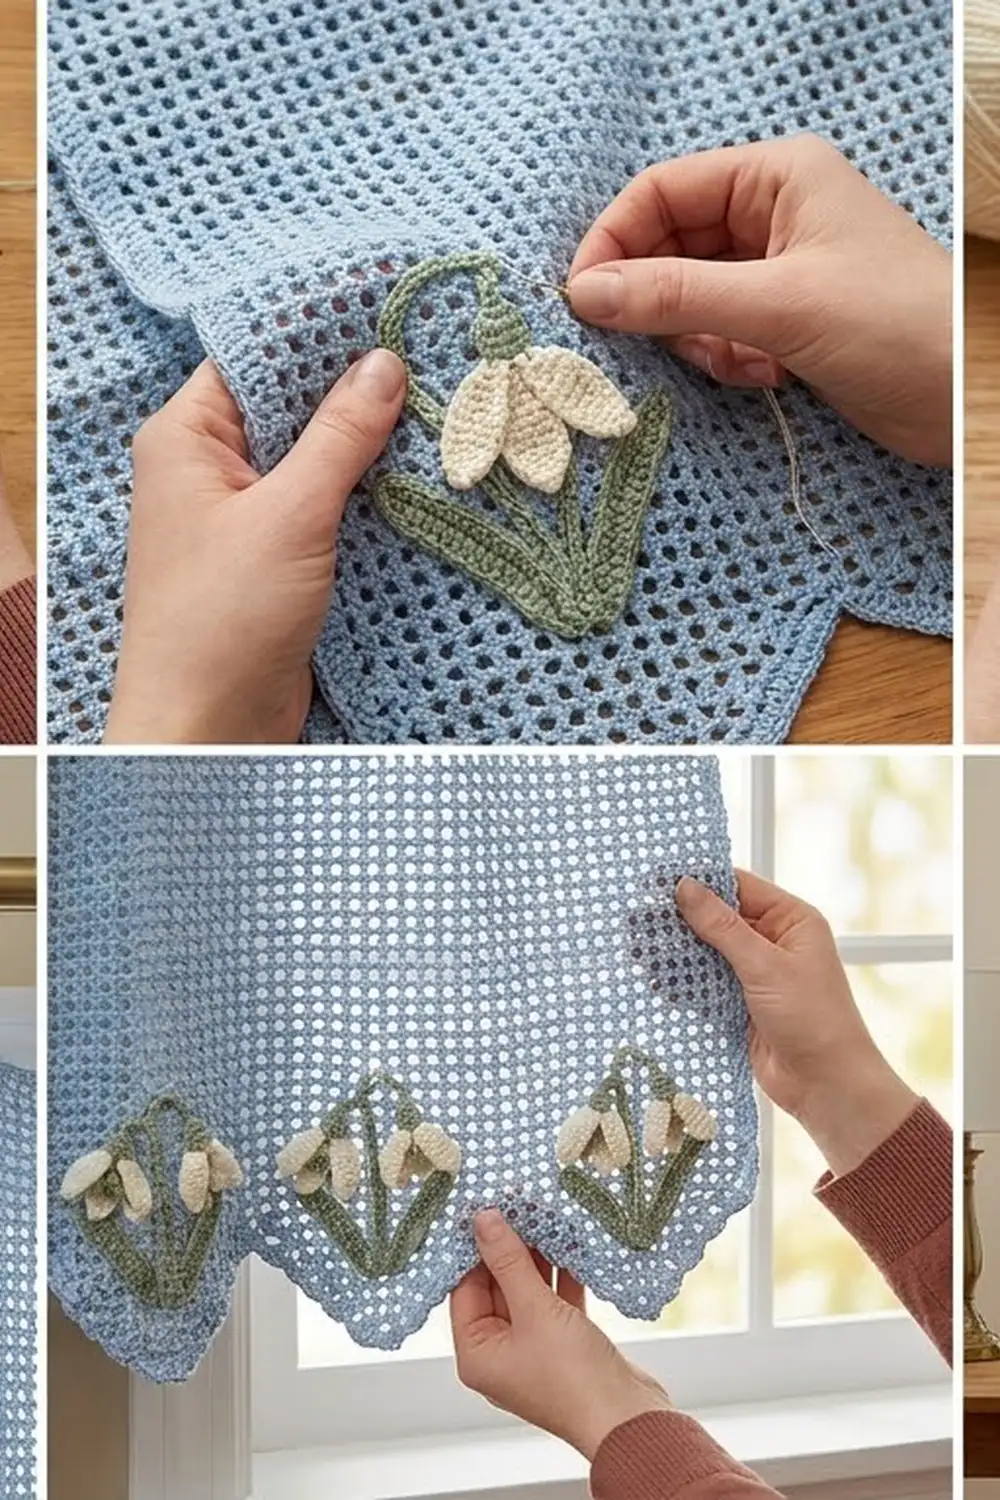
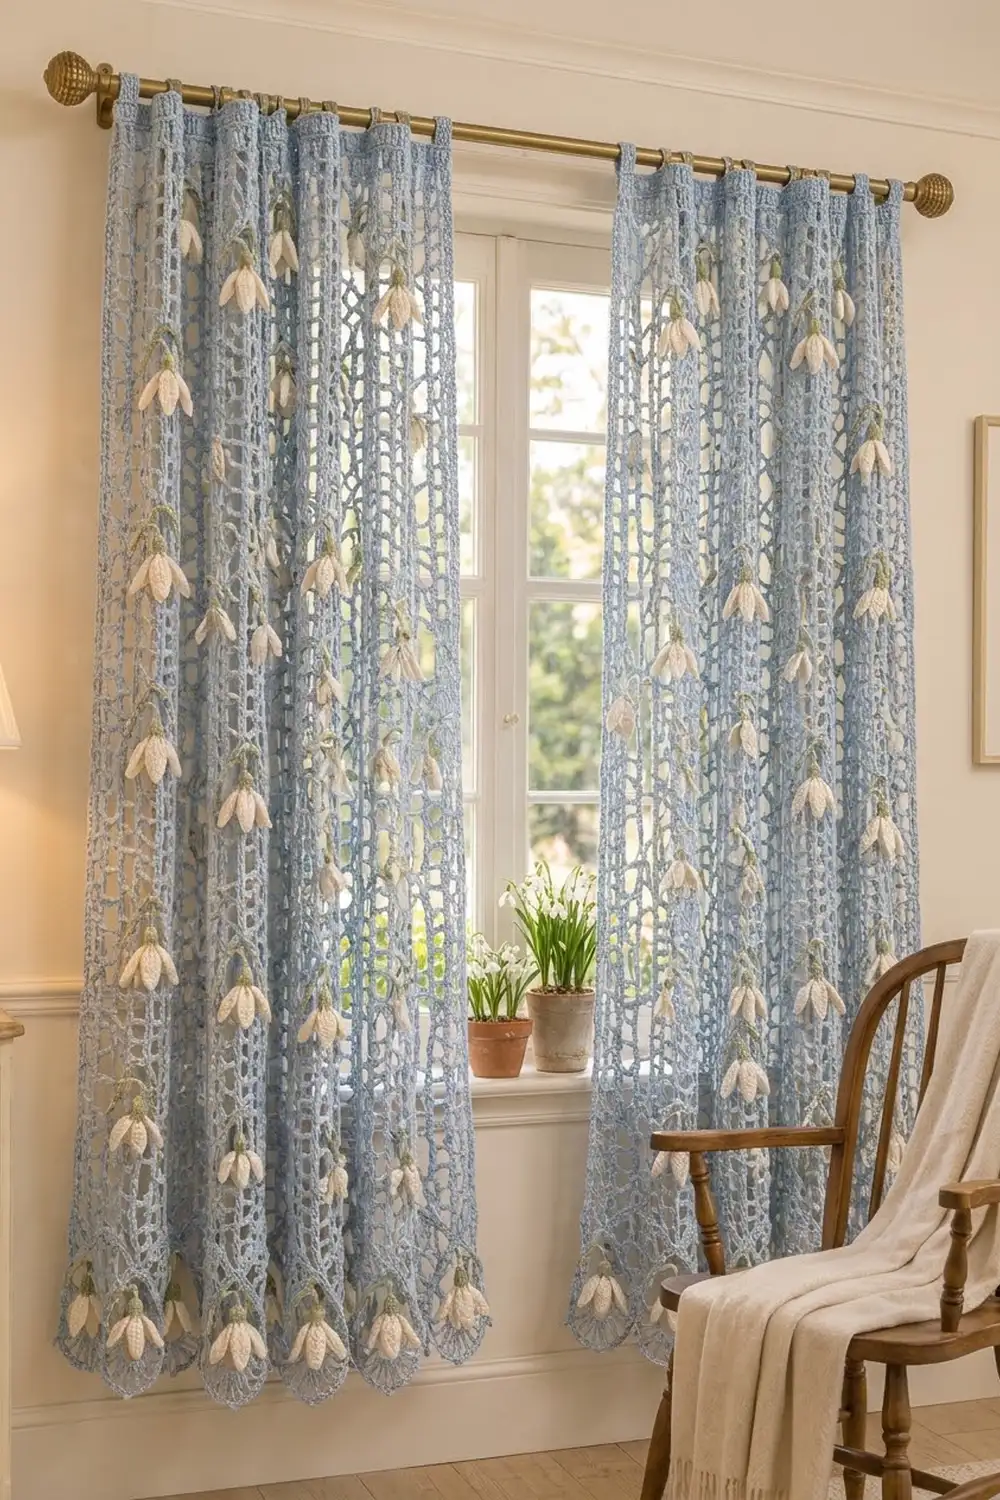
These curtains bring early spring to a window. Each panel is an airy powder-blue trellis mesh with strong vertical columns. Rows of cream snowdrops hang from curled sage-green stems, and a scalloped hem holds one snowdrop inside each arch.
The palette is soft: light blue for the mesh, cream for the petals and muted sage for the caps and stems. The look is cottage-romantic, but the construction is straightforward. This pattern uses US crochet terms.
Each finished panel measures 28 in (71.1 cm) wide and 76 in (193.0 cm) long, from the top of the tab loops to the scallop tips. The pattern makes a matching pair.
You crochet each panel body as one piece, using a two-row trellis repeat. Then you add a scalloped hem, side edging, a top band and eight tabs. Last, you make 45 snowdrops per panel and sew them on.
Finished Size and Construction
- Finished panel size: 28 in x 76 in (71.1 cm x 193.0 cm)
- Skill level: Intermediate
- Terminology: US crochet terms
- Yarn weight: DK (#3) cotton
- Hook: 4.0 mm (G-6)
- Number of pieces: 2 identical panels, plus 45 snowdrop appliqués per panel (90 in total)
- Layout: each panel is one solid piece of mesh. Snowdrops sit in 8 staggered tiers plus a hem row.
- Snowdrop size: 2.25 in (5.7 cm) long, 2 in (5.1 cm) wide, with a 3 in (7.6 cm) stem
- Body before borders: 27 in x 70.5 in (68.6 cm x 179.1 cm)
- Border depth:
- Side edging: 0.5 in (1.3 cm) per side
- Hem: 2.5 in (6.4 cm)
- Top band: 1 in (2.5 cm)
- Tab loops: 2 in (5.1 cm)
Materials
Choose a smooth, mercerized DK cotton. It holds the lace open, drapes straight and shows the petal ridges clearly. Avoid fuzzy yarns, which blur the trellis.
- Color A, light blue (mesh and borders): 1,200 g, about 2,520 m (2,756 yd)
- Color B, cream (petals): 150 g, about 315 m (344 yd)
- Color C, sage green (caps and stems): 100 g, about 210 m (230 yd)
These amounts cover both panels. They assume yarn with about 210 m (230 yd) per 100 g and include a margin of roughly 10–15% for swatching and dye lots.
Tools:
– 4.0 mm hook
– Tapestry needle
– 20 stitch markers
– Measuring tape
– Rust-proof pins
– Large blocking surface
– Spray bottle
Abbreviations (US Terms)
- ch – chain
- sl st – slip stitch
- sc – single crochet
- dc – double crochet
- tr – treble crochet
- sc2tog / sc3tog – single crochet 2 / 3 together
- BLO – back loop only
- MR – magic ring
- sp – space
- st(s) – stitch(es)
- RS / WS – right side / wrong side
Picot: ch 3, sl st in 3rd ch from hook.
Gauge and Checkpoints
Mesh gauge:
– 4 repeats = 6 in (15.2 cm) wide. One repeat (1 dc + 1 ch-5 sp) = 1.5 in (3.8 cm).
– 8 rows (4 row pairs) = 4 in (10.2 cm) tall.
Border gauge: 4 sc = 1 in (2.5 cm), and 4 sc rows = 1 in (2.5 cm).
Swatch first. Ch 26 and work Rows 1–9 of the body, block the swatch and let it dry before you measure. Then adjust if needed:
– Swatch wider than 6 in (15.2 cm): change to a 3.75 mm hook.
– Swatch narrower: change to a 4.5 mm hook.
– Rows too tall: snug the first loop of each dc.
Body checkpoints:
– After Row 2: width 27 in (68.6 cm)
– After Row 21: height about 10.25 in (26.0 cm)
– After Row 81: height about 40.25 in (102.2 cm)
– After Row 142: 27 in x 70.5 in (68.6 cm x 179.1 cm)
Panel Body (make 2)
With Color A, ch 110. The foundation is a multiple of 6 + 2, which gives 18 repeats.
Row 1 (RS): sc in 2nd ch from hook and each ch across, turn. (109 sc)
Row 2 (column row): ch 3 (counts as dc), ch 5, sk next 5 sc, dc in next sc; rep from * across, turn. (19 dc, 18 ch-5 sps)*
Row 3 (lattice row): ch 1, sc in first dc, ch 3, sc in 3rd ch of next ch-5 sp, ch 3, sc in next dc; rep from * across, working the last sc in the top of the turning ch, turn. (37 sc, 36 ch-3 sps)*
There are two kinds of sc in this row:
– Column sc: the 19 sc that sit on top of a dc.
– Center sc: the 18 sc in the middle of each space.
Row 4 (column row): ch 3, ch 5, sk (ch-3 sp, center sc, ch-3 sp), dc in next column sc; rep from * across, turn. (19 dc, 18 ch-5 sps)*
Row 5: repeat Row 3. (37 sc, 36 ch-3 sps)
Rows 6–141: repeat Rows 4–5 another 68 times. You now have 70 column rows and 70 lattice rows.
The dc stack directly on top of each other and form 19 bold vertical columns. The ch-3 arches pinch each space at its center, which creates the trellis diamonds.
Row 142 (closing row): ch 1, sc in each sc and 2 sc in each ch-3 sp, turn. (37 + 72 = 109 sc) Fasten off.
Snowdrop Appliqués (make 45 per panel)
Cap (Color C):
– Rnd 1: 6 sc in MR, sl st to first sc. (6 sc)
– Rnd 2: ch 1, (sc in next st, 2 sc in next st) 3 times, sl st to first sc. (9 sc)
– Rnd 3: ch 1, sc in each st, sl st to first sc. (9 sc) Fasten off.
The MR is the top of the dome. The petals hang from Rnd 3.
Petals (Color B): each petal is worked into 3 cap sts, so the 3 petals use all 9 sts.
– Row 1: join B in any st of Rnd 3, ch 1, sc in same st and next 2 sts, turn. (3 sc)
– Row 2: ch 1, 2 sc in first st, sc in next st, 2 sc in last st, turn. (5 sc)
– Rows 3–5: ch 1, sc BLO in each st, turn. (5 sc)
– Row 6: ch 1, sc2tog, sc in next st, sc2tog, turn. (3 sc)
– Row 7: ch 1, sc3tog. (1 st)
To move to the next petal: ch 1, then work 6 sl sts along the petal edge that leads toward the next unworked cap st. Sl st in that cap st and start Row 1 there.
After the third petal, sl st back to the base of the first petal and fasten off.
Each petal is a ribbed, pointed oval about 1.75 in (4.4 cm) long. Pinch the three petals together so they hang as a closed bell.
Stem (Color C):
1. Join C at the MR, ch 13.
2. Sl st in 2nd ch from hook and in each ch back to the cap. (12 sl sts) The stem is about 3 in (7.6 cm) long.
3. Leave a 10 in (25.4 cm) tail. Run the tail through the stem and tug gently so the stem curls into an arch.
Make All Pieces
- Per panel: 1 body (A) and 45 snowdrops (B and C).
- Pair: 2 bodies and 90 snowdrops.
Number the dc columns 1–19. The grid below shows where the flowers go (F = flower). Tier heights are measured from the base of Row 1.
Col       1234567890123456789
T8 62in   ...F...F...F...F...
T7 54in   .F...F...F...F...F.
T6 46in   ...F...F...F...F...
T5 38in   .F...F...F...F...F.
T4 30in   ...F...F...F...F...
T3 22in   .F...F...F...F...F.
T2 14in   ...F...F...F...F...
T1  6in   .F...F...F...F...F.
Hem       .F.F.F.F.F.F.F.F.F.
Tier heights in cm:
– 6 in = 15.2 cm
– 14 in = 35.6 cm
– 22 in = 55.9 cm
– 30 in = 76.2 cm
– 38 in = 96.5 cm
– 46 in = 116.8 cm
– 54 in = 137.2 cm
– 62 in = 157.5 cm
The tiers fall on lattice Rows 13, 29, 45, 61, 77, 93, 109 and 125.
Flower total per panel: 4 x 5 + 4 x 4 + 9 = 45.
Joining the Snowdrops
Sew the flowers on after the borders are finished and the panel has been blocked once.
- Mark the column sc for each tier.
- Using the stem tail, whipstitch the stem tip to the marked column sc with 3–4 small stitches.
- Let the stem arch so the cap hangs about 2 in (5.1 cm) below the tip, inside the neighboring ch-5 sp.
- Tack the cap to the dc column with 2 stitches through the back of Rnd 3. Leave the petals free.
- Hem flowers: sew each stem tip to the center sc of a scallop (Hem Row 2 sc at columns 2, 4 … 18). Let the flower hang over the fan.
Keep your sewing stitches relaxed so the mesh doesn’t pucker. After each tier, check that the panel still lies flat at 28 in (71.1 cm) wide. Weave tails only through the stem and cap, so nothing shows through the lace.
Borders
Border gauge: 4 sc = 1 in (2.5 cm), and 4 sc rows = 1 in (2.5 cm).
Scalloped Hem
Work the hem into the free loops of the foundation chain.
Hem Row 1 (RS): join A, ch 1, sc in each free loop across, turn. (109 sc)
Hem Row 2: ch 1, sc in first sc, ch 5, sk 5 sc, sc in next sc; rep from * across, turn. (19 sc, 18 ch-5 sps)* The 19 sc line up with the 19 dc columns.
Hem Row 3: ch 1, sc in first sc, ch 3, sk next ch-5 sp, (tr, ch 1) 8 times in next sc, tr in same sc, ch 3, sk next ch-5 sp, sc in next sc; rep from * 9 times total, turn. (9 fans of 9 tr; 10 sc)*
Hem Row 4: ch 1, sc in first sc, 3 sc in ch-3 sp, sc in next tr, (2 sc in ch-1 sp, sc in next tr) 8 times, 3 sc in ch-3 sp, sc in next sc; rep from * across, turn. (32 sts per scallop; 1 + 9 x 32 = 289 sc)*
Hem Row 5: ch 1, sc in first sc, (sc in next 4 sc, picot) 7 times, sc in next 4 sc; rep from * across. (289 sc, 63 picots)* Fasten off.
Why it works: 109 = 9 x 12 + 1. Each scallop uses exactly 2 mesh repeats, so there are no partial scallops. Each fan is centered under an even-numbered column.
Side Edging (each long side)
Side Row 1: with RS facing, join A at the end of Row 1. Work along the row ends to Row 142 only, not along the hem:
– 1 sc in the end of each sc row (Rows 1 and 142)
– 3 sc in the end of each dc row
– 1 sc in the end of each lattice row
That gives 1 + 70 x 3 + 70 x 1 + 1 = 282 sc. Turn.
Side Row 2: ch 1, sc in each sc. (282 sc) Fasten off.
Why it works: each 1 in (2.5 cm) row pair takes 4 sc, which matches the border gauge. So 282 / 4 = 70.5 in (179.1 cm), the exact body length. The two rows add 0.5 in (1.3 cm) per side, bringing the width to 28 in (71.1 cm).
Top Band
Band Row 1 (RS): join A at the top corner.
1. Sc in the ends of the 2 side-edging rows.
2. Sc in each of the 109 sts of Row 142.
3. Sc in the ends of the 2 side-edging rows on the far side. Turn. (2 + 109 + 2 = 113 sc)
Band Rows 2–4: ch 1, sc in each st, turn. (113 sc)
Tabs (8 per panel)
Split the 113 band sts into 8 tabs of 8 sts with 7 gaps of 7 sts: 64 + 49 = 113. Mark the tab starts at sts 1, 16, 31, 46, 61, 76, 91 and 106.
Each tab:
– Row 1: join A in the marked st, ch 1, sc in same st and next 7 sts, turn. (8 sc)
– Rows 2–16: ch 1, sc in each st, turn. (8 sc)
Each tab is 2 in (5.1 cm) wide and 4 in (10.2 cm) long. Fold it to the WS and whipstitch it to the back of Band Row 1. This leaves a 2 in (5.1 cm) loop for the rod.
Final Blocking
- Weave in all mesh ends.
- Soak the panel in cool water for 15 minutes, then press the water out. Don’t wring it.
- Roll the panel in towels to remove more water.
- Pin the panel to 28 in x 76 in (71.1 cm x 193.0 cm).
- Pin each scallop tip and each valley between scallops.
- Check that each dc column runs straight.
- Let the panel dry completely, then sew on the snowdrops. Mist the petals and pinch them into bells.
Final Quality-Control Checklist
- 19 straight columns and 18 spaces in every row
- Side edging has 282 sc on each side
- Top band has 113 sc and 8 evenly spaced tabs
- 9 even scallops, each with 9 tr and 7 picots
- 45 snowdrops per panel, placed as in the grid
- Each snowdrop has 3 petals, a 9-st cap and a 12-st stem
- No puckering around the flowers
- Both panels match in size to within 0.5 in (1.3 cm)
Troubleshooting
- Columns lean: you worked a dc into a center sc instead of a column sc. Undo back to that row and redo it.
- Panel narrows: your ch-5 sps are tightening. Keep the chains even.
- Scallops ripple: use a smaller hook for Hem Row 3.
- Scallops cup: use a larger hook for Hem Rows 4–5.
- Petals curl: steam them flat, or work Rows 3–5 through both loops.
- Panels differ in length: add or remove whole row pairs before Row 142.
Care
Hand wash in cool water with mild detergent and dry flat. Rehang the curtains while they’re slightly damp so their weight straightens the columns.
Final Notes
Every stage builds on the one before:
– At 1.5 in (3.8 cm) per repeat, 18 repeats make 27 in (68.6 cm) of width.
– At 1 in (2.5 cm) per row pair, 70 pairs plus two sc rows make 70.5 in (179.1 cm) of length.
– At 4 sc per inch, the side edging takes 282 sc and brings the width to 28 in (71.1 cm).
– Then 109 sts make 9 scallops, and 113 band sts make 8 tabs.
Check each number as you go, and the pair will hang straight and even.
Happy crocheting!