

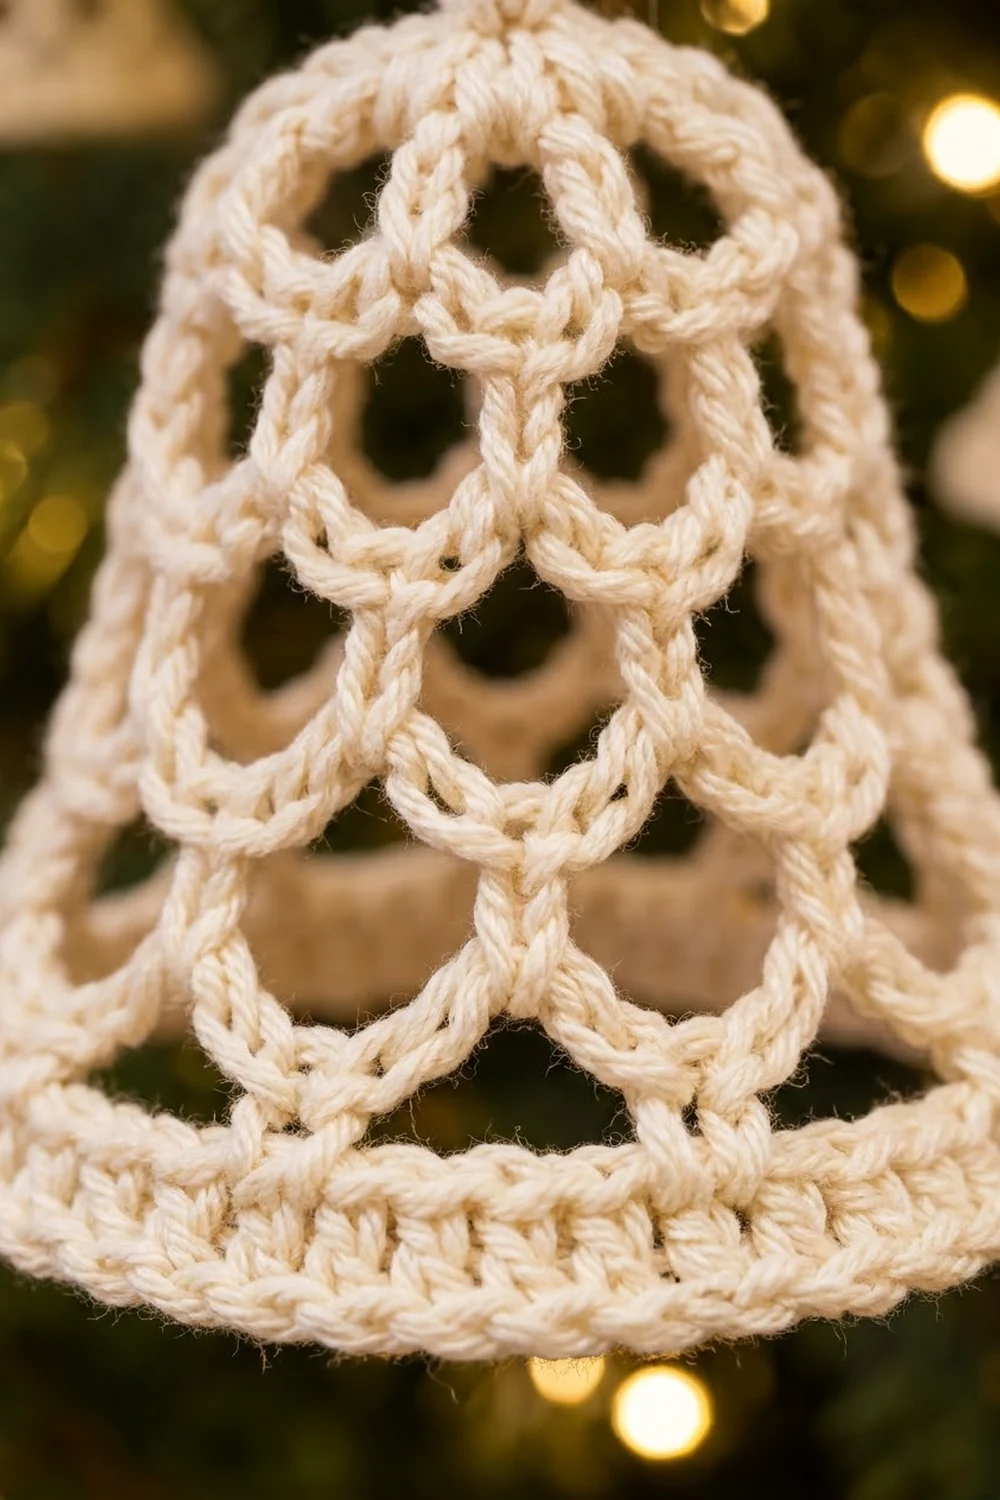
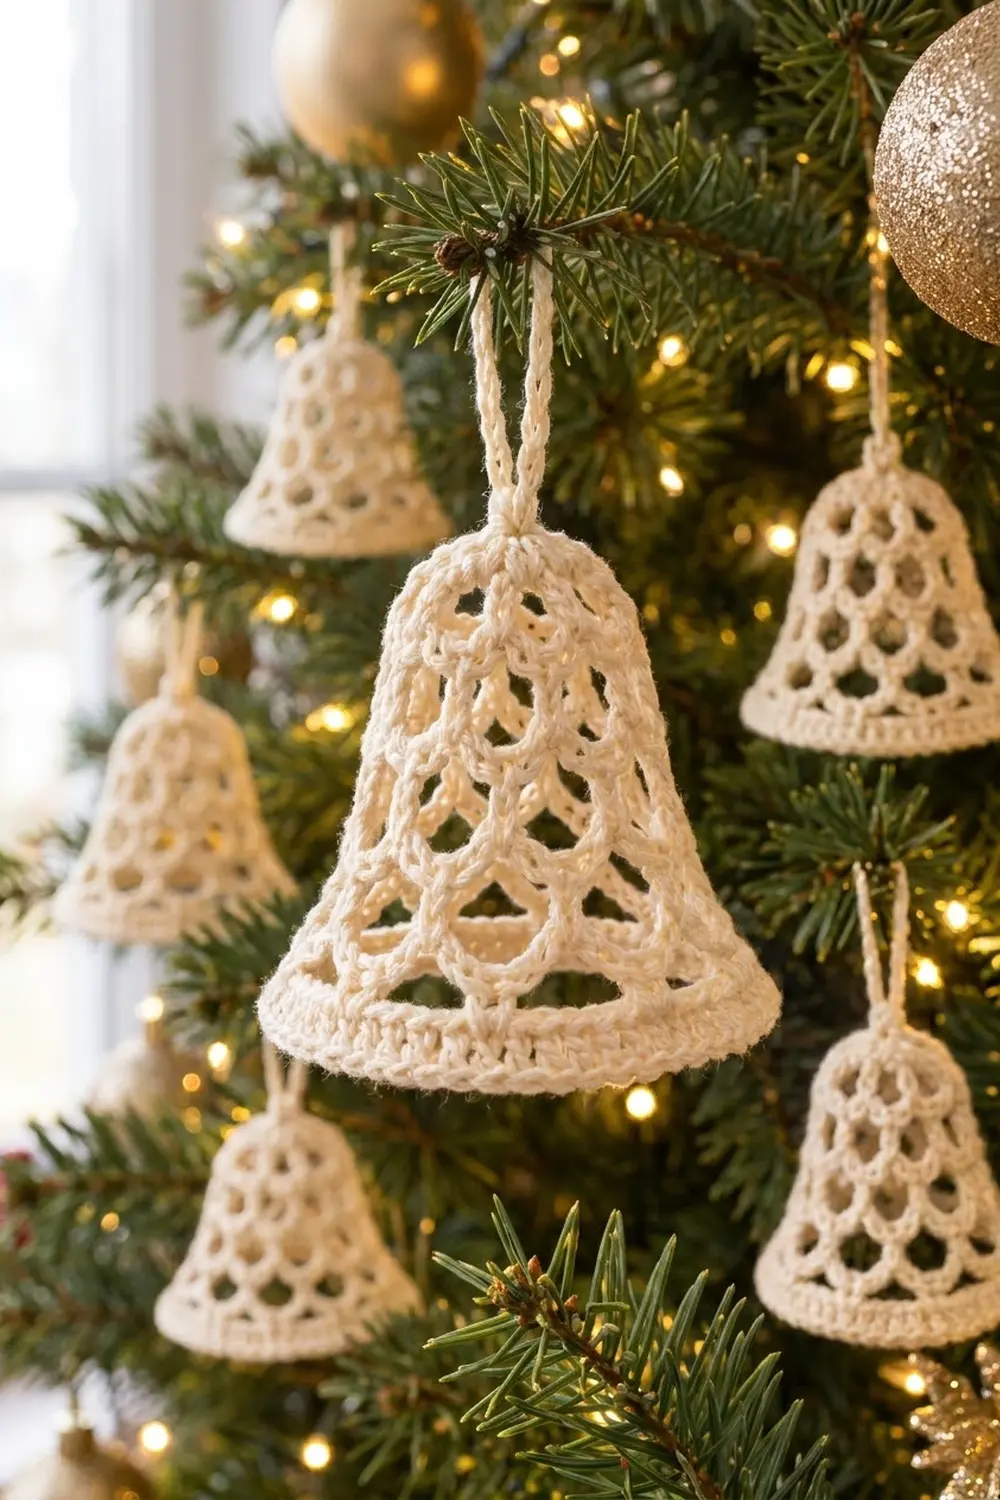
The Snowlace Bell is a flat, lacy Christmas ornament made from one piece of cream cotton. Open chain loops stack row after row into a soft scallop mesh that widens into a bell shape. A solid, gently flared rim band at the bottom finishes it.
The design uses a single color, so the texture does the work. The ivory yarn looks bright against green branches and warm lights, and it suits a natural, Scandinavian, or vintage-style tree.
This pattern uses US crochet terms. The finished ornament measures about 4.5 in (11.4 cm) wide at the rim and 4.75 in (12.1 cm) tall including the hanging loop. The bell body alone is 3.5 in (8.9 cm) tall.
You start by making the hanging loop. From there you work a small crown, then six turned rows of chain-loop mesh, each one loop wider than the last. Three solid rows form the rim band. Nothing is sewn or joined.
Finished Size and Construction
- Finished size: 4.5 in (11.4 cm) wide x 4.75 in (12.1 cm) tall including the loop
- Skill level: Easy
- Terminology: US crochet terms
- Yarn weight: DK (#3) cotton
- Hook: 3.5 mm (E-4)
- Number of pieces: 1
- Layout: a single flat bell worked top down in turned rows
- Piece size: bell body 3.5 in (8.9 cm) tall, plus a 1.25 in (3.2 cm) hanging loop
- Size before the border: about 4 in (10.2 cm) wide x 2.75 in (7.0 cm) tall of mesh, below the loop
- Border (rim band) depth: 0.75 in (1.9 cm)
Materials
Yarn: Use a smooth, mercerized or combed DK cotton. Cotton gives crisp stitch definition and holds the open loops after blocking. Acrylic also works but will look softer and drape more.
- Cream / Ivory: 8 g, about 16 m (17.5 yd)
One ornament uses about 6 g. These quantities include a margin for your gauge swatch and weaving in ends. If you plan a set, one 50 g ball makes about six bells.
Tools:
– 3.5 mm (E-4) crochet hook
– Tapestry needle
– Scissors
– Rust-proof pins
– Blocking mat or folded towel
– Spray bottle
– Optional: fabric stiffener or a starch spray
Abbreviations (US Terms)
- ch – chain
- sl st – slip stitch
- sc – single crochet
- hdc – half double crochet
- st(s) – stitch(es)
- sp – space
- ch-5 loop / ch-6 loop – the arch made by 5 or 6 chains between two sc
- inc – work 2 sts in the same stitch
Special stitch: Loop Anchor. Work 1 sc around the center of the ch loop below, going into the space rather than into a chain. This centers each new arch on the loop below, which creates the scallop look.
Gauge and Checkpoints
Gauge: 11 sc = 2 in (5.1 cm) with a 3.5 mm hook. In the mesh, one ch-5 loop is about 0.5 in (1.3 cm) wide and one mesh row is about 0.45 in (1.1 cm) tall.
Gauge matters less here than for clothing, but it decides whether the rim band fits the mesh. Make one full bell as your test piece before you plan a set.
Checkpoints:
– After the hanging loop: the loop lies flat at about 1.25 in (3.2 cm) tall.
– After Row 3: the mesh is about 2 in (5.1 cm) wide at its lower edge.
– After Row 6: the mesh is about 4 in (10.2 cm) wide and 2.75 in (7.0 cm) tall from crown to lower edge.
– After Row 7: the band is about 4.25 in (10.8 cm) wide.
– After Row 9: the rim is about 4.5 in (11.4 cm) wide, and the bell is 3.5 in (8.9 cm) tall below the loop.
If your bell is too big: go down to a 3.25 mm (D-3) hook, or work ch 4 / ch 5 loops instead of ch 5 / ch 6.
If your bell is too small: go up to a 3.75 mm (F-5) hook, or add one chain to each loop.
Pattern
Hanging Loop and Crown
Leave a 6 in (15.2 cm) tail.
Loop: Ch 15, sl st in the first ch to form a ring. This makes a hanging loop about 1.25 in (3.2 cm) tall.
Crown (Row 0): Ch 1. Work 3 sc into the sl st join, around the joined chain stem, so the sts sit just below the loop. Turn. (3 sc)
The three sc form the small, firm knot at the top of the bell.
Mesh Rows
Each mesh row begins with ch 1 and an edge sc and ends with an edge sc. The ch 1 never counts as a stitch. Because you anchor one loop from each edge and one into each loop below, every row adds exactly one loop.
Row 1: Ch 1, sc in the first sc, ch 5, sc in the center sc, ch 5, sc in the last sc. Turn.
(2 ch-5 loops, 3 sc)
Row 2: Ch 1, sc in the first sc, ch 5, Loop Anchor in the first ch-5 loop, ch 5, Loop Anchor in the next ch-5 loop, ch 5, sc in the last sc. Turn.
(3 ch-5 loops, 4 sc)
Row 3: Ch 1, sc in the first sc, ch 5, Loop Anchor in the next ch-5 loop; repeat from * to * 2 more times (3 anchors total), ch 5, sc in the last sc. Turn.
(4 ch-5 loops, 5 sc)
Checkpoint: the lower edge measures about 2 in (5.1 cm) wide.
From here, the loops grow to ch 6. The longer arches make the sides curve outward into the bell flare.
Row 4: Ch 1, sc in the first sc, ch 6, Loop Anchor in the next loop; repeat from * to * 3 more times (4 anchors total), ch 6, sc in the last sc. Turn.
(5 ch-6 loops, 6 sc)
Row 5: Ch 1, sc in the first sc, ch 6, Loop Anchor in the next loop; repeat from * to * 4 more times (5 anchors total), ch 6, sc in the last sc. Turn.
(6 ch-6 loops, 7 sc)
Row 6: Ch 1, sc in the first sc, ch 6, Loop Anchor in the next loop; repeat from * to * 5 more times (6 anchors total), ch 6, sc in the last sc. Turn.
(7 ch-6 loops, 8 sc)
Checkpoint: the mesh measures about 4 in (10.2 cm) across the lower edge and 2.75 in (7.0 cm) from crown to lower edge. Lay it flat. The loops should sit in staggered rows, with each arch centered under the gap between two arches above it.
Stitch-count check: Row n has n + 1 loops and n + 2 sc. Row 6 has 7 loops and 8 sc. Do not fasten off; the rim band continues from here.
Border (Rim Band)
The rim band is the bell’s border. It turns the open mesh into a solid, weighted edge so the bell hangs straight and keeps its shape.
Border gauge: 11 sc = 2 in (5.1 cm). The band has one working edge: the bottom of the bell. The sides of the band are just the edge stitches of each row.
Row 7 (conversion row): Ch 1, sc in the first sc, work 3 sc into each of the 7 ch-6 loops, sc in the last sc. Skip the 6 Loop Anchor sc between loops. Turn.
Count: 2 edge sc (1 per existing edge sc) + 21 sc worked into loops (7 loops x 3) = 23 sc.
Checkpoint: the band measures about 4.25 in (10.8 cm) wide (23 ÷ 5.5 sc per in = 4.18 in). If the mesh ruffles above it, use 3 sc in the outer loops and 2 sc in the center loop, and keep the edge counts the same.
Row 8: Ch 2 (does not count as a stitch), hdc in each st across. Turn.
Count: 23 hdc (1 per existing stitch + 0 added).
The hdc row adds height and gives the rim its ridged, column-like texture.
Row 9 (flare row): Ch 1, 2 sc in the first st, sc in each of the next 21 sts, 2 sc in the last st.
Count: 23 sc worked 1 per existing stitch + 2 added (1 at each end) = 25 sc.
Fasten off, leaving a 6 in (15.2 cm) tail.
Why the math works: Row 6 ends with 7 loops. Three sc per loop gives 21, and the 2 edge sc bring it to 23. At 5.5 sc per inch, 23 sc spans 4.18 in, just a little wider than the 4 in (10.2 cm) mesh, so the band sits flat with a slight outward lean. Row 8 keeps 23 stitches to build height without extra width. In Row 9, the 2 end increases take the rim to 25 sc, or 4.55 in, which rounds to the target 4.5 in (11.4 cm). Adding stitches only at the outer corners makes the rim flare at the sides, as a real bell does, while the center stays straight.
Band depth: Rows 7 to 9 together are about 0.75 in (1.9 cm). Add that to the 2.75 in (7.0 cm) of mesh and the bell body is 3.5 in (8.9 cm). Add the 1.25 in (3.2 cm) loop for a total height of 4.75 in (12.1 cm).
Final Blocking
- Weave in both tails along the solid sts of the crown and rim band, not through the open loops. Trim close.
- Soak the bell in cool water for 5 minutes, or spray it until it is evenly damp. For a firmer ornament, use diluted fabric stiffener instead of water.
- Press out the excess water in a towel. Don’t wring it.
- Lay the bell face up on the blocking mat.
- Pin the two bottom corners of the rim 4.5 in (11.4 cm) apart. Pin the top of the crown so the body measures 3.5 in (8.9 cm) from crown to rim.
- Pin the bottom of each outer loop on Rows 3 to 6 outward so the sides curve into the bell shape. Row 3 should be about 2 in (5.1 cm) wide and Row 6 about 4 in (10.2 cm).
- Open each mesh loop with a fingertip or a knitting needle so the arches are evenly rounded.
- Straighten the hanging loop above the crown.
- Let it dry completely, at least 6 hours. Unpin only when it is fully dry.
Final Quality-Control Checklist
- [ ] Hanging loop is 1.25 in (3.2 cm) tall and centered over the crown
- [ ] Crown has 3 sc and sits tight under the loop
- [ ] Mesh rows count 2, 3, 4, 5, 6 and 7 loops from top to bottom
- [ ] Rows 1 to 3 use ch-5 loops; Rows 4 to 6 use ch-6 loops
- [ ] Each Loop Anchor sits at the center of the loop below
- [ ] Row 7 has 23 sc, Row 8 has 23 hdc, and Row 9 has 25 sc
- [ ] Rim is 4.5 in (11.4 cm) wide and the body is 3.5 in (8.9 cm) tall
- [ ] Sides of the bell mirror each other
- [ ] All ends are woven into solid stitches and none show through the mesh
Troubleshooting
The bell looks like a narrow triangle, not a bell. The loops in Rows 4 to 6 are too short. Check that you worked ch 6 and pin the outer loops outward during blocking.
One side is longer than the other. You probably missed the edge sc at the start or end of a row. Count sc per row: a row should have one more sc than it has loops.
The rim ruffles. Your stitches are looser than gauge. Work 2 sc into the middle loop on Row 7 (22 sc total) and still work the 2 end increases on Row 9 (24 sc).
The rim pulls the mesh in. Your stitches are tighter than gauge. Go up a hook size for Rows 7 to 9 only.
The loops twist or lean. Work each Loop Anchor around the whole chain space, not into one chain.
The hanging loop sags or twists. Block it straight, or add 2 rounds of sl st inside the loop before you start the crown.
Care
Hand wash in cool water with mild soap, press it dry in a towel, and reshape it flat. Store ornaments flat between sheets of tissue so the loops don’t crush.
Final Notes
The size of the Snowlace Bell depends on a short chain of measurements:
- The hanging loop is 1.25 in (3.2 cm) tall.
- Six mesh rows grow from 2 to 7 loops, reaching 2 in (5.1 cm) wide at Row 3 and 4 in (10.2 cm) wide at Row 6, with 2.75 in (7.0 cm) of mesh height.
- The rim converts 7 loops into 23 sc and flares to 25 sc, finishing at 4.5 in (11.4 cm) wide and 0.75 in (1.9 cm) deep.
- Together these make a bell body 3.5 in (8.9 cm) tall and a finished ornament 4.75 in (12.1 cm) tall.
If each checkpoint matches, the finished bell will too. Make one, block it, and hang it in the light.
Happy crocheting!