

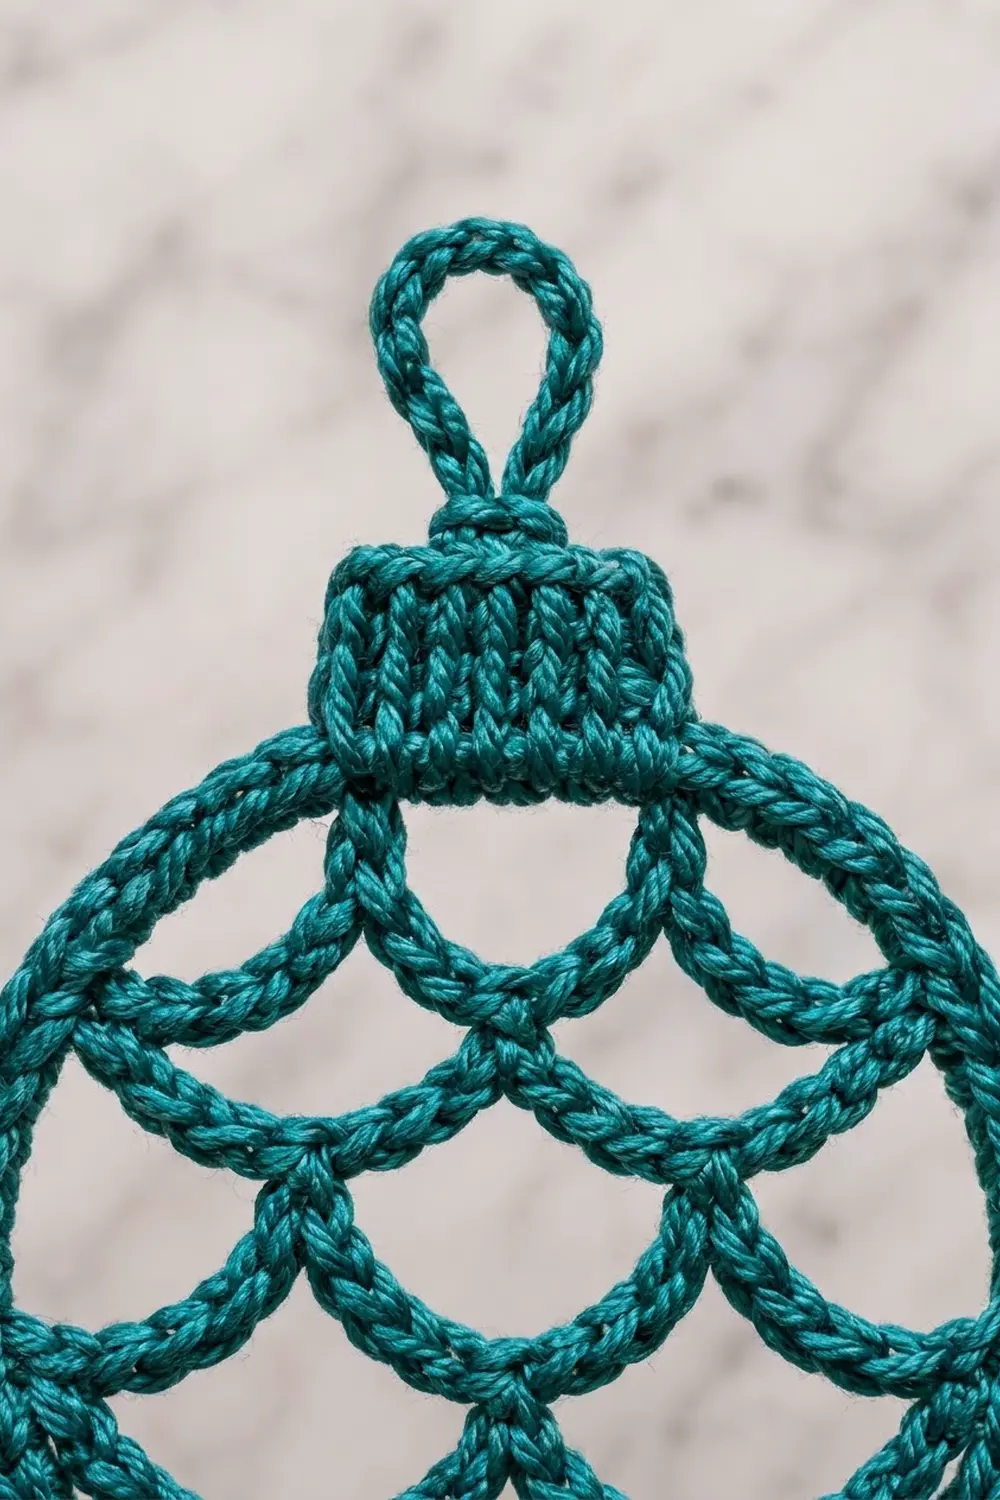
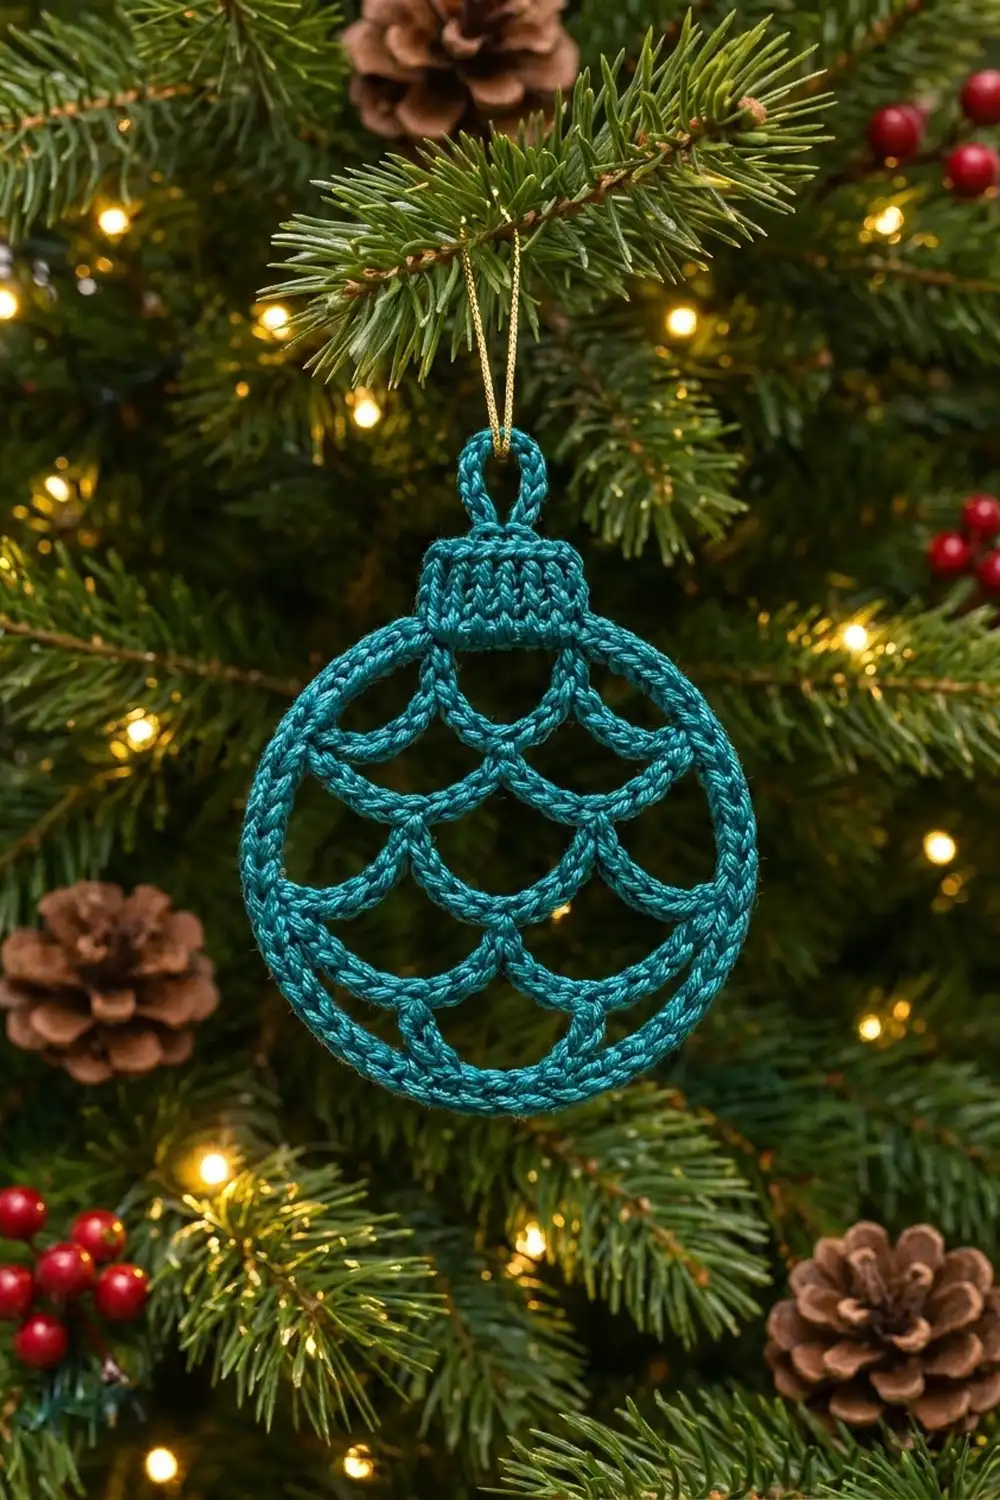
This little bauble is a flat, open-lattice Christmas ornament with a clean graphic look. A firm, rope-like ring makes the outline. Inside it, rows of fish-scale scallops fill the circle, and a solid cap and hanging loop finish the top.
The sample is worked in a single deep teal. It reads beautifully against green branches and warm lights. Any solid, smooth color works, and a non-metallic mercerized thread shows the stitch texture best.
The pattern uses US crochet terms. The finished ornament measures about 3 in (7.6 cm) across the ball and about 4.25 in (10.8 cm) tall from the bottom of the ring to the top of the loop.
Construction is simple and done in one piece. You crochet a chain ring and cover it with single crochet. Then you build four rows of chain scallops inside it, finish the outside with a slip-stitch edge, and add the cap and loop. There is no sewing apart from weaving in ends.
Finished Size and Construction
- Finished size: 3 in (7.6 cm) wide; 4.25 in (10.8 cm) tall including cap and loop
- Skill level: Easy-intermediate (careful counting, no difficult stitches)
- Terminology: US crochet terms
- Yarn weight: Fingering (super fine) mercerized cotton or size 3 crochet thread
- Hook: 2.25 mm (US B-1)
- Number of pieces: 1
- Layout: Single flat motif; no assembly
- Ring: 72 sc, about 9 in (22.9 cm) around
- Size before border: 3 in (7.6 cm) outer diameter, inner opening about 2.75 in (7.0 cm)
- Border depth: One slip-stitch round, adds less than 1/8 in (0.3 cm)
- Cap: 6 sts wide x 4 rows, 0.75 in (1.9 cm) wide x 0.5 in (1.3 cm) tall
- Hanging loop: About 0.75 in (1.9 cm) tall
Materials
Yarn: Use a smooth, tightly plied, mercerized cotton in fingering weight or size 3 crochet thread. The tight twist makes the cord-like texture in the photos and keeps the scallops crisp. Avoid fuzzy or very soft yarns, which blur the lattice.
- Teal: 7 g, about 25 m (27 yd)
That quantity includes a margin of about 30% for weaving in ends and any re-working. One ornament actually uses about 19 m (21 yd).
Tools:
– 2.25 mm (US B-1) crochet hook
– 4–6 locking stitch markers
– Tapestry needle
– Scissors
– Blocking mat and rustproof pins
– Spray starch or fabric stiffener (optional but recommended)
– Ribbon or gold cord for hanging (optional)
Abbreviations (US Terms)
- ch – chain
- sc – single crochet
- sl st – slip stitch
- st(s) – stitch(es)
- Rnd – round
- PM – place marker
- center ch – the 5th chain of a 9-chain arch, counted from the start of that arch
Special technique – anchoring sc: To attach a new arch to the center of an arch above, insert the hook under the center ch (under the top loop and back bump), yarn over, and complete a sc. This locks the two rows together at a single point and creates the pointed meeting spot between scallops.
Gauge and Checkpoints
Gauge: 8 sc = 1 in (2.5 cm), and 8 rows of sc = 1 in (2.5 cm), with a 2.25 mm hook. A chain of 8 ch measures about 1 in (2.5 cm).
Because the ornament is a single small piece, the ornament itself is your test piece. Make the ring first and check it before you start the lattice.
Checkpoint 1 – after Rnd 1: The 72-ch foundation, before joining, measures about 9 in (22.9 cm) unstretched.
Checkpoint 2 – after Rnd 2: Laid flat, the ring is about 3 in (7.6 cm) across the outer edge, with an inner opening of about 2.75 in (7.0 cm).
Checkpoint 3 – after the lattice: The ring still lies flat and round. The scallops sit inside without pulling the ring into an oval or making it ripple.
Checkpoint 4 – after border, cap and loop: Total height is about 4.25 in (10.8 cm).
Too big? Go down a hook size to 2.0 mm, or work tighter chains. Too small? Go up to 2.5 mm. Don’t change the stitch counts. The lattice anchor points are placed by stitch number, so the counts must stay exactly as written.
Ring
Rnd 1: Ch 72. Without twisting, join with a sl st to the first ch to form a ring. (72 ch)
Rnd 2: Ch 1. Sc in the same ch as the join and in each ch around. Join with a sl st to the first sc. (72 sc)
Numbering the ring: Turn the ring so the join sits at the top center. Stitch 1 is the first sc, just right of top center, and stitch 72 is just left of it. Going clockwise with the right side facing you, stitches 1–18 run down the upper right, 19–36 the lower right, 37–54 the lower left and 55–72 the upper left. The mirror of any stitch n is stitch 73 – n. This keeps the lattice symmetrical.
PM in stitches 63, 69, 4 and 10. These are the anchor points for Row 1. Fasten off, leaving a 4 in (10.2 cm) tail.
Fish-Scale Lattice
Work the lattice from top to bottom, entirely inside the ring. Each arch is 9 ch. When you finish an arch, PM in its center ch (5th ch) so the next row can anchor there. Work every ring anchor as a sl st under both loops of the sc, with the hook going in from the inside of the ring.
Row 1 (left to right, 3 arches): Join thread with a sl st in ring st 63. Ch 9, sl st in st 69. Ch 9, sl st in st 4. Ch 9, sl st in st 10. (27 ch; 3 arches; 4 ring sl sts)
The middle arch hangs from the top of the ring, under where the cap will go. The two outer arches hang from the upper sides.
Move down: Sl st in each of sts 11–16. (6 sl sts)
Row 2 (right to left, 4 arches): Ch 9, sc in center ch of Row 1 arch 3. Ch 9, sc in center ch of Row 1 arch 2. Ch 9, sc in center ch of Row 1 arch 1. Ch 9, sl st in ring st 57. (36 ch; 4 arches; 3 anchoring sc)
Move down: Sl st in each of sts 56, 55, 54, 53, 52 and 51. (6 sl sts)
Row 3 (left to right, 5 arches): Ch 9, sc in center ch of Row 2 arch 4 (the leftmost one). Ch 9, sc in center ch of the next Row 2 arch to the right. Repeat from * twice more. Ch 9, sl st in ring st 22. (45 ch; 5 arches; 4 anchoring sc)
Move into position: Sl st back along the last arch into the last 5 ch worked. You end in the center ch of Row 3 arch 5. (5 sl sts)
Row 4 (right to left, 4 tacked scallops): Ch 4, sl st in ring st 30. Ch 4, sc in center ch of Row 3 arch 4. Ch 4, sl st in ring st 34. Ch 4, sc in center ch of Row 3 arch 3. Ch 4, sl st in ring st 39. Ch 4, sc in center ch of Row 3 arch 2. Ch 4, sl st in ring st 43. Ch 4, sc in center ch of Row 3 arch 1. (32 ch; 4 scallops; 4 ring sl sts; 4 anchoring sc)
Each Row 4 scallop is two 4-ch halves that meet at the ring. This pulls the lowest curves snugly onto the inside bottom of the ring, as in the photo. Ring sts 30/43 and 34/39 are mirror pairs (73 – 30 = 43, 73 – 34 = 39), so the bottom row is centered.
Fasten off and weave the tail along the chains.
Lattice totals: 16 scallops (3 + 4 + 5 + 4) and 140 ch in the arches (27 + 36 + 45 + 32).
Border
The border is one round of sl st around the outside of the ring. It tightens the edge into the rope-like texture you see in the photos and locks every lattice anchor in place.
Border gauge: One sl st per sc, worked firmly. That gives 8 sl sts = 1 in (2.5 cm), the same as the sc gauge.
Border Rnd: With the right side facing, join thread with a sl st in ring st 1. Sl st in each st around, working under both loops of each sc. Join to the first sl st. (72 sl sts)
Counts per quarter: 18 sl sts on each quarter (sts 1–18, 19–36, 37–54 and 55–72). That makes 18 x 4 = 72.
Why the math works: The border adds no stitches. It is worked one sl st into each of the 72 existing sc, so the circumference stays at 9 in (22.9 cm) and the ring stays flat. If you added stitches, the edge would ruffle. If you skipped any, it would cup and pull the scallops tight.
Don’t fasten off.
Cap
The cap is worked directly onto the top 6 border stitches, which are ring sts 70, 71, 72, 1, 2 and 3.
Setup: Sl st counter-clockwise from st 1 into sts 72, 71 and 70.
Row 1: Ch 1. Working under the top loops of the sl sts, sc in sts 70, 71, 72, 1, 2 and 3. (6 sc)
Rows 2–4: Ch 1, turn. Sc in each sc across. (6 sc each row)
The stacked sc rows make the neat vertical columns of the cap. The cap measures 0.75 in (1.9 cm) wide x 0.5 in (1.3 cm) tall.
Hanging Loop
Loop: At the end of Row 4, sl st in each of the next 3 sc. Ch 12, then sl st in the 4th sc to form a loop centered on the cap. (12-ch loop)
Cover the loop: Work 16 sc into the loop, then sl st into the cap. (16 sc)
The extra 4 sc pack the 12-ch loop solidly, giving it the same corded look as the ring. The loop stands about 0.75 in (1.9 cm) tall. Fasten off and weave the end in through the cap.
Final Blocking
- Weave in all remaining tails along the chains. Don’t trim them flush until after blocking.
- Dampen the ornament thoroughly or mist it with spray starch.
- Pin the ring into a true 3 in (7.6 cm) circle on the blocking mat. Pin at the top, bottom and both sides first, then at the four diagonals.
- Pin each lattice meeting point (the anchoring sc) so the rows are level and evenly spaced. The scallops should hang in even U-shapes, with the rows about 0.6 in (1.5 cm) apart.
- Square the cap with two pins and pin the loop straight up.
- For a stiff ornament, brush on diluted fabric stiffener and reshape.
- Let it dry completely, then unpin and trim the tails.
Final Quality-Control Checklist
- Ring has 72 sc and 72 border sl sts, and lies flat
- Outer diameter is 3 in (7.6 cm)
- Lattice rows have 3, 4, 5 and 4 scallops
- Every anchoring sc sits exactly in a center chain
- Bottom scallops are tacked at ring sts 30, 34, 39 and 43
- Cap is 6 sts x 4 rows and centered over the top
- Loop is 12 ch covered with 16 sc
- Total height is 4.25 in (10.8 cm)
- No loose tails show on the front
Troubleshooting
Ring twisted: The chain was twisted at the join. Rip back to Rnd 1 and lay the chain flat before you join.
Ring ruffles: The border is too loose or has extra stitches. Recount to 72 and work the sl sts more firmly.
Ring turns oval: The arches are too short or tight. Loosen your chain tension, or go up 0.25 mm for the lattice only.
Scallops sag or droop: The chains are too loose. Go down 0.25 mm for the lattice, or block with starch.
Lattice off-center: An anchor went into the wrong ring stitch. Check it with the mirror rule (73 – n).
Cap leans: The cap was started off-center. It must cover sts 70–3.
Loop flops: Add 1–2 more sc in the loop, or stiffen it.
Care
Hand wash in cool water with mild soap, then press the water out in a towel and pin the ornament flat to dry. Store it flat between tissue so the scallops keep their shape.
Final Notes
Everything in this ornament follows one measurement chain. A gauge of 8 sc = 1 in (2.5 cm) gives a 72-st ring that is 9 in (22.9 cm) around and 3 in (7.6 cm) across. The ring holds a 16-scallop lattice anchored by stitch number. The border adds nothing to the count, so the circle stays true. The 6-st cap and covered loop bring the total height to 4.25 in (10.8 cm).
Check each stage before moving on and your bauble will come out round, symmetrical and crisp every time. Make one, then make a whole tree’s worth.
Happy crocheting!