

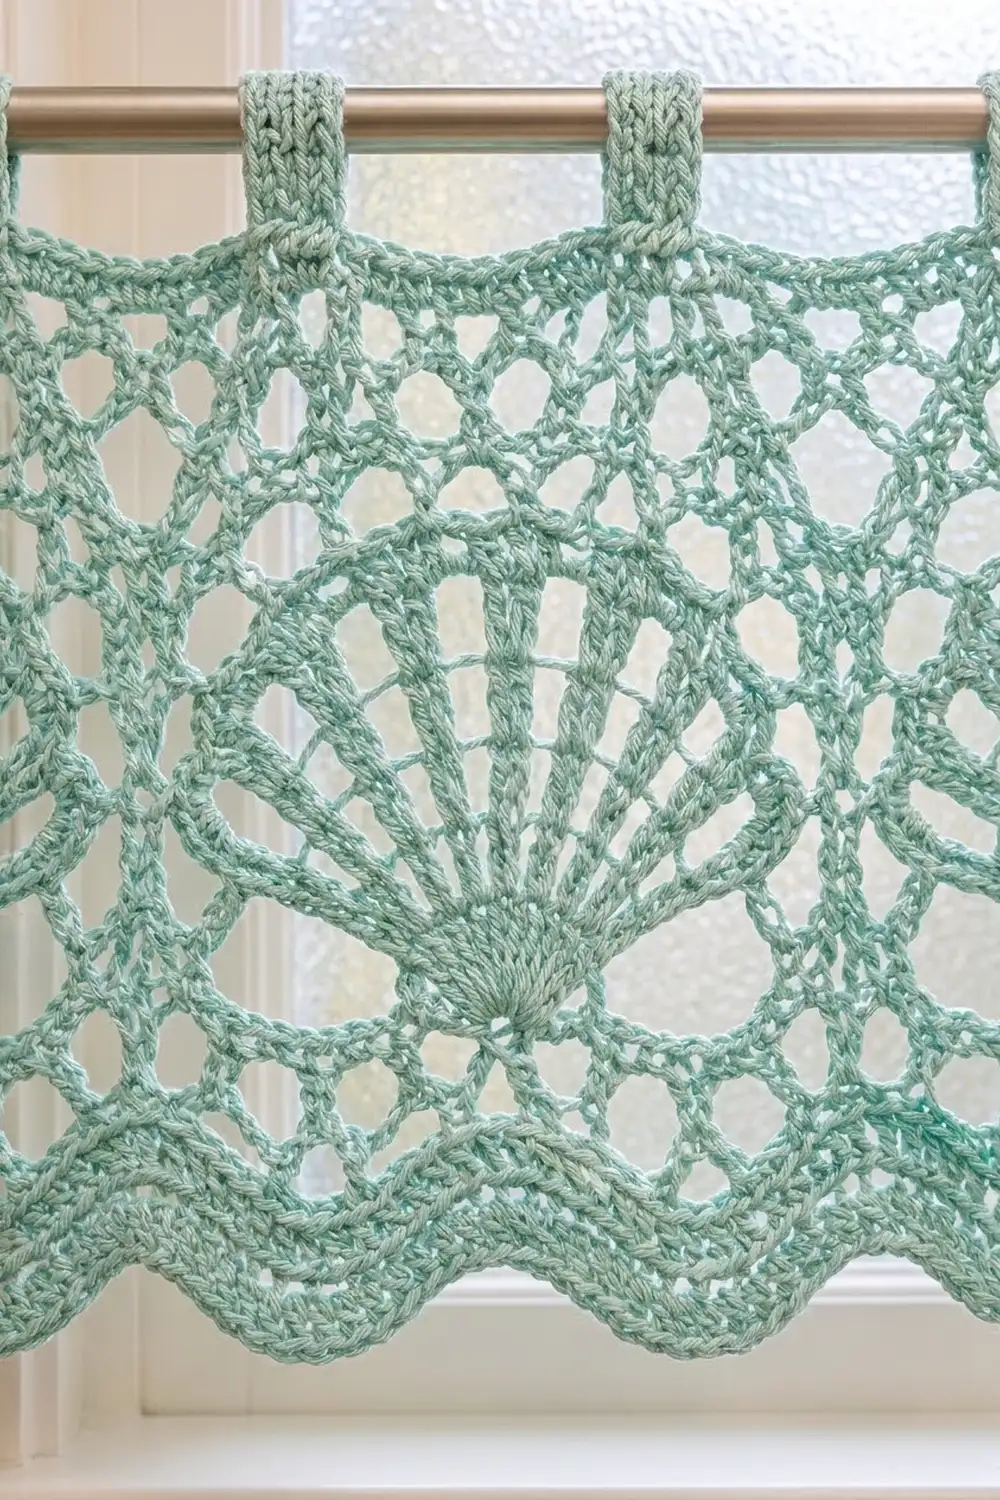
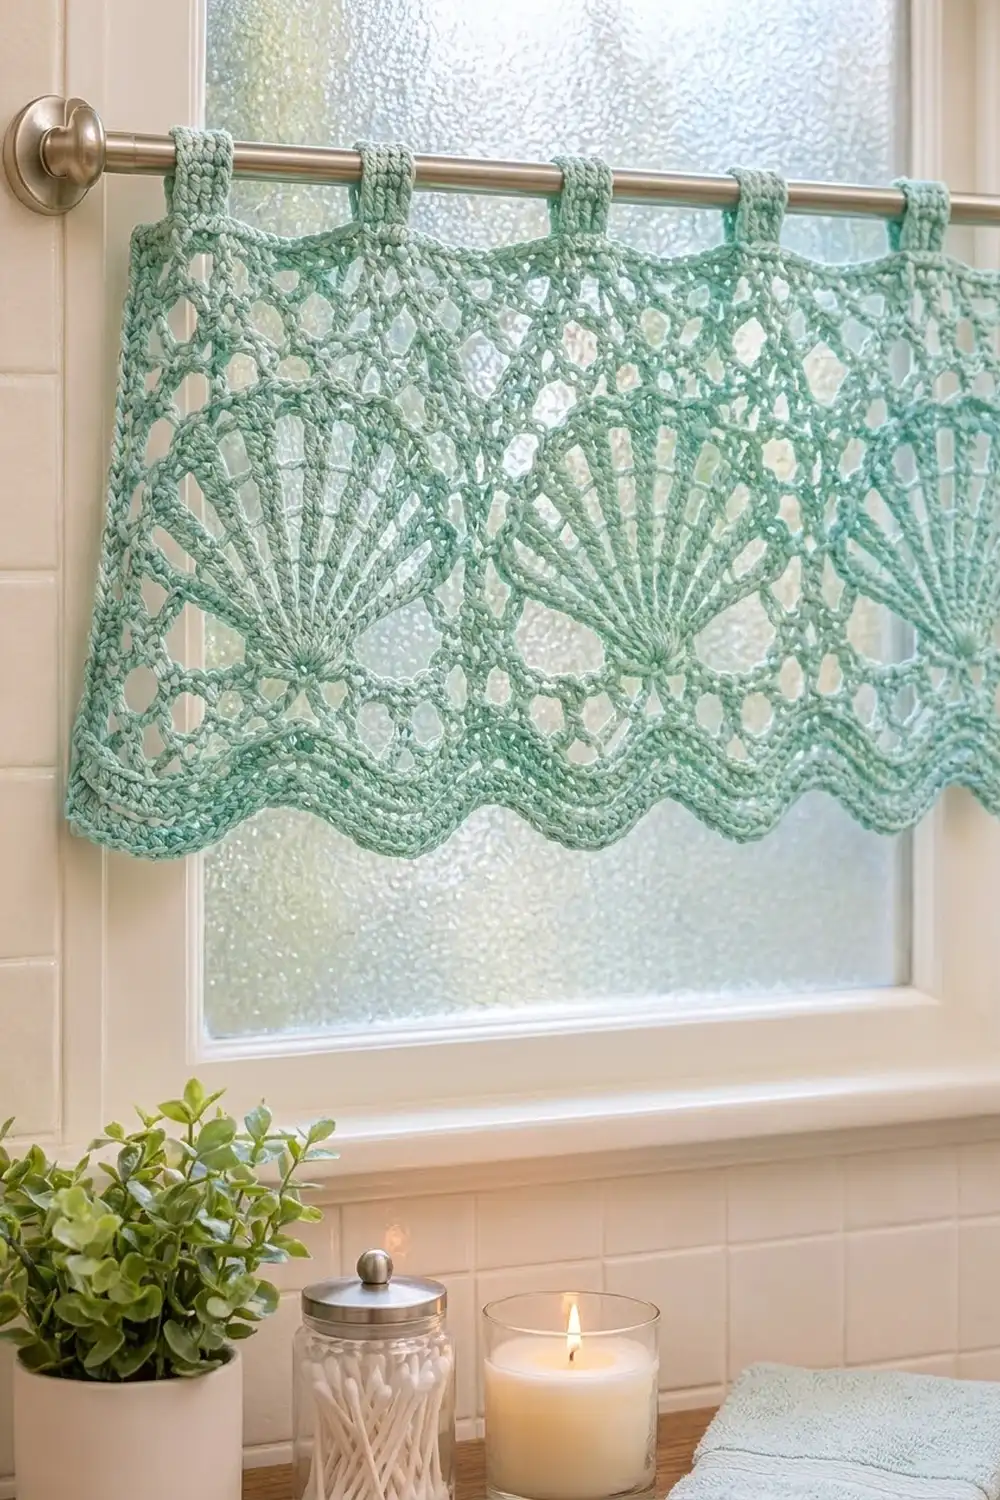
This valance brings a quiet coastal look to a bathroom or kitchen window. Three large shell fans sit in a row across the center, with an open diamond lattice above and below them. The bottom edge is a soft border of rounded waves.
It is worked in a single seafoam green, so the lace stitches carry the design. The style is light and airy, and filtered daylight still comes through it. All instructions use US crochet terms.
The finished valance measures 30.75 in (78.1 cm) wide by 12.25 in (31.1 cm) deep, not counting the tabs. The tabs rise another 1.75 in (4.4 cm) above the top edge.
You work it as one piece from the top down: a solid header, a chain-loop lattice, the fan band, a second lattice band, and a solid row. Then you add a single-crochet border all the way around, three wave rows plus a finishing row across the bottom, and six tabs worked straight off the top edge.
Finished Size and Construction
- Finished size: 30.75 in (78.1 cm) wide × 12.25 in (31.1 cm) deep, plus 1.75 in (4.4 cm) tabs
- Skill level: Intermediate
- Terminology: US
- Yarn weight: Worsted (#4) cotton
- Hook: 5.0 mm (H-8)
- Number of pieces: 1 (the tabs are worked directly onto the edge)
- Layout: three shell fans side by side, one per 40-stitch repeat
- Piece size before border: 30.25 in (76.8 cm) × 10 in (25.4 cm)
- Border depth: 0.25 in (0.6 cm) at the top and sides; 2 in (5.1 cm) at the bottom, measured to the lowest point of a scallop
Materials
Yarn: Use a smooth mercerized or combed cotton, or a cotton blend, in worsted weight. Cotton holds the fan spokes crisp and stands up to bathroom humidity. Avoid fuzzy yarns, because they blur the lattice.
- Seafoam green: 150 g, about 285 m (312 yd)
This amount includes a margin of about 15% for your swatch and differences in tension.
Tools:
– 5.0 mm (H-8) crochet hook
– Tapestry needle
– Stitch markers (at least 6)
– Rust-proof pins and a blocking surface
– Measuring tape
– Spray bottle
Abbreviations (US Terms)
- ch: chain
- sc: single crochet
- dc: double crochet
- tr: treble crochet
- sk: skip
- sp: space
- st(s): stitch(es)
- rep: repeat
- RS / WS: right side / wrong side
Special stitches
- dc2tog, dc3tog, dc4tog: [yo, insert hook in next st, yo and pull up a loop, yo and draw through 2 loops] 2, 3, or 4 times, then yo and draw through all the loops on the hook. Each one counts as 1 stitch.
- Turning chains: In this pattern, ch 3 counts as a dc and ch 4 counts as a tr.
Gauge and Checkpoints
Gauge: 16 dc and 8 dc rows = 4 in (10.2 cm). Each lattice row of ch-5 loops is about 0.5 in (1.3 cm) tall.
Test one repeat first. Before you start the full valance, make one fan as a swatch:
- Ch 43 and work Rows 1–2 as written (41 dc).
- Work Rows 3–5 (you will have 10 loops instead of 30).
- Work Row 10 (41 dc).
- Work Rows 11–15 with a single repeat.
The swatch should measure 10.25 in (26.0 cm) wide and about 6 in (15.2 cm) tall.
- If it’s too big: go down a hook size, to 4.5 mm.
- If it’s too small: go up a hook size, to 5.5 mm.
- If the width is right but the fan looks squat: pull up a taller loop on your tr stitches. Don’t change hooks for this.
Body checkpoints:
– After Row 2: 30.25 in (76.8 cm) wide, 1 in (2.5 cm) deep
– After Row 9: 4.5 in (11.4 cm) deep
– After Row 10: 5 in (12.7 cm) deep
– After Row 14: 7.5 in (19.1 cm) deep
– After Row 15: 8 in (20.3 cm) deep
– After Row 19: 10 in (25.4 cm) deep
Valance Body
Header
Row 1: Ch 123. Dc in the 4th ch from the hook (the skipped 3 ch count as a dc), then dc in each remaining ch. Turn. (121 dc)
Row 2: Ch 3, then dc in each st across, ending in the top of the turning ch. Turn. (121 dc)
Upper Lattice
Row 3 (Lattice A): Ch 1, sc in the first dc. Ch 5, sk 3 dc, sc in next dc; rep from * 29 more times. Turn. (31 sc, 30 ch-5 loops; 1 + 30 × 4 = 121 sts used)
Row 4 (Lattice B): Ch 5 (counts as a dc + ch 2), sc in the first loop. Ch 5, sc in next loop; rep from * 28 more times. Ch 2, dc in the last sc. Turn. (29 full loops + 2 half loops)
Row 5 (Lattice C): Ch 1, sc in the first dc. Ch 5, sc in next ch-5 loop; rep from * 28 more times. Ch 5, sc in the 3rd ch of the turning ch. Turn. (30 loops)
Rows 6–9: Rep Rows 4 and 5 twice. You end on a 30-loop row.
Row 10 (Solid row): Ch 3. 3 dc in next loop, dc in next sc; rep from * 29 more times. Turn. (1 + 30 × 4 = 121 dc)
Shell Fan Band
From here, the row is divided into three 40-stitch repeats, with 1 edge stitch at the start. Place a marker in every 40th stitch so the repeats stay lined up. In every fan-band row, each repeat totals exactly 40 (stitches plus chains). Every row therefore stays at 1 + 120 = 121.
Row 11 (fan opens): Ch 4 (counts as tr). Ch 3, sk 3 dc, tr in next dc. Ch 3, sk 3, tr in next. Ch 1, sk 1, tr in next. [Ch 1, sk 1, tr in next] 10 times. Ch 1, sk 1, tr in next. [Ch 3, sk 3, tr in next] twice; rep from * 2 more times. Turn.
Per repeat: 16 tr + 24 ch = 40. The 11 tr at the center are the fan spokes. The last tr of each repeat forms a column between the fans.
Row 12 (spokes close up): Ch 4. Ch 4, tr in next ch-3 sp. Ch 4, tr in next ch-3 sp. Ch 4, sk the ch-1 sp, tr in each of the 11 spoke tr (skip the ch-1 sps between them). Ch 4, sk the ch-1 sp, tr in next ch-3 sp. Ch 4, tr in next ch-3 sp. Ch 4, tr in the column tr; rep from * 2 more times. Turn.
Per repeat: 16 tr + 24 ch = 40.
Row 13 (fan narrows): Ch 3. Ch 5, dc in next ch-4 sp. Ch 5, dc in next ch-4 sp. Ch 6, sk next ch-4 sp. Dc4tog over the next 4 tr, dc3tog over the next 3 tr, dc4tog over the next 4 tr. Ch 6, sk next ch-4 sp, dc in next ch-4 sp. Ch 5, dc in next ch-4 sp. Ch 5, dc in the column tr; rep from * 2 more times. Turn.
Per repeat: 8 sts + 32 ch = 40.
Row 14 (fan point): Ch 3. Ch 5, dc in next ch-5 sp. Ch 6, dc in next ch-5 sp. Ch 6, sk the ch-6 sp, dc3tog over the 3 clusters. Ch 6, sk the ch-6 sp, dc in next ch-5 sp. Ch 6, dc in next ch-5 sp. Ch 5, dc in the column dc; rep from * 2 more times. Turn.
Per repeat: 6 sts + 34 ch = 40. The 11 spokes now meet in one point at the bottom of each fan.
Row 15: Ch 3, then dc in each ch and each st across. Work into the chains themselves, not around them. Turn. (1 + 3 × 40 = 121 dc)
The fan band now measures 2.5 in (6.4 cm) from Row 11 through Row 14.
Lower Lattice
Row 16: Work as Row 3. (30 loops)
Row 17: Work as Row 4.
Row 18: Work as Row 5. (30 loops)
Row 19: Work as Row 10. (121 dc) Don’t fasten off.
Size checkpoint: 30.25 in × 10 in (76.8 cm × 25.4 cm).
Border
The border has the same gauge as the body: 4 sc per inch along every edge.
Round 1 (sc frame): Turn so the RS is facing. Work the corner first: 3 sc in the last st of Row 19. Then continue around:
- Side: Work 40 sc evenly up the side edge. That is 2 sc per dc row and per lattice row, and 3 sc per tr row: 4 + 14 + 2 + 6 + 4 + 2 + 6 + 2 = 40.
- Top corner: 3 sc in the base of the first foundation ch.
- Top: 1 sc in each of the next 119 foundation chs.
- Top corner: 3 sc in the last foundation ch.
- Side: 40 sc down the second side.
- Bottom corner: 3 sc in the first st of Row 19.
- Bottom: 1 sc in each of the next 119 sts.
Sl st to the first sc to join.
Count check for Round 1: Each corner group has 3 sc, and the center sc of each group is the corner stitch.
- Top and bottom: 1 corner + 1 + 119 + 1 + 1 corner = 123 sc each, including both corners.
- Each side: 1 corner + 1 + 40 + 1 + 1 corner = 44 sc, including both corners.
- Total: 123 + 123 + 44 + 44 − 4 shared corners = 330 sc. Fasten off.
The bottom edge has 121 sc between its two corner stitches. Those 121 sts line up exactly with the 121 sts of Row 19.
Wave Rows 2–4: With the RS facing, join the yarn in the first sc after the bottom-left corner sc. Each wave row is worked across those 121 bottom sts only.
Each wave row: Ch 2, dc in next st (counts as dc2tog: half valley). Dc in next 7 sts, 2 dc in next st, dc in next st, 2 dc in next st, dc in next 7 sts (lobe). Dc3tog (valley); rep from * 4 more times. Work 1 more lobe. Dc2tog over the last 2 sts. Turn.
Count per wave row:
– Stitches used: 2 + (6 × 17) + (5 × 3) + 2 = 121.
– Stitches made: 1 + (6 × 19) + 5 + 1 = 121.
Why the math works:
– Each lobe adds 2 stitches.
– Each valley takes away 2 stitches.
– Each edge dc2tog takes away 1 stitch.
So the total is 12 − 10 − 2 = 0. The count stays at 121, while the paired increases and decreases push the fabric into six rounded scallops, each 5 in (12.7 cm) wide. The row is symmetrical, so every valley sits directly over the valley below it on every row. The valleys fall below the fan points and between the fans.
Row 5: Ch 1, sc in each st across. Fasten off. (121 sc)
Tabs
Tabs are worked into the 121 top sts between the top corner sc. Mark tab positions at sts 1–6, 24–29, 47–52, 70–75, 93–98, and 116–121. That gives 6 tabs of 6 sts each, with 5 even gaps of 17 sts (4.25 in / 10.8 cm).
Row 1: With the RS facing, join the yarn in the first marked st. Ch 1, then sc in the same st and in the next 5 sts. Turn. (6 sc)
Rows 2–16: Ch 1, sc in each st. Turn. (6 sc)
The strip should measure 4 in (10.2 cm) long. Add or remove rows to reach that length. Fasten off, leaving a 10 in (25.4 cm) tail.
Fold the tab to the WS and whipstitch its last row across the back of the header, 0.5 in (1.3 cm) below the top edge. Each loop rises 1.75 in (4.4 cm) above the top edge and fits a rod up to 1 in (2.5 cm) across.
Final Blocking
- Weave in all the ends, following the solid rows so they stay hidden.
- Soak the valance in cool water for 15 minutes. Press the water out in a towel without wringing.
- Pin the top edge straight to 30.75 in (78.1 cm).
- Pin both sides to 12.25 in (31.1 cm), squaring the corners.
- Pin each lattice loop open into a diamond.
- Smooth each fan’s spokes so they run straight from the point, and pin the point.
- Pin each scallop at its lowest point, spacing them 5 in (12.7 cm) apart.
- Let it dry completely before you unpin it.
Final Quality-Control Checklist
- Rows 1, 2, 10, 15, and 19 each have 121 dc.
- Every lattice A or C row has 30 loops.
- Each fan has 11 spokes that meet in one point.
- Border Round 1 has 330 sc: 123 on top, 123 on the bottom, and 44 on each side, corners included.
- Each wave row has 121 sts and 6 lobes.
- The 6 tabs are evenly spaced and have equal loop height.
- The blocked size is 30.75 × 12.25 in (78.1 × 31.1 cm).
Troubleshooting
- The fan leans to one side. Count the chains on both sides of the spokes in Rows 11–14. Each side must match.
- The edges ripple. The side sc count is too high. Work exactly 40 sc per side.
- The lattice looks squashed. Your chains are tight. Make them looser, or ch 6 and then ch 4 in alternating rows.
- The waves drift sideways. A lobe is miscounted. Each valley must sit over the valley below it.
- The top edge flares. You have more than 119 sc between the top corners. Rework the edge.
- The tabs don’t match. Count the rows, not the length.
Care
Hand wash cool, then reshape and dry flat. If needed, press lightly with a steam iron through a cloth while it’s still slightly damp.
Final Notes
The measurements build on each other in this order:
- Row 1 sets 121 sts, or 30.25 in (76.8 cm).
- Three 40-st repeats place the three fans.
- The body finishes at 10 in (25.4 cm) deep.
- The sc frame brings the width to 30.75 in (78.1 cm).
- The wave rows bring the depth to 12.25 in (31.1 cm).
Check your gauge at each step, and the valance will fit your rod.
Happy crocheting!