

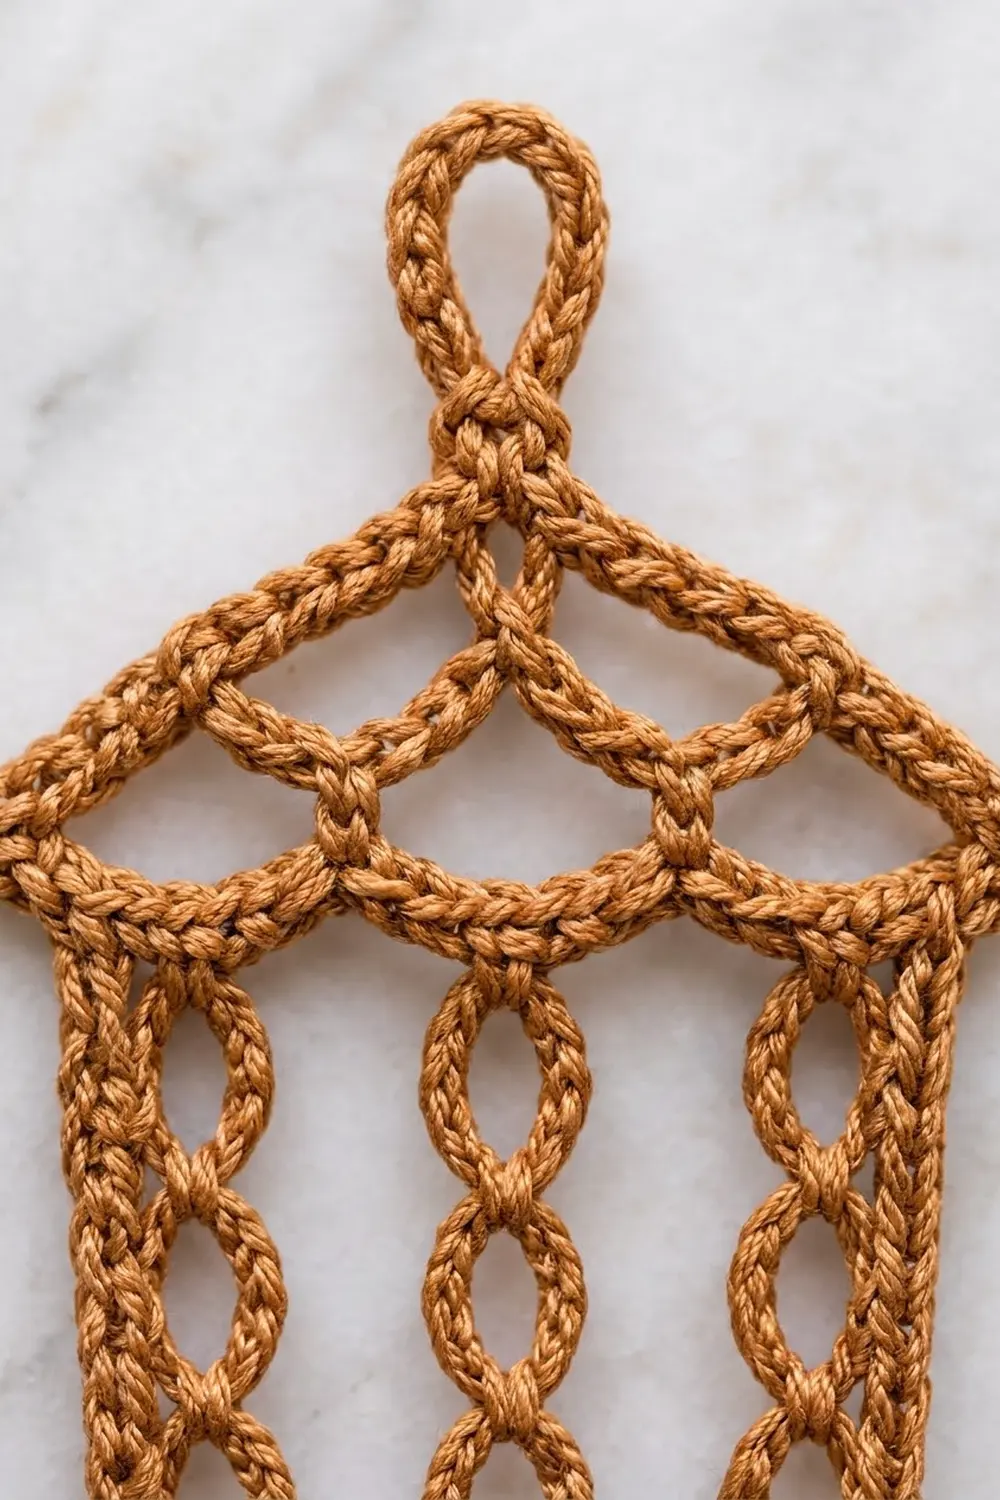
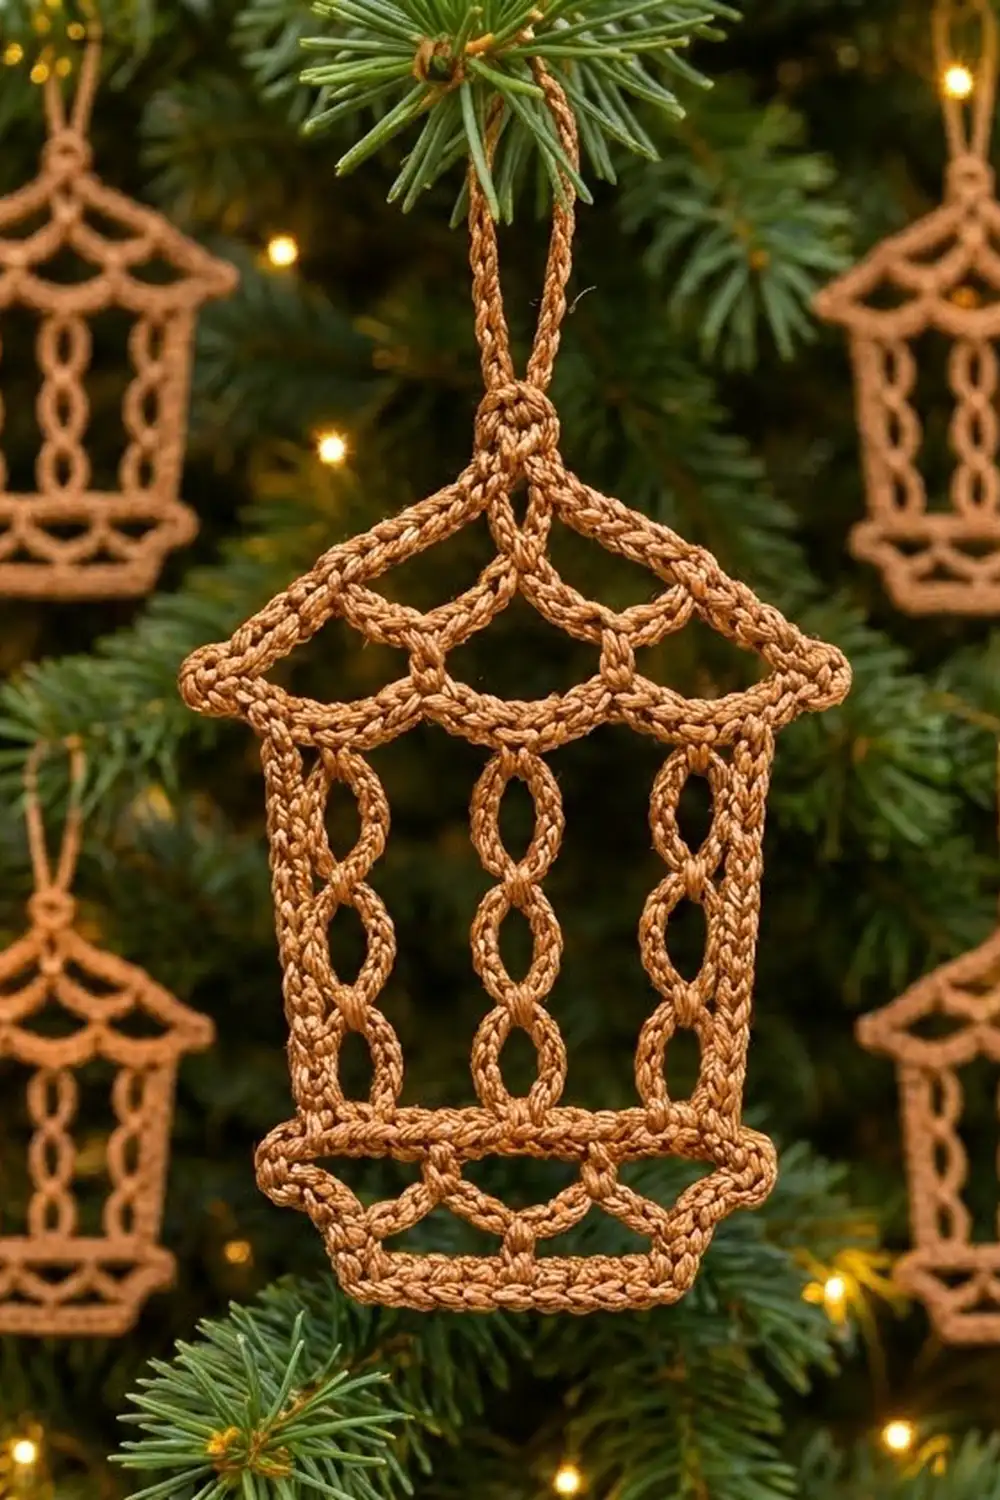
The Copper Glow Lantern is a small, lacy hanging ornament shaped like an old-fashioned street lantern. Every line in it is a firm cord, so the shape stays crisp, and the open panels let the tree lights show through.
It is worked in one warm copper thread. It looks like a cutout or filigree ornament, but the texture is clearly crochet. The roof and the base have matching scallops, and the three center columns are made of linked ovals that twist like a cable.
This pattern uses US crochet terms. The finished ornament measures 3.4 in (8.6 cm) wide and 4.0 in (10.2 cm) tall without the loop, or 5.0 in (12.7 cm) tall with the hanging loop.
Construction is simple once you see the plan. You crochet two closed frame rings, one for the base and one for the roof, and add scallops inside each. Next you connect the two frames with side bars and twisted link columns. Last come the hanging loop and a slip-stitch outline that neatens the outer edge.
Finished Size and Construction
- Finished size: 3.4 in (8.6 cm) wide x 4.0 in (10.2 cm) tall; 5.0 in (12.7 cm) tall with loop
- Skill level: Intermediate
- Terminology: US crochet terms
- Yarn weight: Size 3 cotton crochet thread (Lace / 0)
- Hook: 2.0 mm
- Number of pieces: 1 finished piece (two frame rings joined by the body bars as you go)
- Layout: roof frame on top, open body in the middle, base frame at the bottom
- Piece size before border: 3.3 in (8.4 cm) wide x 3.9 in (9.9 cm) tall, without loop
- Border depth: about 0.05 in (0.1 cm) per edge, one slip-stitch round
Materials
Yarn: Use a mercerized cotton crochet thread in size 3. Mercerized cotton holds a sharp outline, blocks well, and has a soft sheen like the copper look in the photos. Avoid fuzzy or very stretchy fibers, because the cords will droop.
- Copper (caramel/light brown): 8 g, about 22 m (24 yd)
Tools:
– 2.0 mm crochet hook
– Tapestry needle
– 4 locking stitch markers
– Scissors
– Blocking board or foam mat
– Rustproof pins
– Spray bottle with water
– Optional: fabric stiffener
The quantity above includes about a 25% margin for your gauge swatch and weaving in ends.
Abbreviations (US Terms)
- ch – chain
- sc – single crochet
- sl st – slip stitch
- st(s) – stitch(es)
- sp – space
- pm – place marker
- RS – right side
Special technique – Link Column: Two cords that cross each other at three points to make four ovals. Strand 1 is a straight sc cord. Strand 2 is a chain that you slip-stitch to Strand 1 at each crossing point, passing it to the opposite side each time, and then you cover it with sc. Full steps are in Section 5.
Gauge and Checkpoints
Gauge: 10 sc = 1 in (2.5 cm) along an sc-covered chain cord. A finished cord is about 0.1 in (0.3 cm) thick.
Test first: Chain 21 and work 1 sc in each ch from the 2nd ch from the hook: 20 sc. Measure the cord without stretching it. It should measure 2.0 in (5.1 cm).
Checkpoints:
– After Section 1: the ledge is 3.3 in (8.4 cm) and the bottom bar is about 2.5 in (6.4 cm).
– After Section 3: the eave bar is 3.3 in (8.4 cm) and the roof is 1.0 in (2.5 cm) from eave to peak.
– After Section 5: the body bars are 2.3 in (5.8 cm) between ledge and eave.
– Before the border: 3.3 in (8.4 cm) x 3.9 in (9.9 cm).
Too big? Go down 0.25 mm in hook size, or chain more tightly. Too small? Go up 0.25 mm. Since every line is a cord, a gauge that is off will change the whole outline, so fix it before you start.
Section 1: Base Frame
The base frame is one ring with four segments. The ledge is on top, then the right slanted side, then the bottom bar, then the left slanted side.
Foundation: Ch 70, then sl st to the 1st ch to form a ring. Do not twist it.
Count the chains in segments: 33 ch for the ledge (both of its corner ch included), 6 ch for the right side, 25 ch for the bottom bar (both corners included), and 6 ch for the left side. 33 + 6 + 25 + 6 = 70.
Round 1: Ch 1, sc in each ch around, sl st to the 1st sc. (70 sc)
Lay the ring flat. Shape it so the ledge is a straight bar on top, the bottom bar is straight and centered under it, and each 6-st side slants inward. Pm in the 1st and 33rd sts of the ledge. Number the ledge sts 1 to 33 from left to right with the RS facing you. Fasten off.
Section 2: Base Swags
These four swags hang from the underside of the ledge, inside the base.
Row 1: Join thread with a sl st in ledge st 1 (lower edge). Ch 10, skip 7 sts, sl st in the next st; repeat from * 3 more times. You will sl st in sts 9, 17, 25, and 33. (4 ch-10 swags)*
Row 2 (cover): Do not turn. Work 12 sc in each ch-10 sp back across, then sl st in ledge st 1. (48 sc; 12 per swag)
Each swag dips about 0.4 in (1.0 cm) and rests on the bottom bar. Fasten off.
Section 3: Roof Frame
Foundation: Ch 70, then sl st to the 1st ch to form a ring.
Segments: 33 ch for the eave bar (corners included), 18 ch for the right slope, 1 ch for the peak, and 18 ch for the left slope. 33 + 18 + 1 + 18 = 70.
Round 1: Ch 1, sc in each ch around, sl st to the 1st sc. (70 sc)
Shape it into a triangle. The eave bar is the flat bottom edge and the peak st is centered 1.0 in (2.5 cm) above it. Pm in the peak st. Number the eave sts 1 to 33 from left to right. Fasten off.
Section 4: Roof Arches
The four arches stand on the top edge of the eave bar, inside the roof.
Row 1: Join with a sl st in eave st 1 (upper edge). Ch 10, skip 7 sts, sl st in the next st; repeat from * 3 more times, ending in st 33. (4 ch-10 arches)*
Row 2 (cover): Work 12 sc in each ch-10 sp, then sl st in eave st 1. (48 sc)
The outer two arches rest against the slopes. For a firmer piece, when you work the 6th sc of each outer arch, put the hook through the nearest slope st too. Fasten off.
Section 5: Body Bars and Link Columns
Place the base frame below the roof frame, with the ledge and the eave bar lined up and 2.3 in (5.8 cm) apart. Every bar rises from the top edge of the ledge and joins the lower edge of the eave bar at the same st number.
Bar positions: 5, 11, 17, 23, 29. That is 4 open panels, 6 sts each (5 to 11, 11 to 17, 17 to 23, 23 to 29), with 4 sts of overhang on each end of the ledge and eave (sts 1–4 and 30–33).
Left side bar: Join with a sl st in ledge st 5. Ch 23, then sl st in eave st 5. Working back down the chain, sc in each ch: (23 sc). Sl st in ledge st 5.
Move: Sl st in each ledge st from 6 to 11. (6 sl st)
Link Column at st 11:
1. Strand 1 up: Ch 23, then sl st in eave st 11. Ch 6, ch 12, and ch 18 (counted from the bottom) are the crossing points.
2. Strand 1 down: Sc in each ch down. (23 sc) Pm in sc 6, sc 12, and sc 18 counted from the bottom. Sl st in ledge st 11.
3. Strand 2 up: Ch 7, pass the chain to the left of Strand 1, then sl st in the marked sc 6. Ch 7, pass to the right, then sl st in sc 12. Ch 7, pass to the left, then sl st in sc 18. Ch 7, pass to the right, then sl st in eave st 11. (4 ch-7 sps)
4. Strand 2 down: Work 9 sc in each ch-7 sp. (36 sc) Sl st in ledge st 11.
Strand 2 has 9 sc for each 5-st gap on Strand 1, so it bows out. Because it switches sides at every crossing, you get four linked ovals that look twisted.
Move: Sl st in sts 12 to 17. (6 sl st) Work a Link Column at st 17.
Move: Sl st in sts 18 to 23. (6 sl st) Work a Link Column at st 23.
Move: Sl st in sts 24 to 29. (6 sl st)
Right side bar: Ch 23, then sl st in eave st 29. Sc in each ch down. (23 sc) Sl st in ledge st 29. Fasten off.
Checkpoint: All five bars measure 2.3 in (5.8 cm), and the piece measures 3.3 in (8.4 cm) x 3.9 in (9.9 cm).
Section 6: Hanging Loop
Join with a sl st in the peak st. Ch 20, give the chain one half twist, and sl st in the same peak st. Work 26 sc into the loop and sl st in the peak st. Fasten off and leave a 6 in (15.2 cm) tail.
Pinch the loop where it crosses so it makes a teardrop about 1.0 in (2.5 cm) tall. Wrap the tail around the crossing twice, then weave it in.
Border: Slip-Stitch Outline
Border gauge: 10 sl st = 1 in (2.5 cm), the same as the cords, because you work 1 sl st into each existing outer st.
Round 1: With the RS facing, join at the left corner of the bottom bar. Work 1 sl st through both loops of each outer-edge st around the whole outline:
- Bottom bar: 25
- Right base side: 6
- Right ledge overhang (sts 33 to 30): 4
- Right side bar (outer edge): 23
- Right eave overhang (sts 30 to 33): 4
- Right slope: 18
- Peak (behind the loop): 1
- Left slope: 18
- Left eave overhang (sts 4 to 1): 4
- Left side bar (outer edge): 23
- Left ledge overhang (sts 1 to 4): 4
- Left base side: 6
Total: 136 sl st. Join with a sl st to the 1st sl st and fasten off.
Why the math works: Every count is exactly 1 sl st per existing st. The corners were already shaped by the frame chains, so you add no extra stitches. The edge does not ruffle or cup; it only gets slightly firmer and adds about 0.05 in (0.1 cm) per edge. That brings the size from 3.3 in x 3.9 in (8.4 cm x 9.9 cm) to 3.4 in x 4.0 in (8.6 cm x 10.2 cm).
Final Blocking
- Weave in all the ends along the cords. Do not cross any open spaces.
- Wet the ornament, or soak it in fabric stiffener if you want it extra firm. Press out the extra water with a towel.
- Lay it RS up on the board. Pin the bottom bar straight first, then the ledge, centered above it.
- Pin the eave bar parallel to the ledge, 2.3 in (5.8 cm) above it. Check that all five body bars are straight up and down.
- Pin the peak 1.0 in (2.5 cm) above the eave bar, so both slopes are straight.
- Pin each oval in the link columns open evenly, with the crossings in a straight vertical line.
- Shape each roof arch and base swag into a smooth, even curve.
- Leave it to dry fully, then remove the pins. Check that it measures 3.4 in (8.6 cm) x 4.0 in (10.2 cm).
Final Quality-Control Checklist
- Base and roof frames each have 70 sc.
- Each swag and arch has 12 sc, and they are evenly spaced.
- All five bars attach at sts 5, 11, 17, 23, and 29 on both the ledge and the eave.
- Each link column has 23 sc + 36 sc, and the ovals switch sides.
- The border has 136 sl st, and the edge lies flat.
- The loop is centered over the peak and its twist is secure.
- All ends are hidden inside the cords.
Troubleshooting
The lantern leans to one side. One body bar is attached at the wrong st. Count the attachment points again from st 1.
The ovals look flat or bunched. Strand 2 was not passed to alternating sides. Undo it back to the first crossing and redo it.
The ledge or eave bar is bowing. The body bars are too tight. Check your gauge or loosen your chains a little.
The swags pull the ledge downward. Your ch-10 is too tight. Chain more loosely, or use 11 sc to cover each swag.
The border is wavy. You worked 2 sl st into some sts. Keep it at 1 per st.
The piece is floppy. Block it again with fabric stiffener.
Care
Hand wash in cool water, press out the water gently, and dry flat with pins to reshape. Store it flat in tissue so the ovals and arches keep their shape.
Final Notes
The measurement chain is short and easy to check. 10 sc to the inch gives a 33-st ledge and eave of 3.3 in (8.4 cm). Body bars of 23 sts make a body 2.3 in (5.8 cm) tall. Together with the 1.0 in (2.5 cm) roof and the base frame, the piece measures 3.9 in (9.9 cm) before the border. The 136-st slip-stitch outline finishes it at 3.4 in x 4.0 in (8.6 cm x 10.2 cm), and the loop brings the total height to 5.0 in (12.7 cm). If you match each checkpoint, every lantern you make will hang identically on the tree.
Happy crocheting!