

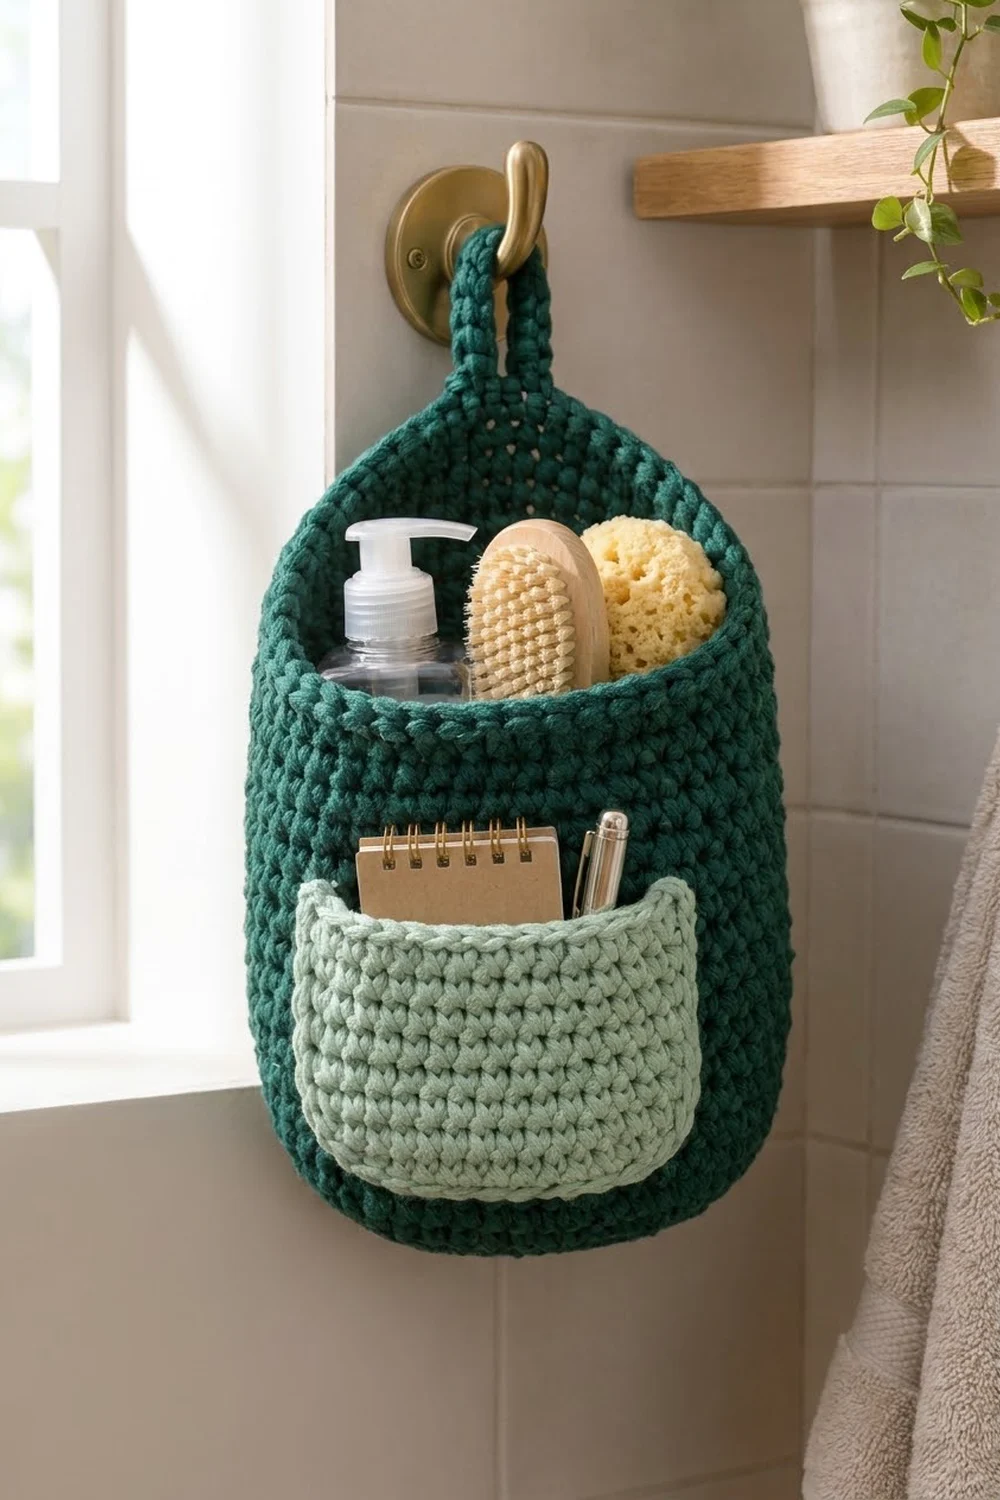
The Evergreen Pocket Hanging Wall Basket is a sturdy storage pouch that hangs on a hook. It has a deep forest green body and a sage green pocket on the front. The main basket is good for bottles, brushes and sponges. The pocket fits a small notebook, a pen or a few hair ties.
The look is simple and modern. Tight single crochet gives the basket a crisp, pebbly texture, and the paler pocket stands out clearly against the dark green. The finished basket keeps its shape on the wall but still feels soft in your hand.
This pattern uses US crochet terms. The finished basket is 8 in (20.3 cm) wide when laid flat and 10 in (25.4 cm) tall. The hanging loop adds 2.25 in (5.7 cm), for a total hanging length of 12.25 in (31.1 cm).
Construction is straightforward. You work an oval base in joined rounds and then work the body even, with no increases, so the bottom curves gently upward. Two border rounds finish the rim, and the hanging loop is worked into the last round. You crochet the pocket flat in rows, edge it, and sew it to the front.
Finished Size and Construction
- Finished size: 8 in (20.3 cm) wide when laid flat x 10 in (25.4 cm) tall, plus a 2.25 in (5.7 cm) loop
- Skill level: Easy
- Terminology: US crochet terms
- Yarn weight: Bulky (#5)
- Hook: 6.0 mm (US J-10)
- Number of pieces: 2 (basket body and pocket), sewn together
- Layout: One basket with one pocket centered on the front
- Base size: 6.25 in x 3.25 in (15.9 cm x 8.3 cm)
- Pocket size: 5.5 in x 4 in (14.0 cm x 10.2 cm) after edging
- Size before border: 8 in (20.3 cm) wide x 9.5 in (24.1 cm) tall
- Border depth: about 0.5 in (1.3 cm)
Materials
Use a smooth bulky cotton or cotton-blend yarn. Cotton holds its shape well and handles damp items in a bathroom. Avoid fuzzy or very stretchy yarns, because they make the basket sag when it’s loaded.
- Color A, forest green: 150 g, about 165 m (180 yd)
- Color B, sage green: 30 g, about 33 m (36 yd)
Tools:
- 6.0 mm (US J-10) crochet hook
- 4 locking stitch markers
- Tapestry needle
- Scissors
- Straight pins
- Tape measure
- Spray bottle and blocking pins
The yarn amounts include a margin of about 15% for your gauge swatch and small differences in tension.
Abbreviations (US Terms)
- ch – chain
- sc – single crochet
- sl st – slip stitch
- st(s) – stitch(es)
- rnd(s) – round(s)
- 2 sc in next – increase: work 2 sc in the same stitch
- ( ) x N – repeat the steps in parentheses N times
Special technique – covered loop: Work single crochet stitches into a chain loop, not into individual chains, so they pack tightly side by side and completely hide the chain.
Gauge and Checkpoints
Gauge: 12 sc and 13 rounds = 4 in (10.2 cm) in single crochet worked in rounds with Color A.
This gauge is firm on purpose. Bulky yarn worked this tightly makes a fabric that stands up on its own. Make the base first and treat it as your test piece.
Checkpoints:
- After Rnd 5 (base): 6.25 in x 3.25 in (15.9 cm x 8.3 cm), with 48 sts.
- After Rnd 15: about 4.75 in (12.1 cm) from the bottom fold, measured flat. Width is 8 in (20.3 cm).
- After Rnd 31 (before border): 8 in (20.3 cm) wide x 9.5 in (24.1 cm) tall.
- Pocket after Row 12: 5 in (12.7 cm) wide x 3.75 in (9.5 cm) tall.
- Pocket after edging: 5.5 in x 4 in (14.0 cm x 10.2 cm).
If your base is too big, go down one hook size and start again. If it’s too small, go up one hook size. Don’t change the stitch counts. Every placement in this pattern depends on the 48-stitch round.
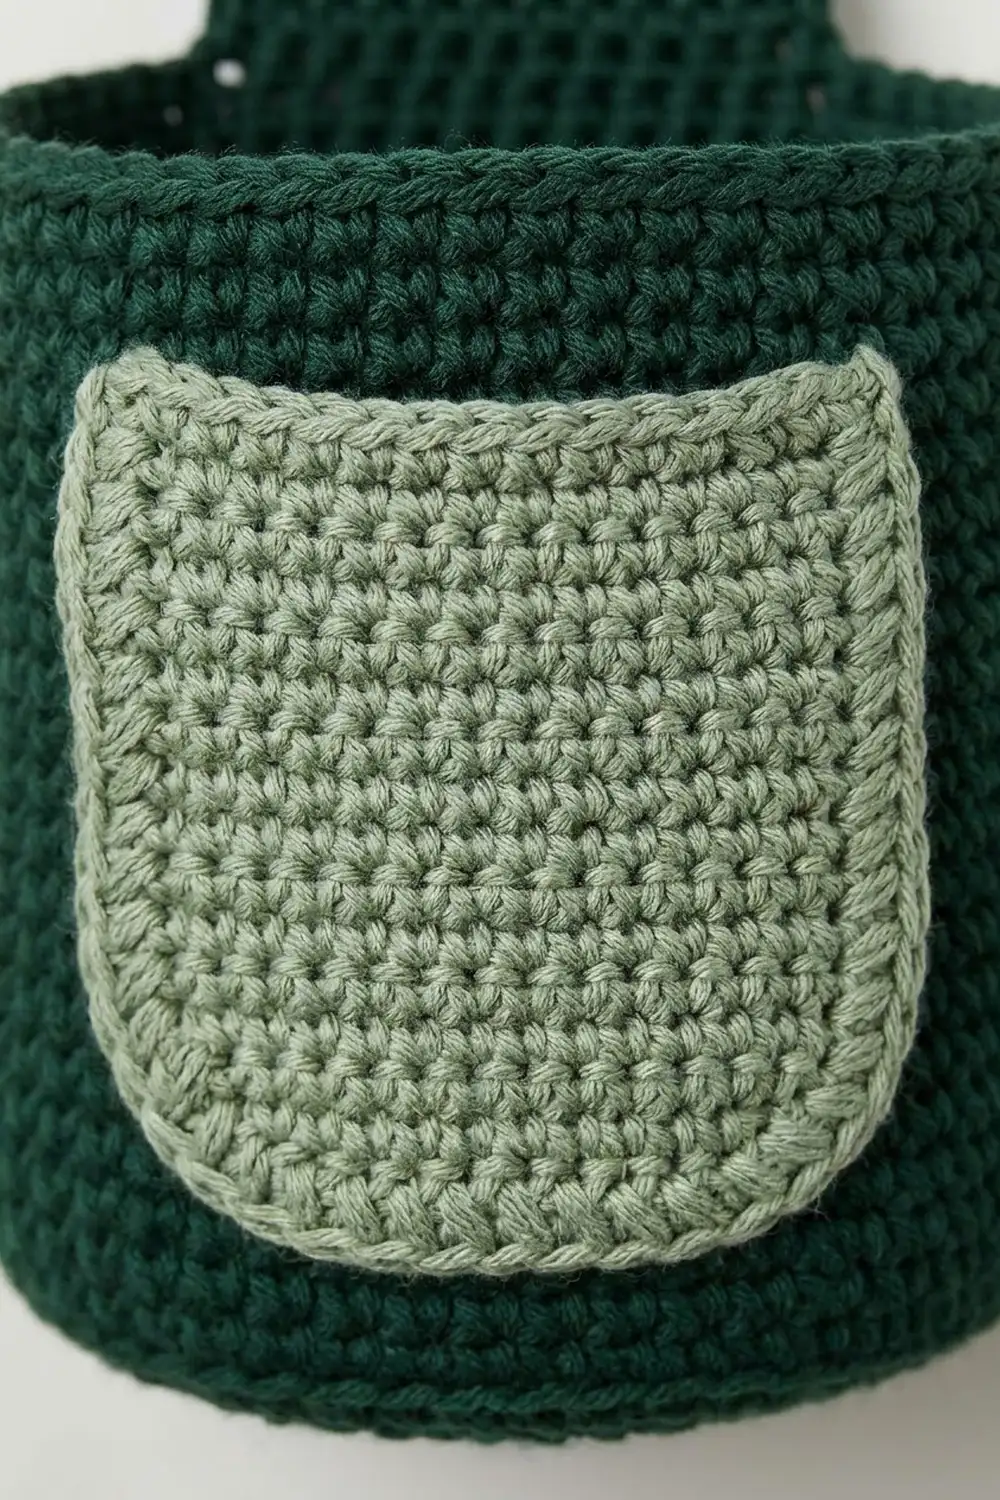
Basket Base
Use Color A. You’ll work in joined rounds. The beginning ch 1 never counts as a stitch. The join sits at one narrow end of the oval, which becomes a side seam.
Foundation: Ch 12.
Rnd 1: Sc in 2nd ch from hook, sc in next 9 ch, 3 sc in last ch. Rotate the work and continue along the opposite side of the foundation chain: sc in next 9 ch, 2 sc in the same ch as the first sc. Join with sl st to the first sc. (24 sts)
The stitches in each round fall into four sections: a narrow end at the join, straight side 1, the far narrow end, and straight side 2.
Rnd 2: Ch 1, 2 sc in next, sc in next 9, (2 sc in next) x 3, sc in next 9, (2 sc in next) x 2. Join. (30 sts)
Rnd 3: Ch 1, sc in next, 2 sc in next, sc in next 9, (sc in next, 2 sc in next) x 3, sc in next 9, (sc in next, 2 sc in next) x 2. Join. (36 sts)
Rnd 4: Ch 1, sc in next 2, 2 sc in next, sc in next 9, (sc in next 2, 2 sc in next) x 3, sc in next 9, (sc in next 2, 2 sc in next) x 2. Join. (42 sts)
Rnd 5: Ch 1, sc in next 3, 2 sc in next, sc in next 9, (sc in next 3, 2 sc in next) x 3, sc in next 9, (sc in next 3, 2 sc in next) x 2. Join. (48 sts)
The final layout is 15 stitches at each narrow end and 9 stitches along each straight side. Each round added exactly 6 stitches, 3 at each end, so the straight sides stay at 9 stitches and the oval stays flat.
Place markers in Rnd 5:
– Stitch 10 = center front (middle of straight side 1)
– Stitch 34 = center back (middle of straight side 2)
Check that the base lies flat and measures 6.25 in x 3.25 in (15.9 cm x 8.3 cm).
Basket Body
Rnds 6–31: Ch 1, sc in each st around. Join. (48 sts each round)
That’s 26 rounds with no increases. Because the body has the same stitch count as the base, the edges of the base curl up into the soft, rounded bottom you see on the finished basket. There’s no sharp corner and no back-loop ridge.
Move the center front and center back markers up every few rounds so they stay aligned. Each half of the basket (front or back) is 24 stitches: 9 straight stitches plus half of each 15-stitch end (7.5 + 7.5). At 3 sc per inch, 24 stitches = 8 in (20.3 cm) of flat width.
Checkpoint after Rnd 15: about 4.75 in (12.1 cm) tall from the fold. After Rnd 31: 9.5 in (24.1 cm) tall. That height comes from 26 body rounds, about 8 in (20.3 cm), plus about 1.5 in (3.8 cm) of curved base.
Border and Hanging Loop
Border gauge: Work at the same tension as the body, 3 sc per inch. The border rounds add height but no width.
Rnd 32: Ch 1, sc in each st around. Join. (48 sc: 24 on the front and 24 on the back)
Rnd 33 (rim and loop): Ch 1. Work a loose sl st in each of sts 1–33 (33 sl sts). Sl st in st 34, the center back. Ch 16, then sl st in the same st 34 to close the loop. Work 26 sc into the ch-16 loop to cover it completely, then sl st in st 34 again to anchor it. Sl st in each of sts 35–48 (14 sl sts). Join to the first sl st and fasten off.
Rim count: 33 + 1 + 14 = 48 sl sts, the same as the 48 sts of the round below. The loop’s 26 sc sit on top of the rim and aren’t part of the rim count.
Why the math works: The border has 48 stitches, worked one into each stitch, just like the body. So the rim keeps its 16 in (40.6 cm) circumference and the basket stays 8 in (20.3 cm) wide when flat. The sc round firms up the edge, and the sl st round locks it in place so the rim won’t flare. The two rounds together add about 0.5 in (1.3 cm), which brings the height to 10 in (25.4 cm).
The covered loop hangs about 2.25 in (5.7 cm) above the rim. Weave in the ends securely at the base of the loop, because that point carries the weight of everything in the basket.
Use Color B. Work flat in rows, starting at the bottom edge. The beginning ch 1 doesn’t count as a stitch.
Foundation: Ch 12.
Row 1: Sc in 2nd ch from hook and in each ch across. (11 sts)
Row 2: Ch 1, turn. 2 sc in first st, sc in next 9, 2 sc in last st. (13 sts)
Row 3: Ch 1, turn. 2 sc in first st, sc in next 11, 2 sc in last st. (15 sts)
Rows 1–3 form the rounded bottom corners.
Rows 4–12: Ch 1, turn. Sc in each st across. (15 sts each row)
Checkpoint: 5 in (12.7 cm) wide x 3.75 in (9.5 cm) tall.
Edging: Don’t turn. Ch 1 and rotate the work so you’re working down the side.
– Side 1: Work 12 sc evenly down the side, one in the end of each row. (12 sts)
– Bottom: Working into the 11 free loops of the foundation chain, work 2 sc in the first loop, sc in the next 9 loops, and 2 sc in the last loop. (13 sts)
– Side 2: Work 12 sc up the other side, one in the end of each row. (12 sts)
– Top: Sl st in each of the 15 sts of Row 12. (15 sl sts)
Join to the first edging sc. (37 sc + 15 sl sts = 52 sts)
The 2-sc corners at the bottom continue the curve from Rows 1–3. The sl st top edge keeps the pocket opening firm, so it won’t stretch out of shape.
Fasten off, leaving a 24 in (61.0 cm) tail for sewing. Steam lightly or pin and mist until the pocket measures 5.5 in x 4 in (14.0 cm x 10.2 cm).
Attaching the Pocket
- Lay the basket flat with the center front marker facing up. The side seam (round joins) should run along one folded edge.
- Center the pocket on the center front marker. The bottom edge should sit 1 in (2.5 cm) above the bottom fold, and the top edge 5 in (12.7 cm) above the fold.
- Check the side margins: 8 in – 5.5 in = 2.5 in, or 1.25 in (3.2 cm) on each side.
- Slip a piece of cardboard inside the basket so you don’t sew through to the back. Pin the pocket’s sides and bottom in place.
- Using the tail, whip stitch through the outer loop of each edging sc and into the basket fabric directly underneath. Work up one side, across the bottom and up the other side, about one stitch per edging stitch (37 stitches). Leave the top open.
- Make 2 or 3 extra stitches at each top corner to reinforce them. These corners take the most strain.
Keep the stitches snug but not tight. If the pocket puckers, loosen them. If it gapes, tighten them.
Final Blocking
- Mist the whole basket lightly until it’s damp, not soaked.
- Stuff it firmly with a folded towel to shape the round bottom and an even oval opening.
- Pin the rim so it’s level all the way around.
- Smooth the pocket flat against the body. Press the edging gently with your fingers so it lies even.
- Let it dry completely, usually 12–24 hours.
- Remove the towel and check the measurements: 8 in (20.3 cm) wide, 10 in (25.4 cm) tall, with a 2.25 in (5.7 cm) loop.
Final Quality-Control Checklist
- Base has 48 sts and lies flat before the body begins
- Body rounds 6–31 each have 48 sts
- Rim is level, and Rnd 33 has 48 sl sts
- Loop is fully covered with 26 sc, centered at the back, and anchored securely
- Pocket is centered with 1.25 in (3.2 cm) margins and its bottom 1 in (2.5 cm) above the fold
- Pocket top edge is open, and both top corners are reinforced
- All ends are woven in at least 2 in (5.1 cm) and trimmed
- Basket hangs straight without tipping forward
Troubleshooting
Base cups or ruffles: A base that cups means your tension is too tight. A base that ruffles means you miscounted the increases. Recount against the six-per-round pattern.
Basket flares at the top: Your tension loosened as you worked. Rip back to the point where the flaring starts and focus on keeping the stitches firm.
Seam slants across the front: Turn the basket so the join sits at the side, and use the markers when placing the pocket rather than the seam line.
Basket tips forward on the hook: The loop isn’t centered. Recount to make sure it’s at stitch 34. Heavy items in the pocket also pull the basket forward, so keep heavier things in the main basket.
Pocket sags open: Check the sl st top edge for loose stitches. You can add a second round of sl st across the top.
Pocket is too wide: Your gauge is loose. Rework the pocket with a smaller hook so it measures 5 in (12.7 cm) after Row 12.
Care
Hand wash in cool water with a mild soap, press out the water in a towel, and reshape the basket over a stuffed towel to dry. Don’t machine dry, because heat can shrink cotton unevenly.
Final Notes
The measurements build on each other in a simple chain. A gauge of 12 sc = 4 in (10.2 cm) gives a 48-stitch oval base of 6.25 in x 3.25 in (15.9 cm x 8.3 cm). The 24 stitches on each half give a flat width of 8 in (20.3 cm). Twenty-six even rounds bring the height to 9.5 in (24.1 cm), and the 0.5 in (1.3 cm) border finishes it at 10 in (25.4 cm). The 15-stitch pocket edges out to 5.5 in x 4 in (14.0 cm x 10.2 cm) and sits centered with 1.25 in (3.2 cm) on each side. If each checkpoint matches, the finished basket will too.
Happy crocheting!