

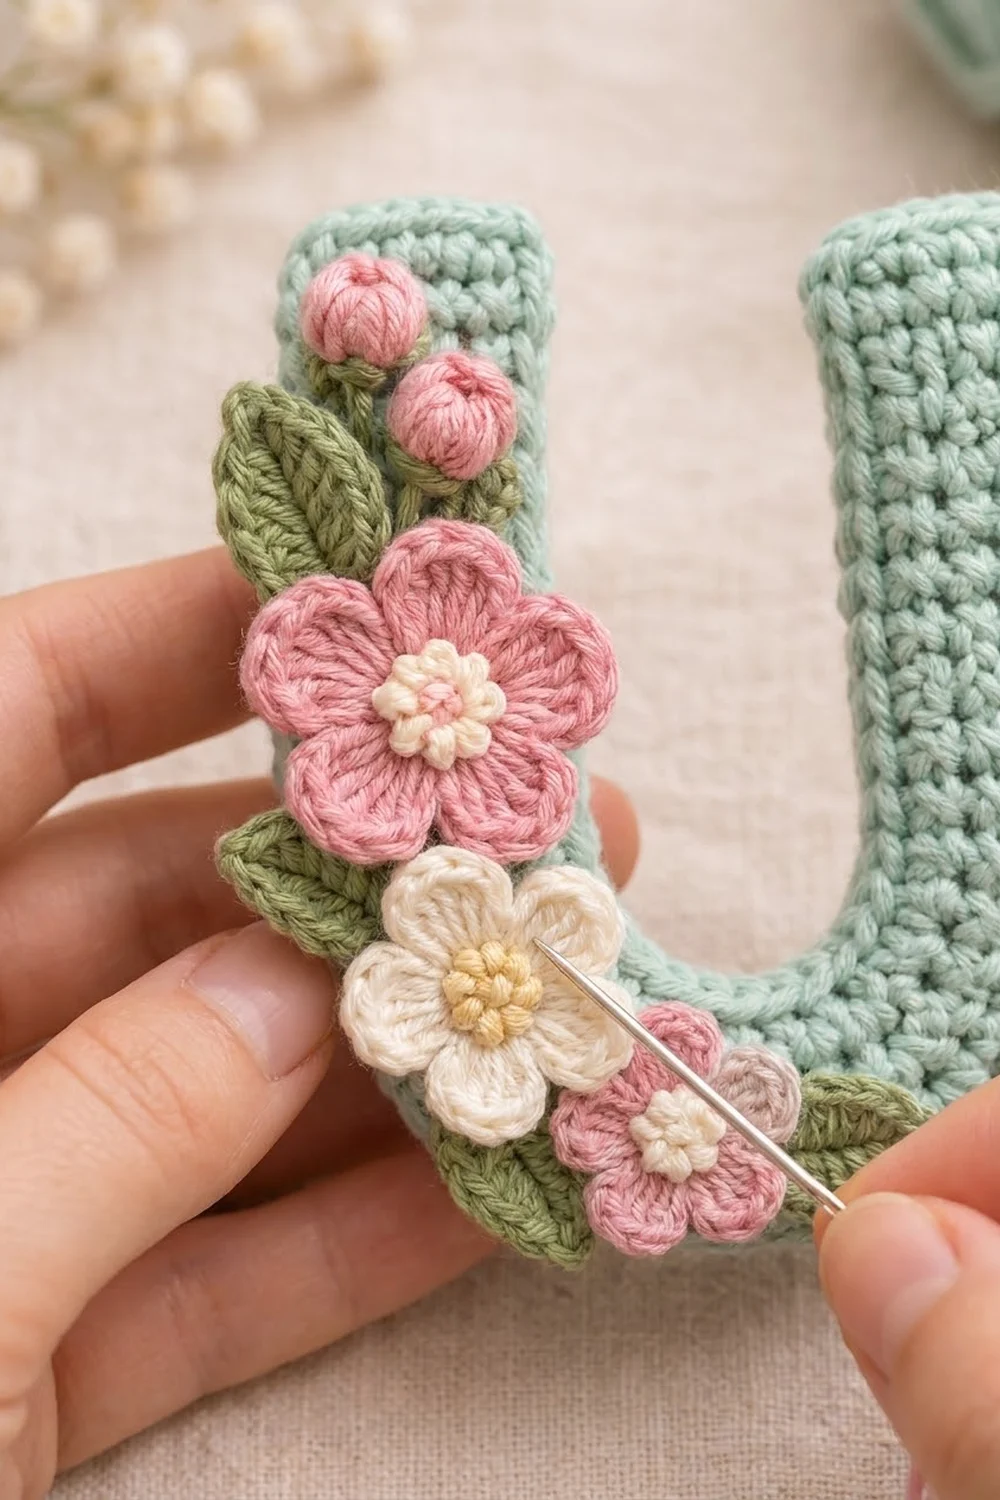
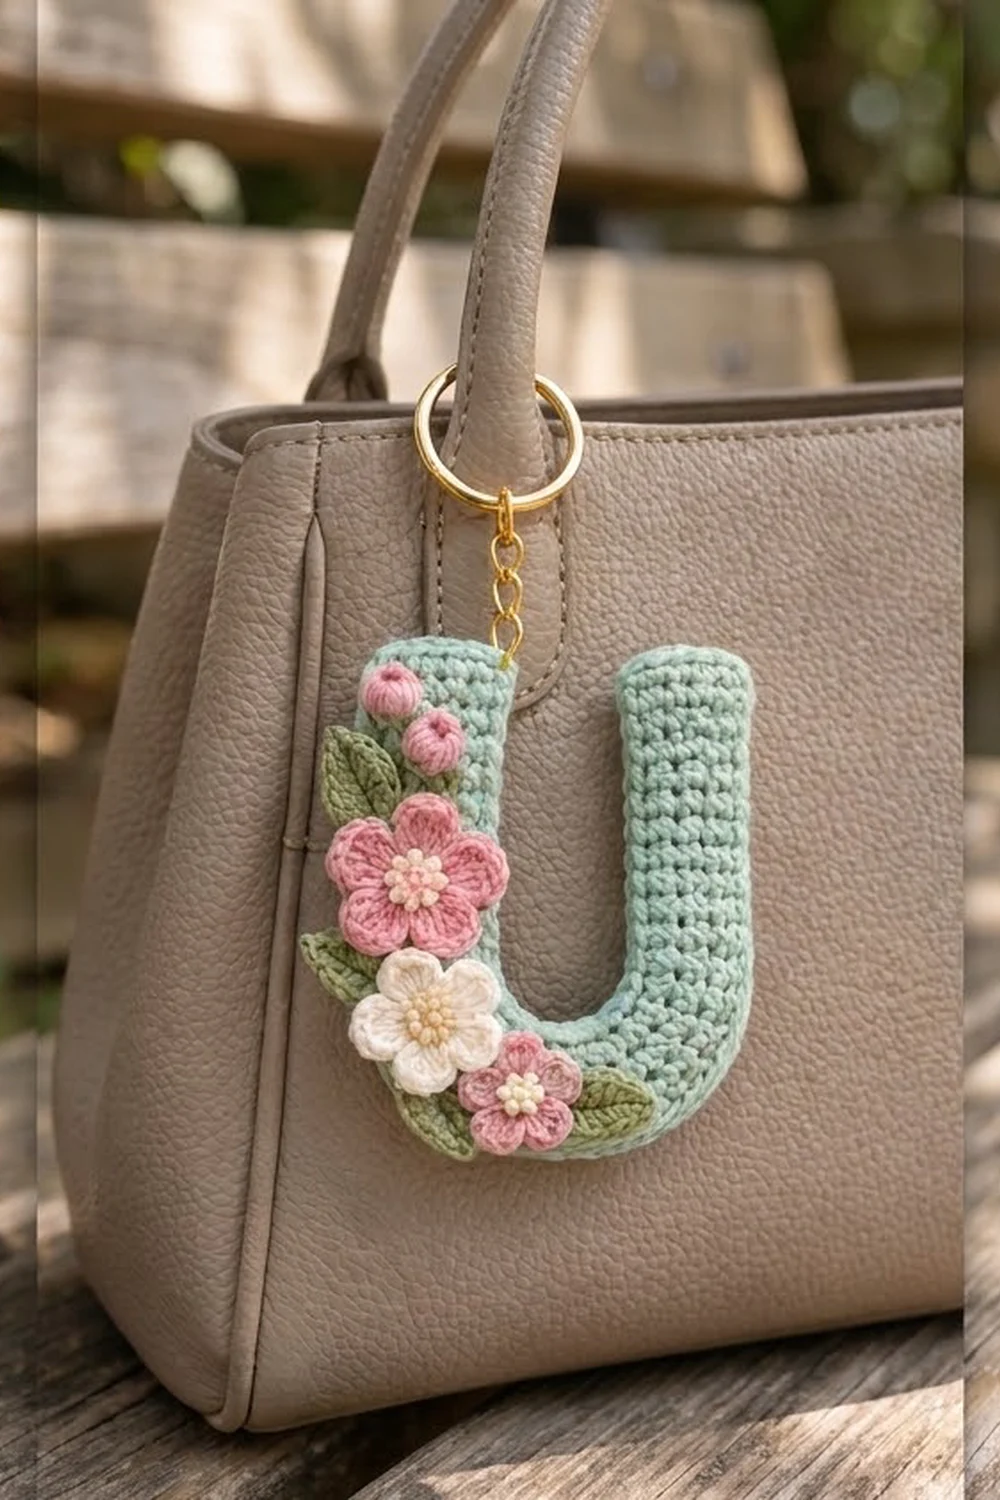
This little letter U is a soft, padded bag charm in mint green, finished with pink and cream flowers, two round rosebuds and sage green leaves. It hangs from a gold split ring and short chain, so it works on a handbag, backpack, pencil case or set of keys.
The style is gentle and cottage-inspired. Tight single crochet makes a smooth, firm letter, and small layered appliqués sit along the left arm and spill slightly past the edge. The palette is mint, rose pink, cream, pale yellow and sage green.
This pattern uses US crochet terms. The finished letter measures 3.75 in (9.5 cm) tall and 3.25 in (8.3 cm) wide. With the chain and keyring, the charm hangs about 5.5 in (14.0 cm) long.
Construction is simple. You crochet two identical flat U panels in rows, from the bottom up, splitting into two arms. Then you join them with one round of single crochet through both layers, adding a little stuffing as you go. After blocking, you sew on the appliqués and attach the hardware.
Finished Size and Construction
- Finished size: 3.75 in (9.5 cm) tall x 3.25 in (8.3 cm) wide, letter only
- Skill level: Easy-intermediate
- Terminology: US crochet terms
- Yarn weight: DK (light worsted, #3), cotton or cotton blend
- Hook: 3.0 mm
- Number of pieces: 1 finished letter, made from 2 matching panels plus 8 appliqués (3 flowers, 2 rosebuds, 3 leaves)
- Layout: Single motif, with the appliqués grouped down the left arm and lower-left curve
- Panel size: 3.5 in (8.9 cm) tall x 3 in (7.6 cm) wide
- Size before border: 3.5 in (8.9 cm) x 3 in (7.6 cm)
- Border depth: about 1/8 in (0.3 cm) per side, adding 0.25 in (0.6 cm) to each dimension
Materials
Choose a smooth DK cotton or cotton blend with good stitch definition. Cotton keeps the letter crisp and doesn’t fuzz much on a bag that gets handled every day. The amounts below assume a yarn of about 120 m per 50 g.
- Color A, Mint green: 10 g, about 24 m (letter panels and joining round)
- Color B, Rose pink: 4 g, about 10 m (large flower, small flower, rosebuds)
- Color C, Cream: 3 g, about 7 m (cream flower petals, pink flower centers)
- Color D, Pale yellow: 1 g, about 2 m (cream flower center)
- Color E, Sage green: 2 g, about 5 m (leaves, bud sepals)
All quantities include a margin of about 20 percent for swatching and weaving in.
Tools:
- 3.0 mm crochet hook
- Tapestry needle
- Polyester fiberfill, about 2-3 g
- 25 mm (about 1 in) gold split keyring
- Short gold chain, 3-4 links, about 0.75 in (1.9 cm)
- 6 mm gold jump ring and two small pliers
- Stitch markers
- Rust-proof pins and a blocking board
- Spray bottle
Abbreviations (US Terms)
- ch – chain
- sl st – slip stitch
- sc – single crochet
- hdc – half double crochet
- dc – double crochet
- sc2tog – single crochet 2 together
- inc – 2 sc in the same stitch
- st(s) – stitch(es)
- sp – space
Special stitch – Popcorn: Work 5 dc in the indicated place. Remove the hook from the loop and insert it from front to back in the top of the first dc. Pick up the dropped loop and pull it through.
Standing sc: With a slipknot on the hook, insert the hook in the stitch and complete an sc as usual.
Gauge and Checkpoints
Gauge: 12 sc and 12 rows = 2 in (5.1 cm) in tight single crochet.
This gauge is meant to be firm. Because the stitch gauge and row gauge are equal, one sc per row end lies flat during joining.
Make one complete panel before starting the second, and check these measurements:
- After Row 1: 12 sts = 2 in (5.1 cm) wide
- After Row 4: 18 sts = 3 in (7.6 cm) wide
- After Row 7: the solid base is about 1.17 in (3.0 cm) tall
- Arm width after Row 9: 6 sts = 1 in (2.5 cm), with 1 in (2.5 cm) between the arms
- Finished panel: 3.5 in (8.9 cm) tall x 3 in (7.6 cm) wide
If the panel is too big, switch to a 2.75 mm hook. If it’s too small, switch to a 3.25 mm hook. Don’t add or remove stitches, because the joining round counts depend on them.
Letter Panels (Make 2)
Use Color A. The ch 1 at the start of each row does not count as a stitch. Turn at the end of each row.
Bottom curve and base
Row 1: Ch 13. Sc in 2nd ch from hook and in each ch across. (12 sts)
Row 2: Ch 1, inc in first st, sc in next 10 sts, inc in last st. (14 sts)
Row 3: Ch 1, inc in first st, sc in next 12 sts, inc in last st. (16 sts)
Row 4: Ch 1, inc in first st, sc in next 14 sts, inc in last st. (18 sts)
The increases at both ends of Rows 2-4 round off the bottom corners of the U.
Rows 5-7: Ch 1, sc in each st across. (18 sts)
Checkpoint: the base is 3 in (7.6 cm) wide and about 1.17 in (3.0 cm) tall. Don’t fasten off.
First arm
Row 8: Ch 1, sc in first 7 sts. Leave the remaining 11 sts unworked and turn. (7 sts)
Row 9: Ch 1, sc2tog over first 2 sts (inner edge), sc in next 5 sts. (6 sts)
Row 8 runs one stitch past the arm width, and Row 9 takes that stitch away at the inner edge. This rounds the bottom of the opening instead of leaving a square notch.
Rows 10-20: Ch 1, sc in each st across. (6 sts)
Row 21: Ch 1, sc2tog, sc in next 2 sts, sc2tog. (4 sts)
Fasten off. Row 21 softens the top corners of the arm.
Second arm
Row 8: Skip the 4 unworked sts of Row 7 next to the first arm. Make a standing sc in the next st (the 12th st of Row 7), then sc in each of the remaining 6 sts. (7 sts)
Row 9: Ch 1, sc in next 5 sts, sc2tog over last 2 sts (inner edge). (6 sts)
Rows 10-20: Ch 1, sc in each st across. (6 sts)
Row 21: Ch 1, sc2tog, sc in next 2 sts, sc2tog. (4 sts)
Fasten off.
Stitch check across Row 8: 7 sts (first arm) + 4 skipped sts + 7 sts (second arm) = 18 sts, which matches Row 7.
Checkpoint: each arm is 14 rows (Rows 8-21), about 2.33 in (5.9 cm) long. The whole panel is 21 rows, 3.5 in (8.9 cm) tall and 3 in (7.6 cm) wide.
Weave in the panel tails.
Border (Joining Round)
This border also joins the two panels. One round of sc through both layers creates the soft rolled edge.
Border gauge: Work 1 sc per stitch along the top and bottom edges and 1 sc per row end along the sides. Since the panel gauge is 6 sts and 6 rows per inch, both rates match and the edge stays flat. It won’t ruffle or cup.
Place the panels wrong sides together with the edges matched. Insert the hook through both layers for every stitch.
Round 1: With Color A, make a standing sc in the first foundation st of Row 1 at the bottom right. Then work around as follows:
- Bottom edge: 1 more sc in the same st, sc in next 10 sts, 2 sc in last foundation st. (14 sc)
- Left outer side: 1 sc in each row end of Rows 1-21. (21 sc)
- Left arm top: 2 sc in first st, sc in next 2 sts, 2 sc in last st. (6 sc)
- Left arm inner edge: 1 sc in each row end of Rows 21 down to 8. (14 sc)
- Opening bottom: 1 sc in each of the 4 skipped sts of Row 7. (4 sc)
- Right arm inner edge: 1 sc in each row end of Rows 8-21. (14 sc)
- Right arm top: 2 sc in first st, sc in next 2 sts, 2 sc in last st. (6 sc)
- Right outer side: 1 sc in each row end of Rows 21 down to 1. (21 sc)
Sl st to the first sc. (100 sc)
Stuffing: After the left arm top, push small pieces of fiberfill into the base and left arm with the back of your hook, then continue. Stuff the right arm before you close its top. Use 2-3 g in total. The letter should feel padded but still lie flat.
Why the math works: 14 + 21 + 6 + 14 + 4 + 14 + 6 + 21 = 100. Each count matches the panel exactly:
- Rows 1-21 give 21 row ends on each outer side.
- Rows 8-21 give 14 row ends on each inner edge.
- Each arm top has 4 sts plus 2 corner increases, for 6.
- The opening bottom has its 4 skipped sts.
- The bottom has 12 foundation sts plus 2 corner increases, for 14.
Extra stitches go only on the four outward-curving corners. The inner corners of the opening get none, so they don’t bulge.
Fasten off and weave the tail into the stuffing. Checkpoint: the letter now measures 3.75 in (9.5 cm) x 3.25 in (8.3 cm).
Appliqués
Leave a long tail on every appliqué for sewing.
Large Pink Flower (make 1) – about 1.25 in (3.2 cm) across
Rnd 1: With Color C, make a magic ring and work 10 sc in the ring. Sl st to first sc and change to Color B. (10 sts)
Rnd 2: *Ch 3, skip 1 st, sl st in next st; rep from * 4 more times. (5 ch-3 sps)
Rnd 3: In each ch-3 sp work (sc, hdc, 3 dc, hdc, sc). Sl st to first sc. (5 petals, 35 sts)
Cream Flower (make 1) – about 1.1 in (2.8 cm) across
Rnd 1: With Color D, make a magic ring and work 10 sc in the ring. Sl st to first sc and change to Color C. (10 sts)
Rnd 2: *Ch 3, skip 1 st, sl st in next st; rep from * 4 more times. (5 ch-3 sps)
Rnd 3: In each ch-3 sp work (sc, hdc, 2 dc, hdc, sc). Sl st to first sc. (5 petals, 30 sts)
Small Pink Flower (make 1) – about 0.85 in (2.2 cm) across
Rnd 1: With Color C, make a magic ring and work 5 sc in the ring. Sl st to first sc and change to Color B. (5 sts)
Rnd 2: In each st work (sc, hdc, dc, hdc, sc). Sl st to first sc. (5 petals, 25 sts)
Rosebuds (make 2) – about 0.4 in (1.0 cm) across
With Color B, make a magic ring, ch 2 (does not count) and work 1 popcorn into the ring. Pull the ring tight and fasten off. With Color E, sew 2 short straight stitches in a V at the base of each bud for the sepal.
Leaves (make 3) – about 0.9 in (2.3 cm) long
With Color E, ch 7.
Rnd 1: Work along one side of the chain: sc in 2nd ch from hook, hdc in next ch, dc in next 2 ch, hdc in next ch. In the last ch, work (sc, ch 2, sl st in 2nd ch from hook, sc) for the pointed tip. Work along the other side of the chain: hdc in next ch, dc in next 2 ch, hdc in next ch, sc in last ch. Sl st to first sc. (12 sts plus tip picot)
Final Blocking
Block the letter before adding the appliqués so the outline underneath them is crisp.
- Lay the joined letter face up on a blocking board.
- Pin it to 3.75 in (9.5 cm) x 3.25 in (8.3 cm). Use one pin at each arm top corner, one on each outer side, one on each inner edge and two around the bottom curve.
- Check that the opening is centered and the arms are parallel.
- Mist lightly. Don’t soak the piece, since it’s stuffed.
- Let it dry completely, usually 4-6 hours.
- Pin the flowers and leaves face down, opening each petal and pointing each leaf tip. Mist them and let them dry.
- Unpin everything once it’s fully dry.
Sewing the appliqués: Work from the bottom layer up.
- Sew one leaf at the upper left of the left arm, angled outward.
- Sew the second leaf at the left edge, about halfway down the arm.
- Sew the third leaf at the lower-left curve, pointing toward the bottom center.
- Sew the two rosebuds side by side near the top of the left arm, overlapping the first leaf.
- Sew the large pink flower below the buds, with its petals slightly past the left outer edge.
- Sew the cream flower directly below it, tucked just under the pink petals.
- Finish with the small pink flower at the lower right of the cream flower, covering the base of the third leaf.
Stitch through the front panel only and hide your stitches between the petals.
Hardware: Open the jump ring with the pliers. Thread it through 2 joining-round sts at the top of the left arm, add the end link of the chain and close the ring. Attach the keyring to the other end of the chain.
Final Quality-Control Checklist
- Letter measures 3.75 in (9.5 cm) x 3.25 in (8.3 cm)
- Both arms are 6 sts wide and the same length
- Joining round has 100 sc, with no gaps between the layers
- Stuffing is even and none shows through the stitches
- Bottom curve and arm tops are rounded, and the inner corners are smooth
- Layers stack in order: leaves, buds, large pink flower, cream flower, small pink flower
- Petals and leaf tips lie open and flat
- Jump ring is fully closed
- All tails are woven in
Troubleshooting
The edge ruffles while joining: Your rows are shorter than your stitches are wide. Skip 1 row end every 6 rows along the long sides.
The edge pulls tight or cups: Your rows are taller than your stitches are wide. Add 1 sc every 7 row ends along the outer sides.
There’s a gap at the bottom of the opening: Work the 4 opening sts snugly and tighten the Row 9 sc2tog on each arm.
Stuffing pokes through: Use less fiberfill, or go down a hook size for the panels.
The petals curl: Re-block them face down with a pin in each petal tip.
The arms are uneven: Recount Row 8. Each arm needs exactly 7 sts, with exactly 4 skipped between them.
Care
Spot clean with a damp cloth and mild soap, then press flat and air dry. Don’t machine wash or tumble dry, because that can damage the stuffing and the metal hardware.
Final Notes
The measurement chain is short and reliable. A gauge of 12 sc x 12 rows = 2 in (5.1 cm) produces an 18-stitch, 21-row panel of 3 in (7.6 cm) x 3.5 in (8.9 cm). One 100-stitch joining round adds 1/8 in (0.3 cm) per side, for a finished letter of 3.25 in (8.3 cm) x 3.75 in (9.5 cm). The flowers, buds and leaves add the finishing touch.
Happy crocheting!