

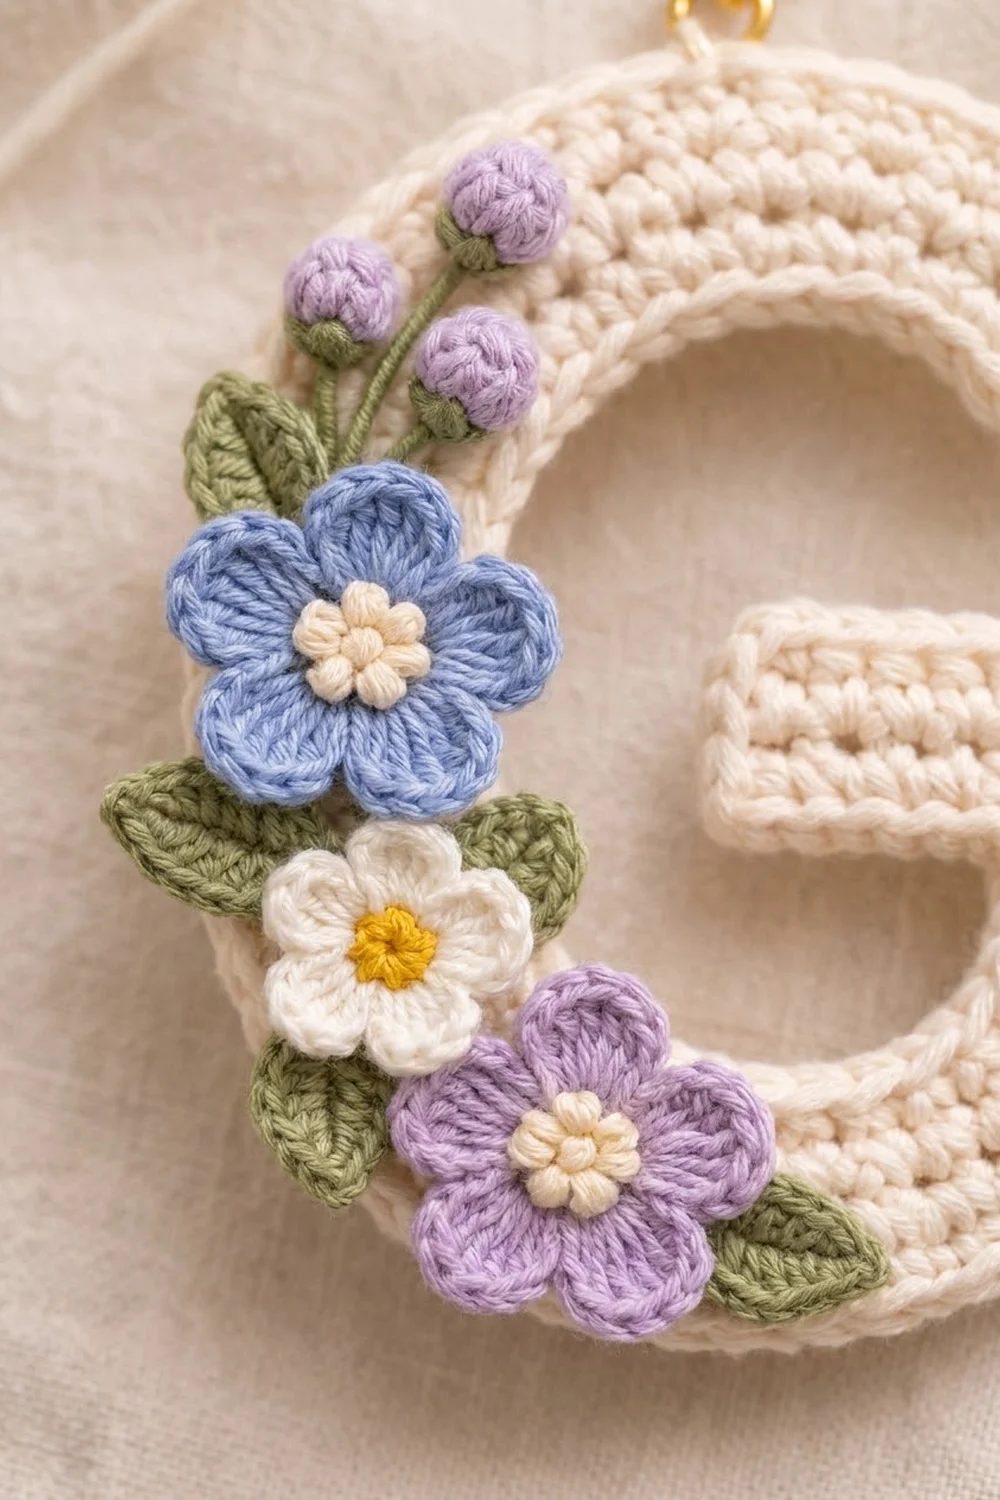
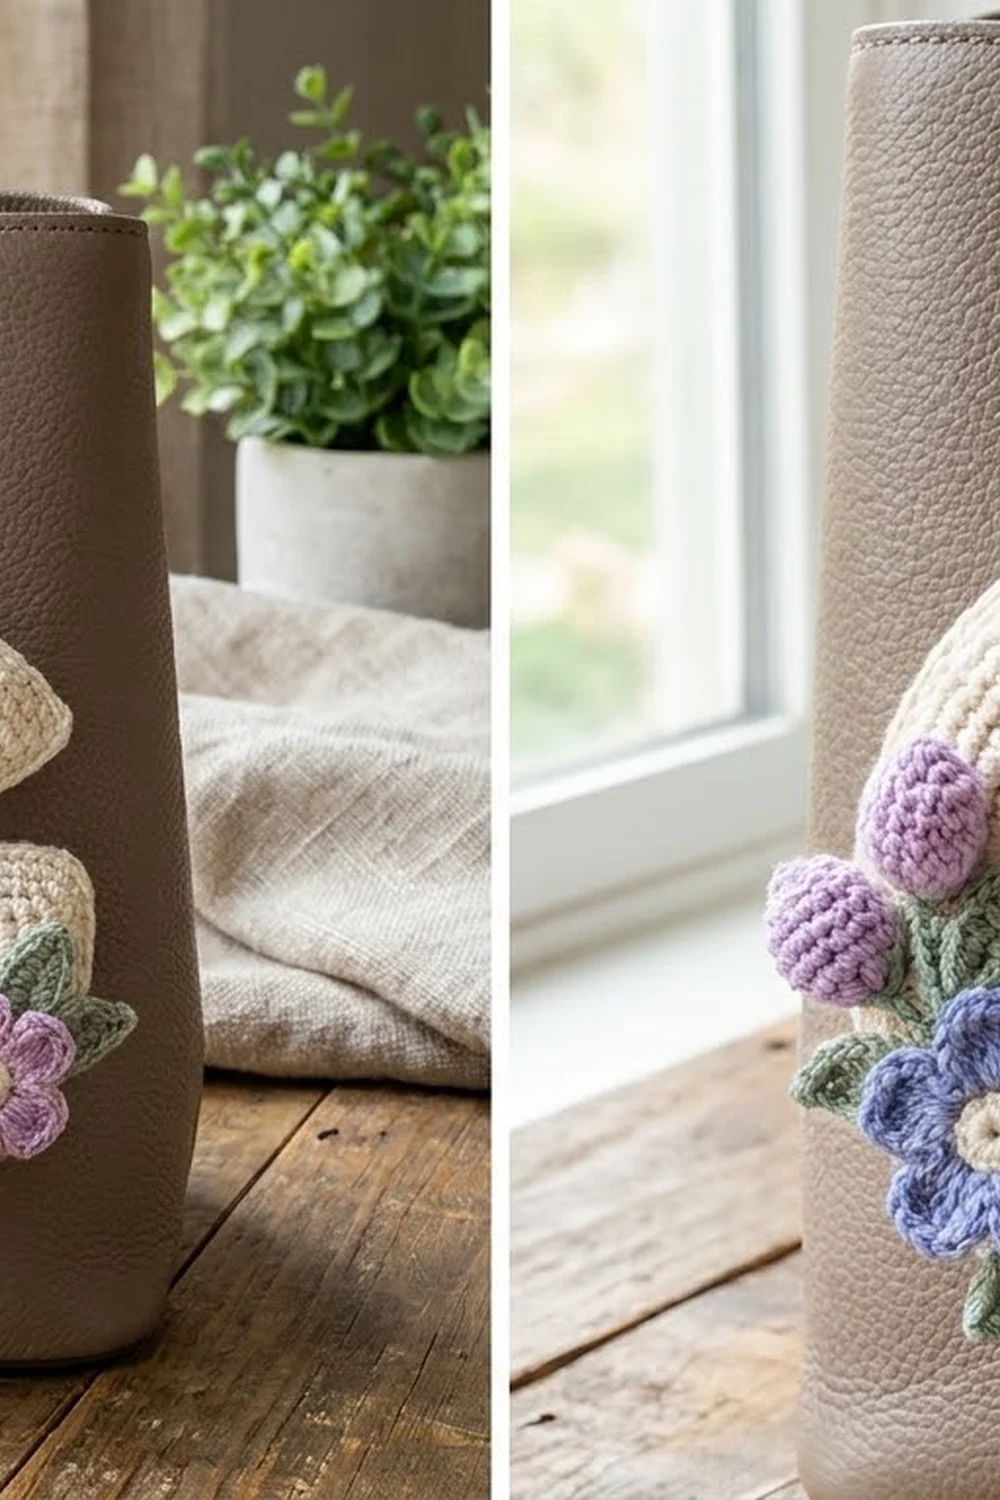
This little letter G keychain is a soft cream initial in tight single crochet, with a small bunch of wildflowers growing along its curve. It works as a bag charm, a key fob, or a personalized gift tag that someone will actually keep.
The palette is calm and springy. The letter is cream, with periwinkle blue, lilac and white flowers, sunny yellow and cream centers, and sage-green leaves. A gold keyring and short chain finish the look.
The pattern uses US crochet terms. The finished letter measures about 4.25 in (10.8 cm) tall and 4.25 in (10.8 cm) wide, not counting the hardware.
The letter is one piece. First you work a curved band in rows: the foundation chain becomes the short inner edge, and each row adds stitches so the band bends into a C. Then you add a small crossbar block onto the inner edge, edge the whole outline with single crochet and a raised reverse single crochet rim, and sew on the appliqués.
Finished Size and Construction
- Finished size: 4.25 in x 4.25 in (10.8 cm x 10.8 cm)
- Skill level: Easy–Intermediate
- Terminology: US crochet terms
- Yarn weight: DK (light worsted / #3), cotton or cotton blend
- Hook: 3.0 mm (US C/2–D/3)
- Number of pieces: 1 letter, plus 3 flowers, 2 buds, 2 stems and 5 leaves as appliqués
- Layout: single letter; the flower cluster sits on the left curve from about 10 o’clock to 6 o’clock
- Band width (letter stroke): 1 in (2.5 cm) before border
- Size before border: 3.75 in x 3.75 in (9.5 cm x 9.5 cm)
- Border depth: 0.25 in (0.6 cm) on every side
Materials
Choose a smooth, mercerized or matte DK cotton. Cotton holds its shape on a bag charm, and it shows the stitch texture and the raised rim clearly. Avoid fuzzy yarns, because they blur the letter outline.
- Cream (letter): 15 g / 35 m
- Periwinkle blue (large flower): 3 g / 7 m
- Lilac (medium flower, buds): 4 g / 9 m
- White (small flower): 2 g / 5 m
- Sage green (leaves, stems): 3 g / 7 m
- Yellow (small flower center): 1 g / 2 m
These quantities include a margin of about 20% for swatching and sewing tails.
Tools:
– 3.0 mm crochet hook
– Tapestry needle
– Stitch markers (4)
– 25 mm (1 in) gold split keyring
– Short gold chain, 4 links, about 0.75 in (1.9 cm)
– 8 mm gold jump ring
– 2 pairs of flat-nose pliers
– Blocking mat, rust-proof pins and a steam iron or spray bottle
– Ruler or tape measure
Abbreviations (US Terms)
- ch – chain
- sl st – slip stitch
- sc – single crochet
- hdc – half double crochet
- dc – double crochet
- inc – 2 sc in the same stitch
- MR – magic ring
- st(s) – stitch(es)
- rev sc – reverse single crochet (crab stitch)
- FLO / BLO – front loop only / back loop only
Special stitches
- Reverse single crochet (rev sc): Work from left to right (right to left if you crochet left-handed). Insert the hook into the next stitch to the right, yarn over, pull up a loop, then yarn over and pull through both loops. This makes the rope-like rim.
- 4-dc bobble: Yarn over, insert the hook, pull up a loop, yarn over, pull through 2 loops. Repeat from * to * 3 more times in the same stitch (5 loops on hook). Yarn over and pull through all 5 loops.
Gauge and Checkpoints
Gauge: 22 sc x 24 rows = 4 in (10.2 cm) in sc worked in rows.
That works out to 5.5 sts and 6 rows per inch (2.5 cm). Gauge matters here because the curve of the G comes entirely from the stitch math.
Test first: Work Rows 1–6 of the letter band and lay it flat before you go any further. It should curve naturally into an open C.
Checkpoints:
– Row 1 (30 sc): about 5.5 in (14.0 cm) when stretched straight.
– After Row 6: the band is 1 in (2.5 cm) wide. The outer edge (55 sts) is about 10 in (25.4 cm) along the curve, and the C measures about 3.75 in (9.5 cm) across.
– Crossbar: 5 sts is about 0.9 in (2.3 cm) tall, and 4 rows is about 0.67 in (1.7 cm) deep.
– After the border: 4.25 in (10.8 cm) each way.
If your piece is too big: go down to a 2.75 mm hook. If it’s too small: go up to a 3.25 mm hook.
If the band cups or ruffles instead of lying flat:
– Cupping (edges curl up) means your increases are too tight. Use a hook 0.25 mm larger.
– Ruffling means your tension is too loose. Use a hook 0.25 mm smaller.
Letter G: Curved Band
Use cream. Leave a 6 in (15.2 cm) starting tail; this tail marks the upper terminal (top-right end) of the G.
Foundation: Ch 31.
Row 1: Sc in the 2nd ch from the hook and in each ch across, turn. (30 sc)
This row is the inner edge of the C.
Row 2: Ch 1, sc in the next 5 sts, inc in the next st. Repeat from * 4 more times, turn. (35 sc)
Row 3: Ch 1, sc in the next 6 sts, inc in the next st. Repeat from * 4 more times, turn. (40 sc)
Row 4: Ch 1, sc in the next 7 sts, inc in the next st. Repeat from * 4 more times, turn. (45 sc)
Row 5: Ch 1, sc in the next 8 sts, inc in the next st. Repeat from * 4 more times, turn. (50 sc)
Row 6: Ch 1, sc in the next 9 sts, inc in the next st. Repeat from * 4 more times. (55 sc)
Fasten off.
Why it curves: Each row adds exactly 5 stitches. That is the same growth rate as rounds 7–11 of a flat sc circle, but over 300° instead of 360°. A full circle at those rounds would have 36, 42, 48, 54, 60 and 66 sts, and 300/360 of each gives 30, 35, 40, 45, 50 and 55. As a result, the band lies flat as an open ring with an inner radius of about 1 in (2.5 cm) and an outer radius of about 2 in (5.1 cm).
Check: Lay the band flat with the starting tail at about 1 o’clock. The opposite end, the lower terminal, should sit at about 3 o’clock, with the opening between them on the right.
Letter G: Crossbar
The crossbar is worked off the inner edge, into the remaining loops of the foundation chain.
With the right side facing, find the last 5 foundation stitches at the lower terminal end. Join cream in the foundation loop at the very end of the lower terminal.
Row 1: Ch 1, sc in the same st and in the next 4 foundation loops, moving inward along the curve, turn. (5 sc)
Rows 2–4: Ch 1, sc in each st across, turn. (5 sc)
After Row 4, do not turn. Fasten off.
The crossbar is a small 5-st x 4-row block that points left into the hollow of the C. Its top edge lines up with the end of the lower terminal, which gives the G its square corner.
Check: The bar should be about 0.9 in (2.3 cm) tall and 0.67 in (1.7 cm) deep. Weave in the crossbar tails now, but keep the starting tail for attaching hardware.
Border
Border gauge: each border round adds about 0.125 in (0.3 cm) on every side. The two rounds together add 0.25 in (0.6 cm) per side, taking the letter from 3.75 in (9.5 cm) to 4.25 in (10.8 cm).
Round 1 (sc outline)
With the right side facing, join cream in the first st of Row 6 at the upper terminal (the outer corner). Work around the letter in this order.
| Segment | Instructions | Sts |
|---|---|---|
| Outer edge | 3 sc in the first st, sc in the next 53 sts, 3 sc in the last st | 59 |
| Lower terminal end | 1 sc in each of the 6 row ends | 6 |
| Crossbar top | 1 sc in each of the 4 row ends | 4 |
| Crossbar end | 3 sc in the first st, sc in the next 3 sts, 3 sc in the last st | 9 |
| Crossbar bottom | 1 sc in each of the 4 row ends | 4 |
| Inner edge | sc in each of the next 24 foundation loops, 3 sc in the last loop (upper terminal inner corner) | 27 |
| Upper terminal end | 1 sc in each of the 6 row ends | 6 |
Join with a sl st to the first sc. (115 sc)
Why the math works:
– The base stitches add up: 55 outer + 6 + 4 + 5 + 4 + 25 inner + 6 = 105.
– There are 5 convex corners: the 2 outer terminal corners, the 2 crossbar corners and the upper inner corner. Each corner stitch gets 3 sc instead of 1, which adds 2 extra stitches: 5 x 2 = 10.
– 105 + 10 = 115. Each corner stitch is counted once inside its segment, never twice.
– One sc per row end is right for this fabric: with 6 rows per inch against 5.5 sts per inch, row ends and stitches are nearly the same height.
– The concave corner where the crossbar bottom meets the inner edge gets no extra stitches, so it stays crisp.
Round 2 (raised rim)
Ch 1. Working left to right, rev sc in each st around. Join with a sl st to the first rev sc. (115 rev sc)
Fasten off and weave in.
The crab stitch rolls slightly toward the front, which forms the raised rope outline around the whole letter.
Appliqués
Leave an 8 in (20.3 cm) tail on each appliqué for sewing.
Large Flower (make 1)
Rnd 1: With cream, MR, 5 sc in the ring. Pull closed and join. (5 sc)
Rnd 2: Join periwinkle. Work 2 sc in each st and join. (10 sc)
Rnd 3: Sl st in the next st, (hdc, 3 dc, hdc) in the next st. Repeat from * 4 more times and join. (5 petals, 30 sts)
Size: about 1.25 in (3.2 cm).
Medium Flower (make 1)
Rnds 1–2: Work as for the Large Flower, with a cream center and lilac for Round 2. (10 sc)
Rnd 3: Sl st in the next st, (hdc, 2 dc, hdc) in the next st. Repeat from * 4 more times and join. (5 petals, 25 sts)
Size: about 1.1 in (2.8 cm).
Small Flower (make 1)
Rnd 1: With yellow, MR, 5 sc in the ring. Pull closed and join. (5 sc)
Rnd 2: Join white. Work (sc, hdc, dc, hdc, sc) in the next st. Repeat from * 4 more times and join. (5 petals, 25 sts)
Size: about 0.8 in (2.0 cm).
Leaves (make 5)
With sage green, ch 7.
Side 1: Sl st in the 2nd ch from the hook, then sc, hdc, dc and hdc in the next 4 ch, and sc in the last ch. (6 sts)
Tip: Ch 1.
Side 2: Rotate and work along the opposite side of the chain: sc, hdc, dc, hdc, sc, then sl st in the last ch. (6 sts)
Join with a sl st to the first sl st. (12 sts plus ch-1 tip)
Length: about 1 in (2.5 cm).
Buds (make 2)
With lilac, ch 3. Work a 4-dc bobble in the 3rd ch from the hook, then ch 1 to close.
Fasten off. Size: about 0.4 in (1.0 cm).
Stems (make 2)
With sage green, ch 7. Sl st in the 2nd ch from the hook and in each ch across. (6 sl st)
Length: about 1 in (2.5 cm).
Arrangement and Sewing
Pin all the pieces in place before you sew anything. Work counterclockwise down the left curve:
- Stems: Lay the 2 stems from about 11 o’clock down toward 9 o’clock, fanning them slightly. Sew a bud to the top of each stem.
- Large blue flower: Place it at about 9 o’clock, overlapping the stem bases.
- Small white flower: Place it just below, at about 8 o’clock.
- Lilac flower: Place it at about 6–7 o’clock.
- Leaves: Tuck 1 leaf behind the stems and 2 beside the blue flower. Put 1 on each side of the white and lilac flowers, so 2 leaves tip out past the outer rim.
To sew, whipstitch around each flower center and the petal bases, using the matching yarn tail. Tack each leaf down at its base and center vein only, so the tips stay slightly lifted. Make sure the stitches catch only the front layer of the letter.
Attaching Hardware
Count 8 stitches along the outer edge, starting from the upper terminal outer corner. That puts you at the top of the curve, at about 11–12 o’clock.
- Open the jump ring with the 2 pliers.
- Slide it through both border rounds at that point.
- Add the bottom chain link and close the ring.
- Thread the top link onto the split keyring.
If you’d like extra strength, wrap the starting tail a few times around the base of the jump ring before weaving it in.
Final Blocking
- Lightly mist the letter, or hover steam over it. Don’t press the iron onto the appliqués.
- Lay the letter face up on the blocking mat.
- Pin the outer curve into a smooth arc 4.25 in (10.8 cm) tall.
- Pin the crossbar corners square, and the two terminal ends straight.
- Check the width with a ruler: 4.25 in (10.8 cm).
- Gently press the raised rim between your fingers so it rolls evenly forward.
- Let it dry completely, at least 2 hours, before you unpin it.
Final Quality-Control Checklist
- Row 6 has exactly 55 sts, and the band lies flat without cupping.
- The crossbar is 5 sts x 4 rows, with its top edge in line with the lower terminal.
- Border Round 1 has exactly 115 sts, with 3 sc at all 5 convex corners.
- The rev sc rim is even, with no skipped stitches.
- The finished size is 4.25 in x 4.25 in (10.8 cm x 10.8 cm).
- Each flower has 5 even petals, and the centers are pulled tight.
- All 5 leaves are sewn at the base and tips stay free.
- No sewing stitches show on the back.
- The jump ring is closed with no gap, and the chain and keyring are secure.
- All ends are woven in.
Troubleshooting
- The C closes into a full ring or overlaps itself. Your gauge is too loose on the outer rows. Rework Rows 4–6 with a hook 0.25 mm smaller.
- The C opens too wide. Your foundation chain is too loose. Chain with a smaller hook, then switch back for Row 1.
- The border ruffles. You’ve added extra stitches along the row ends. Recount each segment against the table.
- The border pulls in at the corners. Make sure each convex corner has 3 sc.
- The rev sc looks twisted. Keep your loops loose and always work into the next stitch to the right.
- The flower centers show a hole. Tighten the magic ring tail before joining, and weave the tail across the back.
- The charm flops on the chain. Move the jump ring 1 stitch toward the upper terminal so the letter hangs straight.
Care
Hand-wash in cool water with mild soap, press out the water in a towel, and dry flat. Remove the keyring first if the metal isn’t tarnish-resistant.
Final Notes
The measurement chain is simple. Gauge sets a 30-st foundation of about 5.5 in (14.0 cm), and 6 rows growing by 5 sts each turn it into a 1 in (2.5 cm) band. That band curls into a G 3.75 in (9.5 cm) across, and the crossbar squares off the inner edge. The 115-st border then adds 0.25 in (0.6 cm) per side for a finished 4.25 in (10.8 cm) letter. If you check each step against its checkpoint, the curve, the corners and the rim will line up neatly. Add the flowers and gold hardware and your personalized charm is ready to clip onto a bag.
Happy crocheting!