

The Terracotta Bloom holder stores three spare toilet paper rolls on the back of a bathroom door. Each basket wall is a ring of six puff-flower hexagons in alternating terracotta and blush pink, and every hexagon has a crisp cream outline. A rounded terracotta base closes each basket, and a ribbed strap joins all three to a wooden ring.
The finished holder is about 19.5 in (49.5 cm) long from the top of the ring to the bottom basket. Each basket is about 5.25 in (13.3 cm) across and 4.25 in (10.8 cm) tall, which fits a standard roll with the top peeking out.
The pattern uses US crochet terms throughout.
Construction is modular. You make 18 small hexagons and join them into three rings of six. Next you work a base directly into the lower zigzag edge of each ring and add a cream rim round to the top. Finally, you crochet a ribbed strap, loop it through the wooden ring, and sew the three baskets down its length.
Finished Size and Construction
- Finished size: 19.5 in (49.5 cm) long including the ring; each basket is 5.25 in (13.3 cm) across and 4.25 in (10.8 cm) tall
- Skill level: Intermediate (puff stitches, post stitches, decreases worked in the round)
- Terminology: US
- Yarn weight: Worsted (#4) cotton
- Hook: 4.5 mm (US 7)
- Number of pieces: 18 hexagons, 3 bases worked onto the rings, 1 strap
- Layout: 3 baskets stacked vertically, each a ring of 6 hexagons
- Piece size (hexagon): 2.75 in (7.0 cm) flat side to flat side, 3.2 in (8.1 cm) point to point, 1.6 in (4.1 cm) per side
- Basket height before border: 4.0 in (10.2 cm)
- Border depth: 0.25 in (0.6 cm), one cream rim round
Materials
Use a smooth worsted-weight cotton or cotton blend. Cotton holds the basket shape and gives clear puff petals. The meter amounts below assume yarn of about 170 m per 100 g.
- Color A, terracotta: 200 g (340 m), for 9 hexagons, 3 bases, and the strap
- Color B, blush pink: 75 g (128 m), for 9 hexagons
- Color C, cream: 75 g (128 m), for hexagon outlines, joining, and rims
All quantities include a safety margin of about 20%.
Tools:
– 4.5 mm (US 7) crochet hook
– One wooden ring, 3 in (7.6 cm) in diameter
– 8 stitch markers
– Tapestry needle
– Scissors
– Rustproof pins and a blocking mat
– One toilet paper roll, for shaping
Abbreviations (US Terms)
- ch – chain
- sl st – slip stitch
- sc – single crochet
- hdc – half double crochet
- dc – double crochet
- sc2tog – single crochet 2 together
- sc3tog – single crochet 3 together
- FPdc – front post double crochet
- BPdc – back post double crochet
- MR – magic ring
- sp(s) – space(s)
- st(s) – stitch(es)
- RS / WS – right side / wrong side
Puff stitch (puff): (Yarn over, insert hook in the stitch, pull up a loop to about 0.5 in (1.3 cm) tall) 4 times. You now have 9 loops on the hook. Yarn over and pull through all 9 loops. The ch 1 that follows in the pattern closes the puff.
Gauge and Checkpoints
Gauge: 11 sc = 2 in (5.1 cm), and 6 sc rounds = 1 in (2.5 cm).
Make one complete hexagon before you start the rest, and check it at each stage:
- After Rnd 2: the flower is about 1.5 in (3.8 cm) across.
- After Rnd 3: the hexagon is about 2.4 in (6.1 cm) flat side to flat side.
- After Rnd 4: the hexagon is 2.75 in (7.0 cm) flat to flat and 3.2 in (8.1 cm) point to point, with 1.6 in (4.1 cm) sides.
If your hexagon comes out larger than 2.75 in (7.0 cm), go down to a 4.0 mm hook. If it comes out smaller, go up to a 5.0 mm hook.
Six hexagons that are each 0.1 in (0.3 cm) too wide make the basket 0.6 in (1.5 cm) larger around. Fix the size at the test hexagon before going further.
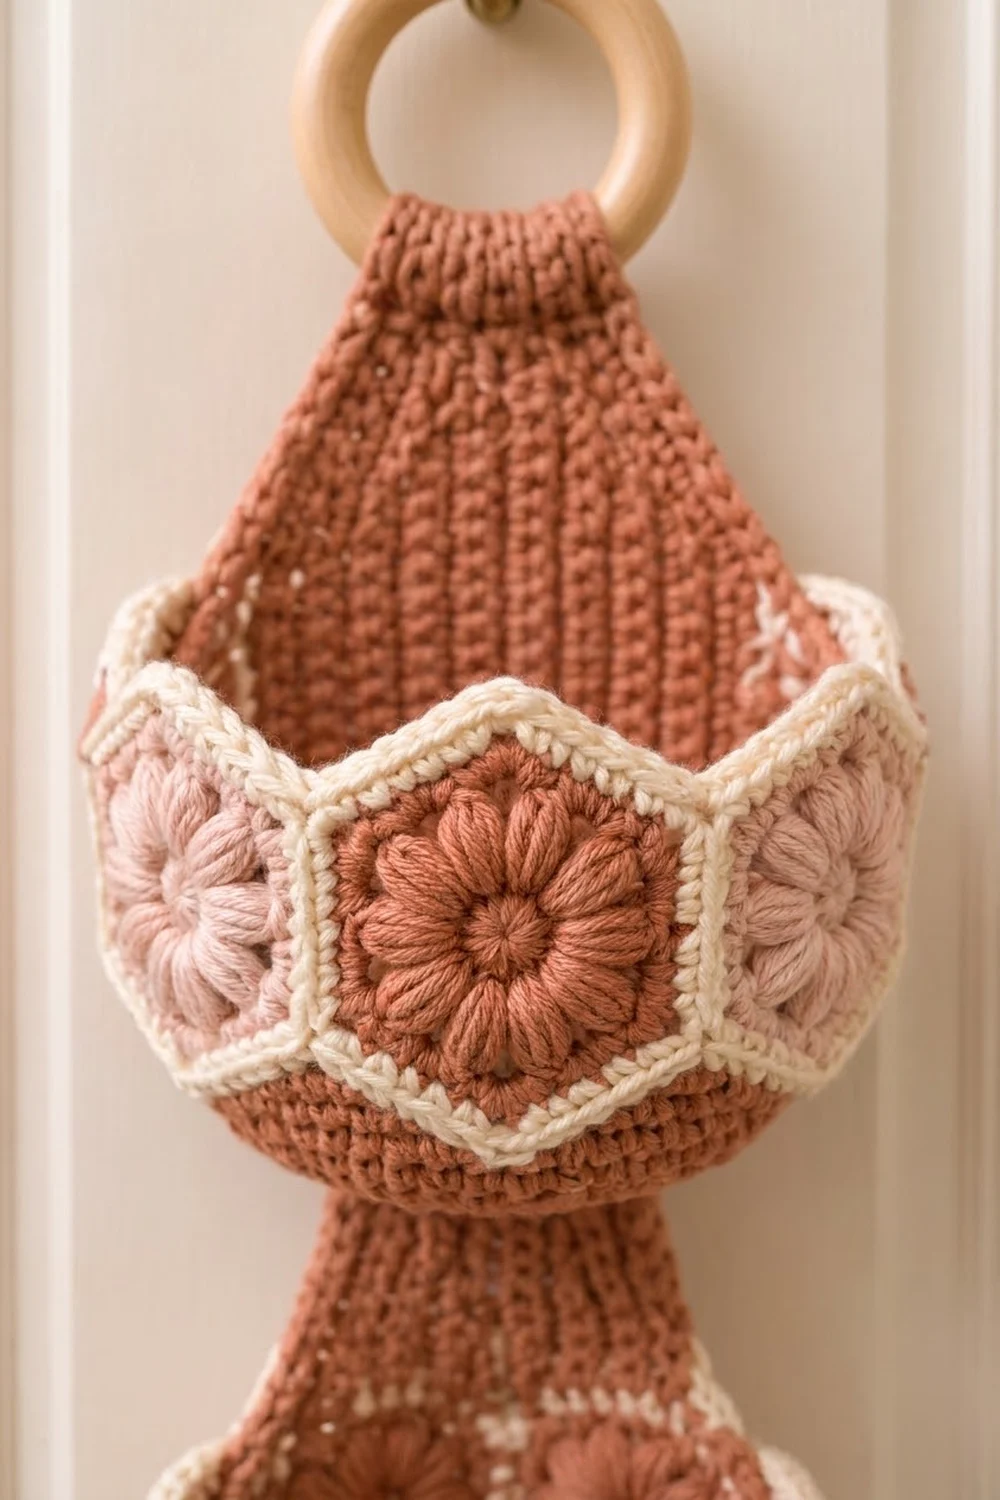
Hexagon (make 18: 9 in A, 9 in B)
Work Rounds 1–3 in the hexagon color (A or B). Work Round 4 in C. Do not turn at the end of any round.
Rnd 1: In hexagon color, MR, ch 1, 12 sc in ring, join with sl st to first sc. (12 sc)
Rnd 2: Ch 2 (does not count as a stitch). Work a puff in the first st, ch 1. Puff in next st, ch 1; repeat from * 10 more times. Join with sl st to the top of the first puff. (12 puffs, 12 ch-1 sps)*
Rnd 3: Sl st into the first ch-1 sp. Ch 3 (counts as dc), then work (dc, ch 2, 2 dc) in the same sp. Work 3 dc in the next ch-1 sp. (2 dc, ch 2, 2 dc) in next ch-1 sp, 3 dc in next ch-1 sp; repeat from * 4 more times. Join with sl st to the top of the beginning ch 3. Fasten off.
(42 dc, 6 ch-2 corner sps; 7 dc per side between corners)*
The corners fall in every other ch-1 space, so the 12-petal flower turns into 6 straight sides.
Rnd 4: Join C in any ch-2 corner sp. Ch 1, then work (sc, ch 2, sc) in the same sp. Sc in each of the next 7 dc. (Sc, ch 2, sc) in next corner sp, sc in each of next 7 dc; repeat from * 4 more times. Join with sl st to the first sc. Fasten off and weave in ends.
(54 sc, 6 ch-2 corner sps; 9 sc per side)*
Per-side count: each side has 9 sc. That number includes the sc on each side of the two corner ch-2 spaces (1 + 7 + 1 = 9). Every count in the rest of the pattern uses this definition.
Lightly steam each hexagon flat and pin it to 2.75 in (7.0 cm) flat to flat.
Make All Pieces
- Hexagons in A (terracotta): 9, which is 3 per basket
- Hexagons in B (blush): 9, which is 3 per basket
- Bases: 3, worked in A directly onto each joined ring
- Strap: 1, in A
Layout for each basket ring. Hold the hexagons pointy-top. Position 1 faces the front and position 4 faces the back.
Front → [A1][B2][A3][B4][A5][B6] → closes back to A1
          ^           ^
        front       back (strap side)
Laid flat before closing, the strip reads A–B–A–B–A–B. After you close the ring, every hexagon sits between two hexagons of the other color.
Joining
Method: sl st seam in C, worked with RS together, so the seam ridge ends up on the inside of the basket.
Each pointy-top hexagon has two vertical sides. Join the right vertical side of each hexagon to the left vertical side of the next one.
Stitch-to-stitch logic:
- Hold two hexagons RS together, with their vertical sides aligned.
- Insert the hook through both top corner ch-2 sps and sl st.
- Sl st through both loops of each pair of matching sc, 9 times.
- Sl st through both bottom corner ch-2 sps.
That makes 11 sl sts per seam: 1 + 9 + 1.
Make 5 seams to form a strip of 6 hexagons. Check that the strip is not twisted, then join the last hexagon to the first with a 6th seam to close the ring.
Tension: keep each sl st about as tall as one sc. Seams pulled too tight make the ring pucker, and loose seams let the hexagons tilt.
Size checkpoint: the closed ring measures 16.5 in (41.9 cm) around at mid-height (6 × 2.75 in), which is 5.25 in (13.3 cm) in diameter.
Base (work 1 per ring)
Work in A, in continuous rounds, into the lower zigzag edge of the ring. Place stitch markers as you go.
The lower edge of each hexagon has two sides of 9 sc each, plus one ch-2 space at the bottom point. A valley is where the bottom corners of two neighboring hexagons meet at the end of a seam.
Rnd 1: With RS facing, join A in any bottom point ch-2 sp and ch 1. Then work this sequence for each hexagon:
– 1 sc in the point sp
– 9 sc along the next lower side
– 1 sc2tog worked across both ch-2 sps at the valley (mark this st)
– 9 sc along the next hexagon’s lower side
Repeat for all 6 hexagons. Skip the final point sp, because it already holds the first sc.
This is a conversion round: 108 sc worked 1 per existing st (6 hexagons × 18) + 12 sts worked into spaces (6 point sc + 6 valley sc2tog) = 120 sts, or 20 per hexagon.
Rnd 2: Sc around, working sc3tog centered on each marked valley st (the st before, the marked st, and the st after). Move the marker to each new sc3tog. (108 sts)
Rnd 3: Repeat Rnd 2. (96 sts)
Rnd 4: Sc around, working sc2tog over each marked st and the st after it. (90 sts)
Checkpoint: 90 sts at 5.5 sc per in is 16.4 in (41.7 cm). That matches the ring’s mid-height circumference, so the base now hangs straight below the points.
From here, the base closes into a bowl. Place one marker at the start of each round.
Rnd 5: (Sc 13, sc2tog) 6 times. (84 sts)
Rnd 6: (Sc 12, sc2tog) 6 times. (78 sts)
Rnd 7: (Sc 11, sc2tog) 6 times. (72 sts)
Rnd 8: (Sc 10, sc2tog) 6 times. (66 sts)
Rnd 9: (Sc 9, sc2tog) 6 times. (60 sts)
Rnd 10: (Sc 8, sc2tog) 6 times. (54 sts)
Rnd 11: (Sc 7, sc2tog) 6 times. (48 sts)
Rnd 12: (Sc 6, sc2tog) 6 times. (42 sts)
Rnd 13: (Sc 5, sc2tog) 6 times. (36 sts)
Rnd 14: (Sc 4, sc2tog) 6 times. (30 sts)
Rnd 15: (Sc 3, sc2tog) 6 times. (24 sts)
Rnd 16: (Sc 2, sc2tog) 6 times. (18 sts)
Rnd 17: (Sc 1, sc2tog) 6 times. (12 sts)
Rnd 18: Sc2tog 6 times. (6 sts)
Fasten off. Thread the tail through the front loops of the last 6 sts, cinch closed, and weave in.
These 14 decrease rounds give a disc about 2.3 in (5.8 cm) in radius. A flat disc would need about 2.6 in (6.6 cm) to fill the opening, so the base cups gently into the rounded bowl. Its lowest point sits about 0.75 in (1.9 cm) below the hexagon points.
Checkpoint: before the rim, the basket is 4.0 in (10.2 cm) tall.
Border (Top Rim, 1 per basket)
Border gauge: same as the main gauge, 11 sc = 2 in (5.1 cm).
Starting count: the upper edge has 6 hexagons × 2 upper sides × 9 sc = 108 sts. No stitches are added at the seams except the single valley stitch shown below.
Rim Rnd: Join C in any peak ch-2 sp. Ch 1, then work (sc, ch 1, sc) in the same sp. Then work this sequence for each hexagon:
– 9 sc along the next upper side
– 1 sc2tog across both ch-2 sps at the valley
– 9 sc along the next hexagon’s upper side
– (sc, ch 1, sc) in the peak ch-2 sp
Repeat around, ending with the 9 sc before the first peak. Join with sl st to the first sc. Fasten off.
Count: this is a trim round: 108 sc worked 1 per existing st + 18 extra sts (12 peak sc + 6 valley sc2tog) = 126 sc + 6 ch-1 sps.
| Section | Sc per section | Total |
|---|---|---|
| Each upper side | 9 | 12 sides × 9 = 108 |
| Each peak | 2 | 6 peaks × 2 = 12 |
| Each valley | 1 | 6 valleys × 1 = 6 |
| Full round | 126 sc |
Why the math works: each upper side keeps its own 9 stitches, so the rim lies flat. At each peak, (sc, ch 1, sc) covers the outward point without flaring. At each valley, the sc2tog takes up the inward corner without gathering.
The rim adds 0.25 in (0.6 cm), bringing each basket to 4.25 in (10.8 cm) tall.
Strap
Work in A, in rows.
Ch 13.
Row 1 (WS): Hdc in 3rd ch from hook and in each ch across. (11 hdc) The skipped ch 2 does not count as a stitch.
Row 2 (RS): Ch 2 (does not count), turn. Hdc in first st, then (FPdc, BPdc) 4 times, FPdc, hdc in last st. (11 sts)
Row 3 (WS): Ch 2, turn. Hdc in first st, then (BPdc, FPdc) 4 times, BPdc, hdc in last st. (11 sts)
Repeat Rows 2–3 until the strap measures 22 in (55.9 cm). That is about 55 rows. The strap has 5 raised ribs on the RS and is 2.25 in (5.7 cm) wide. Fasten off, leaving a long tail.
Assembly
- Thread 3.5 in (8.9 cm) of the strap’s starting end through the wooden ring. Fold it to the WS and whipstitch it down. This leaves 18.5 in (47.0 cm) of strap hanging below the ring.
- Sew the top basket with its back hexagon (position 4) centered on the strap. The basket’s peaks should sit 3 in (7.6 cm) below the ring. Whipstitch down both long edges of the strap, through the back hexagon and the base rounds behind it.
- Sew the middle and bottom baskets the same way, spaced 4.5 in (11.4 cm) from peak to peak. The three baskets take up 13.5 in (34.3 cm) of the strap.
- Tuck the remaining 2 in (5.1 cm) of strap under the bottom basket’s base and tack it in place.
Final Blocking
- Lightly mist each basket with water.
- Insert a toilet paper roll into each basket so the ring forms a true circle.
- Press the base into a smooth bowl shape with your palm.
- Pin the zigzag rim points evenly. Each peak should stand straight up.
- Lay the strap flat and pin it to 2.25 in (5.7 cm) wide along its full length.
- Leave everything to dry completely, at least 12 hours, before hanging.
Final Quality-Control Checklist
- All 18 hexagons measure 2.75 in (7.0 cm) flat to flat.
- Each hexagon has 54 sc and 6 corner sps in its cream round.
- Colors alternate A–B all the way around each basket, and the A hexagon at position 1 faces the front.
- Each seam has 11 sl sts, and no ring is twisted.
- Base counts were 120, 108, 96, 90, then down to 6 stitches.
- Each rim round has 126 sc and 6 ch-1 sps.
- All baskets are 4.25 in (10.8 cm) tall and 5.25 in (13.3 cm) across.
- The baskets hang 4.5 in (11.4 cm) apart and sit level on the strap.
- The ring fold is sewn firmly, and all ends are woven in.
Troubleshooting
Puffs look flat or uneven: pull every loop up to the same height before you close the puff, and keep each closing ch 1 snug.
Hexagon cups: your Rnd 3 tension is too tight. Go up 0.5 mm for Rnd 3 only.
Hexagon ruffles: check that each corner has exactly 2 dc on each side of the ch 2.
Base flares outward: you missed a valley decrease. Recount Rnds 2–4 against 108, 96, and 90.
Base comes out too flat: work Rnds 5–18 with a hook 0.5 mm smaller.
Rim peaks curl inward: loosen the (sc, ch 1, sc) at each peak, or work ch 2 instead of ch 1.
Baskets tilt forward: the strap is sewn too low on the back. Sew higher, through the rim area of the back hexagon.
Care
Hand wash in cool water with mild soap. Reshape around a roll and lay flat to dry, and do not tumble dry.
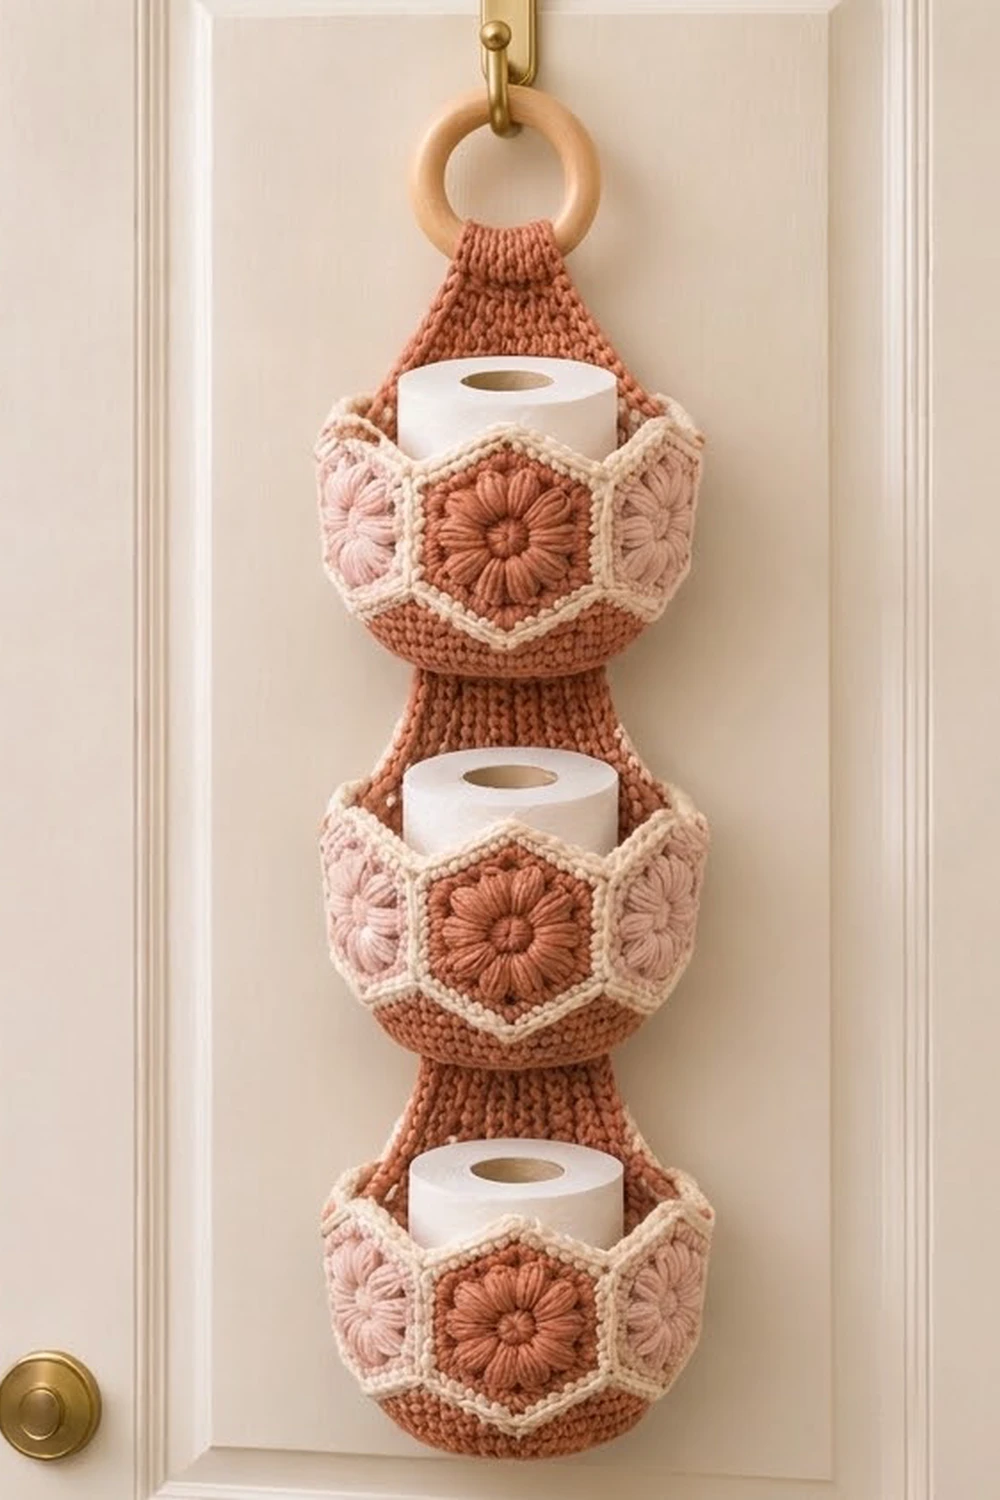
Final Notes
Each measurement leads to the next:
- One 2.75 in (7.0 cm) hexagon, with 9 sc per side.
- Six hexagons make a 16.5 in (41.9 cm) ring.
- The base reduces 120 sts down to 90 sts, which is 16.4 in (41.7 cm), then closes into a cupped bowl.
- The 126-st cream rim brings each basket to 4.25 in (10.8 cm).
- Three baskets spaced 4.5 in (11.4 cm) apart on a 22 in (55.9 cm) strap give a holder 19.5 in (49.5 cm) long.
If your first hexagon is the right size, the rest of the holder will come out to these measurements too.
Happy crocheting!