

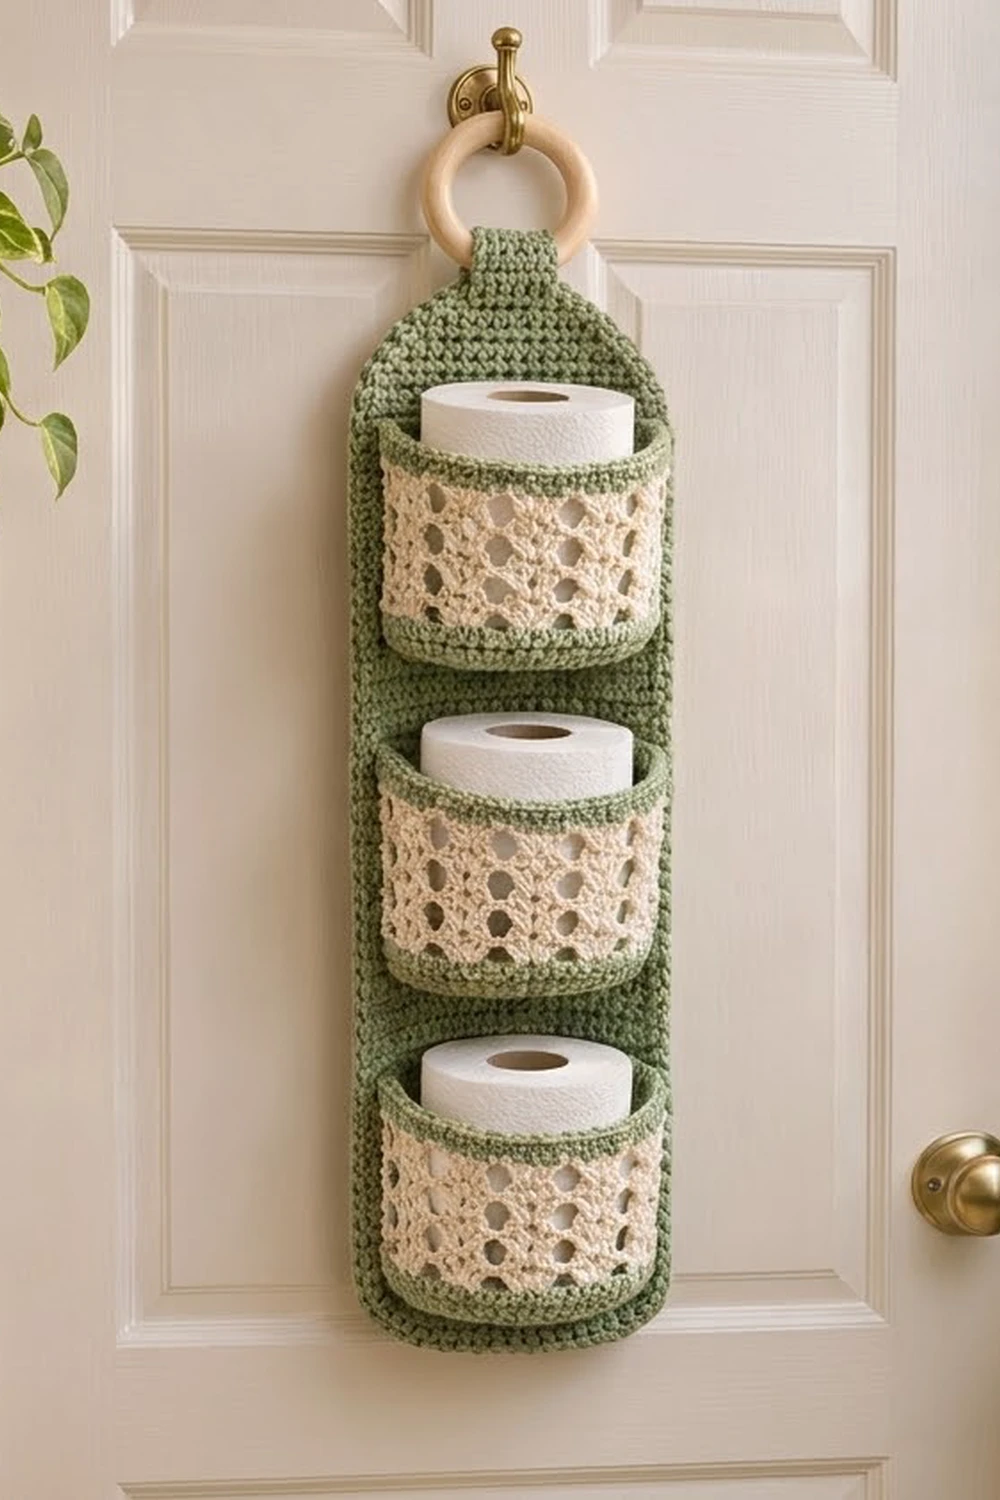
This hanging holder stores three spare rolls on the back of a bathroom door and looks good doing it. A long sage-green panel holds three round cream pockets stacked one above the other, and a wooden ring at the top hooks over any door hook.
Each pocket has a solid sage base, a cream lattice of offset V-stitches, and sage bands at the top and bottom. The open lattice shows a little of the white roll behind it, which gives the piece a soft, fresh look in calm natural colors.
The pattern uses US crochet terms. The finished holder is 6.5 in (16.5 cm) wide and 18 in (45.7 cm) long from the bottom edge to the base of the tab. The folded tab adds about 1.5 in (3.8 cm) above that, plus the ring.
For construction, you work the backing panel flat in single crochet rows and shape it into a tab. Each pocket is worked in joined rounds: first a flat circular base, then the sides. You sew the pockets to the panel, work a one-round border around the panel, and fold the tab around the ring.
Finished Size and Construction
- Finished size: 6.5 in x 18 in (16.5 cm x 45.7 cm), plus about 1.5 in (3.8 cm) of tab
- Skill level: Confident beginner to intermediate
- Terminology: US crochet terms
- Yarn weight: Worsted (#4) cotton
- Hook: 5 mm (H-8)
- Number of pieces: 4 (1 backing panel + 3 pockets), plus 1 wooden ring
- Layout: 3 pockets stacked vertically on 1 panel
- Pocket size: 4.75 in (12.1 cm) base diameter, 3.75 in (9.5 cm) tall
- Panel size before border: 6 in x 17.75 in (15.2 cm x 45.1 cm)
- Border depth: 0.25 in (0.6 cm), 1 round of sc
Materials
Use a worsted-weight cotton or cotton blend. Cotton holds its shape, keeps the lattice crisp, and copes with bathroom humidity. Avoid very drapey yarns, because the pockets need to stand open.
- Sage green: 160 g, about 272 m (297 yd), for the panel, pocket bases and bands, and border
- Cream: 50 g, about 85 m (93 yd), for the pocket lattice
- 5 mm (H-8) crochet hook
- 1 wooden ring, 3 in (7.6 cm) outer diameter
- Tapestry needle
- 6 locking stitch markers
- Scissors
- Measuring tape
- Rustproof pins and a blocking mat
These quantities include a margin of about 15% for gauge swatches and sewing tails.
Abbreviations (US Terms)
- ch: chain
- sl st: slip stitch
- sc: single crochet
- dc: double crochet
- inc: 2 sc in the same stitch
- sc2tog: single crochet 2 together
- BLO: back loop only
- MR: magic ring
- sp: space
- st(s): stitch(es)
- rep: repeat
Special stitch: V-stitch (V-st). Work (dc, ch 2, dc) in the same stitch or space. At the start of a round, ch 5 counts as the first dc plus ch 2.
Gap: the space between two neighboring V-sts of the previous round, between the second dc of one V-st and the first dc of the next.
Gauge and Checkpoints
- Single crochet gauge: 14 sc x 16 rows = 4 in (10.2 cm)
- Lattice gauge: 4 V-st rounds = 2 in (5.1 cm) tall, with 18 V-sts around a 54-st pocket
Make one pocket before you start the panel. It is the best gauge swatch, because it tests the base, the bands, and the lattice in one piece.
Checkpoints:
- After base Rnd 4 (24 sts), the circle measures 2 in (5.1 cm) across.
- After base Rnd 9 (54 sts), the circle measures 4.75 in (12.1 cm) across and lies flat.
- After the bottom band, the side wall is 0.75 in (1.9 cm) tall.
- After the lattice, the side wall is 2.75 in (7.0 cm) tall.
- The finished pocket is 3.75 in (9.5 cm) tall, and a standard roll drops in easily.
- After panel Row 16, the panel is 6 in (15.2 cm) wide and 4 in (10.2 cm) long.
If your pieces come out too big, go down 0.5 mm in hook size. If they come out too small, or a roll won’t fit, go up 0.5 mm. If your base ruffles, your rounds are too short for the increases, so go up a hook size for the base only. If the base cups, go down a hook size.
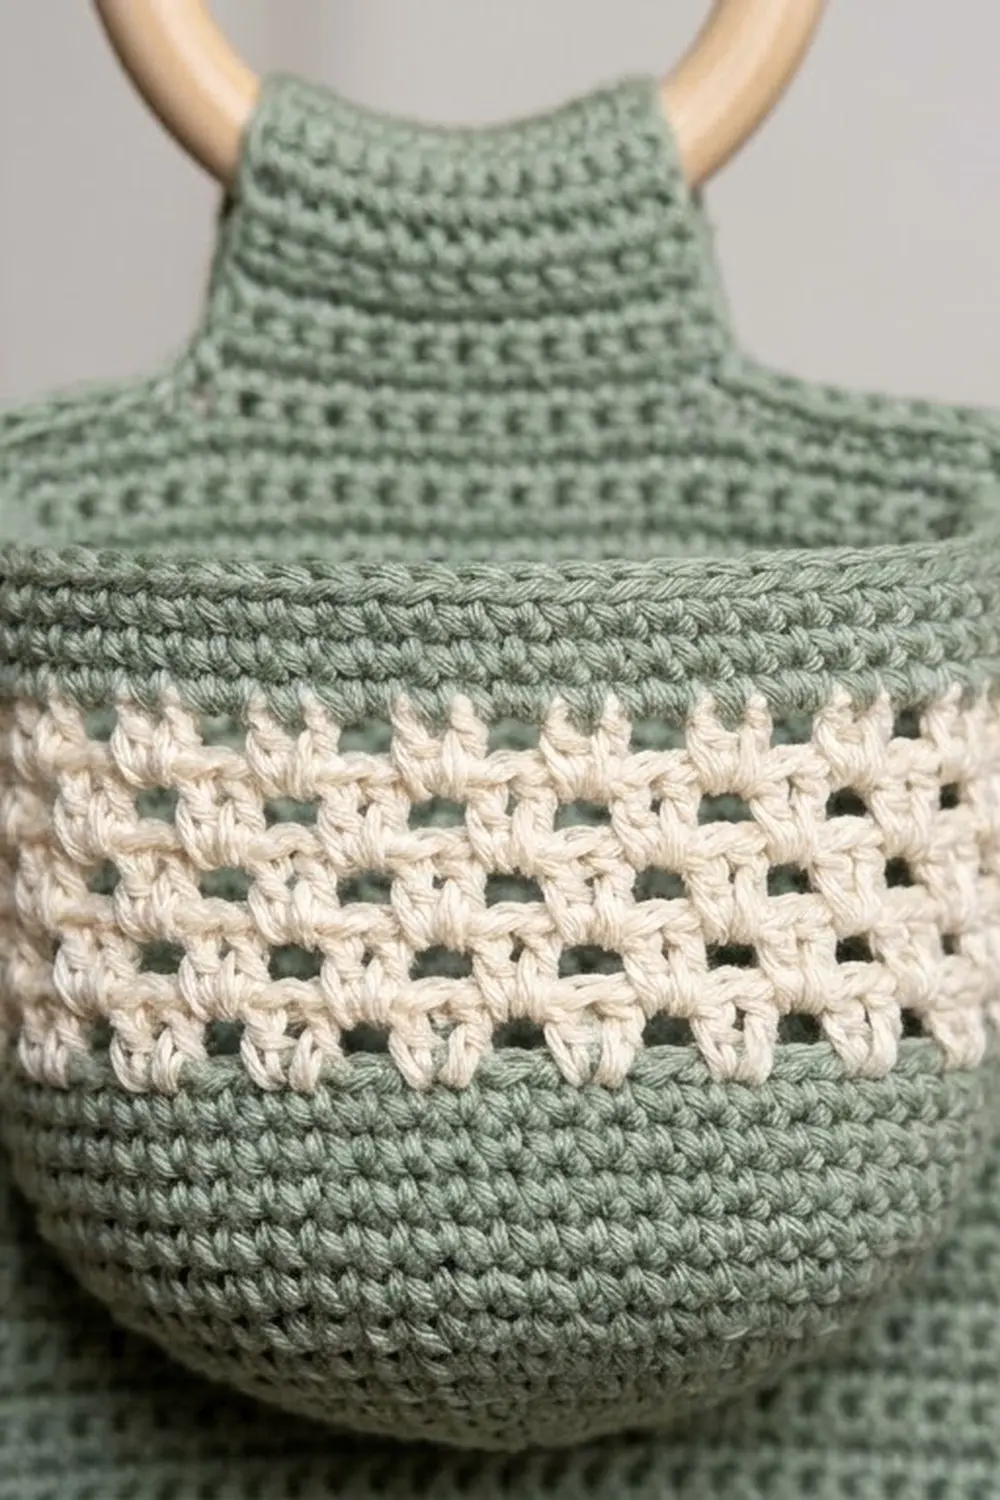
Pocket (make 3)
Base (sage)
Rnd 1: In a MR, ch 1, 6 sc. Join with sl st to the first sc. (6 sts)
Rnd 2: Ch 1, inc in each st around, join. (12 sts)
Rnd 3: Ch 1, sc 1, inc 6 times, join. (18 sts)
Rnd 4: Ch 1, sc 2, inc 6 times, join. (24 sts)
Rnd 5: Ch 1, sc 3, inc 6 times, join. (30 sts)
Rnd 6: Ch 1, sc 4, inc 6 times, join. (36 sts)
Rnd 7: Ch 1, sc 5, inc 6 times, join. (42 sts)
Rnd 8: Ch 1, sc 6, inc 6 times, join. (48 sts)
Rnd 9: Ch 1, sc 7, inc 6 times, join. (54 sts)
Check that the base is 4.75 in (12.1 cm) across.
Bottom band (sage)
Rnd 10: Ch 1, sc in the BLO of each st around, join. (54 sts) The unused front loops form a ridge, and the wall turns upward here.
Rnds 11–12: Ch 1, sc in each st around, join. (54 sts)
Fasten off the sage. The wall is now 0.75 in (1.9 cm) tall.
Lattice (cream)
Lattice Rnd 1: Join the cream in any st. Ch 5 and dc in the same st (first V-st made). Skip 2 sts, V-st in the next st. Rep from * 16 more times, then skip the last 2 sts and join to the 3rd ch of the beginning ch-5. (18 V-sts)
Lattice Rnd 2: Sl st into the next ch-2 sp, sl st in the next dc, then sl st into the next gap. Ch 5 and dc in the same gap. Work a V-st in each of the next 17 gaps, then join to the 3rd ch of the beginning ch-5. (18 V-sts)
Lattice Rnds 3–4: Repeat Lattice Rnd 2. (18 V-sts each round)
Each V-st sits in the gap between two V-sts of the round below. This offset is what makes the honeycomb openings. Fasten off the cream. The wall is now 2.75 in (7.0 cm) tall.
Top band (sage)
Rnd T1 (conversion round): Join the sage in any ch-2 sp. Ch 1. Sc in the first dc of the V-st, sc in the ch-2 sp, sc in the second dc. Work this across all 18 V-sts and skip the gaps. Join. Count: 36 sc worked 1-per-dc + 18 sc in the ch-2 sps = 54 sts.
Rnds T2–T4: Ch 1, sc in each st around, join. (54 sts)
Fasten off and leave a 24 in (61.0 cm) tail for sewing. The pocket is 3.75 in (9.5 cm) tall: 0.75 in band + 2 in lattice + 1 in band.
Backing Panel (sage)
Foundation: Ch 22.
Row 1: Sc in the 2nd ch from the hook and in each ch across. Turn. (21 sts)
Rows 2–64: Ch 1, sc in each st across. Turn. (21 sts)
The panel now measures 6 in x 16 in (15.2 cm x 40.6 cm).
Rounded top shaping
Each shaping row decreases 1 st at each end.
Row 65: Ch 1, sc2tog, sc to the last 2 sts, sc2tog. Turn. (19 sts)
Row 66: Repeat Row 65. (17 sts)
Row 67: Repeat Row 65. (15 sts)
Row 68: Repeat Row 65. (13 sts)
Row 69: Repeat Row 65. (11 sts)
Row 70: Repeat Row 65. (9 sts)
Row 71: Repeat Row 65. (7 sts)
The shaping adds 1.75 in (4.4 cm). Blocking and the border round soften the stepped edges into a dome.
Tab
Rows 72–83: Ch 1, sc in each st across. Turn. (7 sts)
Do not fasten off. Continue into the Border after the pockets are sewn on. The tab measures 2 in (5.1 cm) wide and 3 in (7.6 cm) long.
Make All Pieces
- Sage: 1 backing panel, plus the base and both bands of all 3 pockets
- Cream: the lattice section of all 3 pockets
Layout (bottom to top, by panel row):
Rows 72–83  | tab (folds around ring)
Rows 65–71  | rounded shaping
Rows 58–64  | open panel, 1.75 in (4.4 cm)
Rows 43–57  | POCKET 3
Rows 38–42  | gap, 1.25 in (3.2 cm)
Rows 23–37  | POCKET 2
Rows 18–22  | gap, 1.25 in (3.2 cm)
Rows 3–17   | POCKET 1
Rows 1–2    | bottom margin, 0.5 in (1.3 cm)
Check: 2 + 15 + 5 + 15 + 5 + 15 + 7 = 64 rows, which matches the straight section.
Joining
Each pocket is sewn on with a whipstitch through a fixed “back third” of its stitches.
- Place markers in the top band of a pocket (Rnd T4) to mark off 18 consecutive stitches. Place markers on the base ridge (Rnd 10) directly below them, also 18 sts. These 18 of the 54 sts become the pocket back. They span 5.1 in (13.0 cm), which leaves about 0.45 in (1.1 cm) of panel showing on each side.
- Center the pocket on the panel, with its Rnd 10 ridge on the bottom row of its layout band and its top band on the top row.
- Whipstitch the 18 back stitches of Rnd T4 to the panel, working stitch-to-stitch across 18 panel stitches.
- Whipstitch down each side, from marker to marker, joining 1 pocket round to 1 panel row.
- Whipstitch the 18 back sts of Rnd 10 to the panel across the bottom row of the band.
Tension: Keep the sewing stitches snug but not tight. Pulled seams pucker the panel and narrow the pocket opening.
Size checkpoint: After all three pockets are on, the panel still measures 6 in (15.2 cm) wide at every height, and each pocket front bulges out enough to hold a roll.
Border (sage)
Border gauge: At 14 sc x 16 rows per 4 in (10.2 cm), 7 sc fit along 8 row ends. That means working 1 sc in each of 7 row ends and skipping the 8th.
Border round: Continue from the tab. Ch 1 and rotate to work down the left side. A corner group is 3 sc in the same st.
- Left tab side: 10 sc across the 12 row ends; skip about every 6th row end. (10 sts)
- Left shaped edge: 9 sc across 7 row ends: 1 sc in each row end, plus 1 extra in the first and last. (9 sts)
- Left straight side: 56 sc across 64 row ends, skipping every 8th. (56 sts)
- Bottom: Corner group in the first foundation loop, 1 sc in each of the next 19 loops, then a corner group in the last loop. (25 sts: 19 + 3 + 3)
- Right straight side: 56 sc, as on the left. (56 sts)
- Right shaped edge: 9 sc, as on the left. (9 sts)
- Right tab side: 10 sc, as on the left. (10 sts)
- Tab top: Corner group in the first st, 1 sc in each of the next 5 sts, then a corner group in the last st. (11 sts: 5 + 3 + 3)
Join to the first sc. The total is 25 + 56 + 9 + 10 + 11 + 10 + 9 + 56 = 186 sts.
Why the math works: 56 sc ÷ 3.5 sc per in = 16 in (40.6 cm), the same as 64 rows ÷ 4 rows per in. The edge lies flat without stretching or ruffling. The bottom has 19 sts between corner groups plus 2 three-st corners = 25 sts, worked from the original 21 sts. The 4 added corner sts turn the corners cleanly. The panel grows to 6.5 in (16.5 cm) wide and 18 in (45.7 cm) long below the tab.
Mounting the ring: Fold the tab back through the wooden ring and whipstitch the tab top to the back of Row 72. The tab loop rises about 1.5 in (3.8 cm) above the shaping.
Final Blocking
- Remove the ring if it isn’t sealed wood, or wrap it in plastic.
- Mist the panel and pockets until damp, without soaking.
- Pin the panel flat to 6.5 in x 18 in (16.5 cm x 45.7 cm) and keep both long sides straight.
- Ease the shaped top into a smooth dome.
- Stuff each pocket with a wrapped roll or a folded towel so the lattice opens evenly.
- Pat the honeycomb openings into even shapes with your fingertips.
- Let everything dry completely, about 24 hours.
- Unpin and test the fit with real rolls.
Final Quality-Control Checklist
- [ ] Each pocket base has 54 sts and measures 4.75 in (12.1 cm) across.
- [ ] Each lattice round has 18 V-sts.
- [ ] Rnd T1 has 54 sts (36 + 18).
- [ ] Each pocket is 3.75 in (9.5 cm) tall.
- [ ] The panel has 64 straight rows and shapes from 21 sts down to 7.
- [ ] The pockets sit on rows 3–17, 23–37, and 43–57.
- [ ] The border round has 186 sts.
- [ ] The finished panel is 6.5 in x 18 in (16.5 cm x 45.7 cm).
- [ ] The tab is securely sewn and the ring is firmly held.
- [ ] All ends are woven in at least 2 in (5.1 cm).
Troubleshooting
Base ruffles or cups: Adjust the hook size for the base only. Recount the stitches per round against the pattern.
Lattice twists around the pocket: The joining seam drifts naturally. Always join to the 3rd ch of the beginning ch-5 so the seam stays as straight as possible.
Wrong V-st count: You probably skipped or doubled a gap. Each round needs exactly 18 V-sts, one in every gap.
Roll is too tight: Go up a hook size, or add 1 more lattice round. Each extra lattice round adds 0.5 in (1.3 cm) of height.
Panel edges wave: Too many border sts. Keep to the 7-in-8 rule.
Pocket sags forward: Sew the top band more firmly across all 18 back sts.
Care
Hand wash in cool water and lay flat to dry, reshaping the pockets over a roll. Don’t put the wooden ring in water.
Final Notes
Everything starts from the gauge of 14 sc x 16 rows per 4 in (10.2 cm). That gives a 54-st pocket base of 4.75 in (12.1 cm), and each pocket rises to 3.75 in (9.5 cm). A 21-st panel is 6 in (15.2 cm) wide, and 64 rows give 16 in (40.6 cm) of straight length. The 7-row shaping adds 1.75 in (4.4 cm), and the 186-st border brings the holder to 6.5 in x 18 in (16.5 cm x 45.7 cm). If you check each step, the finished holder will hang straight and hold three rolls neatly.
Happy crocheting!