

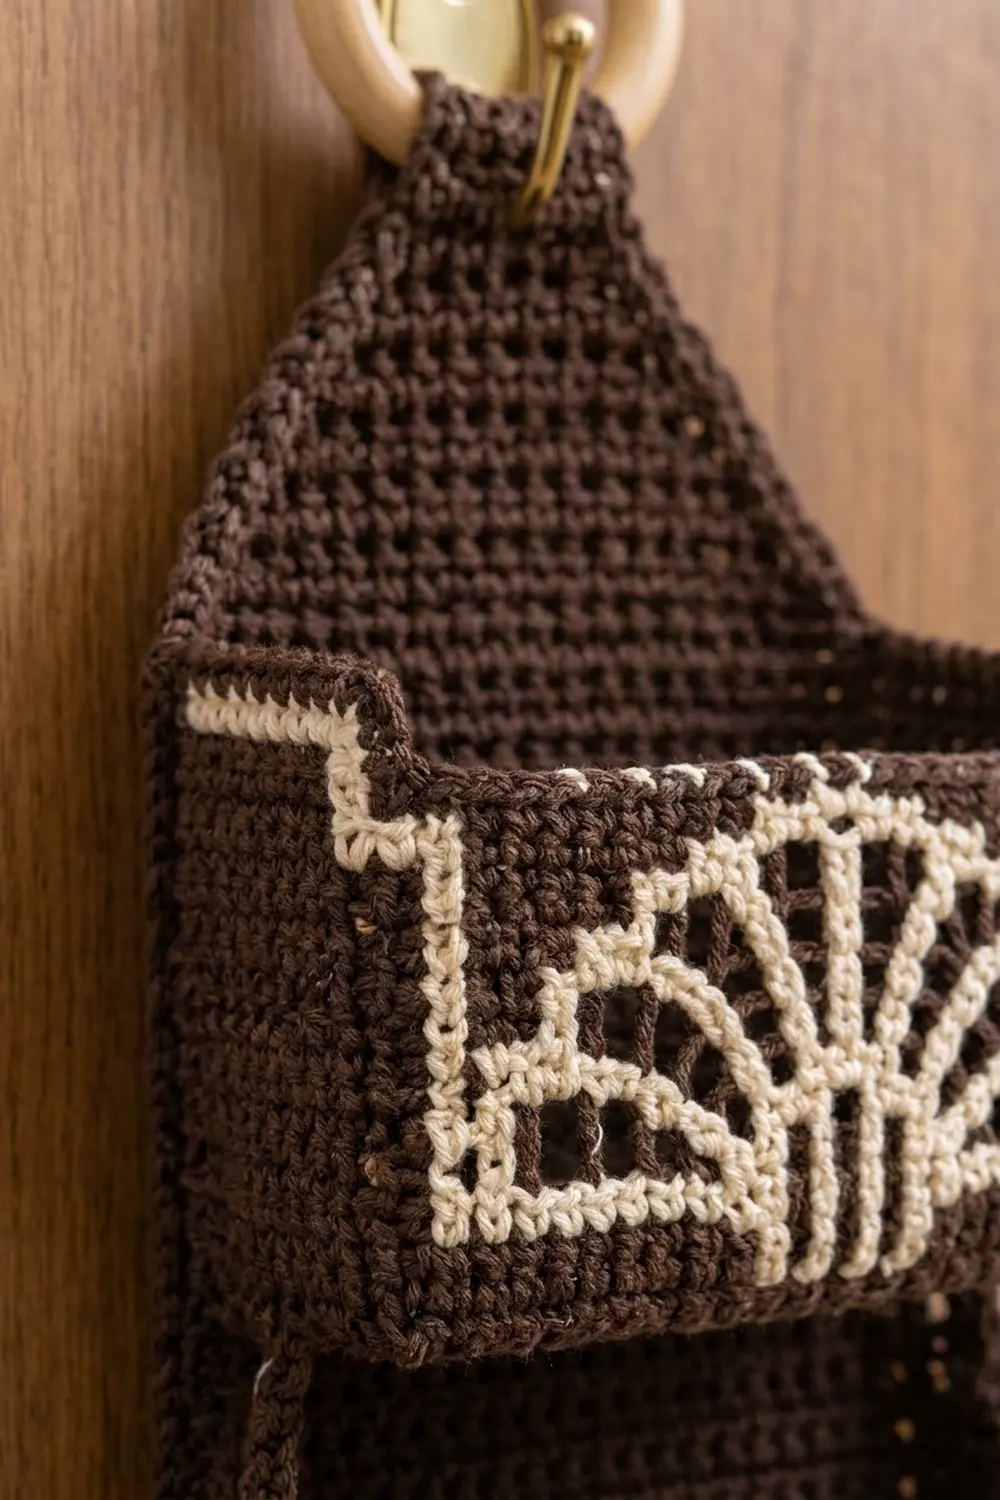
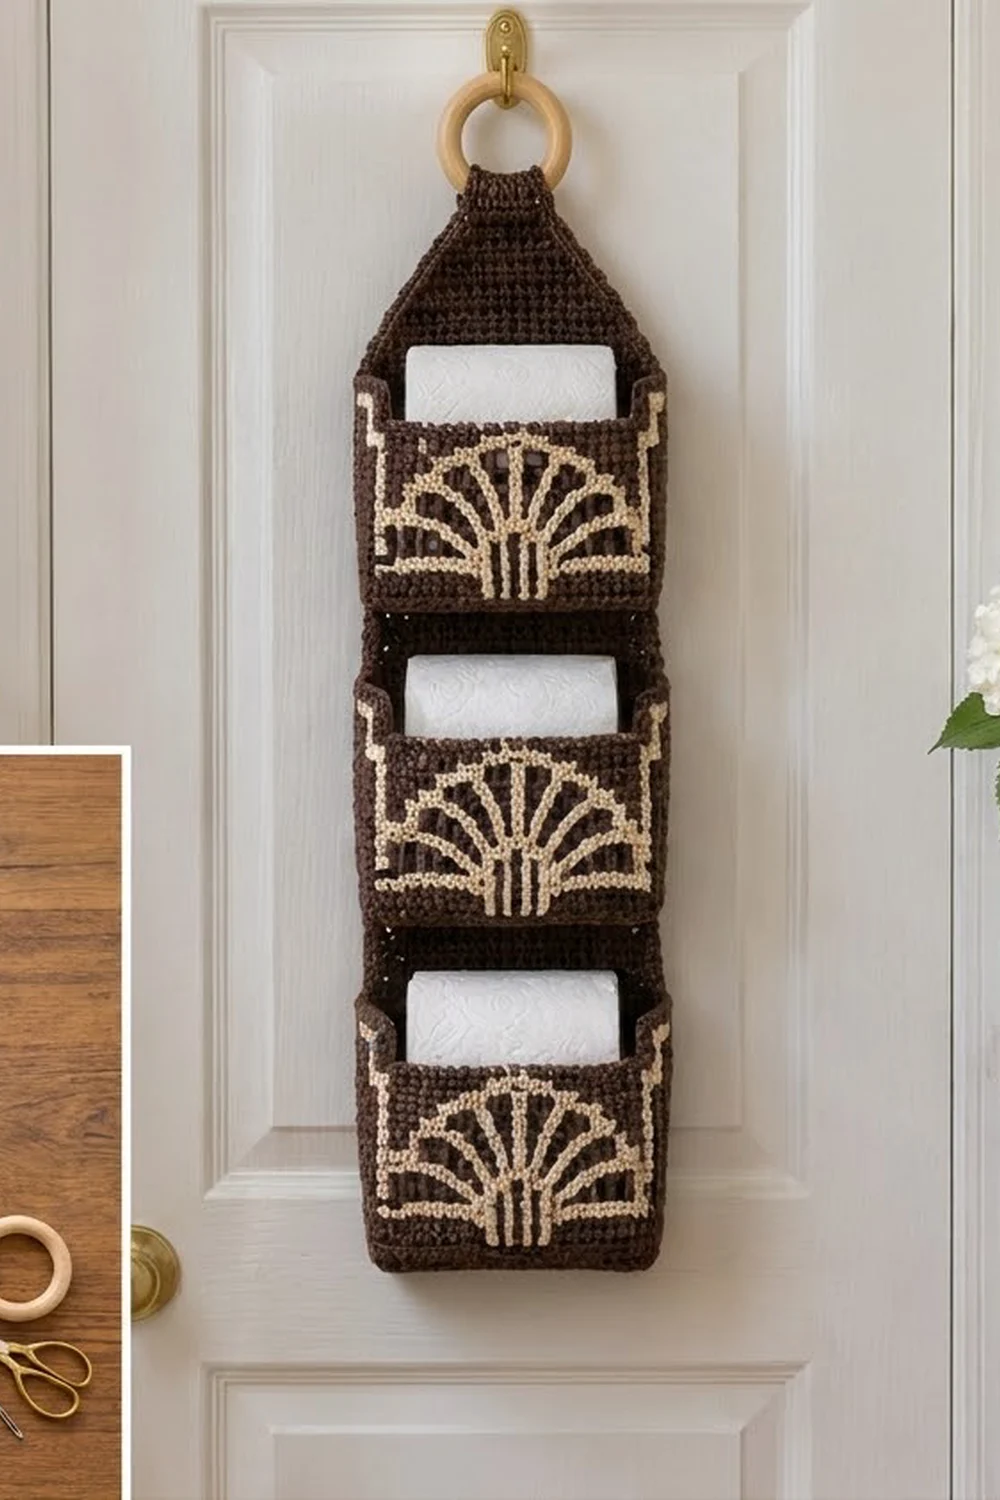
This hanging holder has a structured, vintage look. Three neat baskets are stacked on a long chocolate-brown panel, and each basket has a cream Art Deco fan worked into its front. The holder hangs from a wooden ring on a door hook and keeps three spare rolls tidy and within reach.
The palette has just two colors: dark brown for the body and cream for the fan and the stepped accent line. The colorwork is tapestry crochet in single crochet. The yarn you aren’t using is carried inside the stitches, so the walls come out thick and hold their shape.
This pattern uses US crochet terms. The finished holder measures 6 in (15.2 cm) wide and about 20 in (50.8 cm) from the bottom edge to the top of the folded tab. The ring adds about 3 in (7.6 cm), for a hanging length of about 23 in (58.4 cm). Each basket is 6 in (15.2 cm) wide, 4 in (10.2 cm) deep and 4¼ in (10.8 cm) tall.
Each basket starts with a flat rectangular base. The walls are worked up from it in joined rounds, with the fan worked into the front wall. The panel is worked in rows, tapered to a point and finished with a tab. A two-round border goes around the panel, and then the baskets are sewn on.
Finished Size and Construction
- Finished size: 6 in (15.2 cm) wide × 20 in (50.8 cm) long, plus the ring
- Skill level: Intermediate (tapestry crochet)
- Terminology: US
- Yarn weight: Worsted (#4) cotton
- Hook: 4.0 mm (US G-6)
- Number of pieces: 4 (1 panel + 3 baskets)
- Layout: 1 column of 3 baskets on 1 panel
- Basket size: 6 × 4 × 4¼ in (15.2 × 10.2 × 10.8 cm)
- Panel size before border: 5½ in (14.0 cm) wide × 21¾ in (55.2 cm) long, tab included
- Border depth: about ¼ in (0.6 cm) per edge
Materials
Use a smooth, firmly twisted cotton or cotton blend. Cotton keeps the baskets crisp and stands up to bathroom humidity. Avoid fuzzy or very soft yarns, because the fan lines need clean stitch definition.
- Color A (dark chocolate brown): 220 g / 370 m
- Color B (cream): 80 g / 135 m
These quantities include a margin of about 15% for swatching, color carrying and seaming.
Tools:
– 4.0 mm (US G-6) crochet hook
– 1 wooden ring, 3 in (7.6 cm) outer diameter
– Tapestry needle
– 4 stitch markers
– Scissors
– Optional: 3 plastic canvas rectangles, 5¾ × 3¾ in (14.6 × 9.5 cm), as base inserts
Abbreviations (US Terms)
- ch – chain
- sc – single crochet
- sc2tog – single crochet 2 together
- sl st – slip stitch
- BLO – back loop only
- rev sc – reverse single crochet (crab stitch)
- st(s) – stitch(es)
- A / B – Color A / Color B
Tapestry sc: Work sc as usual, laying the unused color along the top of the round below and enclosing it inside each stitch. To change color, work the last yarn-over of the stitch before the color change with the new color. Keep the carried strand relaxed but not loose.
Gauge and Checkpoints
Gauge: 16 sc and 18 rows/rounds = 4 in (10.2 cm) in sc, worked firmly.
Make one basket first. Its base works as your gauge swatch:
- Checkpoint 1 (base, Row 18): 6 × 4 in (15.2 × 10.2 cm).
- Checkpoint 2 (walls, Rnd 18): walls measure 4 in (10.2 cm) tall from the base fold.
- Checkpoint 3 (finished basket): 6 × 4 × 4¼ in (15.2 × 10.2 × 10.8 cm).
If the base is too large, go down one hook size. If it is too small, go up one hook size. Do this before you start the walls. Tapestry rounds tend to tighten slightly, so check the walls again at Rnd 10.
Basket (Make 3)
Base
With A, ch 25.
Row 1: Sc in 2nd ch from hook and in each ch across. (24 sts)
Rows 2–18: Ch 1, turn, sc in each st across. (24 sts)
Edge Rnd: Ch 1, turn. Sc in each of the 24 sts across (this long edge is the back). Work 16 sc evenly along the 18 row-ends, skipping 2 row-ends spaced evenly. Work 24 sc along the foundation chain (this long edge is the front). Work 16 sc evenly along the remaining 18 row-ends. Join with a sl st to the first sc. (80 sts: 24 + 16 + 24 + 16)
The base perimeter of 20 in (50.8 cm) at 4 sts per in gives exactly 80 sts.
Walls
Every wall round is joined with a sl st and starts with ch 1. The ch 1 does not count as a stitch. Each round runs in this order: back 24, side 16, front 24, side 16. This puts the join at a back corner, where the panel will hide it. The front stitches are numbered 1–24 in working order. The motif is symmetrical, so it reads the same from either direction.
Rnd 1: With A, sc BLO in each st around. (80 sts) This round turns the walls up and leaves a crisp edge around the base.
Rnds 2–3: With A, sc in each st around. (80 sts)
Rnd 4: Join B and carry it from here through Rnd 16. A 40 (back + side). Front: A 8, B 8, A 8. A 16. (80 sts)
Rnds 5–6: A 40. Front: A 8, B 1, A 1, B 1, A 2, B 1, A 1, B 1, A 8. A 16. (80 sts)
Rnd 7: A 40. Front: A 2, B 20, A 2. A 16. (80 sts)
Rnds 8–9: A 40. Front: A 2, B 1, A 2, B 1, A 2, B 1, A 2, B 2, A 2, B 1, A 2, B 1, A 2, B 1, A 2. A 16. (80 sts)
Rnd 10: A 40. Front: A 3, B 1, A 2, B 1, A 1, B 1, A 2, B 2, A 2, B 1, A 1, B 1, A 2, B 1, A 3. A 16. (80 sts)
Rnd 11: A 40. Front: A 3, B 4, A 2, B 1, A 1, B 2, A 1, B 1, A 2, B 4, A 3. A 16. (80 sts)
Rnd 12: A 40. Front: A 6, B 2, A 1, B 1, A 1, B 2, A 1, B 1, A 1, B 2, A 6. A 16. (80 sts)
Rnd 13: A 40. Front: A 7, B 3, A 1, B 2, A 1, B 3, A 7. A 16. (80 sts)
Rnd 14: A 40. Front: B 3, A 6, B 6, A 6, B 3. A 16. (80 sts) The B 6 in the middle closes the top of the fan arch. The B 3 groups at each end are the inward step of the corner accent.
Rnd 15: A 40. Front: B 1, A 22, B 1. A 16. (80 sts)
Rnd 16: B 40. Front: B 1, A 22, B 1. B 16. (80 sts) Cut B and weave in its end on the inside.
The corner accent comes from Rnds 14–16 together. The cream side line in Rnd 16 runs onto each front corner, travels down front sts 1 and 24 through Rnds 16–14, and turns inward 3 sts in Rnd 14.
Rnds 17–18: With A, sc in each st around. (80 sts)
Rnd 19: With A, sl st in each st around. (80 sl sts) Fasten off.
The fan is 20 sts wide, which is 5 in (12.7 cm). It is 11 rounds tall (Rnds 4–14), which is about 2½ in (6.4 cm). It sits centered with a 2-st brown margin on each side.
If you are using base inserts, slip one into each basket now. Fold the corners of each basket gently between your fingers to square them.
Backing Panel (Make 1)
With A, ch 23.
Row 1: Sc in 2nd ch from hook and in each ch across. (22 sts)
Rows 2–72: Ch 1, turn, sc in each st across. (22 sts)
Checkpoint: The rectangle should measure 5½ × 16 in (14.0 × 40.6 cm).
Taper
Rows 73–80: Ch 1, turn, sc2tog, sc in each st to the last 2 sts, sc2tog. This gives 20, 18, 16, 14, 12, 10, 8 and 6 sts. Row 80 ends with 6 sts.
The point is about 1¾ in (4.4 cm) tall.
Tab
Rows 81–98: Ch 1, turn, sc in each st across. (6 sts) Do not fasten off.
The tab is 1½ in (3.8 cm) wide and 4 in (10.2 cm) long. The panel now measures 5½ × 21¾ in (14.0 × 55.2 cm).
Make All Pieces
- Color A: 1 panel and 3 baskets (all bases, walls and rims)
- Color B: 3 baskets (fan and corner accent only)
The layout is one column, read from top to bottom:
      [ RING ]
        [TAB]
       /     \
   |  BASKET 1  |   panel rows 54–72
   |    gap     |   panel rows 48–53
   |  BASKET 2  |   panel rows 29–47
   |    gap     |   panel rows 23–28
   |  BASKET 3  |   panel rows 4–22
   |  margin    |   panel rows 1–3
That adds up to 3 + 19 + 6 + 19 + 6 + 19 = 72 rows, which is exactly the rectangle. Each 6-row gap is about 1⅓ in (3.4 cm).
Border (Panel Only)
Border gauge: 4 sc per in along stitch edges and 8 sc per 9 row-ends along straight sides, which keeps the edges flat.
Rnd 1: Continue from Row 98, ch 1, and work around the whole panel:
- Tab top: 3 sc in the first st, sc in the next 4 sts, 3 sc in the last st. (6 worked 1 per st + 4 extra = 10)
- Tab side: 16 sc along the 18 row-ends, skipping 2 evenly. (16)
- Taper edge: 1 sc in each of the 8 row-ends, plus 2 extra sc spaced evenly along the slope. (8 + 2 = 10)
- Long side: 8 sc in every 9 row-ends, 8 times. (64)
- Bottom: 3 sc in the first ch, sc in the next 20 ch, 3 sc in the last ch. (22 worked 1 per st + 4 extra = 26)
- Long side: 64
- Taper edge: 10
- Tab side: 16
Join with a sl st to the first sc. (216 sts: 10 + 16 + 10 + 64 + 26 + 64 + 10 + 16)
Rnd 2: Ch 1, rev sc in each st around. (216 sts) Join and fasten off.
Why the math works: Measured from corner point to corner point, the bottom edge is 1 + 1 + 20 + 1 + 1 = 24 sts. At 4 sts per in that is 6 in (15.2 cm), which matches the 24-st back wall of each basket exactly. The long sides turn 72 rows (16 in / 40.6 cm) into 64 sc at stitch gauge. Add the outer corner sc and the border height, and the long sides measure 16¼ in (41.3 cm). Bordered, the panel is 6 × 22¼ in (15.2 × 56.5 cm).
Joining
Ring: Fold the tab over the wooden ring toward the back of the panel, so the tab top lies on the back of tab Row 89. Whipstitch the 10 tab-top sts across that row. The visible loop is now about 2 in (5.1 cm).
Baskets: Use A and the tapestry needle. Pin the back wall of each basket flat against the front of the panel at the rows shown in the layout. The basket’s side edges should line up with the panel’s border edges.
- Bottom edge: Whipstitch the 24 unused front loops of the basket’s Edge Rnd (back section) to the 24 sts across the panel row: 22 body sts plus 1 border st at each end. Work one stitch to one stitch.
- Back corners: Whipstitch each back corner to the panel, 1 stitch per basket round. That is 19 stitches per corner, going into the panel row-ends just inside the border.
- Rim: Whipstitch the 24 back rim sl sts to the 24 sts of the panel row at rim level.
Keep the whipstitches snug but not tight. Pulling too hard puckers the panel and narrows the basket mouth. Attach Basket 2 first so the column stays centered, then Basket 1 and Basket 3.
Size checkpoint: The joined holder is 6 in (15.2 cm) wide, and each basket stands 4 in (10.2 cm) out from the panel. From the bottom border to the top of the folded tab, the holder measures about 20 in (50.8 cm).
Final Blocking
- Lightly mist the whole holder with water.
- Lay the panel face up, ease it to 6 in (15.2 cm) wide and pin the long edges straight.
- Stuff each basket with a toilet roll or a folded towel to square the walls.
- Pinch each basket corner and the BLO base fold so they stand crisp.
- Smooth the fan lines so the spokes run straight.
- Let it dry completely before you hang it.
Final Quality-Control Checklist
- [ ] Each basket is 6 × 4 × 4¼ in (15.2 × 10.2 × 10.8 cm).
- [ ] The fan is centered with 2 brown sts on each side.
- [ ] The corner accents match on both sides.
- [ ] No carried yarn shows through on the outside.
- [ ] The panel is 6 in (15.2 cm) wide with even rev sc edges.
- [ ] Each basket’s back wall lines up with the panel edges.
- [ ] The gaps between baskets are equal.
- [ ] The tab is secure around the ring.
- [ ] All ends are woven in on the inside or the back.
Troubleshooting
- The fan leans or slants: Spiral rounds cause drift. Join every round and start each one at the back corner.
- Cream shows dots of brown: Change color on the last yarn-over of the previous stitch, and keep the carried strand flat along the top of the round below.
- The walls flare outward: Your tension is loose. Go down one hook size, or check that you worked Rnd 1 in BLO.
- The walls pucker: The carried strand is too tight. Stretch the round slightly every few stitches.
- The panel edges ripple: You have too many border sts. Keep to 8 sc per 9 row-ends.
- A basket sags forward: Add a base insert and stitch the rim to the panel more firmly.
Care
Hand wash in cool water, press out the water in a towel and reshape the baskets to dry flat. Do not tumble dry, because heat can loosen the tapestry fabric.
Final Notes
The measurements build on each other. Gauge of 16 sc × 18 rows = 4 in (10.2 cm) gives a 24 × 18 base of 6 × 4 in (15.2 × 10.2 cm). That base gives 80-st walls, 4¼ in (10.8 cm) tall with the fan centered on the front. The 22-st panel plus border gives the 24-st width that matches each basket’s back wall exactly. The 72 panel rows hold three 19-row baskets, two 6-row gaps and a 3-row margin. Check your gauge on the first basket base, and the rest of the pieces will fit.
Happy crocheting!