

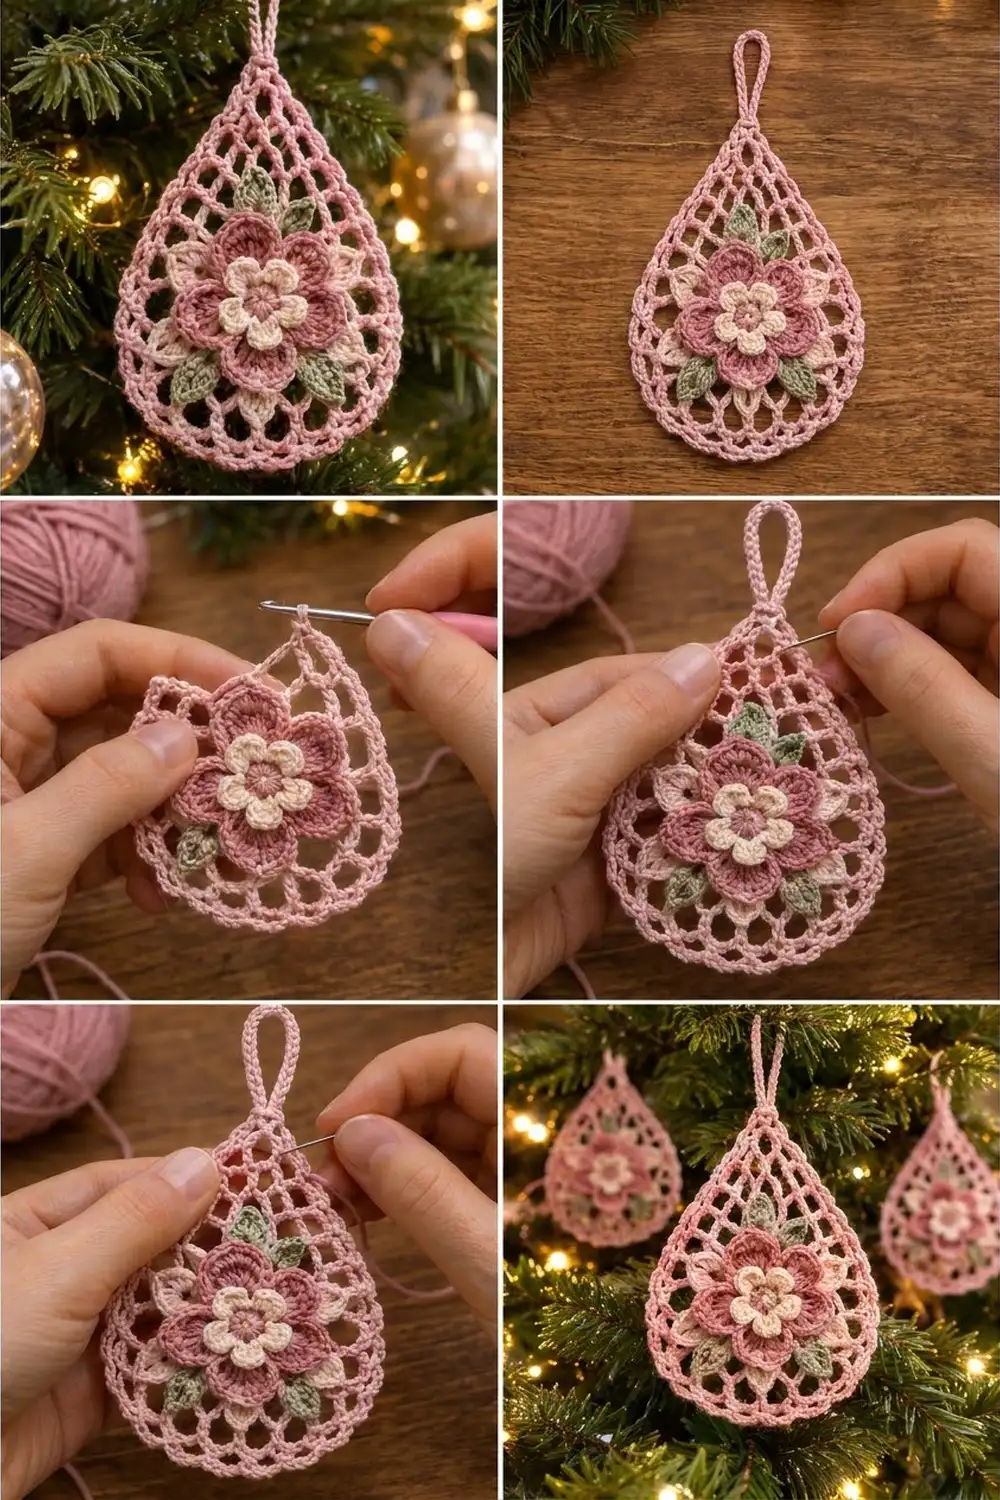
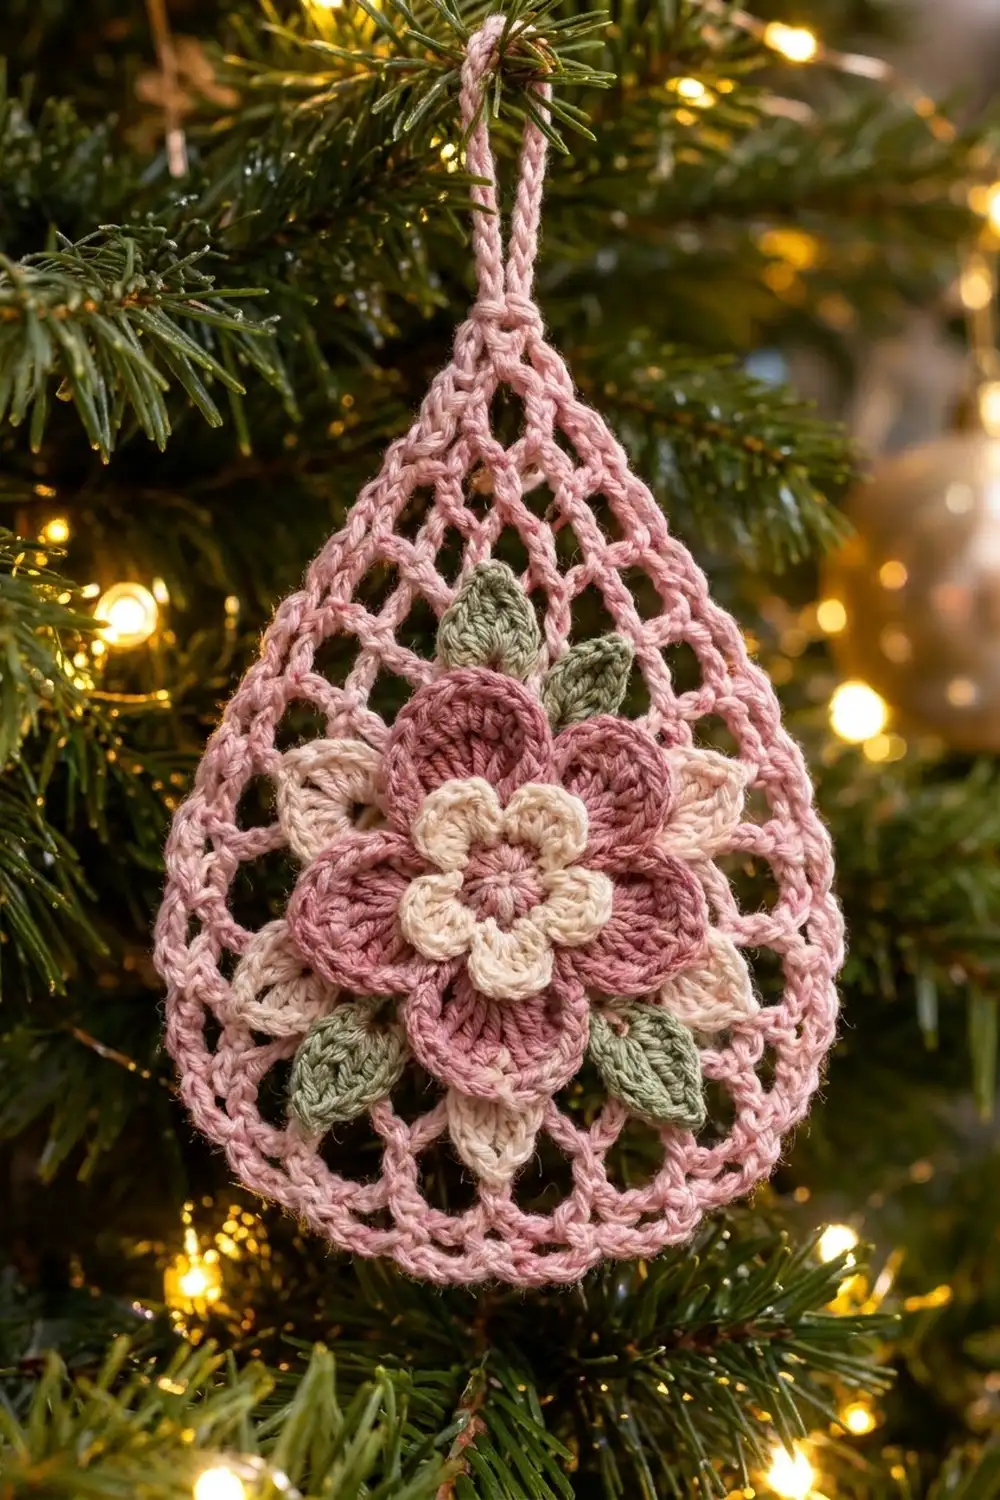
This ornament is a lacy teardrop of light pink chain mesh with a layered flower sewn to its center. A dusty rose five-petal flower sits on a cream back layer whose pointed petals peek out between the rose petals. A small cream flower with a dusty rose center goes on top. Four sage green leaves are tucked into the gaps, and a picot edge and a crocheted hanging loop finish the piece.
The palette is soft and vintage: light pink, dusty rose, cream, and sage green. It looks romantic on a Christmas tree, and it also works year-round as a bag charm, window hanging, or gift-wrap topper.
This pattern uses US crochet terms. The finished ornament measures 4.25 in (10.8 cm) wide and 5 in (12.7 cm) tall without the loop. With the loop it is 6.5 in (16.5 cm) tall.
You start the mesh as a circle, worked in the round from a magic ring. One shaping round pulls the top into a point. Next you make the three flower layers and the leaves separately and sew them to the center. A two-round border and the hanging loop finish the edge.
Finished Size and Construction
- Finished size: 4.25 in (10.8 cm) wide x 5 in (12.7 cm) tall, plus a 1.5 in (3.8 cm) loop
- Skill level: Intermediate (lace rounds and shaping)
- Terminology: US crochet terms
- Yarn weight: Sport weight (#2) cotton
- Hook: 3.0 mm (C/2–D/3)
- Number of pieces: 1 ornament (one mesh base with sewn-on appliqué: 1 cream back layer, 1 rose flower, 1 small flower, 4 leaves)
- Layout: Single teardrop, point at top, flowers centered on the Round 1 ring
- Piece size before border: 3.75 in (9.5 cm) wide x 4.5 in (11.4 cm) tall
- Border depth: 0.25 in (0.6 cm) on every edge
Materials
Choose a smooth, mercerized sport-weight cotton, around 165 yd (150 m) per 1.75 oz (50 g). Cotton gives crisp stitch definition, holds the mesh shape after blocking, and doesn’t fuzz on the tree.
- Color A, Light Pink (mesh, border, loop): 12 g / 36 m
- Color B, Dusty Rose (large flower, small flower center): 5 g / 15 m
- Color C, Cream (back petal layer, small flower): 4 g / 12 m
- Color D, Sage Green (leaves): 2 g / 6 m
These quantities include a margin of about 20% for gauge swatching and tails.
Tools:
- 3.0 mm crochet hook
- Tapestry needle
- Stitch markers (2)
- Scissors
- Rustproof pins and a foam blocking mat
- Spray bottle with clean water
- Optional: fabric stiffener for a firmer ornament
Abbreviations (US Terms)
- ch – chain
- sl st – slip stitch
- sc – single crochet
- hdc – half double crochet
- dc – double crochet
- tr – treble crochet
- sk – skip
- sp(s) – space(s)
- MR – magic ring
- st(s) – stitch(es)
Special stitch – Picot: Ch 3, sl st in the 3rd ch from hook (the first chain made).
Gauge and Checkpoints
Gauge is measured as round diameters, not a flat swatch. Make Rounds 1–4 of the mesh first as your test piece, lay it flat without stretching, and measure across.
- After Round 1: 1 in (2.5 cm) diameter
- After Round 2: 1.75 in (4.4 cm)
- After Round 3: 2.5 in (6.4 cm)
- After Round 4: 3.25 in (8.3 cm)
- After Round 6: 3.75 in (9.5 cm) wide x 4.5 in (11.4 cm) tall
- After the border: 4.25 in (10.8 cm) wide x 5 in (12.7 cm) tall
Too big? Drop to a 2.75 mm hook, or tighten your chains, because loose chains make the mesh bigger.
Too small? Go up to a 3.25 mm hook. If the circle cups, your chains are too tight. If the circle ruffles, they are too loose.
Mesh Base
Use Color A. Work every round with the right side facing; don’t turn between rounds.
Round 1: MR, ch 3 (counts as dc), 15 dc in ring, sl st in top of ch-3. Pull the ring tight. (16 dc)
Round 2: Ch 1, sc in same st, ch 3, sc in next dc, ch 3; rep from * 14 more times, sl st in first sc. (16 sc, 16 ch-3 sps)
Round 3: Sl st in first ch-3 sp, ch 1, sc in sp, ch 4; rep from * in each sp around, sl st in first sc. (16 sc, 16 ch-4 sps)
Round 4: Sl st in next 2 ch, ch 1, sc in sp, ch 5; rep from * in each sp around, sl st in first sc. (16 sc, 16 ch-5 sps)
Checkpoint: the flat circle measures 3.25 in (8.3 cm) across.
Round 5 (shaping round): This round builds the top point. Number the Round 4 spaces 1 to 16 in the order you work them. Space 9 becomes the top center. Place a marker in it now.
Sl st in next 2 ch, ch 1.
- Sps 1–6: sc in sp, ch 5; rep from * 5 more times. (6 sc, 6 ch-5 sps)
- Sp 7: hdc, ch 6.
- Sp 8: dc, ch 7.
- Sp 9 (top center): (tr, ch 4, tr), ch 7.
- Sp 10: dc, ch 6.
- Sp 11: hdc, ch 5.
- Sps 12–16: sc in sp, ch 5; rep from * 4 more times, sl st in first sc.
Round 5 count: 18 sts (11 sc, 2 hdc, 2 dc, 2 tr). There are 17 spaces: 12 ch-5, 2 ch-6, 2 ch-7, and 1 ch-4 point space. The taller stitches and longer chains raise the top into a point, and the bottom stays round.
Round 6: Sl st in next 2 ch, ch 1, sc in sp, ch 5; rep from * in every ch-5, ch-6, and ch-7 sp. In the ch-4 point sp, work (sc, ch 3, sc), ch 5. Sl st in first sc to join.
Round 6 count: 18 sc (16 regular plus 2 at the point), 17 ch-5 sps, and 1 ch-3 point sp. Fasten off.
Checkpoint: 3.75 in (9.5 cm) wide x 4.5 in (11.4 cm) tall, point to bottom.
Flower Layers and Leaves
Cream Back Layer (Color C)
Round 1: MR, ch 1, 10 sc in ring, sl st in first sc. (10 sc)
Round 2: Ch 1, sc in next st, ch 6, sk 1; rep from * 4 more times, sl st in first sc. (5 ch-6 sps)
Round 3: In each ch-6 sp: (sc, hdc, dc, tr, ch 2, tr, dc, hdc, sc). Sl st in first sc. (5 pointed petals, 8 sts plus a ch-2 tip each, 40 sts)
Fasten off with a 10 in (25.4 cm) tail. Diameter: 2.75 in (7.0 cm), tip to tip.
Large Rose Flower (Color B)
Round 1: MR, ch 1, 10 sc in ring, sl st in first sc. (10 sc)
Round 2: Ch 1, sc in next st, ch 4, sk 1; rep from * 4 more times, sl st in first sc. (5 ch-4 sps)
Round 3: In each ch-4 sp: (sc, hdc, 2 dc, tr, 2 dc, hdc, sc). Sl st in first sc. (5 rounded petals, 9 sts each, 45 sts)
Fasten off with a 10 in (25.4 cm) tail. Diameter: 2.25 in (5.7 cm).
Small Top Flower (Colors B and C)
Round 1 (B): MR, ch 1, 10 sc in ring, sl st in first sc. (10 sc) Fasten off B. This round becomes the rose center.
Round 2 (C): Join C in any st, ch 1, sc in same st, ch 2, sk 1; rep from * 4 more times, sl st in first sc. (5 ch-2 sps)
Round 3: In each ch-2 sp: (sc, hdc, 2 dc, hdc, sc). Sl st in first sc. (5 petals, 6 sts each, 30 sts)
Fasten off with an 8 in (20.3 cm) tail. Diameter: 1.25 in (3.2 cm).
Leaves (Color D, make 4)
Ch 7. Sl st in 2nd ch from hook (leaf base). Then sc, hdc, dc, hdc, sc in the next 5 ch. Ch 2 for the tip. Working along the free loops on the other side of the chain, work sc, hdc, dc, hdc, sc. Sl st in the base sl st. (10 sts plus a ch-2 tip)
Fasten off with a 6 in (15.2 cm) tail. Each leaf is 0.75 in (1.9 cm) long.
Assembly of the Appliqué
- Lay the mesh flat, point up. The Round 1 ring is the center target.
- Center the cream back layer over the ring and whipstitch its Round 1 to the mesh’s Round 1 dc. Only the center is sewn, so the petals stay free.
- Place the rose flower on top. Turn it so each rose petal sits between two cream petals and the cream tips peek out in the gaps. Sew through the Round 1 and Round 2 sc.
- Center the small flower on the rose flower and sew around its Round 1.
- Tuck the 4 leaves under the rose flower so their tips point outward. Put 2 in the upper petal gaps, angled toward the point, and 2 in the lower gaps. Tack each leaf base to the mesh behind the flower.
- Weave in all tails on the back.
The finished flower stack is about 2.75 in (7.0 cm) across. That leaves an even band of open mesh, about 0.5 in (1.3 cm), showing at the sides.
The border only touches the outer edge, so the appliqué can go on before or after it. Sewing it on first makes the center easier to handle while the ornament is still small and flexible.
Border
Border gauge: 6 sc fill one ch-5 sp, and the border adds 0.25 in (0.6 cm) on every edge.
Round 7: Join A in any ch-5 sp, ch 1, 6 sc in every ch-5 sp around. In the ch-3 point sp, work (2 sc, ch 2, 2 sc). Sl st in first sc.
Round 7 count: 102 sc in the spaces (17 x 6) + 4 sc at the point = 106 sc, plus 1 ch-2 point sp.
Per side: The 17 ch-5 sps run point to point around the edge. Each side, from the top point to the bottom center, has 8 full spaces plus half of the bottom center space: 48 + 3 + 2 point sc = 53 sc. Two sides x 53 = 106.
Round 8 (picot round): Ch 1. Over each 6-sc group: sc in next 3 sc, picot, sc in next 3 sc. At the point: sc in each of the 2 point sc, (sc, ch 2, sc) in the ch-2 sp, sc in the next 2 point sc. Sl st in first sc.
Round 8 count: 106 sc worked 1-per-existing-st + 2 extra sc at the point = 108 sc, plus 17 picots and 1 ch-2 point sp. That makes 54 sc per side, and the bottom center picot sits exactly at the bottom of the teardrop.
Why the math works: A ch-5 space is about as wide as 6 sc at this gauge. So 6 sc per space lies flat without cupping or waving. The single picot per space lines up with the scallops of the mesh. The extra sc and ch-2 at the point keep the tip sharp.
Hanging Loop: Do not fasten off. Sl st into the ch-2 point sp, ch 24, then sl st into the same sp to form the loop. Ch 1 and work 30 sc over the loop chain, sliding them together until the chain is fully covered. Sl st in the point sp. Fasten off and weave in. The loop stands 1.5 in (3.8 cm) tall.
Final Blocking
- Spray the mesh and border evenly with water until damp. Keep the flowers as dry as you can so they stay plump.
- Draw a 4.25 in (10.8 cm) x 5 in (12.7 cm) teardrop on paper and place it under a clear sheet on your mat.
- Pin the top point first, then the bottom center picot, then the widest point on each side.
- Pin each of the 17 picots outward so the scallops are even.
- Open each mesh space with a fingertip so the chains lie straight.
- Optional: brush a light coat of stiffener on the mesh only.
- Let it dry completely, at least 6 hours, before unpinning.
Final Quality-Control Checklist
- Width is 4.25 in (10.8 cm) and height is 5 in (12.7 cm) without the loop
- The top point is sharp and centered
- Round 6 has 18 sc and 17 ch-5 sps
- Round 7 has 106 sc and Round 8 has 108 sc and 17 picots
- Cream petal tips peek out evenly between all 5 rose petals
- The 4 leaves are placed symmetrically, 2 above and 2 below
- The loop is fully covered and 1.5 in (3.8 cm) tall
- Every tail is woven in on the back
Troubleshooting
The point is round, not pointed. Check that Round 5 uses tr at the top center and the ch-6 and ch-7 lengths. Make sure the (tr, ch 4, tr) went into space 9 and not space 8.
The mesh cups. Your chains are too tight. Rework Rounds 3–6 with looser chains or a larger hook.
The border ripples. You are working too many sc per space, or your chains are loose. Try 5 sc per space only if the space count stays at 17, and rebalance the picots.
The cream petals don’t show. Turn the rose flower until its petals sit between the cream points.
The petals curl forward. Pin each flower flat, damp, for an hour before sewing it on.
A leaf twists. You probably worked the second side into the wrong loops. Work into the free bottom loops only.
The ornament hangs crooked. The loop isn’t centered in the point sp. Remove it and rework it in the ch-2 sp.
Care
Hand wash in cool water with mild soap, press out the water in a towel, and dry flat, reshaping the point. Store flat between sheets of tissue paper.
Final Notes
Measure the ornament at every stage:
- Round 1: 1 in (2.5 cm)
- Round 4: 3.25 in (8.3 cm)
- Round 6 shaped teardrop: 3.75 in (9.5 cm) x 4.5 in (11.4 cm)
- Border: 0.25 in (0.6 cm) on each edge
- Finished: 4.25 in (10.8 cm) x 5 in (12.7 cm)
- With the 1.5 in (3.8 cm) loop: 6.5 in (16.5 cm) tall
If your circle measures right at Round 4 and Round 7 has 106 sc, the rest of the ornament will come out to size. Make one for each branch, or change the flower colors for a whole set.
Happy crocheting!