

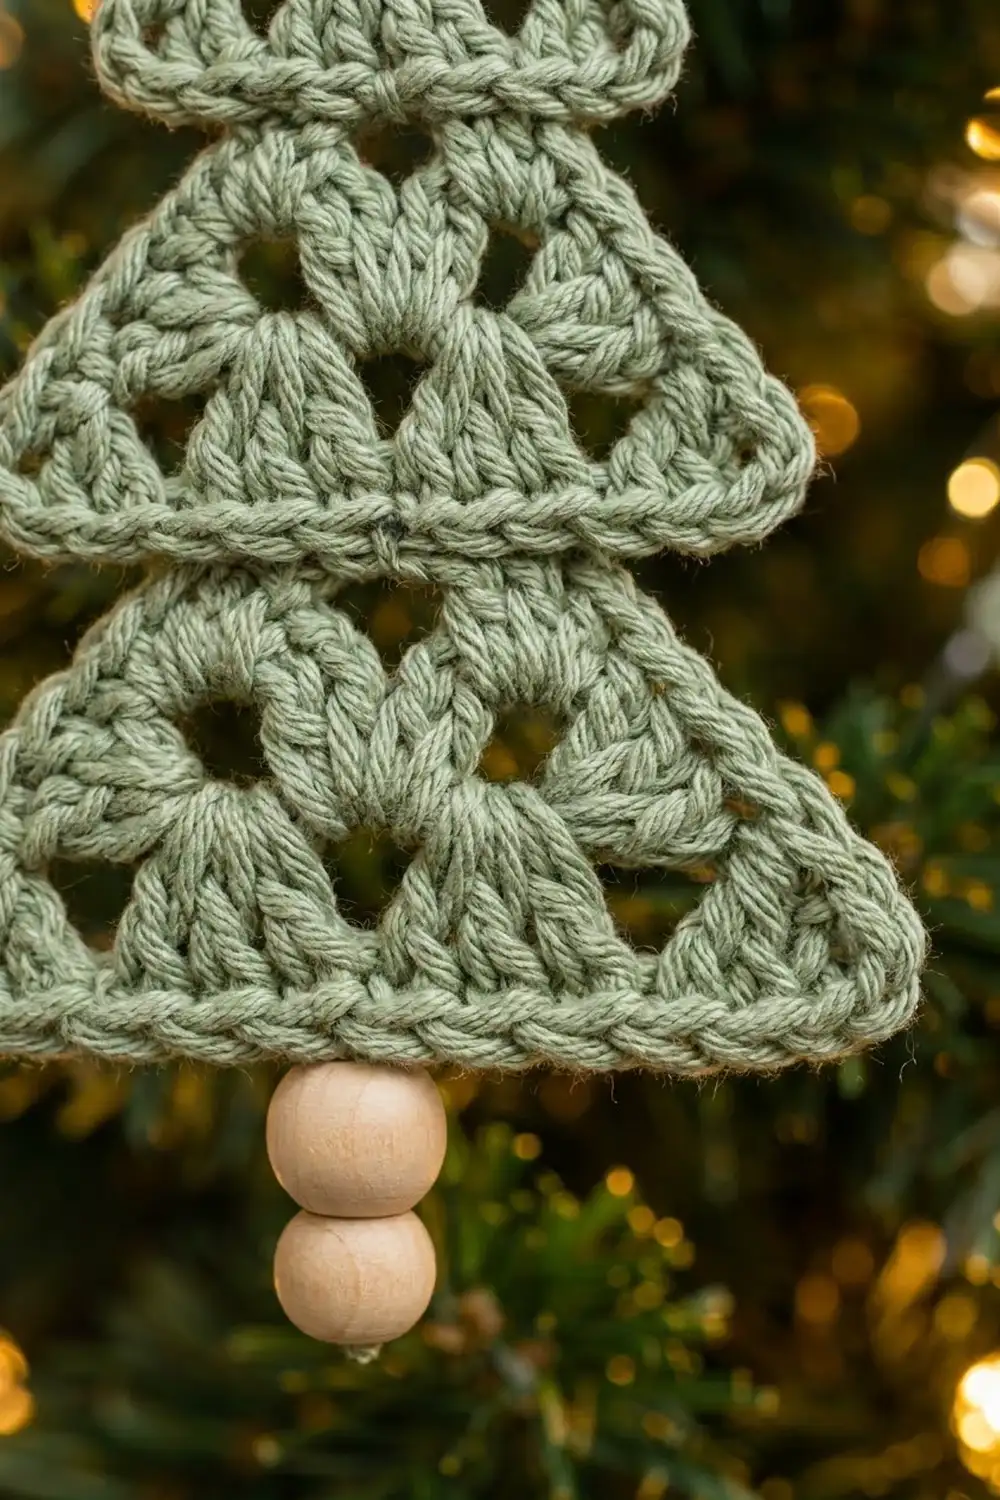
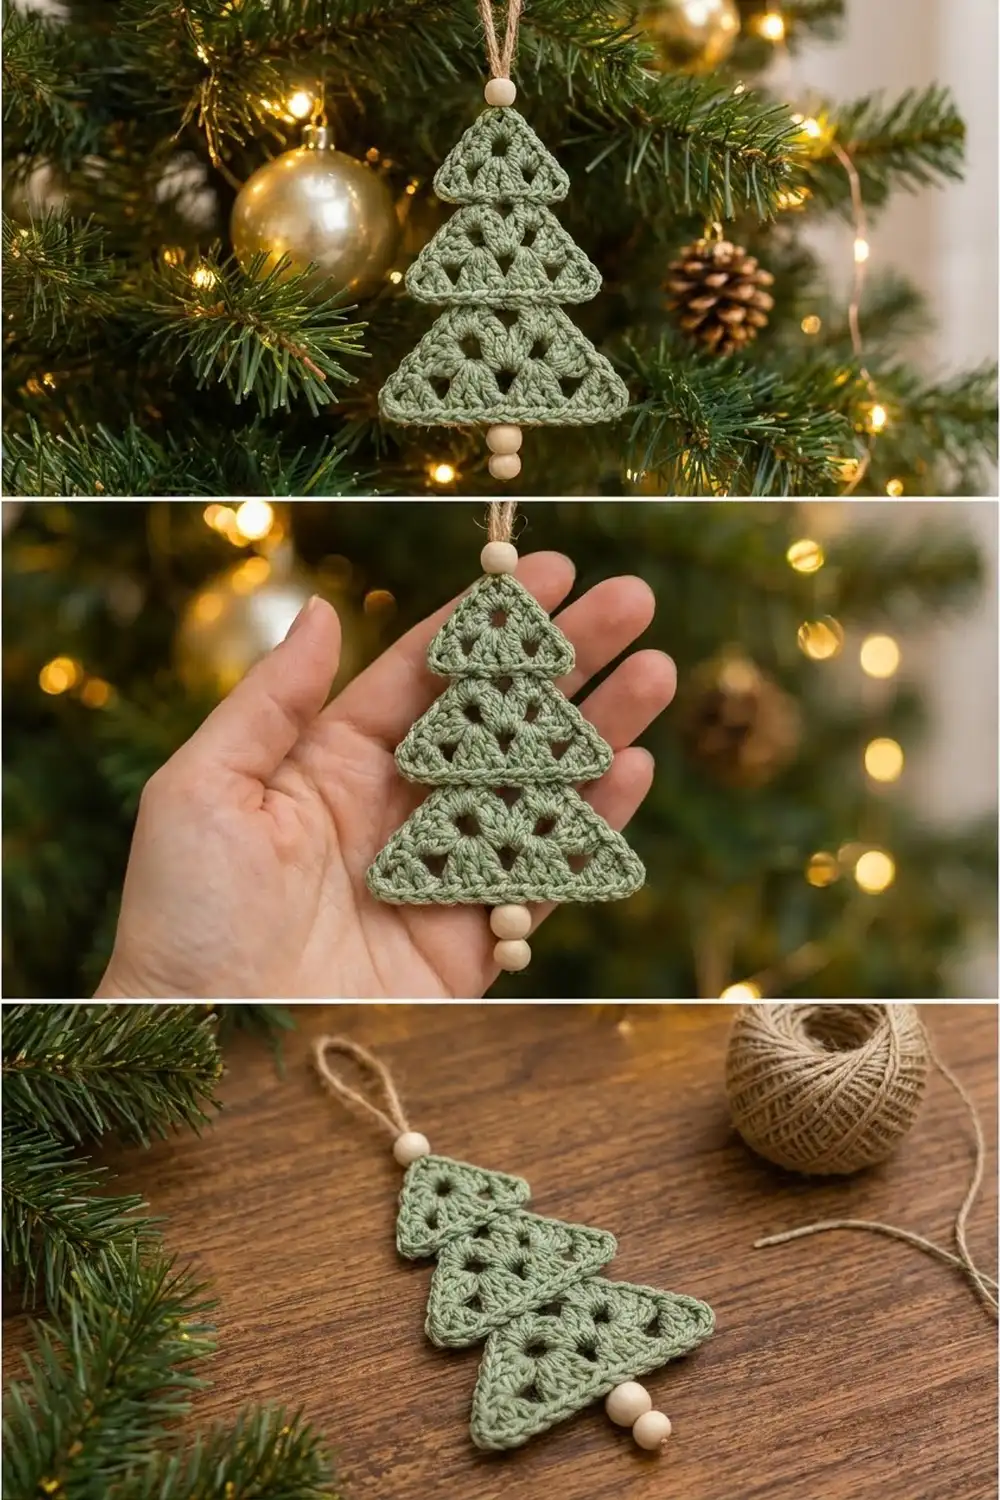
This little tree is made from three granny triangles in graduated sizes, stacked into a soft, tiered Christmas tree. Every tier has the familiar granny look: a round hole at the center and airy three-double-crochet clusters with small triangular windows between them.
The sample is worked in one sage-green cotton, with natural wooden beads and a jute hanging loop. It looks Scandinavian and quiet, suits a natural-themed tree, and works well as a gift topper. The pattern uses US crochet terms throughout.
The finished tree measures about 3.4 in (8.6 cm) wide and 4.75 in (12.1 cm) tall, not counting the beads. With the top bead and the bead trunk, it hangs about 6 in (15.2 cm) long, plus a 2 in (5.1 cm) twine loop.
How it’s made: you crochet three granny triangles (2, 3 and 4 rounds) and finish each one with a single-crochet edge. Then you overlap the tiers and sew them together, and add the beads and the loop.
Finished Size and Construction
- Finished size: 3.4 in (8.6 cm) wide × 4.75 in (12.1 cm) tall (the tree only)
- Hanging length with beads: about 6 in (15.2 cm), plus a 2 in (5.1 cm) loop
- Skill level: Easy
- Terminology: US
- Yarn weight: DK / light worsted cotton (#3)
- Hook: 3.5 mm (E-4)
- Number of pieces: 3 triangles
- Layout: stacked vertically, small on top, large at the bottom, each overlapping the next by 1 in (2.5 cm)
- Piece sizes (side length after the edge): small 1.8 in (4.6 cm), medium 2.6 in (6.6 cm), large 3.4 in (8.6 cm)
- Sizes before the edge: small 1.5 in (3.8 cm), medium 2.25 in (5.7 cm), large 3 in (7.6 cm)
- Border depth: about 1/8 in (0.3 cm), one round of single crochet
Materials
Yarn: use a smooth, mercerized or combed cotton in DK weight. Cotton holds the corners crisp and shows off the granny holes. Acrylic works too, but it makes softer, rounder points.
- Sage green (Color A): 10 g / about 23 m per ornament
- Natural jute twine: 1 g / about 0.3 m (12 in / 30.5 cm) for the hanging loop
All quantities include a margin for swatching and weaving in ends.
Tools and notions:
– 3.5 mm (E-4) crochet hook
– Tapestry needle with an eye large enough for the yarn
– One 12 mm natural wooden bead (top)
– Two 10 mm natural wooden beads (trunk)
– Scissors
– Rust-proof pins and a foam blocking mat
– Small spray bottle
– Optional: fabric stiffener or a light starch spray
Abbreviations (US Terms)
- ch: chain
- sl st: slip stitch
- sc: single crochet
- dc: double crochet
- sp: space
- st(s): stitch(es)
- rep: repeat
Corner group: (3 dc, ch 2, 3 dc) worked in the same corner space.
Starting corner: ch 3 (counts as 1 dc), then (2 dc, ch 2, 3 dc) in the same space.
Gauge and Checkpoints
Gauge matters here because the three tiers have to nest neatly. Make the small triangle first and measure it before you go on.
- Granny gauge: Rounds 1–2 make a triangle measuring 1.5 in (3.8 cm) along one side, from corner point to corner point.
- Border gauge: 5 sc = 1 in (2.5 cm) along an edge.
Checkpoints (side length, measured flat):
– After Round 2: 1.5 in (3.8 cm)
– After Round 3: 2.25 in (5.7 cm)
– After Round 4: 3 in (7.6 cm)
– After the border: add about 0.35 in (0.9 cm) to each of these sizes
Too big? Go down to a 3.25 mm hook. Too small? Go up to a 3.75 mm hook. Being off by 1/8 in (0.3 cm) is fine. All three tiers are made with the same hook, so they keep the same proportions.
Granny Triangle (Base Pattern)
All three triangles start the same way. You stop after a different round for each tier.
Round 1: Ch 4 and sl st to the first ch to form a ring. Ch 3 (counts as dc), 2 dc in the ring, ch 2, [3 dc in the ring, ch 2] twice. Sl st to the top of the beginning ch-3.
(9 dc, 3 ch-2 corner spaces)
The ring leaves the round hole you see at the center of each tier.
Round 2: Sl st in the next 2 dc and into the ch-2 corner space. Work a starting corner in this space. Ch 1, [corner group in the next ch-2 sp, ch 1] twice. Sl st to the top of the beginning ch-3.
(18 dc: 6 dc per side, plus 3 ch-2 corners and 3 ch-1 spaces)
The ch-1 spaces sit in the middle of each side. They become the small triangular windows.
Round 3: Sl st in the next 2 dc and into the corner space. Work a starting corner. Ch 1, 3 dc in the next ch-1 sp, ch 1, corner group in the next corner sp; rep from * once more. Ch 1, 3 dc in the next ch-1 sp, ch 1, sl st to the top of the beginning ch-3.
(27 dc: 9 dc per side, plus 3 ch-2 corners and 6 ch-1 spaces)*
Round 4: Sl st in the next 2 dc and into the corner space. Work a starting corner. [Ch 1, 3 dc in the next ch-1 sp] twice, ch 1, corner group in the next corner sp; rep from * once more. [Ch 1, 3 dc in the next ch-1 sp] twice, ch 1, sl st to the top of the beginning ch-3.
(36 dc: 12 dc per side, plus 3 ch-2 corners and 9 ch-1 spaces)*
Per-side working spots before the border (dc plus ch-1 spaces, not counting the corner ch-2):
– After Round 2: 6 dc + 1 ch-1 sp = 7
– After Round 3: 9 dc + 2 ch-1 sp = 11
– After Round 4: 12 dc + 3 ch-1 sp = 15
Make All Pieces
Make all three triangles in sage green:
- Small (top tier): work Rounds 1–2, then the Border round. Make 1.
- Medium (middle tier): work Rounds 1–3, then the Border round. Make 1.
- Large (bottom tier): work Rounds 1–4, then the Border round. Make 1.
Each triangle gets its single-crochet edge before joining. The border is explained in its own section below so all the edge math is in one place. Leave a 10 in (25.4 cm) tail on the small and medium triangles for sewing. Weave in the tails on the large triangle, but keep one 8 in (20.3 cm) tail at the bottom center for the trunk beads.
Layout (front view):
        (bead + loop)
           [ S ]
         [   M   ]
       [     L     ]
          (bead)
          (bead)
Every triangle points up with one flat edge at the bottom, and all three are centered on one vertical line.
Joining
Method: overlap the tiers and sew them flat with a running stitch, working from the back.
- Lay the large triangle flat, right side up. Put the medium triangle on top so that its bottom edge covers the large triangle’s top point. The large triangle’s top corner should be hidden behind the medium tier by about 1 in (2.5 cm), measured straight up from the medium tier’s bottom edge.
- Stitch-to-stitch logic: the medium triangle’s bottom border has 13 sc. Find the center sc (the 7th) and line it up with the large triangle’s top corner ch-1 space. Pin it there.
- Thread the medium triangle’s tail. Sew through the center 5 sc of the medium’s bottom edge (sts 5–9) into the large triangle’s fabric behind. Work through the back loops only so the stitches don’t show on the front.
- Add 2–3 tacking stitches higher up, through the medium triangle’s Round 1 ring and into the large triangle, so the tiers don’t flap.
- Repeat with the small triangle over the medium. Its bottom edge has 9 sc. Line up the center sc (the 5th) with the medium’s top corner, sew through sts 3–7, and keep the same 1 in (2.5 cm) overlap.
Tension: pull each stitch just snug. If you pull too hard, the bottom edge of the upper tier will pucker and the points will curl forward.
Size checkpoint: tier heights are about 1.6 in (4.1 cm), 2.25 in (5.7 cm) and 2.9 in (7.4 cm), which adds up to 6.75 in. Take away two overlaps of 1 in (2.5 cm) each and you get 4.75 in (12.1 cm) of tree height. Check this before you add the beads.
Border (Single-Crochet Edge, One Round on Each Triangle)
Work this round straight after the last granny round of each triangle, without fastening off.
Border gauge: 5 sc = 1 in (2.5 cm).
Border round: Sl st in the next 2 dc and into the corner space. Ch 1, (sc, ch 1, sc) in the same corner sp. *Sc in each dc and each ch-1 sp along the side to the next corner, (sc, ch 1, sc) in the corner sp; rep from * once more. Sc in each dc and ch-1 sp along the last side. Sl st to the first sc and fasten off.
Counts per side (each side includes its 2 corner sc, one at each end; a corner’s ch-1 belongs to no side):
– Small: 1 corner sc + 7 + 1 corner sc = 9 sc per side, 27 sc total, plus 3 ch-1 corners
– Medium: 1 + 11 + 1 = 13 sc per side, 39 sc total, plus 3 ch-1 corners
– Large: 1 + 15 + 1 = 17 sc per side, 51 sc total, plus 3 ch-1 corners
Why the math works: each corner (sc, ch 1, sc) gives one sc to each of its two sides, so no corner stitch is counted twice. Three sides × 9 = 27, × 13 = 39 and × 17 = 51 all match the totals. At 5 sc per inch, 9 sc = 1.8 in (4.6 cm), 13 sc = 2.6 in (6.6 cm) and 17 sc = 3.4 in (8.6 cm), which are exactly the side lengths listed above. The ch-1 at each corner gives you the slightly pointed tips.
Beads and Hanging Loop
- Trunk: thread the 8 in (20.3 cm) tail at the bottom center of the large triangle. Put both 10 mm beads on it, then pass the needle back up through both beads (skip the lowest strand so the beads don’t slip off) and into the triangle. Fasten off at the back.
- Loop: fold the 12 in (30.5 cm) jute in half. Thread both ends through the 12 mm bead, bringing the bead down to leave a 2 in (5.1 cm) loop above it. Push both ends through the small triangle’s top corner ch-1 space from front to back, tie a tight square knot at the back, trim to 1/4 in (0.6 cm), and tuck the ends in.
Final Blocking
- Lightly mist the finished ornament with water until it is damp but not dripping.
- Draw a 3.4 in (8.6 cm) wide outline of the tree on paper and put it under the blocking mat as a guide.
- Pin the large triangle’s three points first, then the medium tier’s two lower points, then the small tier’s two lower points.
- Open each granny hole with a fingertip so the windows are even.
- Optional: spray on light starch or a fabric stiffener for crisp points.
- Let it dry completely, at least 6 hours, before you unpin it.
Final Quality-Control Checklist
- Stitch counts per side are 9, 13 and 17
- Side lengths are 1.8 in (4.6 cm), 2.6 in (6.6 cm) and 3.4 in (8.6 cm), give or take 1/8 in (0.3 cm)
- Every tier is centered on the same vertical line
- Overlaps are an even 1 in (2.5 cm)
- No sewing stitches show on the front
- The beads are snug and don’t dangle loosely
- The loop knot is tight and hidden at the back
- All ends are woven in securely
Troubleshooting
The triangle cups or ruffles. The ch-1 spaces are too loose. Keep each ch-1 snug, or go down half a hook size.
The corners are rounded instead of pointed. Make sure each corner has a full ch 2 in the granny rounds and a ch 1 in the border, then pin the points firmly when blocking.
The tiers lean to one side. Unpick the joining stitches and line up the center sc again with the lower tier’s top corner.
The center ring has closed up. Use a ch-4 ring rather than a magic ring, and don’t pull the starting tail tight.
The bead trunk swings around. Run the needle through the beads a second time and anchor it in two different stitches.
The tree is too tall. Increase the overlap to 1.25 in (3.2 cm) per tier.
Care
Hand wash in cool water, press out the water in a towel, and dry it flat, re-shaping the points. Store it flat or hanging so the tiers don’t crease.
Final Notes
Here is the measurement chain to check against. A 1.5 in (3.8 cm) small triangle after Round 2 confirms your gauge. The granny rounds then give side lengths of 1.5, 2.25 and 3 in (3.8, 5.7 and 7.6 cm). The single-crochet border brings them to 9, 13 and 17 sc per side, or 1.8, 2.6 and 3.4 in (4.6, 6.6 and 8.6 cm). Overlapping the tiers by 1 in (2.5 cm) gives a tree 4.75 in (12.1 cm) tall. Check those numbers at each step and every ornament in your batch will match.
Happy crocheting!