

This lacy icicle ornament is a slim, pointed drop of thread lace that catches the tree lights beautifully. Four stacked fans get smaller from top to bottom, and open chain lattice frames each one. Tiny five-petal flowers sit at the side points and at the tip. One more flower at the top holds the hanging loop.
The sample uses one pale icy blue cotton thread, which gives it a frosty, snow-crystal look against green branches. It also looks lovely in white, silver-gray, or soft gold if you want a mixed set for the tree or for gift toppers.
This pattern uses US crochet terms. The finished ornament is about 2 in (5.1 cm) wide at its widest point and 4.5 in (11.4 cm) long from the tip flower to the top flower. With the 1 in (2.5 cm) hanging loop, the total length is 5.5 in (14.0 cm).
The ornament is one single piece, worked from the bottom up in turned rows. You start with the tip flower and build each fan tier upward from a small chain space. The edge flowers are made at the row ends as you go. You finish with the top flower and the hanging loop. There is no sewing and no joining.
Finished Size and Construction
- Finished size: 2 in (5.1 cm) wide x 4.5 in (11.4 cm) long, plus a 1 in (2.5 cm) hanging loop; 5.5 in (14.0 cm) total
- Skill level: Intermediate (fine thread, counting chain spaces)
- Terminology: US crochet terms
- Yarn weight: Lace (0), size 10 crochet cotton thread
- Hook: 1.75 mm (US steel 6)
- Number of pieces: 1
- Layout: One vertical icicle with 4 fan tiers
- Piece size: 2 in x 4.5 in (5.1 cm x 11.4 cm) body
- Size before border: Same as finished; the edge is built into the rows
- Border depth: None added; the edge flowers form the border
Materials
Choose a mercerized size 10 cotton thread. It has a slight sheen, holds stiffener well, and keeps the fan ribs crisp. Avoid fuzzy or acrylic threads. They blur the lattice and don’t starch evenly.
- Pale icy blue size 10 cotton thread: 5 g, about 14 m (15 yd)
Tools:
- 1.75 mm (US steel 6) crochet hook
- Fine tapestry needle
- Small sharp scissors
- Fabric stiffener, liquid starch, or sugar-water solution
- Blocking board or foam covered with plastic wrap
- Rustproof pins
- Ruler or measuring tape
The thread amount includes a margin of about 30 percent for a test piece, a practice flower, and weaving in ends.
Abbreviations (US Terms)
- ch – chain
- sl st – slip stitch
- sc – single crochet
- dc – double crochet
- sp(s) – space(s)
- st(s) – stitch(es)
- sk – skip
- PF – picot flower (special stitch)
Picot Flower (PF): Ch 5, sl st in the first of these 5 ch to form a small ring, [ch 3, sl st in ring] 5 times. This makes a five-petal flower with an open center at the end of your chain. Your hook stays at the ring, and the next row starts from there.
Gauge and Checkpoints
Gauge isn’t critical for an ornament, but it controls the shape. Make the tip flower and Rows 1–3 as a test. If your measurements match, keep going on the same piece.
- Tip flower: 0.4 in (1.0 cm) across
- Fan 4 (7 dc): 0.5 in (1.3 cm) across its arc
- Fan 1 (13 dc): 0.75 in (1.9 cm) across its arc
Measure at these points with the piece lightly stretched flat:
- After Row 3: 1.25 in (3.2 cm) wide, 1 in (2.5 cm) tall from the tip
- After Row 5: 1.5 in (3.8 cm) wide, 1.75 in (4.4 cm) tall
- After Row 7: 1.75 in (4.4 cm) wide, 2.75 in (7.0 cm) tall
- After Row 9: 2 in (5.1 cm) wide, 3.75 in (9.5 cm) tall
- After Row 11: 4.5 in (11.4 cm) body, plus 1 in (2.5 cm) loop
If your test piece is too big, go down to a 1.5 mm hook. If it’s too small or the fans cup, go up to a 2 mm hook. Chain tension matters as much as hook size. Loose chains make floppy lattice, and tight chains pull the fans out of shape.
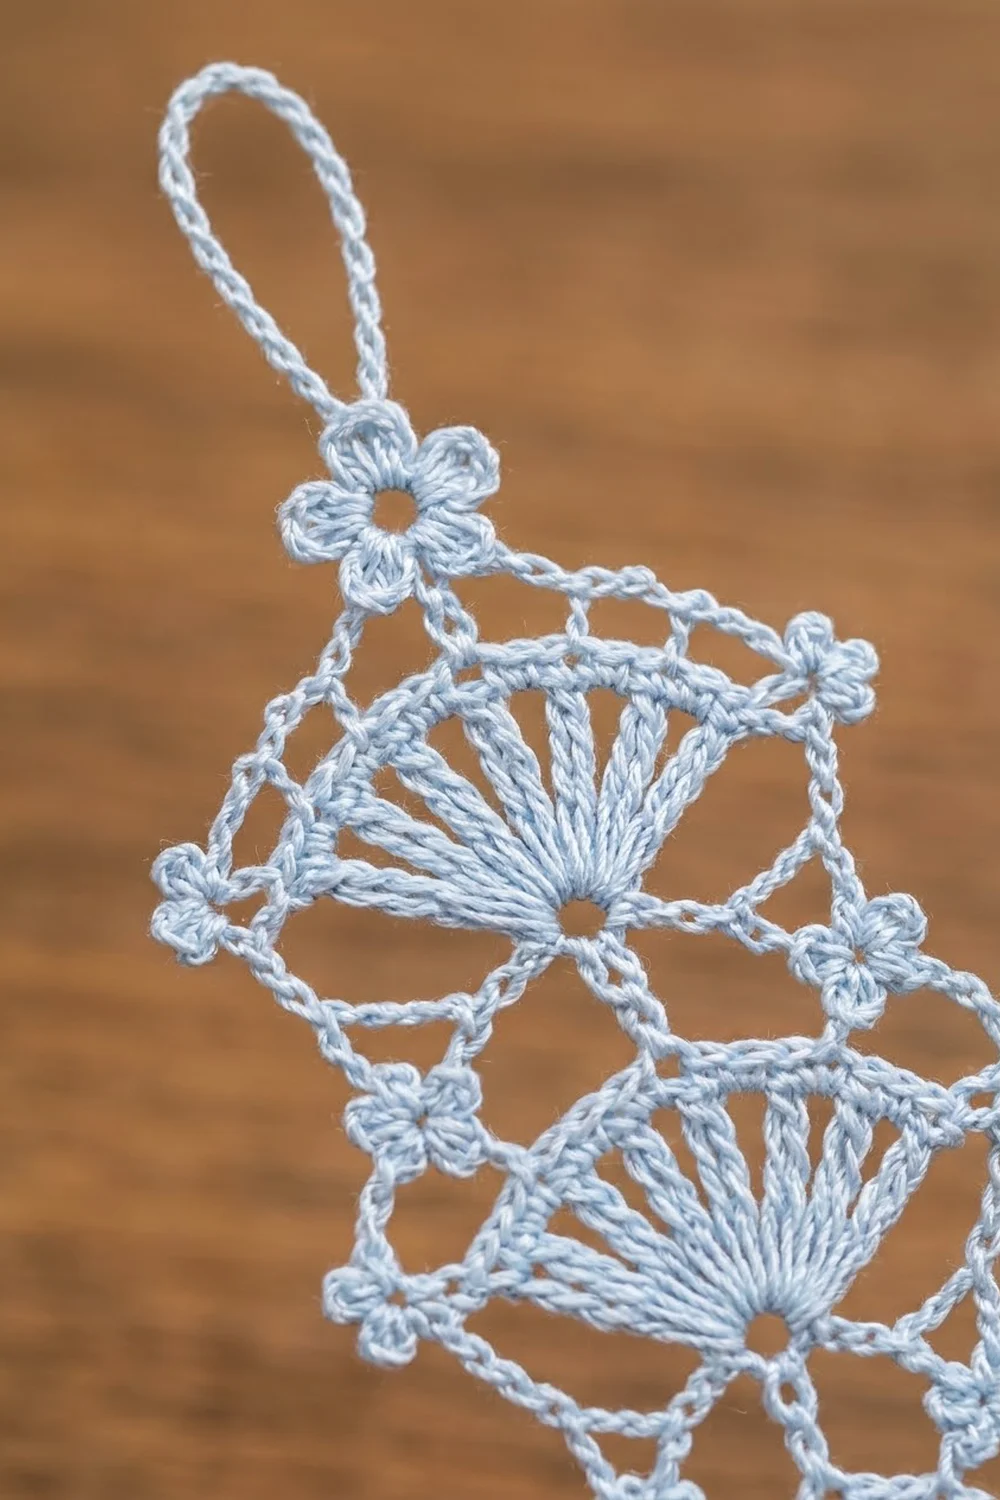
Pattern
Work the rows from the bottom to the top. Turn at the end of every row except Row 10. Rows 2 through 9 each end with a PF, so the flowers alternate sides. You’ll end up with 4 flowers on each side edge.
Tip: Count every chain on the lattice rows. One extra or missing chain makes the side lattice uneven. That shows clearly once the piece is starched.
Tip Flower and Row 1
Tip flower: Make a slip knot. Ch 5, sl st in the first ch to form a ring, [ch 3, sl st in ring] 5 times. (5 petals)
Row 1: Sl st into the ch-3 petal you just made, ch 1, (sc, ch 3, sc) in the same petal. Turn. (2 sc, 1 ch-3 sp)
This ch-3 sp becomes the open hole at the base of Fan 4.
Tier 4 (Smallest Fan)
Row 2 (Fan 4): Ch 1, sc in first sc, ch 2, 7 dc in ch-3 sp, ch 2, sc in last sc, ch 4, PF. Turn. (7 dc, 2 sc, 2 ch-2 sps, 1 ch-4 sp, 1 PF)
Row 3 (Arc 4): Ch 4, sc in next sc, ch 2, sc in first dc of fan, ch 3, sk next 2 dc, (sc, ch 3, sc) in middle (4th) dc, ch 3, sk next 2 dc, sc in last dc of fan, ch 2, sc in next sc, ch 4, PF. Turn. (6 sc, 2 ch-4 sps, 2 ch-2 sps, 2 ch-3 arcs, 1 center ch-3 sp, 1 PF)
The two ch-3 arcs form the chain arc over the fan. The center ch-3 sp is the base for the next fan.
Tier 3
Row 4 (Fan 3): Ch 4, sc in next sc, ch 6, 9 dc in center ch-3 sp, ch 6, sc in first sc of Row 3, ch 4, PF. Turn. (9 dc, 2 sc, 2 ch-6 sps, 2 ch-4 sps, 1 PF)
Row 5 (Arc 3): Ch 4, sc in next sc, ch 2, sc in first dc of fan, ch 4, sk next 3 dc, (sc, ch 3, sc) in middle (5th) dc, ch 4, sk next 3 dc, sc in last dc of fan, ch 2, sc in next sc, ch 4, PF. Turn. (6 sc, 2 ch-4 sps, 2 ch-2 sps, 2 ch-4 arcs, 1 center ch-3 sp, 1 PF)
Tier 2
Row 6 (Fan 2): Ch 4, sc in next sc, ch 7, 11 dc in center ch-3 sp, ch 7, sc in first sc of Row 5, ch 4, PF. Turn. (11 dc, 2 sc, 2 ch-7 sps, 2 ch-4 sps, 1 PF)
Row 7 (Arc 2): Ch 4, sc in next sc, ch 2, sc in first dc of fan, ch 5, sk next 4 dc, (sc, ch 3, sc) in middle (6th) dc, ch 5, sk next 4 dc, sc in last dc of fan, ch 2, sc in next sc, ch 4, PF. Turn. (6 sc, 2 ch-4 sps, 2 ch-2 sps, 2 ch-5 arcs, 1 center ch-3 sp, 1 PF)
Tier 1 (Largest Fan)
Row 8 (Fan 1): Ch 4, sc in next sc, ch 8, 13 dc in center ch-3 sp, ch 8, sc in first sc of Row 7, ch 4, PF. Turn. (13 dc, 2 sc, 2 ch-8 sps, 2 ch-4 sps, 1 PF)
Row 9 (Arc 1): Ch 4, sc in next sc, ch 2, sc in first dc of fan, ch 6, sk next 5 dc, (sc, ch 3, sc) in middle (7th) dc, ch 6, sk next 5 dc, sc in last dc of fan, ch 2, sc in next sc, ch 4, PF. Turn. (6 sc, 2 ch-4 sps, 2 ch-2 sps, 2 ch-6 arcs, 1 center ch-3 sp, 1 PF)
Fan math check: In each arc row, the first dc, the skipped dc, the middle dc, the skipped dc, and the last dc add up to the fan count:
- 1 + 2 + 1 + 2 + 1 = 7
- 1 + 3 + 1 + 3 + 1 = 9
- 1 + 4 + 1 + 4 + 1 = 11
- 1 + 5 + 1 + 5 + 1 = 13
Each arc chain is 1 longer than the number of dc it skips, so the arc lies flat over the fan.
Top Point and Hanging Loop
Row 10 (Inner V): Ch 9, sc in center ch-3 sp of Row 9, ch 9, sl st in the ring of the PF made at the end of Row 8. Don’t turn. (1 sc, 2 ch-9 sps)
Row 11 (Top flower and loop): Ch 12, PF for the top flower, ch 35, sl st in the ring of the top flower to form the hanging loop, ch 12, sl st in the ring of the PF made at the end of Row 9. Fasten off. (2 ch-12 sps, 1 PF, 1 ch-35 loop)
The inner V and the two ch-12 sides form the open diamond above Fan 1, with the top flower at its point.
Weave in both ends along the chain lines. Split the thread as you weave so the ends can’t slip out.
Piece totals: 4 fans of 7, 9, 11, and 13 dc (40 dc in all), 10 flowers (1 tip, 1 top, and 4 on each side), and 1 hanging loop.
Border
This ornament has no separate border round because the edge is built into the rows. Rows 2 through 9 each end with ch 4 and a PF, and the next row starts with ch 4 from that same flower.
Border gauge: Each edge flower and its two ch-4 legs stick out about 0.35 in (0.9 cm) past the lattice on each side.
Edge counts per side: There are 4 PF on each side edge. The tip flower and the top flower sit on the center line, which makes 10 flowers in all.
Why the math works: Each tier has exactly 2 rows, and the rows alternate direction. That puts exactly 1 flower on each side per tier, so both side edges always have the same count. The ch-4 legs are the same on every row, so the flowers stay the same distance from the lattice all the way up. Only the fans and the lattice chains (ch 6, 7, and 8) get wider, and that’s what makes the tapered icicle shape.
Final Blocking
- Soak the ornament in cool water for a few minutes, then press out the water in a towel.
- Dip it in fabric stiffener or starch and squeeze out the extra. The holes should be clear, not filmed over.
- Lay it right side up on a covered blocking board.
- Pin the tip flower and the top flower first, in a straight line, 4.5 in (11.4 cm) apart.
- Pin each side flower outward so the widest point, at Fan 1, measures 2 in (5.1 cm).
- Open each fan with your fingertip so the dc ribs spread evenly from the base hole.
- Pin the center of each chain arc so it curves smoothly over its fan.
- Pin the petals of each flower open, and lay the hanging loop flat at 1 in (2.5 cm).
- Let it dry completely, at least 12 hours, before you take out the pins.
Final Quality-Control Checklist
- The fans have 7, 9, 11, and 13 dc from bottom to top.
- Each fan has an open hole at its base.
- Each chain arc is centered over its fan.
- There are 4 edge flowers on each side, at matching heights.
- The tip and top flowers sit on the center line.
- The body is 4.5 in (11.4 cm) long and 2 in (5.1 cm) wide.
- The hanging loop is 1 in (2.5 cm) and hangs straight.
- All ends are woven in and trimmed close.
Troubleshooting
Fans cup or ruffle: Your dc are too tight or too loose for the space. Rework the fan with a slightly larger or smaller hook, or loosen the ch-3 base.
Chain arc pulls the fan inward: Your arc chains are too tight. Leave a little slack in each chain, or go up a hook size for the arc rows only.
Ornament leans to one side: You may have skipped a PF or worked into the wrong sc. Check that each row has 1 PF and that both flowers in a tier sit at the same height.
Edge flowers look closed: The ch-5 ring was pulled too tight. Keep the ring chains loose and pin the petals open when you block.
Lattice sags after blocking: Use a stronger stiffener mix and let the piece dry fully while flat.
Piece is too long: Your lattice chains are loose. Make the chains in Rows 10 and 11 one shorter each, or go down a hook size.
Care
Store the ornament flat in tissue paper, away from heat and humidity. If it gets soft, rinse it gently in cool water and block it again with fresh stiffener.
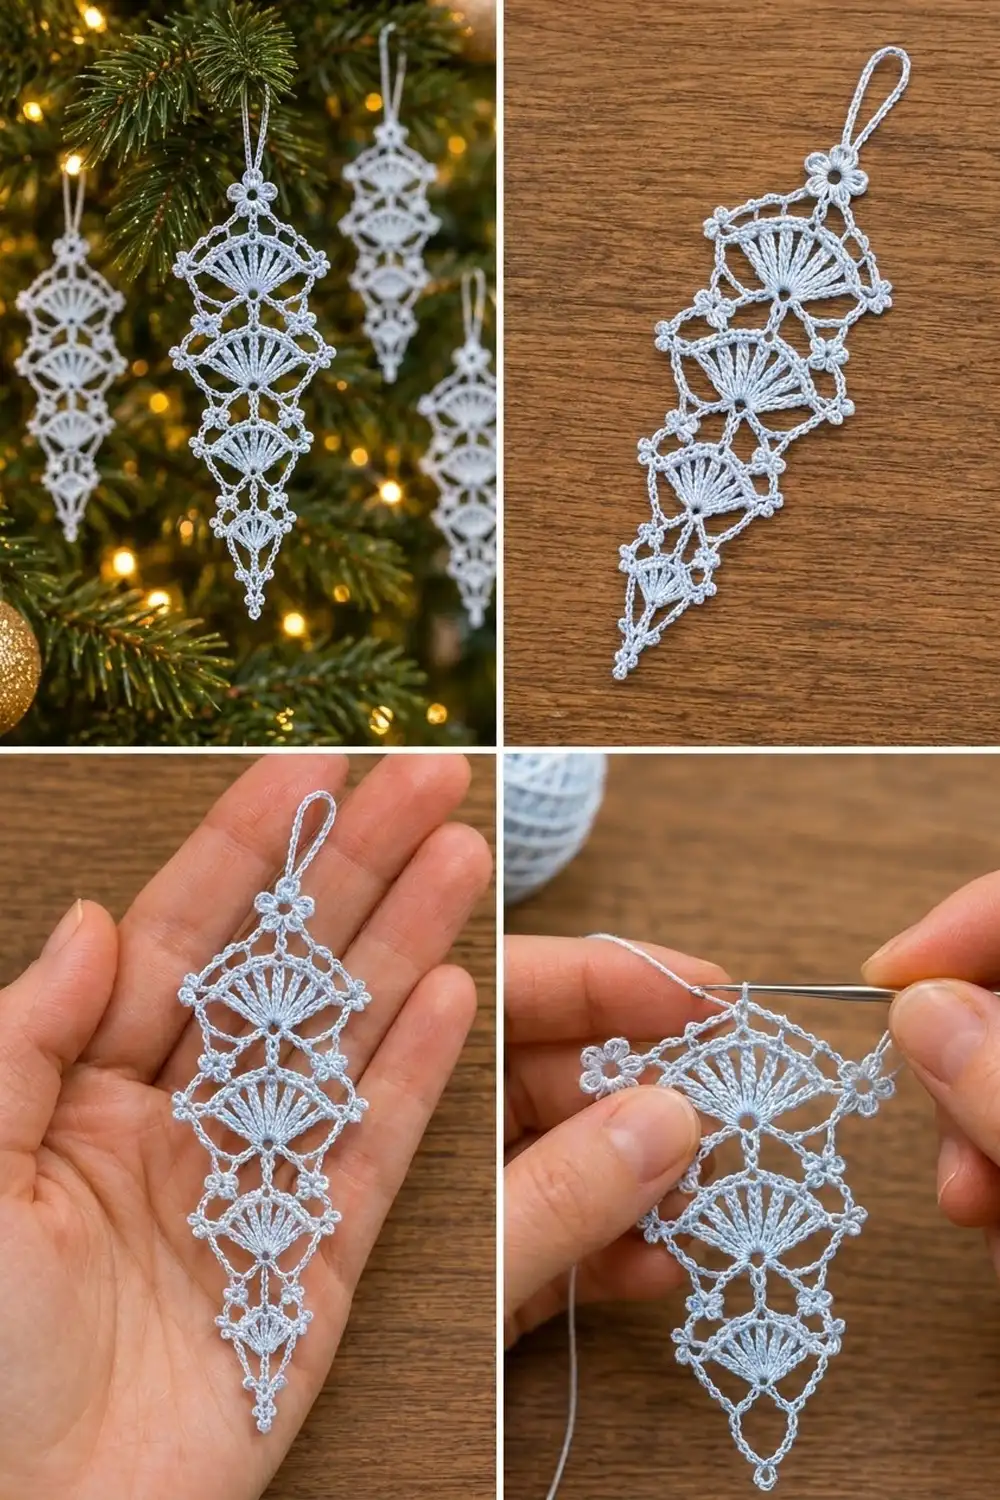
Final Notes
The measurements build like this:
- The 0.4 in (1.0 cm) tip flower grows to 1.25 in (3.2 cm) wide at Tier 4.
- The width then grows to 1.5 in (3.8 cm), then 1.75 in (4.4 cm), and finally 2 in (5.1 cm) at Fan 1.
- The top diamond brings the body to 4.5 in (11.4 cm) long.
- The loop adds 1 in (2.5 cm), for a total length of 5.5 in (14.0 cm).
Check your fan counts on every tier, keep your chains even, and block firmly. Make one for the tree, or make a whole set in frosty colors for gift toppers.
Happy crocheting!