

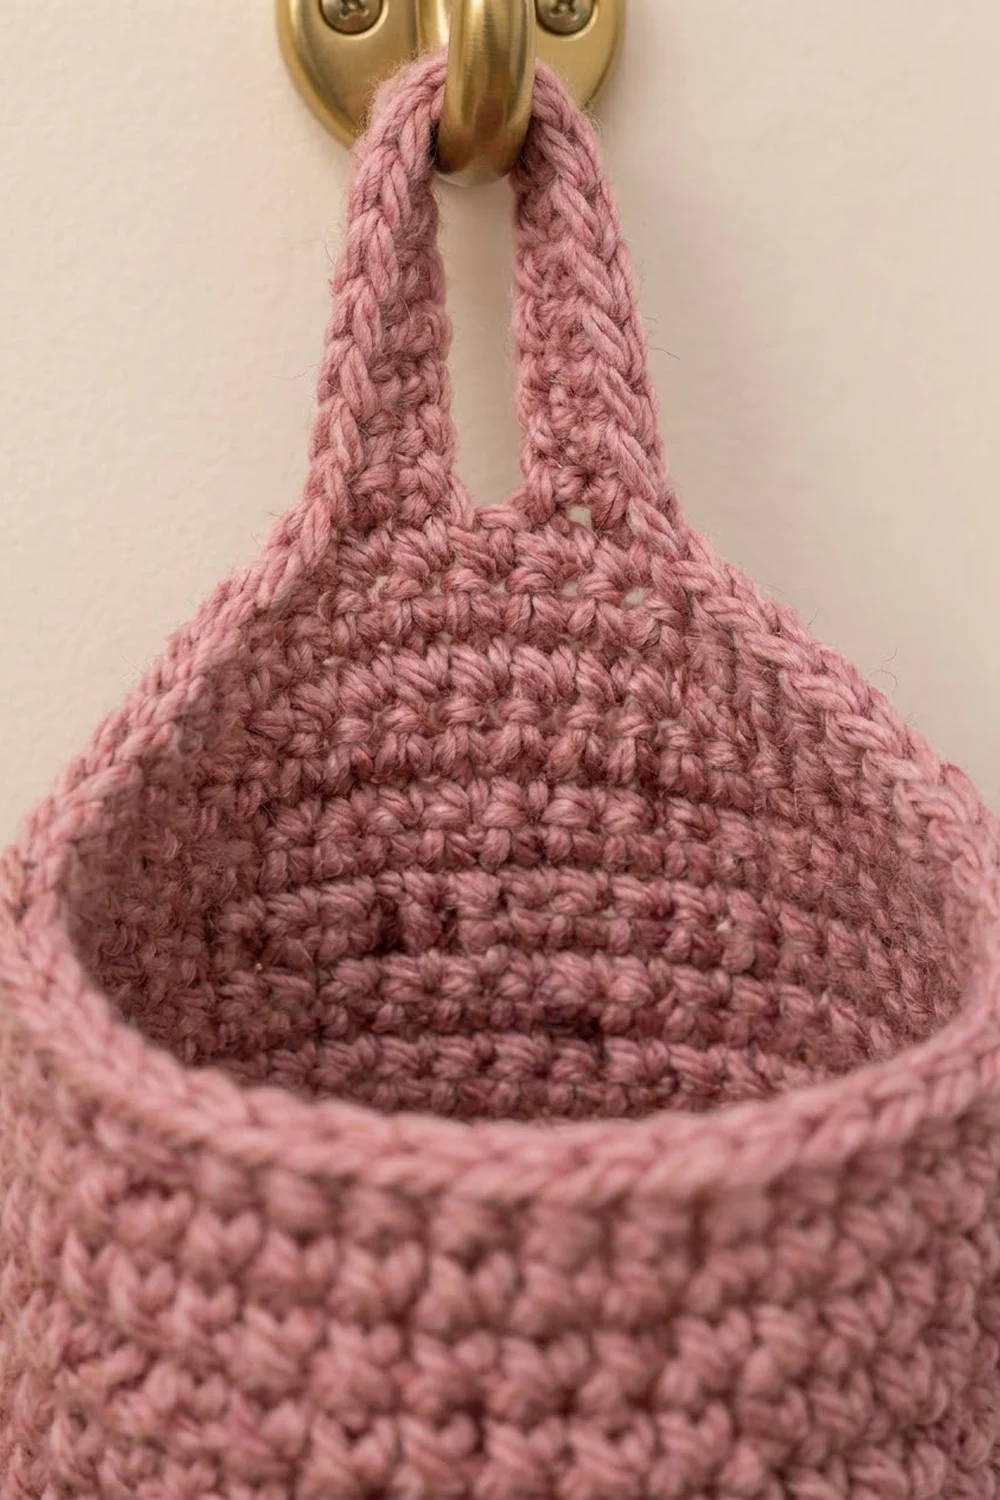
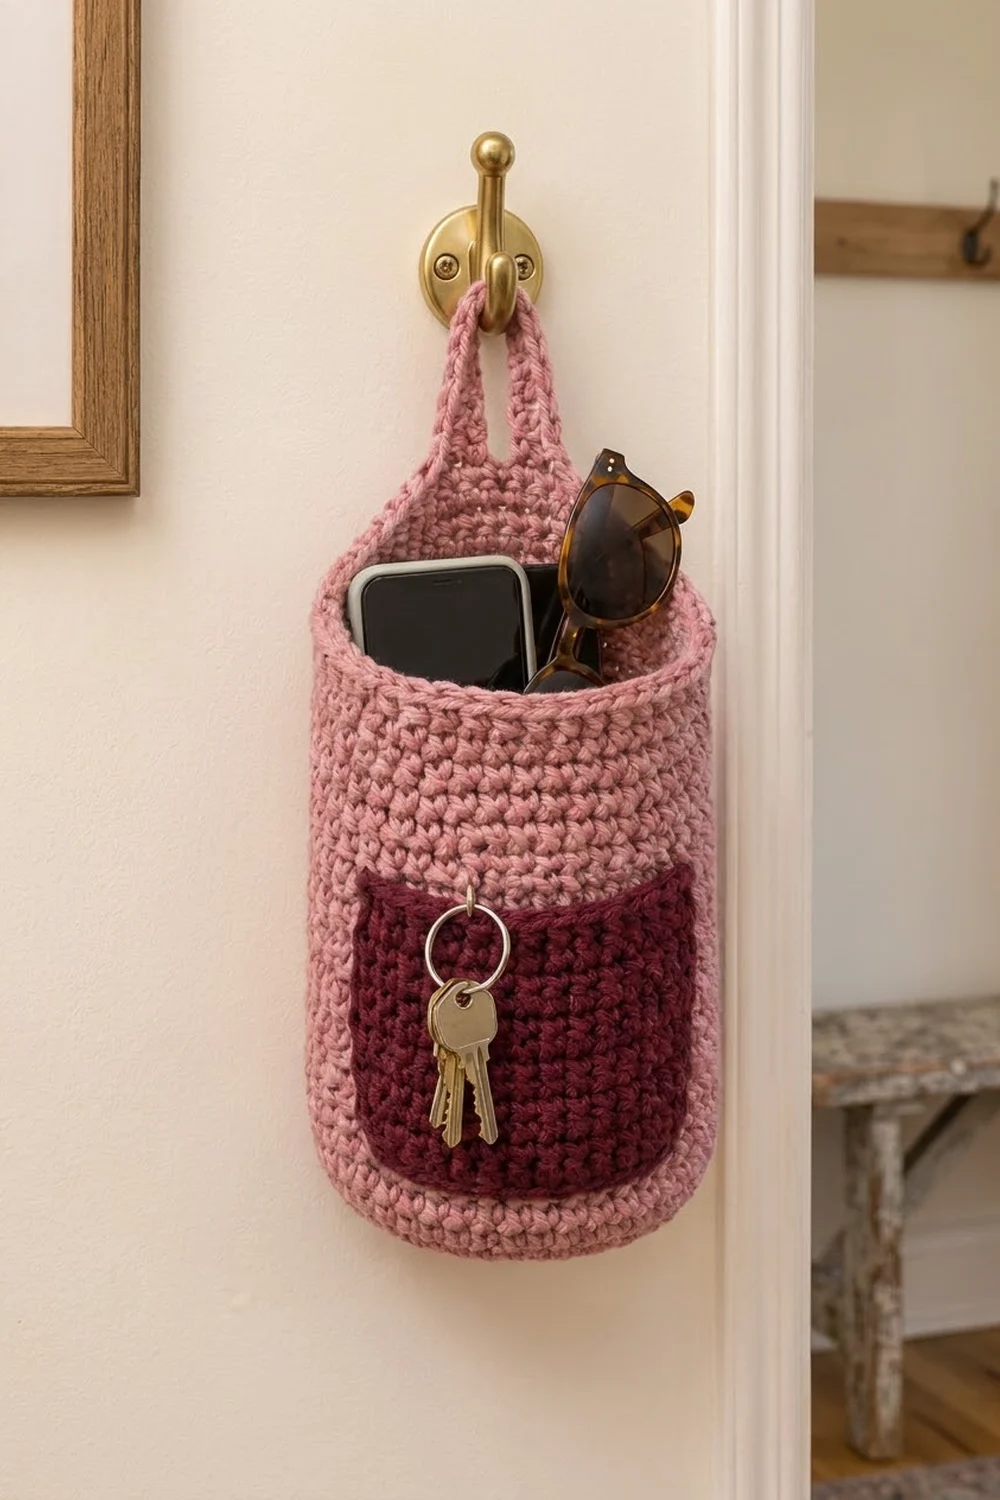
This hanging organizer gives your phone, sunglasses and keys a home by the door. It’s a deep, sturdy single crochet basket in dusty rose, with a burgundy pocket on the front and a loop that hangs it on a wall hook.
The look is simple and modern. The dense stitches let it hold its shape without stiffener. The two-tone pink and burgundy suits an entryway, bedroom or craft corner, and the pocket is the right size for keys, earbuds or a lip balm.
The finished basket is about 6 in (15.2 cm) across and 8 in (20.3 cm) deep. It measures about 12 in (30.5 cm) from the base to the top of the hanging loop. All terms are US crochet terms.
You’ll crochet an oval base, then work the walls straight up in joined rounds. Next you work a tapered back tab and loop in rows, and add a two-round edging. The pocket is a small rectangle worked in rows and sewn on.
Finished Size and Construction
- Finished size: 6 in (15.2 cm) wide x 8 in (20.3 cm) deep body; about 12 in (30.5 cm) tall including loop
- Skill level: Easy / Advanced beginner
- Terminology: US crochet terms
- Yarn weight: Bulky (#5) cotton or cotton blend
- Hook: 6 mm (US J-10)
- Number of pieces: 2 (1 body including tab and loop, plus 1 pocket)
- Layout: One basket with the pocket centered on the lower front
- Base size: 6 x 3 in (15.2 x 7.6 cm) oval
- Body size before border: 8 in (20.3 cm) deep, 14.7 in (37.3 cm) around
- Pocket size: 5 x 4 in (12.7 x 10.2 cm)
- Border depth: 0.3 in (0.8 cm)
Materials
Choose a smooth bulky cotton or cotton blend. Cotton holds its shape when the basket is loaded. Avoid fuzzy or very stretchy acrylics, because the walls will sag.
- Color A, Dusty Rose (body, tab, loop, border): 110 g / 110 m (120 yd)
- Color B, Burgundy (pocket and sewing): 25 g / 25 m (27 yd)
Quantities include a margin of about 25% for your gauge swatch and tension differences.
Tools:
– 6 mm (US J-10) crochet hook
– 4 stitch markers
– Tapestry needle
– Scissors
– Measuring tape
– Pins and a spray bottle for blocking
– Optional: a jar or cardboard tube about 6 in (15.2 cm) wide to shape the body while it dries
Abbreviations (US Terms)
- ch – chain
- sc – single crochet
- sc2tog – single crochet 2 together (decrease)
- sl st – slip stitch
- st(s) – stitch(es)
- sp – space
- BLO – back loop only
- RS – right side
Special stitch – sc2tog: Insert hook in next st, yarn over, pull up a loop. Insert hook in following st, yarn over, pull up a loop. Yarn over and pull through all 3 loops on the hook. This turns 2 sts into 1.
Joined rounds: At the end of each round, sl st into the first sc. Ch 1 at the start of the next round; this ch 1 does not count as a stitch. Joined rounds keep the base sides lined up with the front and back of the body, so the tab ends up centered.
Gauge and Checkpoints
Gauge: 12 sc x 13 rounds = 4 in (10.2 cm) in Color A.
Make the base first and check it before you start the walls. The base is small, so it’s a quick way to test your gauge.
Checkpoints:
– After base Rnd 4: The oval measures 6 x 3 in (15.2 x 7.6 cm), with 44 sts.
– After Rnd 17: The wall measures 4 in (10.2 cm) up from the base ridge.
– After Rnd 30: The wall measures 8 in (20.3 cm) up from the base ridge.
– After the tab, Row 6: The tab is 1.8 in (4.6 cm) tall and 1.3 in (3.3 cm) wide at the top.
– Pocket: 5 x 4 in (12.7 x 10.2 cm).
If your base is too big, change to a hook 0.5 mm smaller. If it is too small, change to a hook 0.5 mm larger. If your width matches but your rounds are too short or too tall, keep the hook and simply add or skip rounds until the wall reaches 8 in (20.3 cm).
Base (Color A)
With Color A, ch 13.
Rnd 1: Sc in 2nd ch from hook, sc in next 10 ch, 3 sc in last ch. Rotate and work along the opposite side of the chain: sc in next 10 ch, 2 sc in last ch (the same ch as the first sc). Join. (26 sts)
This gives 10 sts along each long side and 3 sts at each end. The first sc of the round is the first of the 3 sts at the starting end.
Rnd 2: Ch 1, 2 sc in first st, sc in next 10, 2 sc in each of next 3, sc in next 10, 2 sc in each of last 2. Join. (32 sts)
Rnd 3: Ch 1, sc in first st, 2 sc in next, sc in next 10, [sc in next, 2 sc in next] 3 times, sc in next 10, [sc in next, 2 sc in next] 2 times. Join. (38 sts)
Rnd 4: Ch 1, sc in first 2 sts, 2 sc in next, sc in next 10, [sc in next 2, 2 sc in next] 3 times, sc in next 10, [sc in next 2, 2 sc in next] 2 times. Join. (44 sts)
Each end now has 12 sts and each long side has 10. The oval should measure 6 x 3 in (15.2 x 7.6 cm) and lie flat.
Body (Color A)
Rnd 5 (turning ridge): Ch 1, sc in BLO of each st around. Join. (44 sts)
The unused front loops form the crisp ridge between the base and the wall.
Rnds 6–30: Ch 1, sc in each st around. Join. (44 sts each round)
There are no increases, so the wall rises straight up. The 26 wall rounds (Rnds 5–30) measure 8 in (20.3 cm).
Mark the back: Number the sts of Rnd 30 starting from the first st of the round. The second long side of the base sits under sts 27–36. Place markers in st 25 and st 38. The 14 sts from marker to marker are the back tab sts. The other 30 sts are the front rim.
Fasten off.
Back Tab and Hanging Loop (Color A)
With RS facing, join Color A in st 25 (the first marked st).
Row 1 (RS): Ch 1, sc in same st and in next 13 sts, ending in st 38. Turn. (14 sts)
Row 2: Ch 1, sc2tog, sc in next 10, sc2tog. Turn. (12 sts)
Row 3: Ch 1, sc2tog, sc in next 8, sc2tog. Turn. (10 sts)
Row 4: Ch 1, sc2tog, sc in next 6, sc2tog. Turn. (8 sts)
Row 5: Ch 1, sc2tog, sc in next 4, sc2tog. Turn. (6 sts)
Row 6: Ch 1, sc2tog, sc in next 2, sc2tog. Turn. (4 sts)
Rows 2–6 decrease 2 sts per row. That gives the tab the tapered, sloping outline that rises from the rim. The tab is now 1.8 in (4.6 cm) tall.
Row 7: Ch 1, sc in first st, ch 16, skip next 2 sts, sc in last st. Turn. (2 sc + ch-16 loop)
Row 8: Ch 1, sc in first sc, work 20 sc into the ch-16 sp (wrapping the chain), sc in last sc. (22 sts)
Packing 20 sc around 16 chains covers the chain completely, so the loop is thick and firm. Laid flat, the loop stands about 2.4 in (6.1 cm) above the tab.
Do not fasten off. Continue straight into the border.
Border (Color A)
Border gauge: Work 1 sc per stitch along the stitch tops, and 1 sc per row end on the tab sides. In this gauge, 13 rows and 12 sts both measure 4 in (10.2 cm). A 1-to-1 ratio on the row ends therefore keeps the edge flat without ruffling or pulling.
Rnd 1: Ch 1. Turn the work so that RS faces you. Work down the left side of the tab: 8 sc down the row ends (1 per row, Rows 8–1). Next, work around the front rim: sc in each of the 30 front rim sts (sts 39–44, then sts 1–24). Then work up the right side of the tab: 8 sc up the row ends (Rows 1–8). Finally, sc in each of the 22 sts across the top of the loop. Join with sl st to first sc. (68 sts)
Counts per section: 8 (left tab side) + 30 (front rim) + 8 (right tab side) + 22 (loop) = 68.
Rnd 2: Sl st loosely in each st around. Join. (68 sl sts)
Why the math works: The front rim’s 30 sts plus the tab’s 14 sts on Row 1 add up to 30 + 14 = 44. That’s the full body count, so Rnd 1 picks up each body stitch only once. The tab’s side edges are measured in rows, not stitches, which is why each side gets exactly 8 sc for 8 rows. The slip stitch round adds almost no height. It firms the edge and gives the clean, rolled rim seen on the finished basket. The border depth is 0.3 in (0.8 cm).
Fasten off and weave in the ends.
Pocket (Color B)
With Color B, ch 16.
Row 1: Sc in 2nd ch from hook and in each ch across. Turn. (15 sts)
Rows 2–13: Ch 1, sc in each st across. Turn. (15 sts each row)
The pocket measures 5 x 4 in (12.7 x 10.2 cm). Fasten off and leave a 30 in (76.2 cm) tail for sewing.
Rounding the corners (optional): The finished pocket’s bottom corners are slightly soft. To match that, ease each bottom corner a little inward with one tight stitch while you sew it on.
Attach the Pocket
- Lay the basket flat with the tab at the back and the front rim facing you.
- Center the pocket on the front, with its last row (Row 13) at the top as the open edge.
- Place the bottom edge of the pocket 1 in (2.5 cm) above the base ridge. The top of the pocket will then sit 5 in (12.7 cm) above the ridge, which is a little more than halfway up the 8 in (20.3 cm) wall.
- Pin all 4 corners and the middle of each side.
- Using the Color B tail, whipstitch down one side, across the bottom and up the other side. Work 1 stitch per row end on the sides and 1 per st along the bottom. Catch one loop of each body st under the pocket edge.
- Leave the top edge open. Make 2 extra stitches at each top corner to reinforce it, because keys and clips put strain there.
- Weave in the tails on the inside of the basket.
Sew evenly and not too tightly. If the stitches are too tight, the curved front will pucker around the pocket.
Final Blocking
- Lightly mist the whole basket with water until it is damp but not soaked.
- Slide a jar or rolled cardboard tube about 6 in (15.2 cm) wide inside the body.
- Smooth the walls upward so the rounds are straight and the wall measures 8 in (20.3 cm).
- Flatten the base against a table so the turning ridge is crisp.
- Pat the pocket flat against the body and check that it measures 5 x 4 in (12.7 x 10.2 cm).
- Lay the tab and loop flat, and pin the loop open so it dries round.
- Let it dry completely, at least 24 hours, before hanging.
Final Quality-Control Checklist
- Base is an even oval of 6 x 3 in (15.2 x 7.6 cm) and sits flat
- Turning ridge is visible all the way around
- Body is 44 sts in every round and 8 in (20.3 cm) tall
- Tab is centered over the back long side of the base
- Tab tapers evenly from 14 sts down to 4 sts
- Loop is fully covered by 20 sc, with no chain showing
- Border Rnd 1 has exactly 68 sts
- Pocket is 15 sts by 13 rows and sewn straight and centered, with the top left open
- All ends are woven in on the inside
Troubleshooting
Base curls up like a bowl: Your increases are too tight, or you are using a hook that’s too small. Go up 0.5 mm.
Base ruffles: Recount the sts. Each end should gain exactly 6 sts per round in Rnds 2–4.
Walls flare out: Count the round again. Extra sts usually come from working into the joining sl st. Every wall round must be exactly 44.
Tab is off-center: Your rounds drifted. Join each round into the first sc, never into the ch 1, and place the tab markers by counting from the round’s first st.
Loop is floppy: Pack the sc tighter over the chain, or work 22 sc into the ch-16 sp and add 2 sc to the loop count in Border Rnd 1, making that round 70 sts.
Pocket puckers: Remove the seam and sew it again more loosely, matching row ends to body rounds.
Care
Hand wash in cool water with mild soap. Press out the water in a towel, then reshape the basket over a jar and let it dry flat or hanging.
Final Notes
The measurement chain is simple. Gauge is 12 sc x 13 rounds = 4 in (10.2 cm). That gives a 44-st base of 6 x 3 in (15.2 x 7.6 cm), and 26 wall rounds give 8 in (20.3 cm) of depth. The 14 back sts taper into a 4-st strap and loop, and the 68-st border trims everything in one pass. Finally, a 5 x 4 in (12.7 x 10.2 cm) pocket sits 1 in (2.5 cm) above the base. If you check each of these numbers as you go, your organizer will hang straight and hold everything you drop at the door.
Happy crocheting!