

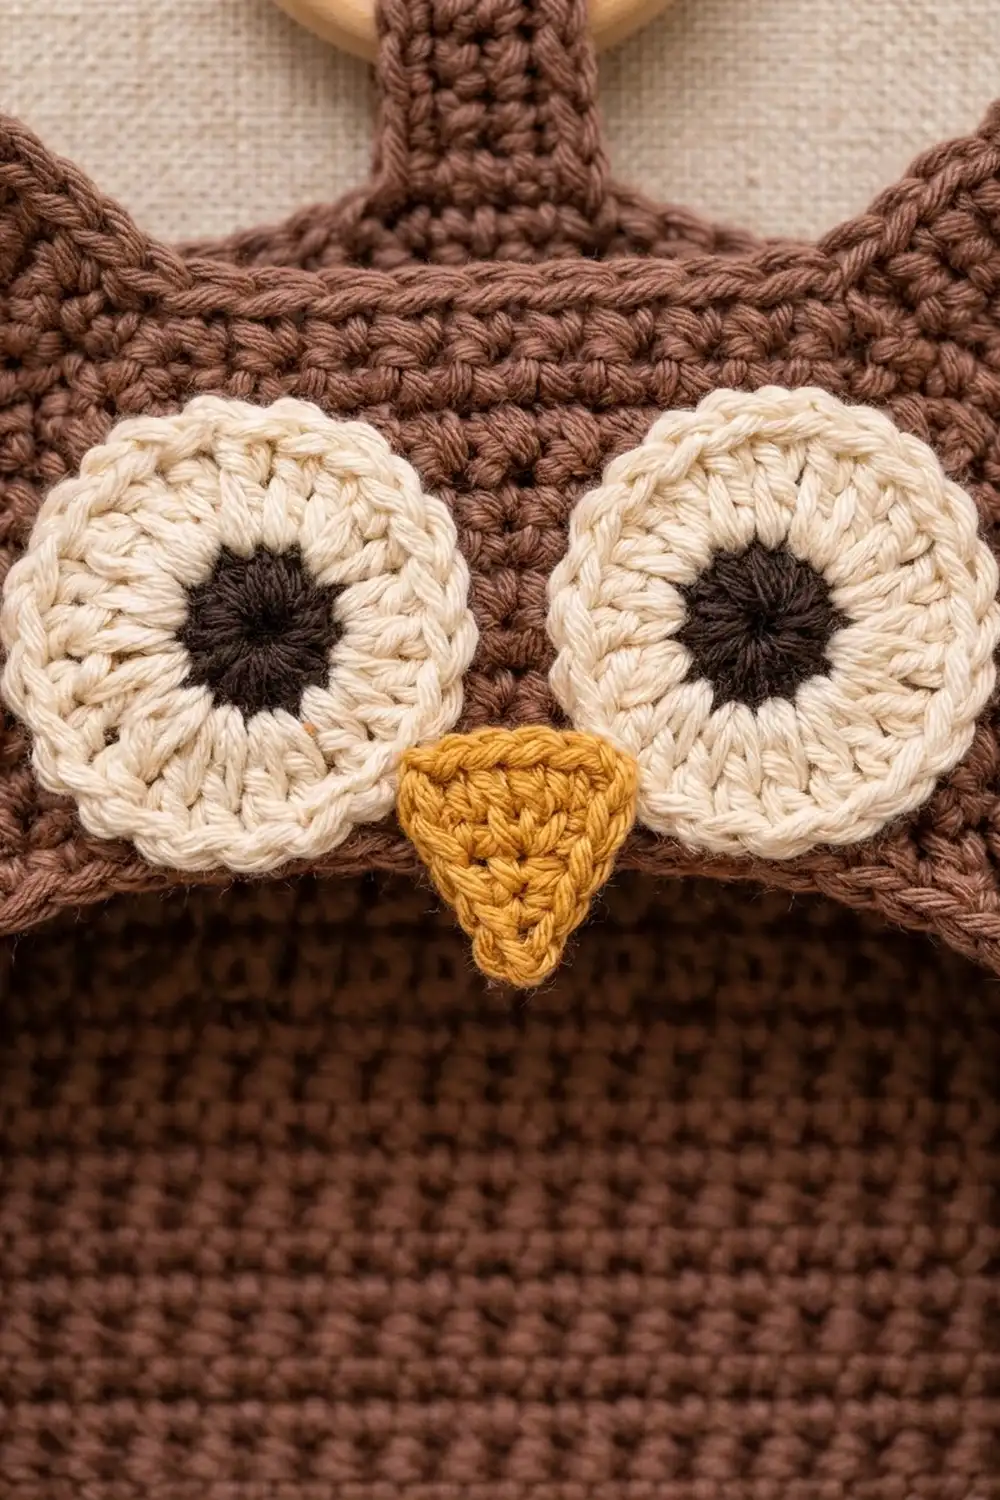
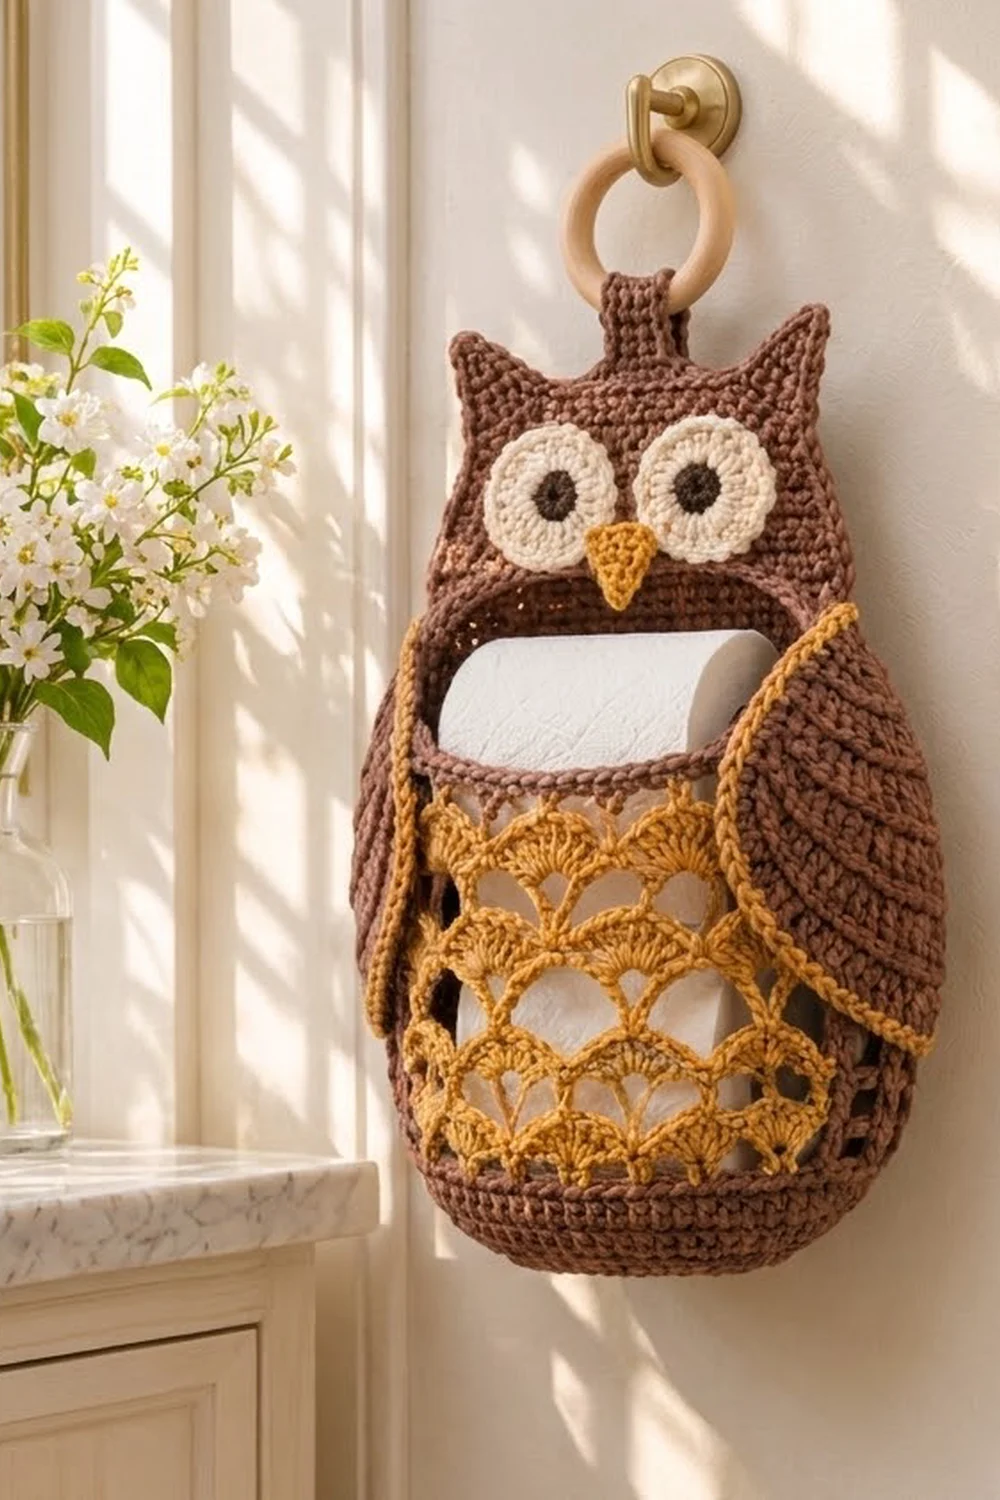
The Honey Hoot holder is a hanging owl pocket that keeps a spare roll in sight without looking like storage. A solid brown body frames a front panel of golden fan lace, so the paper shows through the scallops. Big cream eyes, a mustard beak and gold-edged wings give the owl its friendly face.
The palette is warm and calm: chocolate brown, golden mustard, cream and a touch of dark brown. It suits a neutral bathroom with brass fixtures and wood accents. The pattern uses US crochet terms throughout.
The finished holder is 12.75 in (32.4 cm) tall, not counting the strap and ring. It is 7.7 in (19.6 cm) wide at the back, 9.5 in (24.1 cm) across the wings and 3.5 in (8.9 cm) deep.
You make an oval base, a flat back panel with ears, and a wider front lace panel. Then you join the back and front to the base and seam the sides. A short edging finishes the head, and you add the appliqués and the hanging strap last.
Finished Size and Construction
- Finished size: 12.75 in (32.4 cm) tall × 7.7 in (19.6 cm) wide (back) × 3.5 in (8.9 cm) deep
- Width across wings: 9.5 in (24.1 cm)
- Skill level: Intermediate
- Terminology: US
- Yarn weight: #4 worsted, cotton or cotton blend
- Hook: 5.0 mm (H-8)
- Number of pieces: 9 (base, back, front, 2 wings, 2 eyes, beak, strap), plus 1 wooden ring
- Layout: the back and front stand on the oval base, with the front bowing forward to make a pocket
- Piece sizes: base 7 in × 3.5 in (17.8 cm × 8.9 cm); back 7.7 in × 12.75 in (19.6 cm × 32.4 cm); front 10.6 in (26.9 cm) wide
- Front size before border: 10.6 in × 6.5 in (26.9 cm × 16.5 cm)
- Border depth: front rim 0.5 in (1.3 cm); head edging 0.25 in (0.6 cm)
Materials
Use a smooth worsted cotton of about 170 m per 100 g. Cotton holds its shape against the weight of a roll and handles bathroom humidity well. Avoid fuzzy yarns, because they hide the lace.
- Chocolate brown (MC): 120 g / 200 m
- Golden mustard (CC1): 50 g / 85 m
- Cream (CC2): 25 g / 40 m
- Dark brown (CC3): 10 g / 15 m
All quantities include a margin of about 20% for gauge swatches and seams.
Tools:
– 5.0 mm (H-8) crochet hook
– Wooden ring, 2 in (5.1 cm) diameter
– Tapestry needle
– Stitch markers (at least 6)
– Measuring tape
– Pins and a blocking mat
Abbreviations (US Terms)
- ch – chain
- sl st – slip stitch
- sc – single crochet
- hdc – half double crochet
- dc – double crochet
- sc2tog – single crochet 2 together
- rev sc – reverse single crochet (crab stitch)
- sp – space
- st(s) – stitch(es)
- RS / WS – right side / wrong side
Special stitch – Fan: 7 dc worked into the same stitch.
Gauge and Checkpoints
Gauge: 14 sc × 16 rows = 4 in (10.2 cm) in rows of sc with MC. That works out to 3.5 sts and 4 rows per inch.
Lace gauge: one 6-st fan repeat = 1.7 in (4.3 cm), and one lace row = 0.75 in (1.9 cm).
Make the base first and treat it as your test piece. Every other measurement depends on it.
Checkpoints:
– Base after Rnd 7: 7 in × 3.5 in (17.8 cm × 8.9 cm)
– Back after Row 44: 7.7 in × 11 in (19.6 cm × 27.9 cm)
– Front after Row 16: 10.6 in × 6.5 in (26.9 cm × 16.5 cm)
– Eye: 2.5 in (6.4 cm) across
– Wing: 6 in × 2.5 in (15.2 cm × 6.4 cm)
If a piece is more than 0.25 in (0.6 cm) too big, go down half a hook size. If it is too small, go up half a size. Change the hook, not the stitch counts, because the joining math depends on exact counts.
Base
Work the base in joined rounds with MC.
Ch 14.
Rnd 1: 3 sc in 2nd ch from hook, sc in next 11 ch, 3 sc in last ch. Rotate and work along the other side of the chain: sc in next 11 ch. Join with sl st to first sc. (28 sts)
Each round from here on adds 3 sts at each end. The two long sides stay at 11 sts.
Rnd 2: Ch 1, 2 sc in each of next 3 sts, sc in next 11, 2 sc in each of next 3 sts, sc in next 11. Join. (34 sts)
Rnd 3: Ch 1, (sc, 2 sc in next) 3 times, sc 11, (sc, 2 sc in next) 3 times, sc 11. Join. (40 sts)
Rnd 4: Ch 1, (sc 2, 2 sc in next) 3 times, sc 11, (sc 2, 2 sc in next) 3 times, sc 11. Join. (46 sts)
Rnd 5: Ch 1, (sc 3, 2 sc in next) 3 times, sc 11, repeat the bracket, sc 11. Join. (52 sts)
Rnd 6: Ch 1, (sc 4, 2 sc in next) 3 times, sc 11, repeat the bracket, sc 11. Join. (58 sts)
Rnd 7: Ch 1, (sc 5, 2 sc in next) 3 times, sc 11, repeat the bracket, sc 11. Join. (64 sts)
Each end now has 21 sts and each side has 11, so 21 + 11 + 21 + 11 = 64.
Mark the base: Choose one long side as the back. Place markers so that the back section holds that side’s 11 sts plus 8 sts from each end, for 27 sts. The other 37 sts (13 + 11 + 13) are the front section. Fasten off.
Back Panel
Work the back panel flat in rows with MC.
Ch 28.
Row 1: Sc in 2nd ch from hook and in each ch across. (27 sts)
Rows 2–44: Ch 1, turn, sc in each st across. (27 sts)
The panel now measures 7.7 in × 11 in (19.6 cm × 27.9 cm).
Left ear: Work over the first 7 sts only.
– Ear Row 1: Ch 1, turn, sc in next 7 sts. (7)
– Ear Rows 2–7: Ch 1, turn, and work sc across with one sc2tog at the inner edge (the edge facing the middle of the head) each row. The rows have 6, 5, 4, 3, 2 and 1 sts.
– Fasten off.
Right ear: Skip the next 13 sts of Row 44, which become the top of the head. Join MC in the next st and sc in the last 7 sts (7). Repeat Ear Rows 2–7, again decreasing at the inner edge, and fasten off.
Each ear adds 1.75 in (4.4 cm), so the full back is 12.75 in (32.4 cm) tall.
Front Lace Panel
Work the front panel flat in rows. It needs a multiple of 6 + 1 sts.
With MC: Ch 38.
Row 1: Sc in 2nd ch from hook and across. (37 sts)
Rows 2–6: Ch 1, turn, sc across. (37 sts)
This brown band measures 1.5 in (3.8 cm).
Change to CC1 for the lace.
Row 7 (Fan row A): Ch 1, turn, sc in first st. Skip 2 sts, Fan in next st, skip 2 sts, sc in next st; repeat from * 5 more times.
(6 fans + 7 sc)*
Row 8 (Fan row B): Ch 3 (counts as dc), turn, 3 dc in first sc (half fan). Ch 1, sc in 4th dc of next fan, ch 1, Fan in next sc; repeat from * 4 more times. Ch 1, sc in 4th dc of last fan, ch 1, 4 dc in last sc.
(2 half fans + 5 full fans + 6 sc + 12 ch-1 sps)*
Row 9 (Fan row C): Ch 1, turn, sc in first dc. Ch 1, Fan in next sc, ch 1, sc in 4th dc of next fan; repeat from * 4 more times. Ch 1, Fan in last sc, ch 1, sc in top of turning ch.
(6 fans + 7 sc + 12 ch-1 sps)*
Row 10: Repeat Row 8.
Row 11: Repeat Row 9.
Each row’s fans sit between the fans of the row below. That offset creates the fish-scale pattern, and the ch-1 spaces keep the fabric open enough to see the roll through it. Rows 7–11 measure 3.75 in (9.5 cm).
Row 12 (conversion row, CC1): Ch 1, turn, sc in first sc. Skip ch-1 sp, sc in the 1st, 2nd, 4th, 6th and 7th dc of the fan, skip ch-1 sp, sc in next sc; repeat from * 5 more times.
(37 sts = 7 sc worked into sc + 30 sc worked into fan dc, 5 per fan)*
Change to MC.
Rows 13–16: Ch 1, turn, sc across. (37 sts)
The front measures 10.6 in × 6.5 in (26.9 cm × 16.5 cm). The front rim (Rows 17–18) is part of the Border below. Work it before assembly, while the panel is still flat.
Appliqués and Strap
Eyes (make 2):
– Rnd 1 (CC3): Magic ring, 6 sc. Join. (6)
– Rnd 2 (CC3): Ch 1, 2 sc in each st. Join. (12)
– Change to CC2.
– Rnd 3: Ch 1, (sc, 2 sc in next) 6 times. Join. (18)
– Rnd 4: Ch 1, (sc 2, 2 sc in next) 6 times. Join. (24)
– Rnd 5: Ch 1, (sc 3, 2 sc in next) 6 times. Join. (30)
– Fasten off and leave a long tail. The eye is 2.5 in (6.4 cm) across.
Beak (CC1):
– Ch 6.
– Row 1: Sc in 2nd ch from hook and across. (5)
– Row 2: Ch 1, turn, sc across. (5)
– Row 3: Ch 1, turn, sc2tog, sc, sc2tog. (3)
– Row 4: Ch 1, turn, sc across. (3)
– Row 5: Ch 1, turn, sc3tog (insert hook in each of the 3 sts, then yarn over and pull through all 4 loops). (1)
– The beak is 1.4 in (3.6 cm) wide × 1.25 in (3.2 cm) tall.
Wings (make 2): Ch 18.
– Rnd 1 (MC): Sc in 2nd ch from hook, hdc in next 3 ch, dc in next 9 ch, hdc in next 3 ch, 3 sc in last ch. Working along the other side of the chain: hdc in next 3 ch, dc in next 9 ch, hdc in next 3 ch, 2 sc in the same ch as the first sc. Join. (16 + 3 + 15 + 2 = 36 sts)
– Rnd 2 (MC): Ch 1, sc in each st, working 3 sc in the center sc of each 3-sc tip. Join. (40 sts)
– Rnd 3 (CC1): Ch 1, sc in each st, working 3 sc in the center st of each tip. Join. (44 sts)
The dc posts make the feather lines. Each wing is 6 in × 2.5 in (15.2 cm × 6.4 cm).
Strap (MC): Ch 5.
– Row 1: Sc in 2nd ch from hook and across. (4)
– Rows 2–20: Ch 1, turn, sc across. (4)
– The strap is 1.1 in × 5 in (2.8 cm × 12.7 cm).
Make All Pieces
- MC: base, back, front (Rows 1–6 and 13–16), wing Rnds 1–2 (×2), strap
- CC1: front Rows 7–12 and 17–18, wing Rnd 3 (×2), beak
- CC2: eye Rnds 3–5 (×2)
- CC3: eye Rnds 1–2 (×2)
Assembly layout (front view):
        /\               /\        <- ears (back panel)
       [    EYE  ^  EYE    ]       <- eyes + beak on back panel
       [   open pocket     ]
  WING |  ~~ fan lace ~~   | WING
       |  ~~ fan lace ~~   |
       |  brown band       |
        \____ BASE ______/
Joining
Back to base: Hold the back panel’s starting chain edge against the 27-st back section of the base, wrong sides together. With MC, sc through both layers, one base stitch to one back stitch. That gives 27 sc.
Front to base: Hold the front panel’s starting chain edge against the 37-st front section, wrong sides together. Join the same way for 37 sc. The total is 27 + 37 = 64, which matches Rnd 7 of the base exactly, so no stitches are added or skipped.
Side seams: The front is 2.9 in (7.4 cm) wider than the back. That extra width bows forward and forms the pocket. Match the front side edges, Rows 1–18, to back Rows 1–28. Both edges are 7 in (17.8 cm) long. Pin at the bottom, the middle and the top, then whipstitch with MC through one row end on each side.
Keep the tension firm but not tight. The seam should be as long as the edges it joins.
Checkpoint: Measured from the back, the pocket opening sits 7 in (17.8 cm) above the base, and the head rises another 5.75 in (14.6 cm) above it.
Border
The border has two parts and is worked to the sc gauge of 3.5 sts per inch (2.5 cm).
Front rim (work before assembly): Continue from Row 16 of the front panel in CC1.
– Row 17: Ch 1, turn, sc across. (37 sts)
– Row 18: Ch 1, do not turn, rev sc across. (37 sts)
The rim adds 0.5 in (1.3 cm) and gives the opening its gold edge. Because both rows are worked 1 sc per st, the opening stays 10.6 in (26.9 cm) wide.
Head edging (after assembly): Join MC at the top of the left side seam, with the RS facing. Work 1 round of sc around the head:
– Left side (back Rows 29–44, 16 row ends): 14 sc. Skip the 4th and 12th row ends.
– Left ear: 6 sc along the outer edge, 3 sc in the tip, 6 sc along the inner edge. (15)
– Top of head: 1 sc in each of the 13 unworked sts. (13)
– Right ear: 6 + 3 + 6. (15)
– Right side: 14 sc, skipping the same two row ends.
Total: 14 + 15 + 13 + 15 + 14 = 71 sts. Sl st into the seam and fasten off.
Why the math works: Rows run 4 per inch and sts run 3.5 per inch, so 16 row ends take 16 × 3.5 ÷ 4 = 14 sc. That keeps the edge flat. The ears get 1 sc per row end because their decreased edges are diagonal and therefore longer. The 3 sc at each tip turn the point cleanly.
Final Assembly
- Center the eyes between back Rows 32 and 42, 1.25 in (3.2 cm) to each side of center, with the outer edges touching. Sew them on.
- Sew the beak point-down between the eyes, with its top edge at Row 38.
- Sew each wing over a side seam with its top tip at 7.5 in (19.1 cm) above the base. Stitch only the upper 3 in (7.6 cm) of the inner edge so the lower part can sit slightly away from the body.
- Fold the strap around the wooden ring, overlapping the ends by 1 in (2.5 cm). Sew both ends to the WS of the back panel at the center of the head.
Final Blocking
- Mist the holder lightly with water, or steam it from 1 in (2.5 cm) away without touching the yarn.
- Stuff the pocket with a towel rolled to 4.5 in (11.4 cm) across so the front curve sets evenly.
- Pin the lace so each fan opens fully. The front should be 10.6 in (26.9 cm) wide.
- Pin the back flat to 7.7 in × 12.75 in (19.6 cm × 32.4 cm), and pin the ears to points.
- Pin the wings to 6 in (15.2 cm) long.
- Let everything dry completely before you unpin it.
Final Quality-Control Checklist
- [ ] The base has 64 sts and lies flat
- [ ] The back has 27 sts and the front has 37 sts, joined 1:1 to the base
- [ ] The side seams are 7 in (17.8 cm) long and match each other
- [ ] There are 6 fans across Row 7, Row 9 and Row 11
- [ ] The head edging has 71 sts and neither cups nor ruffles
- [ ] The eyes are level and the beak is centered
- [ ] The strap holds the weight of a full roll without stretching
Troubleshooting
- Base is cupping: You are crocheting too tightly at the ends. Loosen your tension on the increase stitches.
- Base is rippling: You may have added extra increases. Count to 64 again.
- Lace is narrower than 10.6 in (26.9 cm): Make the dc fans a bit looser, or go up half a hook size for Rows 7–11 only.
- Fans don’t line up: Check that each sc of Row 8 and Row 10 goes into the 4th dc of a fan, not the 3rd or 5th.
- Head edging is wavy: Skip one more row end on each side.
- Head edging is pulling in: Skip one fewer row end on each side.
- Pocket sags forward: Re-check the side seams and pull the stitches snug.
Care
Hand wash in cool water with mild soap. Press out the water in a towel, reshape the holder around a rolled towel and lay it flat to dry.
Final Notes
Each piece in this holder builds on the one before it. Gauge of 14 sc = 4 in (10.2 cm) gives a 64-st base of 7 in × 3.5 in (17.8 cm × 8.9 cm). That base takes a 27-st back and a 37-st front, so 27 + 37 = 64. The front’s extra width bows into a pocket, and a 7 in (17.8 cm) side seam closes it. The 71-st head edging finishes the owl at 12.75 in (32.4 cm) tall. Check each piece against its measurement before you move on, and the whole owl will come together without any adjustments.
Happy crocheting!