

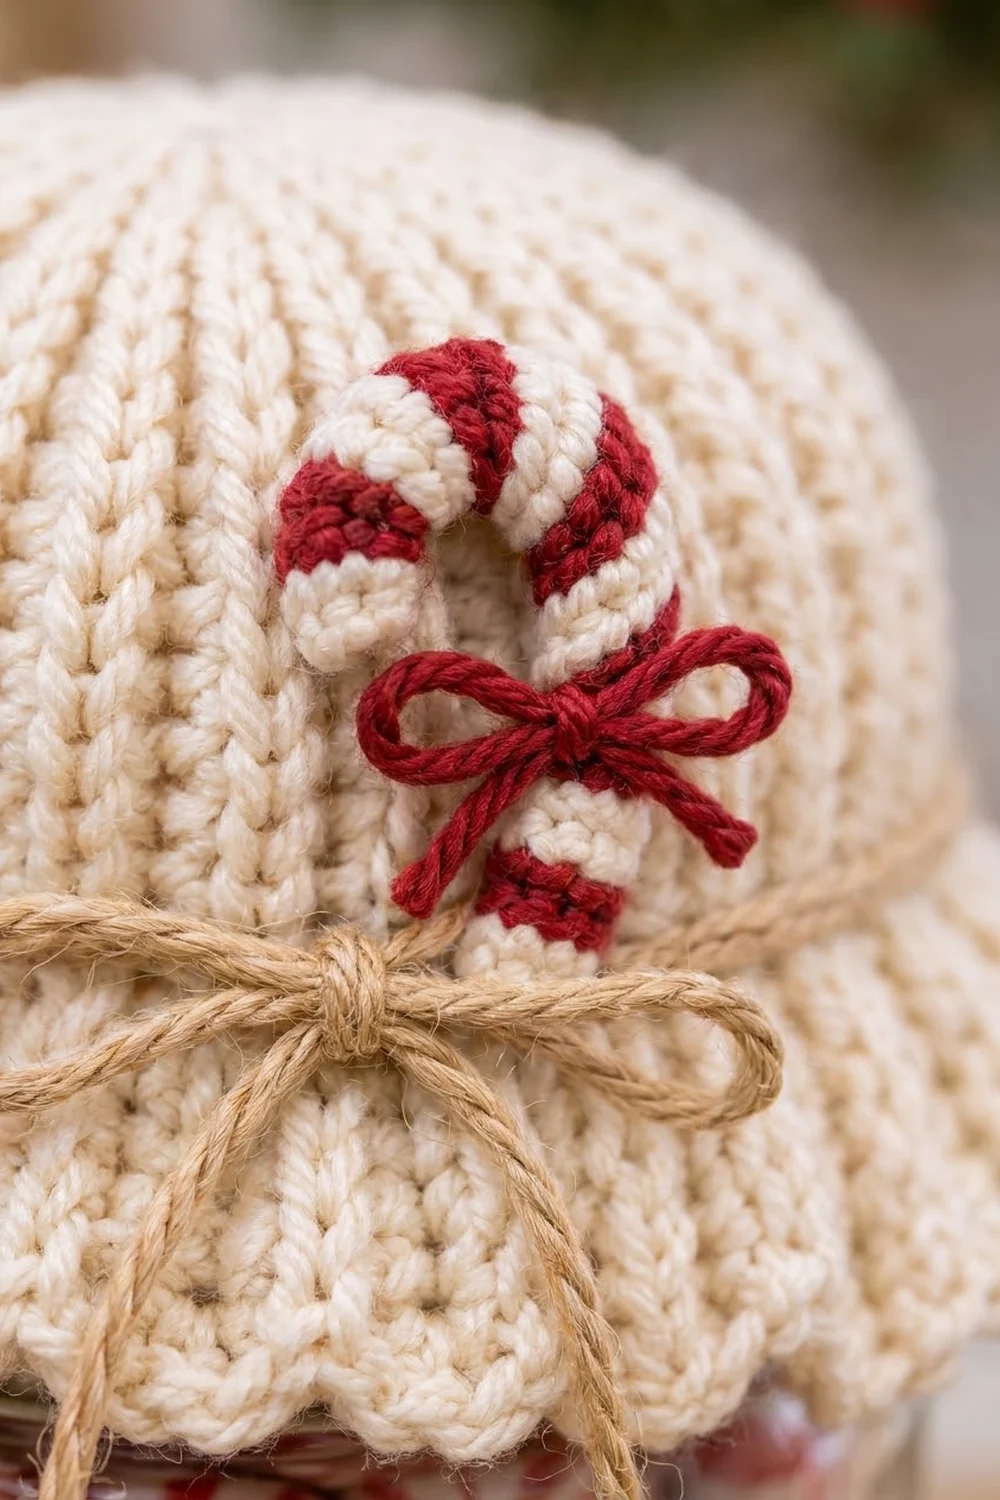
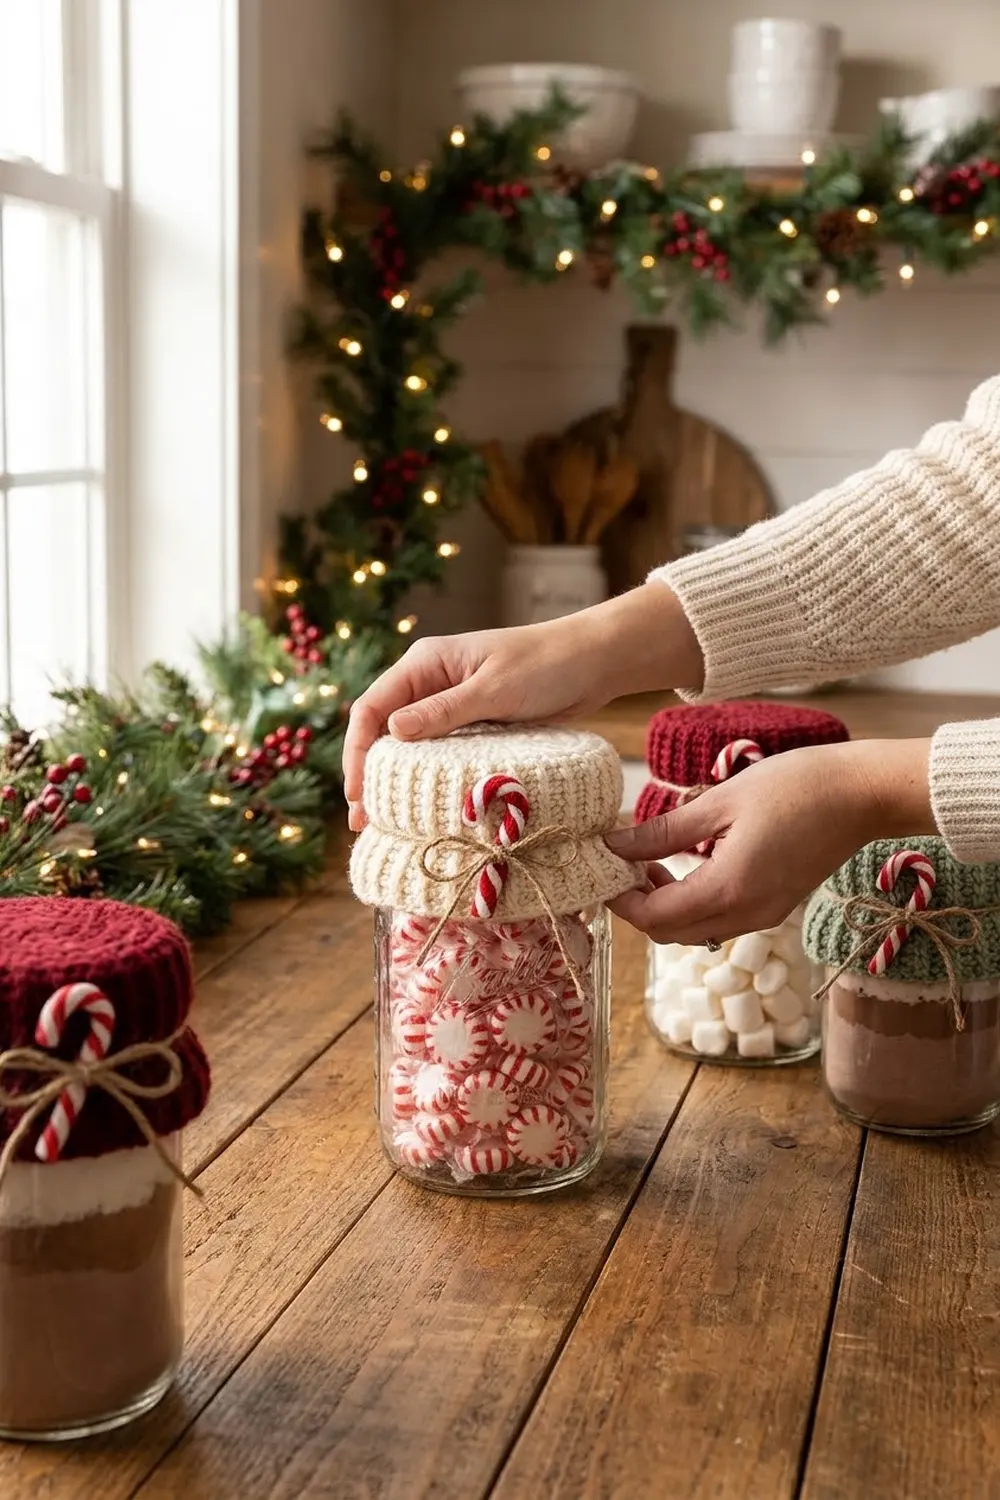
The Peppermint Cottage Jar Lid Cover turns a plain mason jar into a holiday gift. It has a soft ribbed dome, a scalloped ruffle that flares over the jar’s shoulder, a jute bow and a small candy cane on top. Fill the jar with peppermints, cocoa mix or marshmallows and it’s ready to give.
The sample is made in warm cream with a white-and-red candy cane and natural jute twine. The ribbing looks knitted, but it’s plain half double crochet worked in the back loop only. The style is cozy and simple, made to sit on a kitchen counter or under a tree. Deep red and sage green also work well for the main color.
This pattern uses US crochet terms. The finished cover is 12 in (30.5 cm) around at the base of the dome and 5.75 in (14.6 cm) long from crown to scallop tip. It fits a wide-mouth jar lid that is 3.4 in (8.6 cm) across. A regular-mouth size is given in the notes.
The cover is one piece. You work a ribbed rectangle sideways in rows, seam it into a tube and gather one edge closed to make the crown. Then you work a ruffle in rounds along the open edge. Last, you thread the twine and sew on the candy cane.
Finished Size and Construction
- Finished size: 12 in (30.5 cm) around at the dome base; 5.75 in (14.6 cm) from crown to scallop tip
- Skill level: Easy
- Terminology: US
- Yarn weight: Worsted (#4)
- Hook: US H-8 (5 mm)
- Number of pieces: 1 cover + 1 small candy cane appliqué
- Layout: Single piece. No grid and no joining.
- Piece size (ribbed panel, flat): 4 in × 12 in (10.2 cm × 30.5 cm)
- Size before border: a tube 12 in (30.5 cm) around and 4 in (10.2 cm) tall, gathered at the top
- Border (ruffle) depth: 1.75 in (4.4 cm)
Materials
Use a smooth worsted acrylic or acrylic-wool blend so the ribs show clearly. Very fuzzy yarn will blur the texture.
- Cream (main): 30 g / about 60 m
- White (candy cane): 2 g / about 4 m
- Red (stripes and bow): 3 g / about 6 m
- Natural jute twine: 1 m (you’ll use one 24 in / 61.0 cm length)
All quantities include a small safety margin.
Tools:
– US H-8 (5 mm) crochet hook
– Tapestry needle
– Scissors
– Stitch marker
– Measuring tape
– Wide-mouth mason jar for fitting
Abbreviations (US Terms)
- ch – chain
- sl st – slip stitch
- sc – single crochet
- hdc – half double crochet
- dc – double crochet
- BLO – back loop only
- st(s) – stitch(es)
- sk – skip
- rep – repeat
Special stitch: Scallop. Work 5 dc into the same stitch.
Gauge and Checkpoints
Gauge: 14 hdc and 12 rows = 4 in (10.2 cm) in hdc BLO, measured flat and relaxed.
Before you start the cover, make a test swatch. Ch 16 and work 12 rows of the panel pattern below. Measure it without stretching the ribs.
- Checkpoint 1 (swatch): 4 in × 4 in (10.2 cm × 10.2 cm).
- Checkpoint 2 (after Row 18): the panel is 6 in (15.2 cm) wide, still 4 in (10.2 cm) tall.
- Checkpoint 3 (after Row 36): the panel is 12 in (30.5 cm) wide.
- Checkpoint 4 (after the ruffle): 5.75 in (14.6 cm) from crown to scallop tip.
Too big? Go down one hook size, to US G-6 (4 mm).
Too small? Go up one hook size, to US I-9 (5.5 mm).
Row height matters most because it sets the circumference. If your rows are a little short or tall, you can also add or remove rows in multiples of 6. That keeps the scallop count even.
Ribbed Panel
The panel is worked sideways. Each row runs from the crown to the hem, so the BLO ridges become vertical ribs on the finished dome.
Foundation: With cream, ch 16.
Row 1: Hdc in the 3rd ch from the hook and in each ch across. The 2 skipped chains don’t count as a stitch. Turn. (14 hdc)
Row 2: Ch 1 (doesn’t count as a stitch). Hdc BLO in each st across. Turn. (14 hdc)
Rows 3–36: Rep Row 2. (14 hdc in every row)
At the end of Row 36 the panel has 36 rows. Each row is about 0.33 in (0.8 cm) wide, so the panel measures 12 in (30.5 cm). Don’t fasten off.
Mark your edges: The two long 12 in (30.5 cm) edges are made of row ends. Pick the long edge where you left the starting tail and call it the crown edge. The other long edge is the hem edge.
Seaming and Shaping the Dome
Seam: Fold the panel so Row 36 lies against the foundation chain, with the right side facing in. Sl st through the back loops of Row 36 and the free loops of the foundation chain together. (14 sl sts) Fasten off and leave an 18 in (45.7 cm) tail. Turn the tube right side out.
Gather the crown: Thread the long tail onto a tapestry needle. Weave it in and out through every row end along the crown edge, all 36 of them. Pull firmly until the opening closes, then pass the needle through the gathered ring twice more and secure it on the wrong side.
The ribs now radiate from the center, like the dome in the photo. The tube is 12 in (30.5 cm) around and 4 in (10.2 cm) tall.
Border: Ruffle and Scalloped Edge
The ruffle is the border on this piece. Because the cover is round, the counts are given for the full round and for each quarter.
Border gauge: about 3.6 dc per inch (2.5 cm) along the outer edge of the ruffle, and each dc round is 0.5 in (1.3 cm) tall.
Turn the cover upside down so the hem edge faces up. Join cream with a sl st in any row end next to the seam. Place a marker in the first stitch of each round.
Rnd 1 (conversion round, twine line): Ch 1. Sc in each row end around. Join with a sl st to the first sc.
(36 row ends × 1 sc + 0 extra = 36 sc; 9 per quarter)
This round is 0.25 in (0.6 cm) tall. It eases the ribbing in a little and makes a firm channel for the twine.
Rnd 2 (growth round): Ch 3 (counts as dc). Dc in the same st, then work 2 dc in each remaining st around. Join with a sl st to the top of ch-3.
(72 dc; 18 per quarter)
Doubling every stitch makes the flare.
Rnd 3: Ch 3 (counts as dc). Dc in each st around. Join with a sl st to the top of ch-3.
(72 dc; 18 per quarter)
This straight round adds drape without more fullness.
Rnd 4 (scallops): Ch 1. Sc in the same st. [Sk 2 sts, 5 dc in the next st, sk 2 sts, sc in the next st] 11 times. Then sk 2 sts, 5 dc in the next st, sk the last 2 sts and join with a sl st to the first sc.
(12 scallops: 60 dc + 12 sc; 3 scallops per quarter)
Fasten off and weave in the ends.
Why the math works: Each scallop repeat uses exactly 6 stitches: 1 sc, 2 skipped, 1 scallop base and 2 skipped. 72 ÷ 6 = 12, so the repeats close neatly with no partial scallop. Rnd 1 is 1 sc per row end, so a 36-row panel always gives 36. Doubling to 72 keeps a multiple of 6.
Border depth check: 0.25 + 0.5 + 0.5 + 0.5 = 1.75 in (4.4 cm). The total length is 4 in (10.2 cm) of dome plus 1.75 in (4.4 cm) of ruffle, which equals 5.75 in (14.6 cm).
Candy Cane Appliqué
Cane: With white, ch 9.
Sc in the 2nd ch from the hook and in the next 6 ch. Work 3 sc in the last ch. Then, working along the other side of the foundation chain, sc in each of the next 7 ch. (7 + 3 + 7 = 17 sc)
Fasten off with a 10 in (25.4 cm) tail. The strip is about 2 in (5.1 cm) long and 0.4 in (1.0 cm) wide.
Shape the hook: Bend the end with the 3-sc turn into a curve about 0.75 in (1.9 cm) wide. Tack the curve in place with the white tail. The cane now stands about 1.5 in (3.8 cm) tall.
Stripes: Thread about 20 in (50.8 cm) of red yarn. Anchor it on the back of the cane bottom. Wrap it diagonally around the cane 5 times, spacing the wraps about 0.4 in (1.0 cm) apart and following the curve. Secure the red yarn on the back and trim it.
Bow: With red, ch 30. The chain should be about 7 in (17.8 cm) long. Fasten off and tie it in a small bow. Sew the knot across the lower third of the cane and trim the bow tails to about 0.75 in (1.9 cm).
Attach: Place the cane on the upper right of the dome so its base sits about 1.25 in (3.2 cm) above Rnd 1. Tilt it slightly so the hook leans toward the center. Use the white tail to sew it on, catching the cream ribs from behind.
Twine Bow
Cut 24 in (61.0 cm) of jute twine. Start at the center front. Weave it over and under every 3 stitches of Rnd 1 all the way around, so it comes out about 1 in (2.5 cm) from where it went in.
Put the cover on the jar. Pull the twine until the cover hugs the lid without crushing the ribs, then tie a bow at the front. The front should line up under the candy cane, slightly to its left.
Final Blocking
- Lightly spray the cover with water until it’s damp but not soaked.
- Pull it over the jar lid, or over a ball or small bowl of about the same size.
- Smooth the ribs so they run straight down from the crown.
- Open each scallop with your fingers so all 12 fan out evenly.
- Gently pat the ruffle outward so it flares evenly all the way around.
- Leave it to dry completely, about 6–8 hours.
- Don’t steam acrylic hard. It can flatten the ribs for good.
Final Quality-Control Checklist
- Panel has 36 rows of 14 hdc each.
- The seam is flat and lines up with the ribs.
- The crown is fully closed with no hole in the center.
- Rnd 1 has 36 sc, Rnd 2 has 72 dc and Rnd 3 has 72 dc.
- There are 12 even scallops with no partial repeat.
- The ruffle is 1.75 in (4.4 cm) deep all around.
- The candy cane is 1.5 in (3.8 cm) tall with 5 even red stripes.
- The red bow is centered on the lower part of the cane.
- The twine passes through Rnd 1 and the bow is tied at the front.
- All ends are woven in and hidden.
Troubleshooting
The dome is too loose on the lid. Your rows are too wide. Remove 6 rows, or tighten the twine more before tying.
The dome won’t stretch over the lid. Add 6 rows, or use a hook one size larger.
There’s a hole at the crown. Weave the tail through the row ends a second time and pull it tighter.
The ribs are slanting. Check that you always work into the back loop only, and that every row starts with ch 1.
The ruffle is wavy instead of flared. Your tension is tight on Rnd 2. Go up one hook size for the ruffle only.
The last scallop doesn’t fit. Recount Rnd 3. It must be 72 stitches.
The candy cane curls sideways. Pin it flat, spray lightly and let it dry before you sew it on.
Care
Hand wash in cool water and lay flat to dry. Remove the jute twine first, since it can bleed or weaken when it gets wet.
Final Notes
The measurements build on each other. A gauge of 14 hdc × 12 rows = 4 in (10.2 cm) gives a panel 4 in (10.2 cm) tall. With 36 rows it is 12 in (30.5 cm) wide, so the tube is 12 in (30.5 cm) around. The ruffle runs 36 → 72 → 72 stitches and finishes with 12 scallops, adding 1.75 in (4.4 cm). That gives a cover 5.75 in (14.6 cm) long that fits a wide-mouth lid 3.4 in (8.6 cm) across.
For a regular-mouth jar, with a lid 2.75 in (7.0 cm) across, work 30 rows instead of 36. The panel will be 10 in (25.4 cm) wide. The ruffle then runs 30 → 60 → 60 stitches and ends with 10 scallops. The rest of the pattern stays the same.
Happy crocheting!