

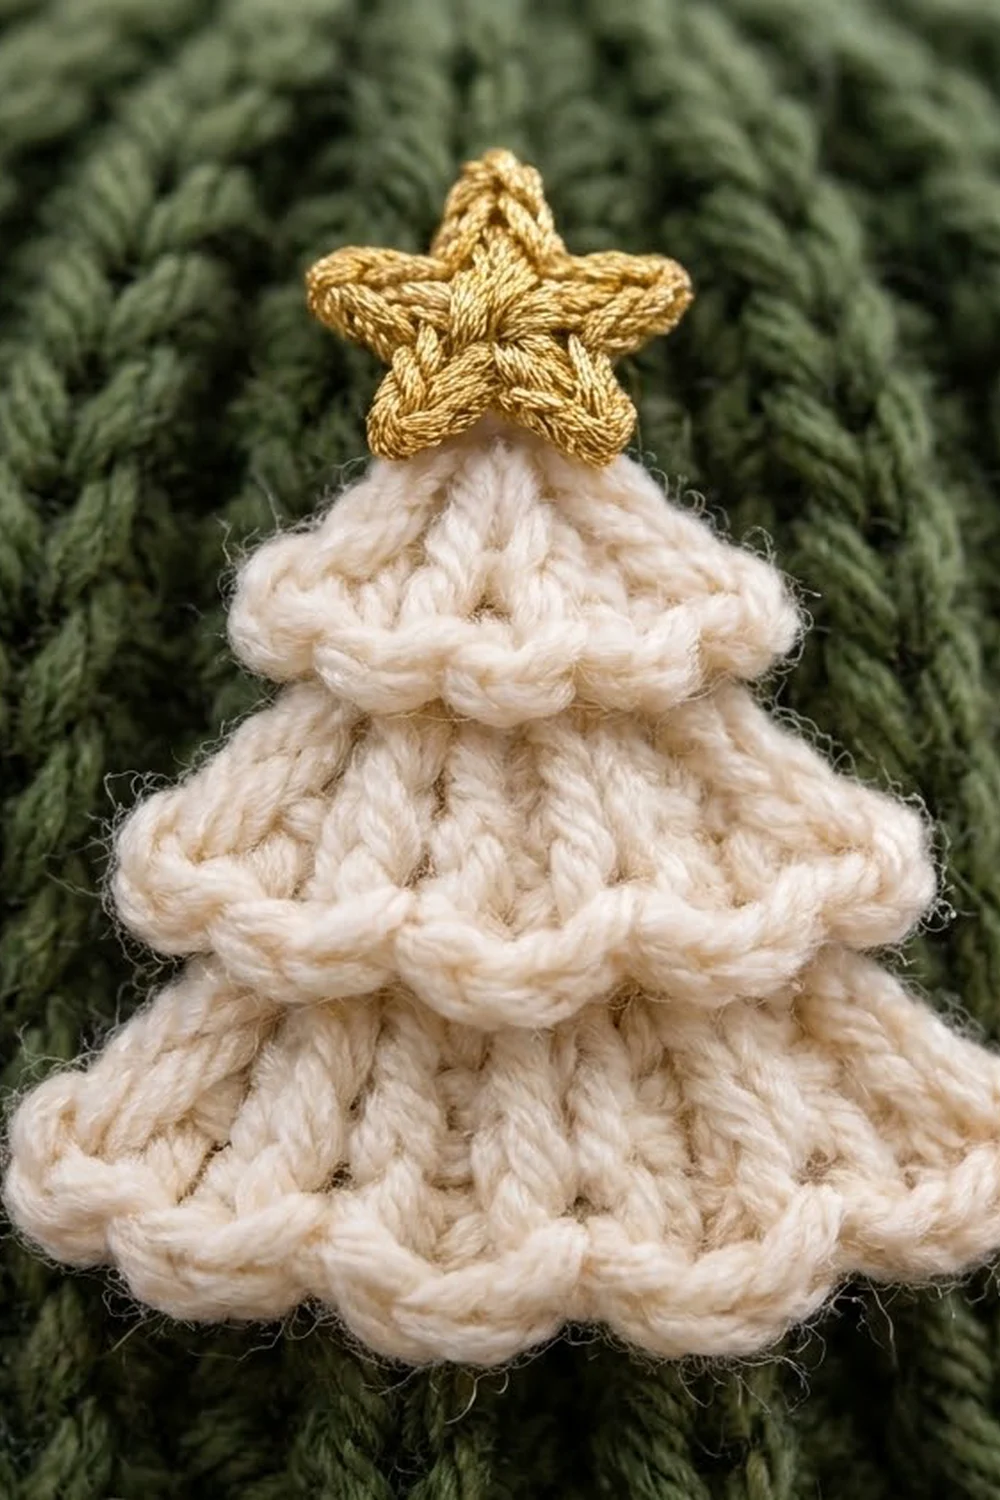
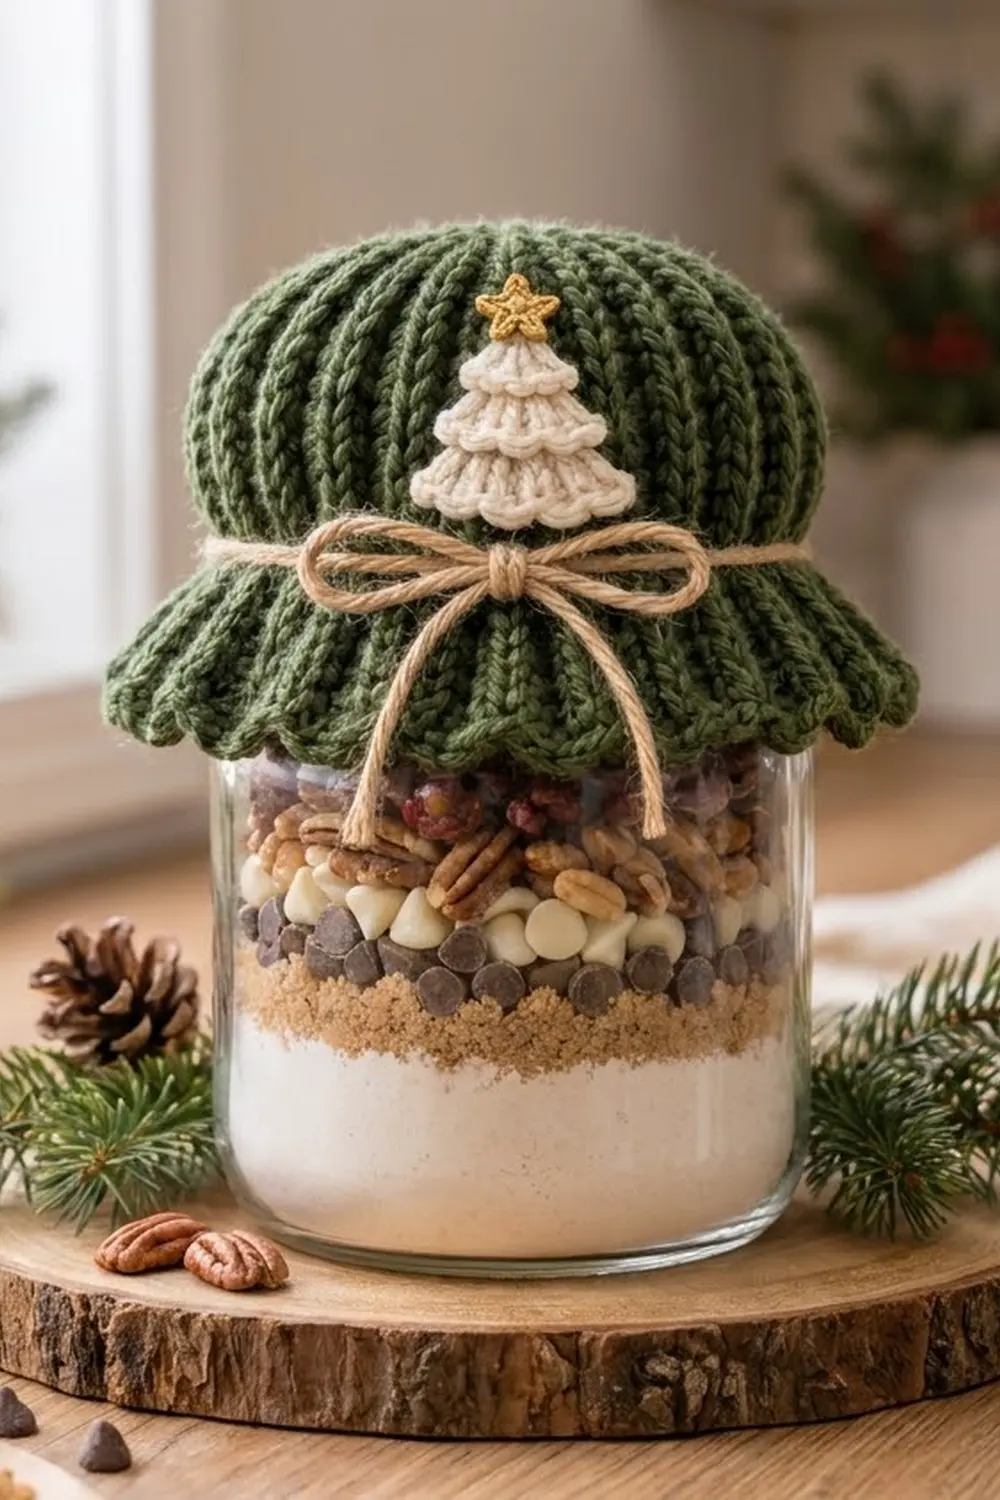
This little jar topper turns a jar of cookie mix or trail mix into a gift. The cover is forest green with vertical ribs that look knitted. It is gathered into a soft dome at the top and opens into a wavy, scalloped ruffle at the bottom. A cream tree with three scalloped tiers and a small gold star sits on the dome, and a natural jute twine bow is tied where the dome meets the ruffle.
The style is cozy farmhouse Christmas: muted green, warm cream, a spot of gold and rustic twine. The ribs come from single crochet worked in the back loop only, turned sideways so the ridges run from the top of the dome down into the ruffle. All instructions use US crochet terms.
The finished cover measures 12 in (30.5 cm) around the body, 24 in (61.0 cm) around the ruffled edge before it waves, and 7 in (17.8 cm) from the gathered center to the scallop tips. It fits a wide-mouth jar with a lid circumference of 10.5–11 in (26.7–27.9 cm).
You work one flat ribbed panel with short rows along one long edge, seam it into a tube, gather the top closed and add a scallop edging to the ruffle. Then you sew on the tree and star and tie on the twine.
Finished Size and Construction
- Finished size: 12 in (30.5 cm) body circumference; 7 in (17.8 cm) from center top to scallop tips
- Skill level: Easy-intermediate (short rows, simple seaming)
- Terminology: US crochet terms
- Yarn weight: Worsted (#4) for the cover and tree; fine metallic yarn for the star
- Hook: 5.0 mm (H-8) for the cover; 4.0 mm (G-6) for the appliqués
- Number of pieces: 1 jar cover, plus 3 small tree tiers and 1 star sewn on as decoration
- Layout: Single cover; tree centered on the front of the dome, 1.5 in (3.8 cm) above the ruffle line
- Panel size: 6.5 in (16.5 cm) tall x 12 in (30.5 cm) along the body edge
- Size before border: 6.5 in (16.5 cm) from top edge to ruffle edge
- Border depth: 0.5 in (1.3 cm) of scallops
Materials
Pick a smooth, light-colored worsted yarn with good stitch definition. Acrylic or a wool blend both work. Fuzzy or very dark yarn hides the ribs.
- Forest green (Color A): 45 g / 90 m, for the cover, edging and gathering strand
- Cream (Color B): 5 g / 10 m, for the three tree tiers
- Gold metallic, fine weight (Color C): 2 g / 4 m, for the star
- Natural jute twine: 36 in (91.4 cm)
These quantities include a margin of about 15 percent for your gauge swatch and tails.
Tools:
- 5.0 mm (H-8) crochet hook
- 4.0 mm (G-6) crochet hook
- Tapestry needle
- 2 stitch markers
- Scissors
- Pins
- Wide-mouth jar for fitting
Abbreviations (US Terms)
- ch: chain
- sc: single crochet
- hdc: half double crochet
- sl st: slip stitch
- BLO: back loop only
- sc2tog: single crochet 2 together
- sc3tog: single crochet 3 together
- st(s): stitch(es)
Special stitch: sc BLO. Insert the hook under only the back loop of the stitch (the loop farther from you), then complete a normal sc. Every 2 rows of sc BLO makes 1 raised rib.
Short row: Work only part of the row, then turn and leave the remaining stitches unworked. You pick them up again on a later full row.
Gauge and Checkpoints
Cover gauge (5.0 mm hook): 16 sts and 20 rows = 4 in (10.2 cm) in sc BLO. That is 4 sts and 5 rows per inch.
Appliqué gauge (4.0 mm hook): 20 sc = 4 in (10.2 cm), or 5 sts per inch.
Swatch first: ch 17, work 16 sc, then work 20 rows of sc BLO. Measure without stretching. Then check as you go:
- After Row 1: the 26-st foundation row measures 6.5 in (16.5 cm).
- After Row 41: the body edge (the top edge, full rows only) measures 4.2 in (10.7 cm) across 21 rows. The ruffle edge should already be visibly wavy.
- After Row 120: the body edge measures 12 in (30.5 cm).
If your piece is too big, go down one hook size. If it is too small, go up one hook size. Don’t change the stitch or row counts, because the ruffle and scallop math depends on them.
Ribbed Cover Panel
You work the panel sideways. Each row runs from the bottom (ruffle) edge to the top (dome) edge or back. Sts 1–6 at the bottom form the ruffle zone and sts 7–26 form the body zone.
With the 5.0 mm hook and Color A, ch 27. Leave a 6 in (15.2 cm) tail.
Row 1: Sc in 2nd ch from hook and in each ch across. (26 sc)
Place a marker at the end where you finished. This is the bottom (ruffle) edge, and every set below starts there.
Row 2 (short row): Ch 1, turn. Sc BLO in the first 6 sts. Leave the remaining 20 sts unworked. (6 sc)
Row 3 (short row): Ch 1, turn. Sc BLO in each of the 6 sts back to the bottom edge. (6 sc)
Row 4 (full row): Ch 1, turn. Sc BLO in the 6 sts, then sc BLO in each of the 20 unworked sts of Row 1. (26 sc)
At the step where the short rows end, pull the yarn snug so you don’t leave a gap.
Row 5 (full row): Ch 1, turn. Sc BLO in each st across, ending at the bottom edge. (26 sc)
Rows 2–5 make one set: 2 short rows and 2 full rows. In later sets, Row 4 picks up the 20 unworked sts of the previous full row.
Rows 6–117: Repeat Rows 2–5 twenty-eight more times, for 29 sets in all. Each full row has 26 sc and each short row has 6 sc.
Row 118 (short): Work as Row 2. (6 sc)
Row 119 (short): Work as Row 3. (6 sc)
Row 120 (full): Work as Row 4. You finish at the top edge. (26 sc)
Panel check:
- Top edge: 60 row ends (Row 1, 29 sets x 2 full rows, and Row 120). At 5 rows per inch this is 12 in (30.5 cm). The 60 rows form 30 ribs.
- Bottom edge: 120 row ends (Row 1, 29 sets x 4 rows, and Rows 118–120). This edge is twice as long, which is what makes it ruffle.
Don’t fasten off.
Seam and Gather
Seam: Fold the panel so Row 120 lies against the foundation chain, with the ribs facing out. Sl st through the back loop of each Row 120 st together with the matching free loop of the foundation chain. Work from the top edge down to the bottom edge. (26 sl st)
The seam sits like one more rib. Fasten off and weave in both tails.
Gather the top: Cut a 14 in (35.6 cm) strand of Color A and thread it onto a tapestry needle. Weave it in and out through all 60 row ends of the top edge, about 0.25 in (0.6 cm) from the edge. Pull firmly until the opening closes. Take two stitches across the center to lock it, then weave the ends in on the inside.
The ribs now radiate from the center like a dome.
Scalloped Edging (Border)
Border gauge: each scallop uses 4 row ends, about 0.8 in (2.0 cm) of the flat ruffle edge, and stands 0.5 in (1.3 cm) deep.
With the 5.0 mm hook, join Color A with a sl st in the bottom row end at the seam.
Round 1: Skip 1 row end, 5 hdc in the next row end, skip 1 row end, sl st in the next row end. Repeat from * around. The last sl st lands in the joining row end. (30 scallops: 150 hdc + 30 sl st)
Fasten off and weave in the end.
Why the math works: The bottom edge has exactly 120 row ends. Each repeat uses 4 of them, and 120 ÷ 4 = 30, so the scallops close evenly with no partial repeat at the seam. The 5 hdc fanned into a single row end make each scallop lift. On the 24 in (61.0 cm) edge, 30 scallops land about 0.8 in (2.0 cm) apart, small enough to follow the ruffle waves.
Tree Appliqué
Use the 4.0 mm hook and Color B. Each tier is a small triangle with scallops on its foundation edge. Leave a 10 in (25.4 cm) tail at the end of each tier for sewing.
Large tier:
- Row 1: Ch 10, sc in 2nd ch from hook and across. (9 sc)
- Row 2: Ch 1, turn, sc2tog, sc in next 5 sts, sc2tog. (7 sc)
- Row 3: Ch 1, turn, sc2tog, sc in next 3 sts, sc2tog. (5 sc)
- Row 4: Ch 1, turn, sc2tog, sc in next st, sc2tog. (3 sc)
- Row 5: Ch 1, turn, sc3tog. (1 st)
- Scallops: Sl st evenly down one side to the foundation chain. Sl st in the first free loop, then 3 hdc in the next loop, sl st in the next loop 4 times. This uses all 9 loops. (4 scallops)
Width: 1.8 in (4.6 cm).
Medium tier:
- Row 1: Ch 8, sc in 2nd ch from hook and across. (7 sc)
- Rows 2–4: Work as Rows 3–5 of the large tier. (5, 3, 1)
- Scallops: Sl st down the side, sl st in the first loop, then 3 hdc, sl st 3 times. This uses all 7 loops. (3 scallops)
Width: 1.4 in (3.6 cm).
Small tier:
- Row 1: Ch 6, sc in 2nd ch from hook and across. (5 sc)
- Rows 2–3: Work as Rows 4–5 of the large tier. (3, 1)
- Scallops: Sl st down the side, sl st in the first loop, then 3 hdc, sl st 2 times. This uses all 5 loops. (2 scallops)
Width: 1 in (2.5 cm).
Stack the tiers: Lay the large tier flat. Place the medium tier so its scallops cover the top half of the large tier. Place the small tier the same way on the medium tier. Let each scallop row curl forward slightly, like layered branches.
The tree measures about 2.5 in (6.4 cm) tall, or 3 in (7.6 cm) with the star.
Gold Star
With the 4.0 mm hook and Color C, make a magic ring.
- Round 1: 5 sc in the ring. Join with a sl st to the first sc. (5 sc)
- Round 2: Ch 3, sl st in 2nd ch from hook, hdc in next ch, sl st in next sc of Round 1. Repeat 4 more times. (5 points)
Fasten off. The star measures about 0.75 in (1.9 cm) across.
Finishing the Cover
- Put the cover on the jar. Turn it so the seam is at the back.
- Pin the tree to the center front of the dome with its bottom 1.5 in (3.8 cm) above the ruffle line, where the short rows begin.
- Whipstitch each tier along its upper edges only, so the scallops stay free.
- Sew the star to the top of the small tier.
- Wrap the jute twine around the jar at the ruffle line. Pull it snug and tie a bow at the front, just under the tree. Trim the twine ends to about 3 in (7.6 cm).
Final Blocking
- Take the cover off the jar and untie the twine.
- Mist the cover and tree lightly with water. For acrylic, steam from 1 in (2.5 cm) above instead, without touching the yarn.
- Put the cover back on the jar or on a similar-sized rounded object so the dome dries in shape.
- Pinch each scallop into an even fan with your fingers.
- Smooth the ribs straight so they run from the center down into the ruffle.
- Let it dry completely, then tie the twine bow again.
Final Quality-Control Checklist
- [ ] Body edge measures 12 in (30.5 cm) with 30 ribs.
- [ ] Ruffle edge has 120 row ends and 30 even scallops.
- [ ] The seam lies flat and reads as a rib.
- [ ] The top center is fully closed, with no hole.
- [ ] Short-row steps have no visible gaps.
- [ ] The tree tiers overlap evenly and the scallops are free.
- [ ] The star is centered on top of the tree.
- [ ] The twine bow is centered under the tree.
Troubleshooting
The ruffle is flat. You probably skipped short rows. Count the bottom row ends: you need 120.
The ruffle is too frilly. Your rows are too loose. Go down a hook size and check gauge.
There are holes at the short-row turns. Tighten the first stitch past the turn. You can close a gap later with a small stitch using a yarn tail.
The cover slides off. Pull the twine tighter, or weave it in and out through the ruffle-line stitches before tying.
The scallops don’t close evenly. You have more or fewer than 120 row ends. Spread the difference over a few repeats by skipping 0 or 2 row ends instead of 1.
The dome is pointed. Gather closer to the edge, and push the center down from inside.
Care
Hand wash in cool water and lay flat to dry. Remove the twine first, and don’t wring or tumble dry.
Final Notes
The measurement chain is simple. 16 sts and 20 rows = 4 in (10.2 cm) gives a 26-st panel that is 6.5 in (16.5 cm) tall. The 60 full rows make a 12 in (30.5 cm) body. The 120 ruffle rows double the bottom edge to 24 in (61.0 cm), and dividing those 120 row ends by 4 gives 30 scallops that add 0.5 in (1.3 cm). If gauge, row count and scallop count all match, the cover will fit snugly on a wide-mouth jar with no adjustments.
Happy crocheting!