

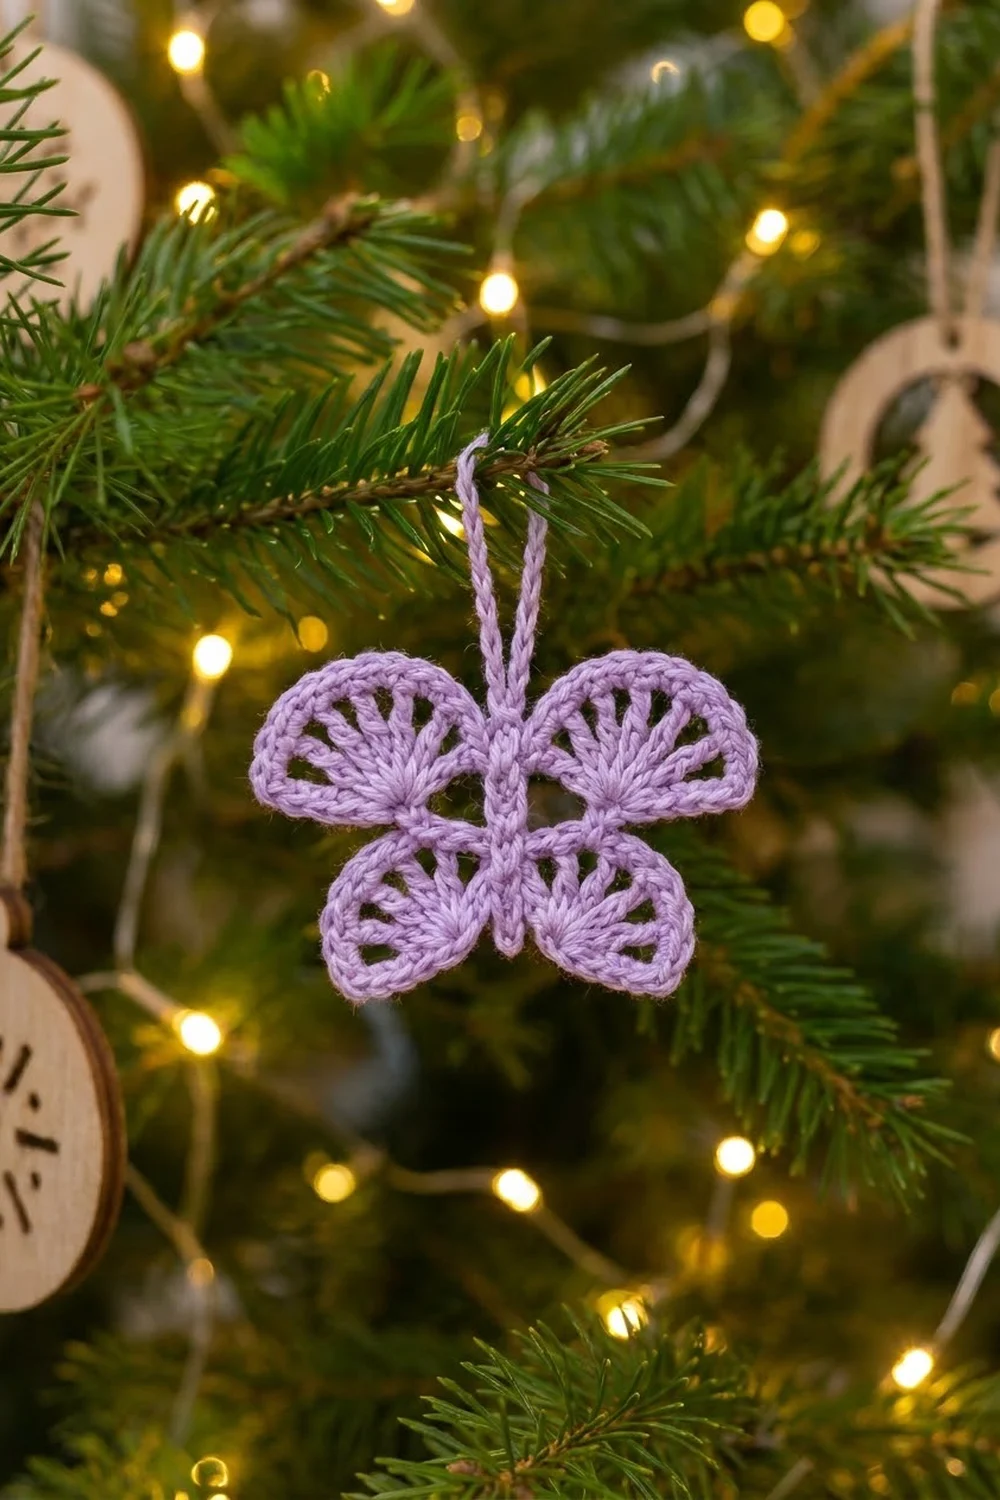
This little butterfly is made from four lacy fans. Each wing is a half circle of open spokes edged with a solid band, and a slim body with a hanging loop holds the four together. The finished piece looks delicate but sits flat and keeps its shape, so it works well as a tree ornament, gift topper, or bag charm.
The sample is worked in one soft lavender, which gives it a calm, vintage feel against green branches and warm lights. Any pale pastel works, and so does crisp white for a snowflake-style tree.
This pattern uses US crochet terms. The finished butterfly measures about 5 in (12.7 cm) wide and 2.5 in (6.4 cm) tall, not counting the loop. With the hanging loop, it is 3.75 in (9.5 cm) tall.
Construction is simple. You make two large upper wings and two small lower wings, each worked back and forth from a small ring. Next, a single chain line forms the hanging loop and body and gathers the four wing corners. Finally, a single crochet border goes around each wing arc and locks everything into shape.
Finished Size and Construction
- Finished size: 5 in (12.7 cm) wide x 2.5 in (6.4 cm) tall; 3.75 in (9.5 cm) tall with loop
- Skill level: Easy / advanced beginner
- Terminology: US crochet terms
- Yarn weight: Sport weight (#2), mercerized cotton
- Hook: 2.5 mm
- Number of pieces: 4 wings joined into 1 ornament by the body chain
- Layout: 2 upper wings over 2 lower wings, body down the center
- Piece size: Upper wing 2.5 in (6.4 cm) wide x 1.25 in (3.2 cm) tall; lower wing 2 in (5.1 cm) wide x 1 in (2.5 cm) tall
- Size before border: Upper wing 2.25 in (5.7 cm) wide; lower wing 1.75 in (4.4 cm) wide; assembled 4.75 in (12.1 cm) wide
- Border depth: 0.125 in (0.3 cm), one row of single crochet
Materials
Yarn: Choose a smooth, mercerized sport weight cotton. It shows the spokes clearly and blocks crisply. Fuzzy or loosely plied yarn will blur the lace and make the fans curl.
- Lavender: about 4 g (12 m) per butterfly. Buy at least 10 g (30 m) so you have enough for a test wing and spare yarn for joining.
Quantities include a margin. A full 50 g ball makes a whole set of tree ornaments.
Tools:
- 2.5 mm crochet hook
- Tapestry needle
- Scissors
- Rust-proof pins and a foam blocking mat
- Spray bottle
- Optional: fabric stiffener or spray starch
Abbreviations (US Terms)
- ch – chain
- sl st – slip stitch
- sc – single crochet
- dc – double crochet
- tr – treble crochet (yarn over twice, insert hook, pull up a loop, [yarn over, pull through 2 loops] 3 times)
- sp – space
- st(s) – stitch(es)
- RS / WS – right side / wrong side
Special term – spoke: one tall stitch (tr on upper wings, dc on lower wings) worked into the ring, followed by ch 1. Spokes create the open, sunburst center of each wing.
Gauge and Checkpoints
Gauge isn’t critical for an ornament. Still, it decides whether the wings meet neatly at the body. Make one upper wing first and measure it before you go on.
Base gauge: 10 sc = 1 in (2.5 cm) along the wing edge with a 2.5 mm hook.
Upper wing checkpoints (measured across the flat edge):
- After Row 1: 1.5 in (3.8 cm)
- After Row 2: 2.25 in (5.7 cm)
- After border: 2.5 in (6.4 cm) wide x 1.25 in (3.2 cm) tall
Lower wing checkpoints:
- After Row 1: 1 in (2.5 cm)
- After Row 2: 1.75 in (4.4 cm)
- After border: 2 in (5.1 cm) wide x 1 in (2.5 cm) tall
If your wing is too big, switch to a 2.25 mm hook. If it is too small, switch to a 2.75 mm hook. If Row 2 ripples instead of lying flat, your dc are tighter than your spokes. Go up a hook size for Row 2 only. If Row 2 cups, go down a size.
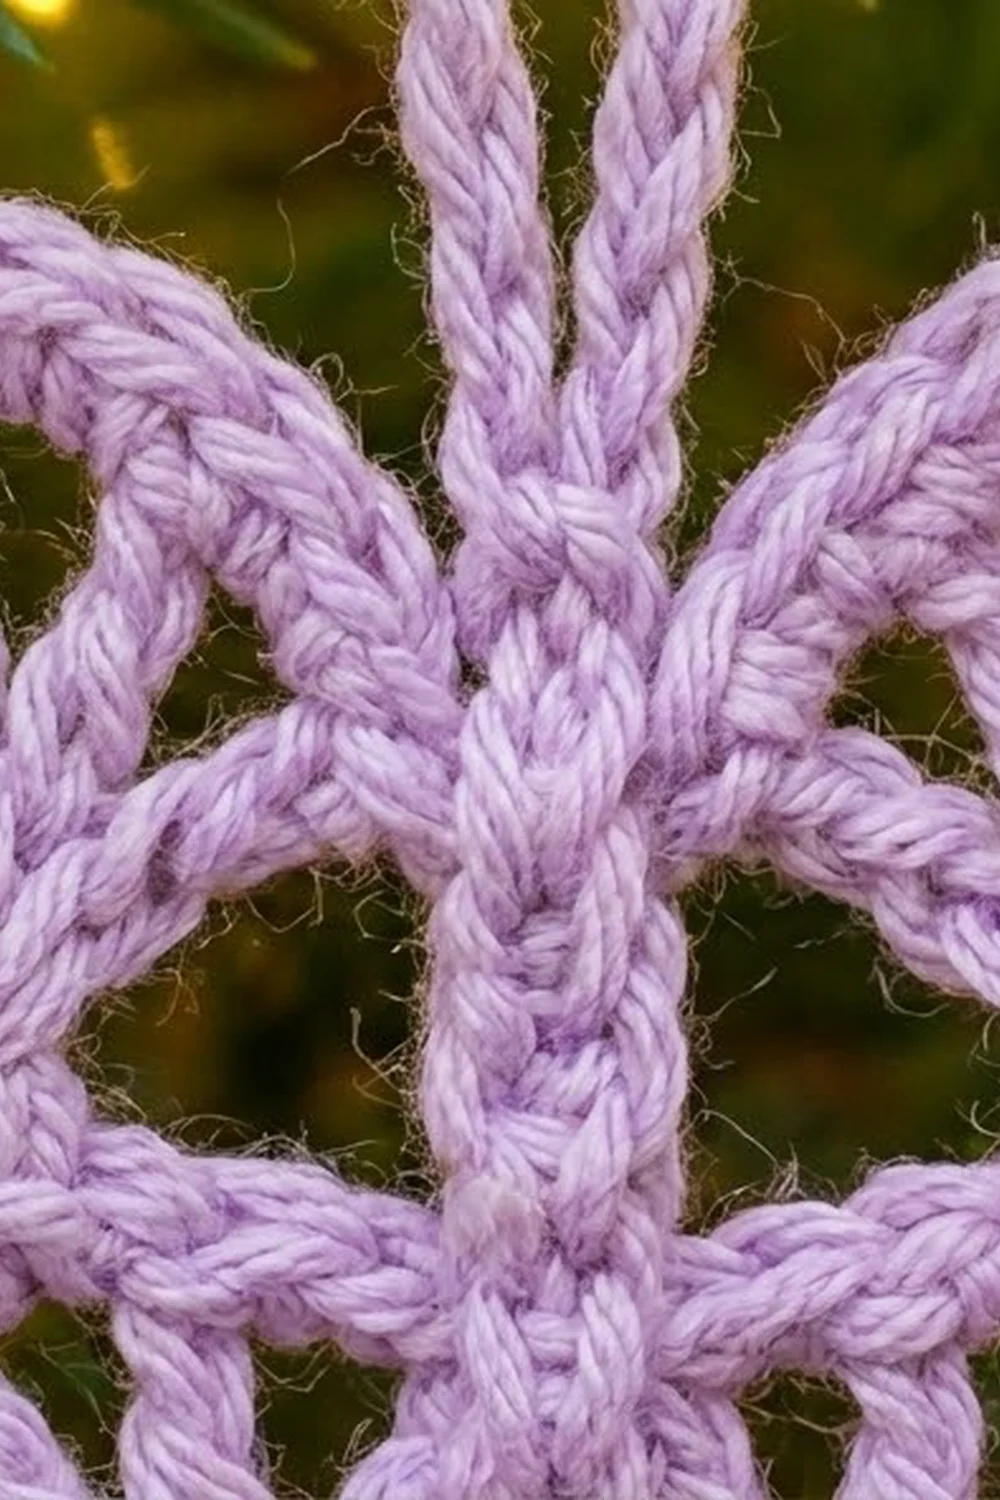
Upper Wing (Make 2)
The upper wing is a half circle. Half of the ring carries the spokes. The other half stays bare and becomes the middle of the flat edge.
Ring: Ch 5, sl st in first ch to form a ring.
Work over the beginning tail as you make Row 1. Afterward, you can tug the tail to snug the ring a little and close any gap at the center.
Row 1 (RS): Ch 4 (counts as first tr), ch 1, (tr in ring, ch 1) 8 times, tr in ring. (10 tr, 9 ch-1 sp)
Push the stitches toward one half of the ring so they fan out in a semicircle. The first and last tr should face in opposite directions and form a straight line.
Row 2 (WS): Turn, ch 3 (counts as first dc), [2 dc in next ch-1 sp, dc in next tr] 9 times, working the final dc in the top of the beginning ch-4. (28 dc)
Conversion check: 10 dc (one in each tr, counting the ch-3) + 18 dc (two in each of the 9 spaces) = 28 dc.
This solid band forms the smooth outer ring around the spokes. Fasten off, leaving an 8 in (20.3 cm) tail.
Mark the corners. The last dc of Row 2 (in the top of the ch-4) is the inner corner and will join the body. The beginning ch-3 of Row 2 is the outer corner.
Checkpoint: 2.25 in (5.7 cm) across the flat edge.
Lower Wing (Make 2)
The lower wing is built the same way, but it is smaller and uses dc spokes.
Ring: Ch 5, sl st in first ch to form a ring.
Row 1 (RS): Ch 3 (counts as first dc), ch 1, (dc in ring, ch 1) 6 times, dc in ring. (8 dc, 7 ch-1 sp)
Fan the stitches across half of the ring, as on the upper wing.
Row 2 (WS): Turn, ch 3 (counts as first dc), [2 dc in next ch-1 sp, dc in next dc] 7 times, working the final dc in the top of the beginning ch-3. (22 dc)
Conversion check: 8 dc (one per spoke) + 14 dc (two in each of the 7 spaces) = 22 dc.
Fasten off, leaving an 8 in (20.3 cm) tail. Mark the inner corner (last dc) and the outer corner (beginning ch-3), just as on the upper wings.
Checkpoint: 1.75 in (4.4 cm) across the flat edge.
Make All Pieces
For one butterfly, you need:
- Lavender upper wings: 2 (28 dc each after Row 2)
- Lavender lower wings: 2 (22 dc each after Row 2)
Weave in only the beginning tails now. Keep the 8 in (20.3 cm) end tails for tacking later.
Lay the wings out flat. Turn the two left-hand wings WS up so their inner corners point toward the center. The lace looks the same on both sides, so this mirror image won’t show.
   [ UPPER L ]  |  [ UPPER R ]     arcs face up
   ---------- body ----------      inner corners meet here
   [ LOWER L ]  |  [ LOWER R ]     arcs face down
The flat edges of the upper wings rest on the flat edges of the lower wings, and all four inner corners touch at the center.
Joining
The body is one chain line. It forms the hanging loop, gathers the four inner corners, and then turns back on itself to thicken into a small raised body.
Hanging loop: Ch 14, sl st in first ch to form a loop.
Upper body: Ch 7.
Gather the wings: With RS facing, sl st through the inner corner of the upper right wing. Then sl st through the inner corner of the upper left wing, the lower left wing, and the lower right wing, in that order. (4 sl st, all at one point)
Lower body: Ch 8, sl st in 2nd ch from hook and in each of the next 6 ch. (7 sl st)
Return up the body: Sl st in the gathered join point (1 sl st), sl st in each of the 7 upper body ch (7 sl st), sl st in the base of the hanging loop (1 sl st). (16 sl st on the return pass)
Fasten off and weave in.
Stitch logic: The four corner sl sts connect one stitch from each wing to a single point on the body. No wing stitches are used up except those four inner corners, so the arcs stay free for the border.
Tension advice: Keep the body chains snug but not tight. If the body is tighter than the wings, the ornament will bow. If it is looser, the wings will droop.
Tack the flat edges: Using the 8 in (20.3 cm) tails, whipstitch each upper wing’s flat edge to the lower wing’s flat edge below it for 0.5 in (1.3 cm), starting from the body. Leave the outer part of the flat edges free so the wing tips can move a little.
Size checkpoint: The assembled butterfly should measure 4.75 in (12.1 cm) across the upper wings before the border.
Border
The border is one row of sc around the arc of each wing. It is worked in two passes, one for each side of the butterfly. Only the arcs get a border. The flat edges stay unbordered so the wings sit close together.
Border gauge: 10 sc = 1 in (2.5 cm) along the edge.
Pass A (right side of butterfly):
Upper right wing arc (28 sts): Join yarn with a sl st in the outer corner, ch 1. Sc in the same st and the next 2 sts, 2 sc in the next st, then (sc in next 3 sts, 2 sc in next st) 6 times, ending at the inner corner. (35 sc)
Cross the body: Sl st in the gathered join point.
Lower right wing arc (22 sts): Starting at the inner corner, (sc in next 3 sts, 2 sc in next st) 5 times, sc in the last 2 sts, ending at the outer corner. (27 sc)
Fasten off.
Pass B (left side of butterfly): Work Pass A on the left wings. Join at the outer corner of the upper left wing (35 sc), sl st in the join point, then work the lower left wing (27 sc). Fasten off.
Per-side counts:
- Upper wing arc: 35 sc, including both corner stitches
- Lower wing arc: 27 sc, including both corner stitches
- Total border: 2 x 35 + 2 x 27 = 124 sc, plus 2 sl sts at the body
Why the math works: Each arc grows by about 25% in length from Row 2 to the border edge. On the upper wing, 28 sts are covered by 7 repeats of 4 sts, and every repeat makes 5 sc, so 7 x 5 = 35. On the lower wing, 5 repeats of 4 sts cover 20 sts and make 25 sc; the last 2 sts take 1 sc each, so 25 + 2 = 27. The corner stitches are part of these counts, with no extras added. The border adds 0.125 in (0.3 cm) on each side of every wing: 2.25 in (5.7 cm) becomes 2.5 in (6.4 cm), and 1.75 in (4.4 cm) becomes 2 in (5.1 cm).
Final Blocking
- Weave in all remaining tails along the backs of the dc bands.
- Pin the butterfly RS up on a blocking mat.
- Pin the body straight first, from the base of the loop to the tip of the lower body.
- Pin each upper wing arc into a smooth half circle 2.5 in (6.4 cm) wide. Pin each lower wing arc 2 in (5.1 cm) wide.
- Line up the spokes so they radiate evenly from each ring.
- Check the total width: 5 in (12.7 cm).
- Mist with water until damp, or use diluted fabric stiffener for a firmer ornament.
- Let it dry completely, at least 6 hours, before unpinning.
Final Quality-Control Checklist
- Each upper wing has 10 spokes and 35 border sc.
- Each lower wing has 8 spokes and 27 border sc.
- All four inner corners meet at a single point on the body.
- The flat edges are tacked for 0.5 in (1.3 cm) from the body.
- The butterfly measures 5 in (12.7 cm) x 2.5 in (6.4 cm).
- The hanging loop is about 1.25 in (3.2 cm) tall and closed securely.
- All tails are hidden, and none show through the spokes.
- Both sides of the butterfly are mirror images.
Troubleshooting
Spokes bunch on one side. Before Row 2, slide the Row 1 stitches along the ring until they fan out evenly.
Wing curls into a cone. Row 2 is too tight. Rework it with a larger hook, or check that you made 2 dc in every space.
Border ruffles. Your sc is looser than the gauge. Use a smaller hook for the border, but keep the stitch count.
Wings tilt or flop. Check that all four sl sts went through the true inner corners. Then tack the flat edges a little farther, up to 0.75 in (1.9 cm).
Body looks thin. Make sure the return pass goes into every chain. You should have 16 sl sts on the way up.
Loop twists. Check that the 14 chains aren’t twisted before you join them. If the loop still twists, block it flat along with the body.
Care
Hand wash in cool water, press out the water in a towel, and reshape it flat to dry. If you used stiffener, store it flat between uses and stiffen it again after washing.
Final Notes
The measurement chain is short and reliable. Upper wings measure 1.5 in (3.8 cm) after Row 1 and 2.25 in (5.7 cm) after Row 2. Lower wings measure 1 in (2.5 cm) and 1.75 in (4.4 cm) at the same stages. The assembled butterfly measures 4.75 in (12.1 cm) across. The border adds 0.125 in (0.3 cm) per side, for a finished size of 5 in (12.7 cm) wide and 2.5 in (6.4 cm) tall, or 3.75 in (9.5 cm) with the loop. If the first wing hits its checkpoints, the rest of the butterfly will too.
Happy crocheting!