

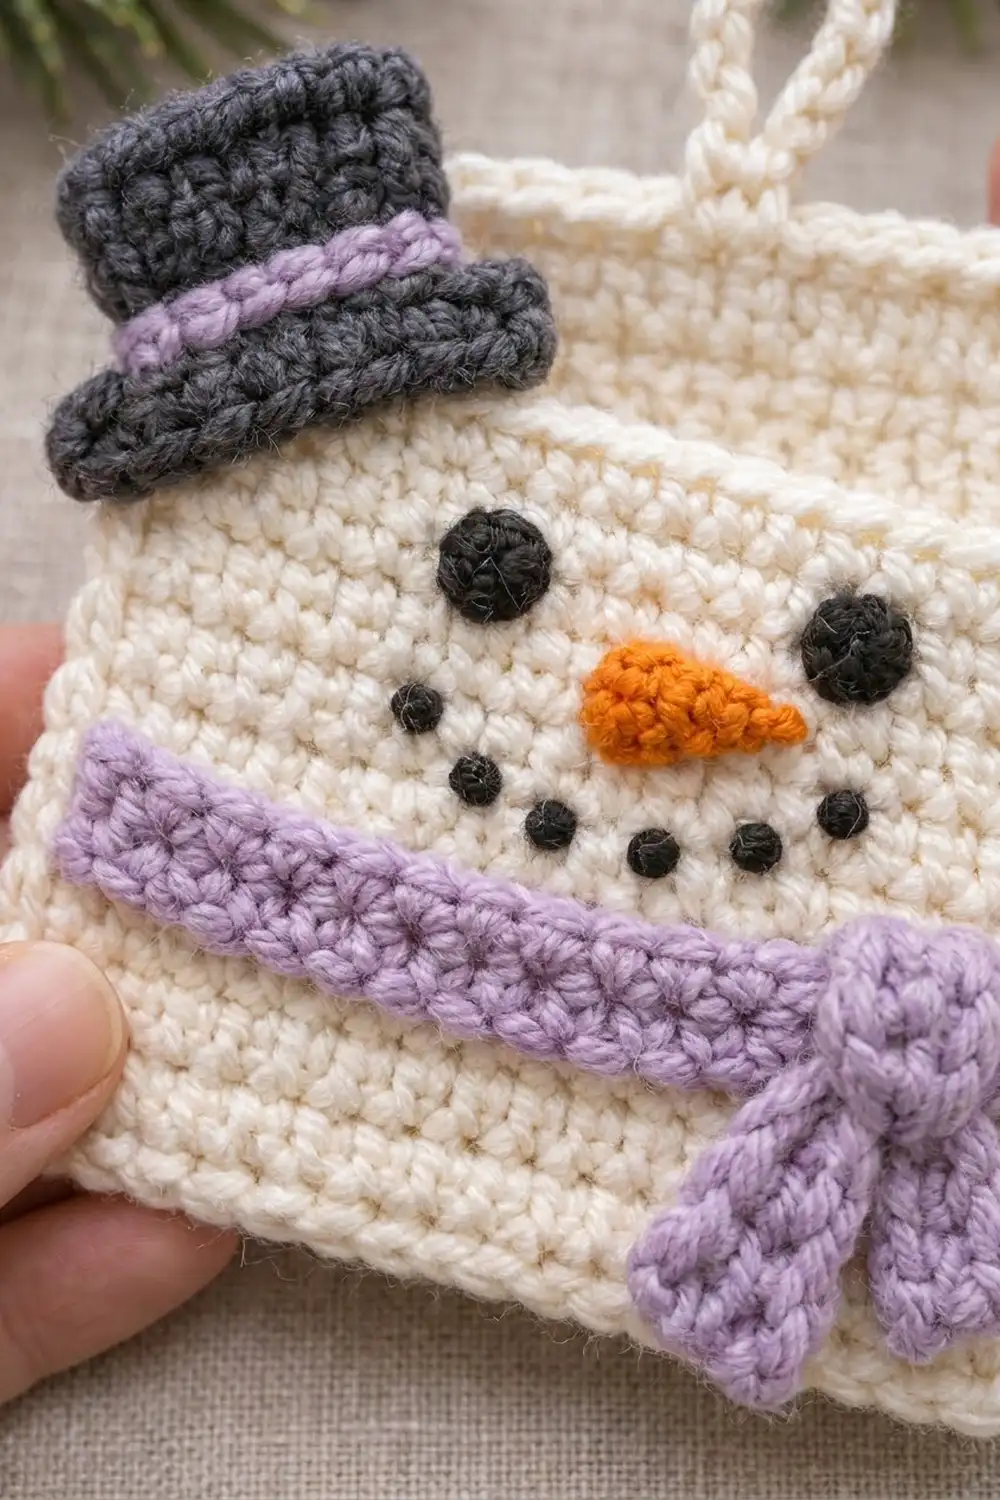
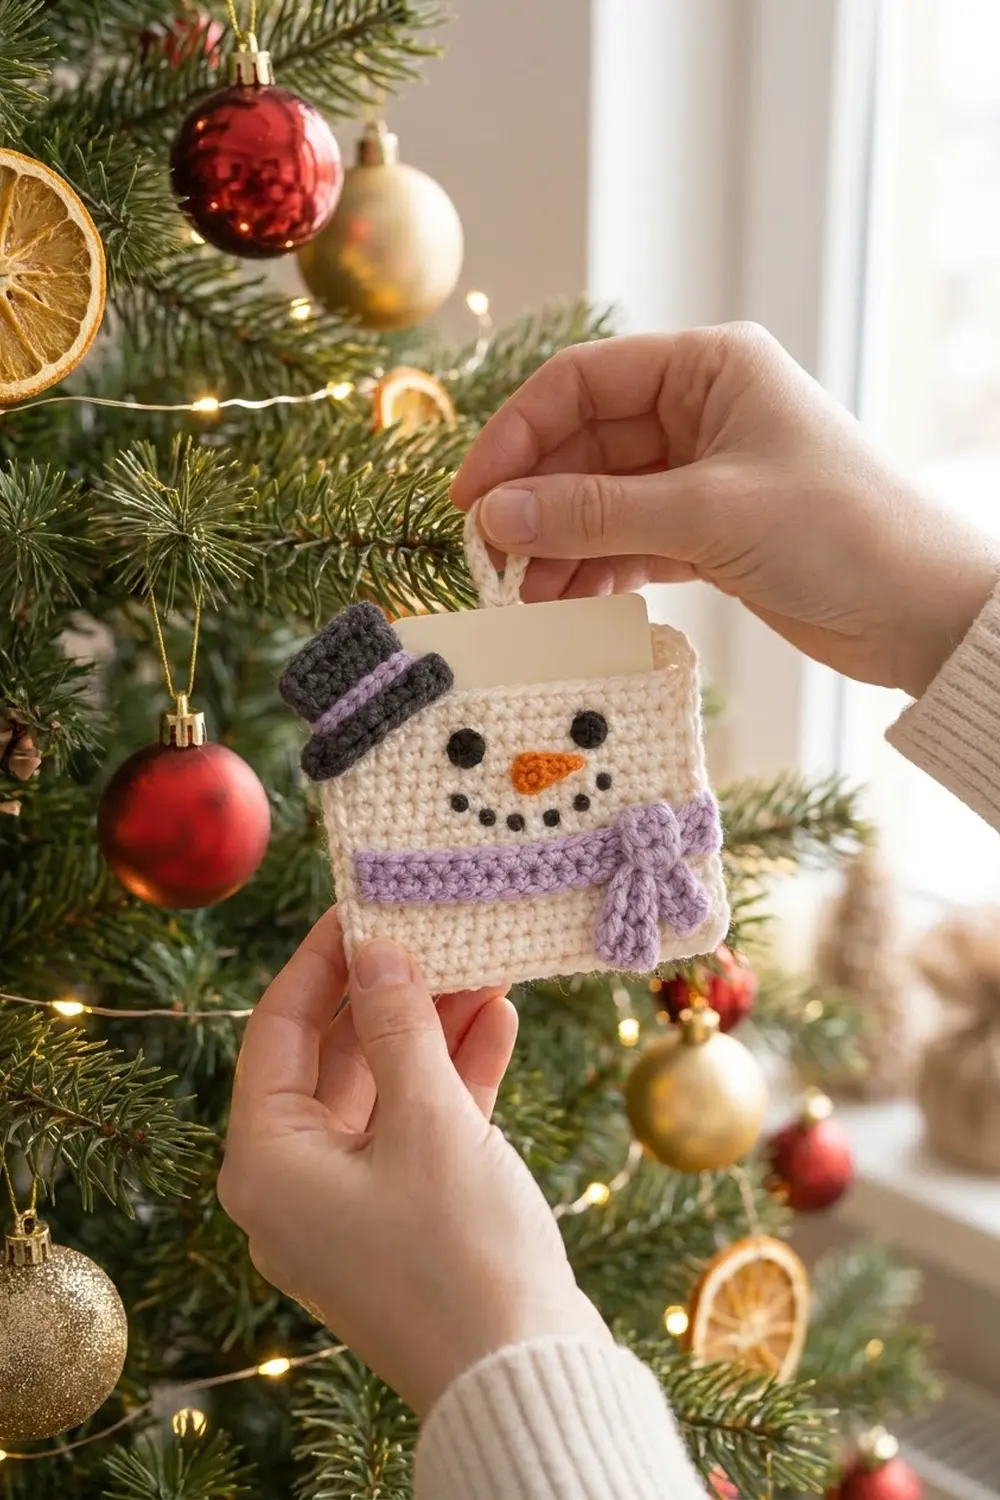
This little snowman pouch turns a plain gift card into a gift on its own. A cream single crochet pocket becomes a snowman face with round black eyes, an orange carrot nose and a dotted smile. A lavender scarf runs across the front and ties in a knot with two tails. A charcoal gray top hat with a lavender band sits tilted on the top left corner.
The style is soft, tidy and graphic. All the texture comes from plain single crochet, and every detail is a small flat appliqué sewn onto the front. A covered loop on the back lets you hang the holder on a tree or tie it to a package.
This pattern uses US crochet terms. The finished pouch measures 4.2 in wide x 3.8 in tall (10.7 cm x 9.7 cm), not counting the hanging loop. A standard 3.375 x 2.125 in (8.6 x 5.4 cm) gift card slides in sideways.
Construction is simple. You crochet two identical panels in rows and sew the appliqués to the front panel. Then you whipstitch the panels together along the sides and bottom and work one border over the seam and around the opening. You finish with the loop and the hat.
Finished Size and Construction
- Finished size: 4.2 in wide x 3.8 in tall (10.7 cm x 9.7 cm), plus a 1.25 in (3.2 cm) loop
- Skill level: Easy
- Terminology: US crochet terms
- Yarn weight: DK (weight 3)
- Hook: 3.5 mm (E-4)
- Number of pieces: 2 panels (front and back), plus 8 appliqué pieces
- Layout: front panel stacked on back panel, open at the top
- Panel size: 19 sc x 17 rows = 3.8 in x 3.4 in (9.7 cm x 8.6 cm)
- Size before border: 3.8 in x 3.4 in (9.7 cm x 8.6 cm)
- Border depth: 0.2 in (0.5 cm) on each edge
Materials
Choose a smooth DK yarn in cotton, a cotton blend or soft acrylic. Smooth yarn shows the small appliqués clearly. Avoid fuzzy or loosely plied yarn, because it blurs the eyes and smile.
- Cream (main color): 15 g / 35 m
- Lavender (scarf and hat band): 5 g / 12 m
- Charcoal gray (hat): 3 g / 7 m
- Black (eyes and smile): 2 g / 5 m
- Orange (nose): 1 g / 2 m
Tools:
- 3.5 mm (E-4) crochet hook
- Tapestry needle
- Scissors
- Stitch markers and pins
- Ruler or tape measure
- A gift card or a 3.375 x 2.125 in (8.6 x 5.4 cm) card for fit testing
All quantities include a margin of about 30 percent for your swatch, sewing tails and small differences in tension.
Abbreviations (US Terms)
- ch – chain
- sl st – slip stitch
- sc – single crochet
- hdc – half double crochet
- sc2tog – single crochet 2 together
- st(s) – stitch(es)
- RS – right side
- MR – magic ring
Special stitch – standing sc: Make a slip knot on the hook, insert the hook into the stitch, yarn over and pull up a loop, yarn over and pull through both loops. This joins new yarn without a chain.
French knot: Bring the needle up, wrap the yarn twice around the needle, insert the needle back down right beside where it came up, and pull through gently.
Gauge and Checkpoints
Gauge: 20 sc and 20 rows = 4 in (10.2 cm) in rows of sc. That is 5 sc and 5 rows per 1 in (2.5 cm).
Check gauge by making one full panel first. A panel is small, so it works as your swatch.
Checkpoints for each panel:
- After Row 1: 19 sc = 3.8 in (9.7 cm) wide
- After Row 10: height is 2.0 in (5.1 cm)
- After Row 17: height is 3.4 in (8.6 cm)
If your panel is too big, switch to a 3.25 mm hook. If it is too small, switch to a 3.75 mm hook. Do not change the stitch or row counts, because the border and appliqué placement depend on them.
Width matters most. A panel narrower than 3.6 in (9.1 cm) will be too tight for the card.
Panels (Make 2)
With cream:
Foundation: Ch 20.
Row 1 (RS): Sc in 2nd ch from hook and in each ch across. (19 sc)
Rows 2–17: Ch 1, turn, sc in each st across. (19 sc)
Fasten off and weave in the ends. Each panel is 19 sc x 17 rows, 3.8 in x 3.4 in (9.7 cm x 8.6 cm).
Put a stitch marker on the RS of the front panel. Number the stitches 1 to 19 from your right to your left, and number the rows 1 to 17 from bottom to top. You will use these numbers to place the face.
Appliqués
Leave a 12 in (30.5 cm) tail on each appliqué for sewing.
Eyes (Make 2)
With black:
Round 1: Make a MR, 6 sc in ring. Pull the ring closed and sl st to the first sc. (6 sc)
Fasten off. Each eye is about 0.4 in (1.0 cm) across.
Carrot Nose (Make 1)
With orange:
Row 1: Ch 6. Sl st in 2nd ch from hook, sc in next ch, sc in next ch, hdc in next ch, 2 hdc in last ch. (6 sts)
Fasten off. The stitches get taller from the sl st to the hdc, so the piece forms a tapered carrot about 0.9 in (2.3 cm) long. The sl st end is the point.
Scarf Band (Make 1)
With lavender:
Foundation: Ch 20.
Row 1: Sc in 2nd ch from hook and in each ch across. (19 sc)
Rows 2–3: Ch 1, turn, sc in each st across. (19 sc)
Fasten off. The band is 3.8 in x 0.6 in (9.7 cm x 1.5 cm), exactly as wide as the panel.
Scarf Tails (Make 2)
With lavender:
Foundation: Ch 9.
Row 1: Sc in 2nd ch from hook and in each ch across. (8 sc)
Rows 2–3: Ch 1, turn, sc in each st across. (8 sc)
Fasten off. Each tail is 1.6 in x 0.6 in (4.1 cm x 1.5 cm).
Scarf Knot (Make 1)
With lavender:
Round 1: MR, 6 sc in ring. (6 sc)
Round 2: 2 sc in each st. (12 sc)
Round 3: Sc2tog 6 times. (6 sc)
Push the starting tail inside, fasten off, and close the hole with the long tail. The knot is about 0.5 in (1.3 cm) across.
Top Hat (Make 1)
With charcoal gray:
Row 1 (brim): Ch 11, sc in 2nd ch from hook and in each ch across. (10 sc) Fasten off gray.
Row 2 (band): Do not turn. Skip the first 2 sts. Join lavender with a standing sc in the 3rd st, sc in next 5 sts. Leave the last 2 sts unworked. (6 sc) Fasten off lavender.
Row 3: Turn. Join gray with a standing sc in the first st, sc in next 5 sts. (6 sc)
Rows 4–5: Ch 1, turn, sc in each st across. (6 sc)
Fasten off. The brim is 2.0 in (5.1 cm) wide, the crown is 1.2 in (3.0 cm) wide, and the hat is 1.0 in (2.5 cm) tall. Because 2 stitches are left unworked at each end, the brim sticks out past the crown.
Make All Pieces
Pieces per color:
- Cream: 2 panels
- Lavender: 1 scarf band, 2 scarf tails, 1 scarf knot (plus the hat band row)
- Charcoal gray: 1 top hat
- Black: 2 eyes, plus 5 French knots added later
- Orange: 1 nose
Front panel layout (stitches numbered from your right to your left, rows from bottom to top):
Row 17-15 | hat (added after border, top left corner)
Row 14    | eye at st 14 ........ eye at st 6
Row 12    | ....... nose: wide end at st 10, point toward st 7
Row 11    | dot st 14 ................. dot st 6
Row 10    | ..... dot st 12 .... dot st 8 .....
Row 9     | ........... dot st 10 ...........
Row 4-6   | scarf band, sts 1-19; knot at st 5, row 5
Row 1-3   | plain cream; tails hang over rows 1-4
Sew these pieces to the front panel only, before joining:
- Pin the scarf band over Rows 4–6, edge to edge. Whipstitch along its top and bottom edges. Leave the short ends loose so the border can catch them.
- Sew the knot over the band at st 5, Row 5.
- Tuck the top ends of the two tails under the knot. Angle them down and apart, and sew only the top 0.25 in (0.6 cm) of each.
- Sew the eyes centered on sts 6 and 14, Row 14.
- Sew the nose with its wide end at st 10, Row 12, and the point toward your right (toward st 7).
- Work 5 black French knots with doubled yarn at the smile points shown above. The outer dots sit higher, so the smile curves up.
Joining
Place the panels wrong sides together with the front panel facing you and Row 17 at the top on both.
With cream and a tapestry needle, whipstitch the panels together along the left side, the bottom and the right side. Leave the top open.
Match stitch to stitch:
- Sides: 17 row ends on the front to 17 row ends on the back
- Bottom: 19 foundation sts on the front to 19 foundation sts on the back
Take one stitch through each matching pair. Pull each stitch snug but not tight. If you pull too hard, the seam puckers and the pouch curls inward.
Size checkpoint: The joined pouch should still measure 3.8 in x 3.4 in (9.7 cm x 8.6 cm). Slide the card in now. It should go in without forcing.
Border
Border gauge: Same as the panels, 5 sc per 1 in (2.5 cm). The border is one row of sc, 0.2 in (0.5 cm) deep on every edge.
The border is worked in one continuous pass. Part 1 goes around the joined sides and bottom, through both layers. Part 2 goes around the opening, through one layer at a time.
Part 1 (through both layers): With the front panel facing you, join cream with a standing sc in the Row 17 row end at the top left corner, working through both layers.
- Left side: Sc in each row end down the side, counting the standing sc as the first. (17 sc)
- Bottom: 3 sc in the first foundation st, sc in the next 17 sts, 3 sc in the last st. (19 sts worked 1 per st + 4 extra = 23 sc)
- Right side: Sc in each row end up the side. (17 sc)
Part 1 total: 17 + 23 + 17 = 57 sc. Do not fasten off.
Part 2 (opening rim):
- Front top: Working in the front panel only, sc in each of the 19 sts of Row 17. (19 sc)
- Back top: Continue around the opening into the back panel only, sc in each of the 19 sts of Row 17. (19 sc)
Sl st to the first sc of the front top. Part 2 total: 19 + 19 = 38 sc.
Border total: 57 + 38 = 95 sc.
Why the math works: The two panels are stacked, not placed side by side, so each joined side gets one panel’s count: 17 row ends. The bottom gets the panel’s 19 sts plus 2 extra sts at each corner to turn 90 degrees. The top edges are not joined, so each one gets its own 19 sc. Nothing is added at the seams.
The border adds 1 sc on each side and 1 row at the top and bottom. Width becomes 19 + 2 = 21 sts = 4.2 in (10.7 cm). Height becomes 17 + 2 = 19 rows = 3.8 in (9.7 cm).
Hanging Loop
Find the 10th sc of the back top border (the center). Join cream there with a sl st.
Loop: Ch 16, sl st in the same st to make a ring. Work 24 sc over the chain ring, then sl st in the same back st.
Fasten off. The loop stands about 1.25 in (3.2 cm) above the pouch.
Sewing the Hat
Tilt the hat about 15 degrees to the left. Place the brim over the top left corner of the front so it overhangs the left edge by about 0.25 in (0.6 cm). The crown can rise slightly above the top edge.
Sew the hat to the front panel only. Do not sew through the back, or you will close the opening.
Final Blocking
- Lightly mist the pouch with water, or hold a steam iron 1 in (2.5 cm) above it. Never press acrylic.
- Slide a piece of cardboard cut to 3.6 in x 3.6 in (9.1 cm x 9.1 cm) inside to hold the shape.
- Pin the outer edges flat to 4.2 in x 3.8 in (10.7 cm x 9.7 cm).
- Smooth the scarf tails so they angle neatly.
- Pat the hat brim flat and straighten the loop.
- Let the pouch dry completely, then remove the pins and cardboard.
Final Quality-Control Checklist
- Pouch measures 4.2 in x 3.8 in (10.7 cm x 9.7 cm)
- Border has 95 sc: 17 + 23 + 17 + 19 + 19
- Bottom corners are square
- Scarf band ends are caught in the side borders
- Eyes are level on Row 14
- Nose points to your right
- Smile curves up, with 5 evenly spaced dots
- Hat is sewn to the front only
- Loop is centered on the back
- A gift card slides in and out easily
- All ends are woven in and hidden
Troubleshooting
The card does not fit. Your gauge is tight. Remake the panels with a larger hook, or check that the side seams did not pull in.
The pouch curls. The whipstitch or border is too tight. Re-block with cardboard inside, or redo the seam more loosely.
The bottom corners are rounded. Make sure you worked 3 sc in each bottom corner stitch.
The face looks crowded. Count stitches and rows again before sewing. Small shifts change the expression a lot.
The French knots pull through. Use doubled yarn and wrap three times instead of two.
The scarf band ripples. It may be wider than the panel. Check that it has exactly 19 sc.
Care
Hand wash in cool water with mild soap and lay flat to dry. Reshape while damp and do not tumble dry.
Final Notes
The measurement chain is short. A gauge of 5 sc and 5 rows per 1 in (2.5 cm) makes each 19 sc x 17 row panel 3.8 in x 3.4 in (9.7 cm x 8.6 cm). Joining stitch to stitch keeps that size. The 95 sc border adds 0.2 in (0.5 cm) to each edge, so the finished pouch is 4.2 in x 3.8 in (10.7 cm x 9.7 cm), with a 1.25 in (3.2 cm) loop on top.
Check your panel after Row 1 and after Row 17, and everything else will line up. Then tuck a card inside and hang it on the tree.
Happy crocheting!