

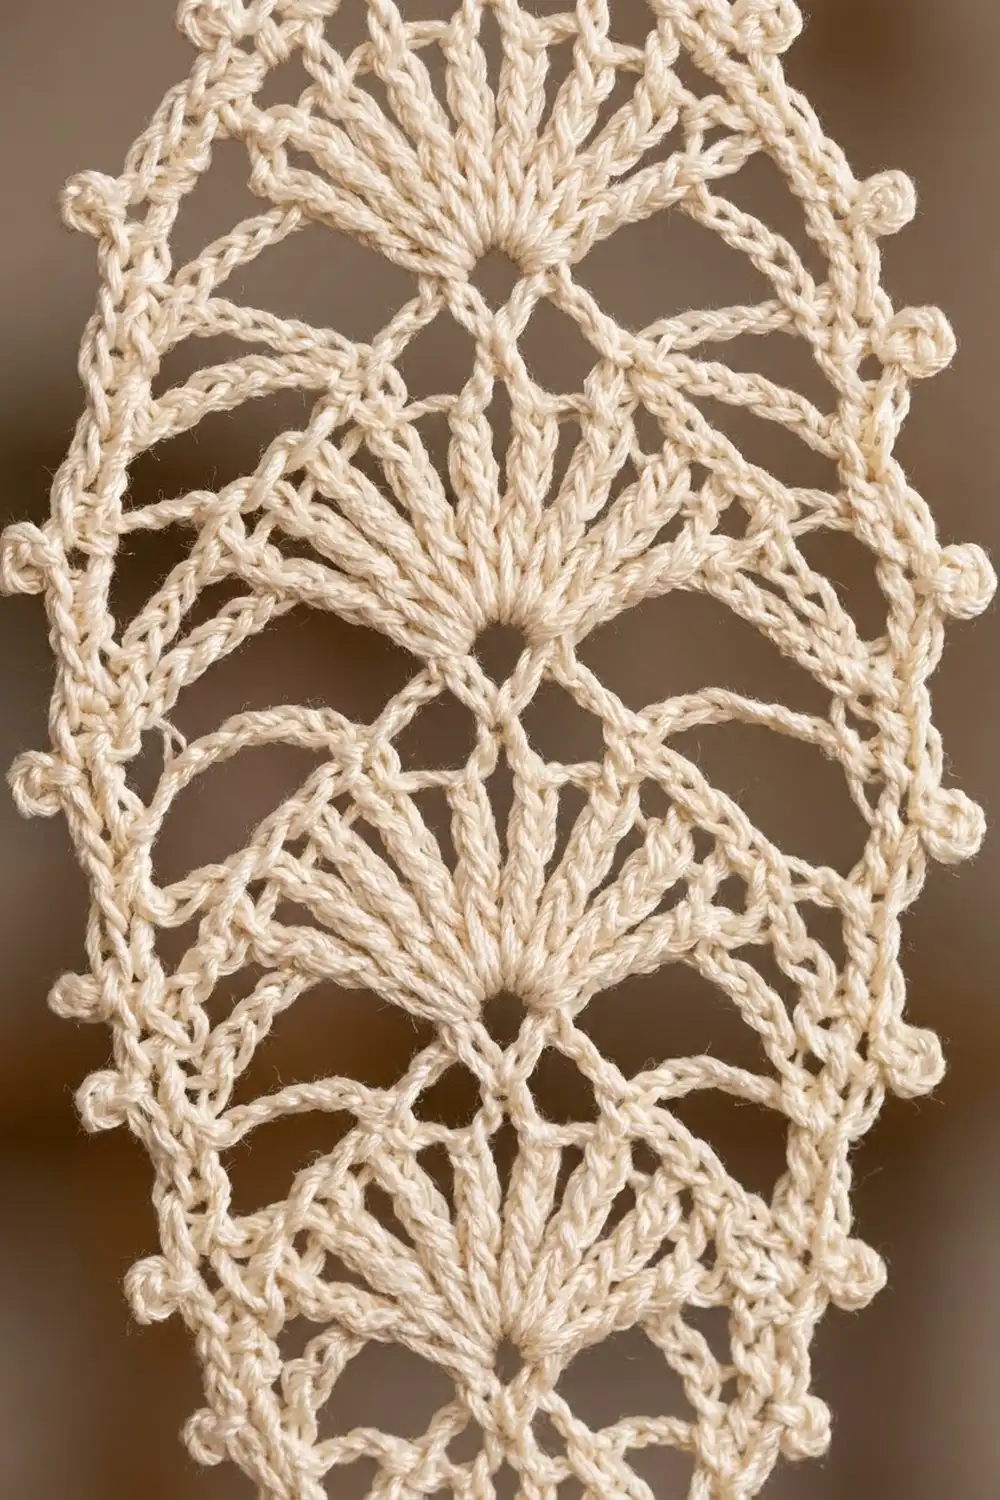
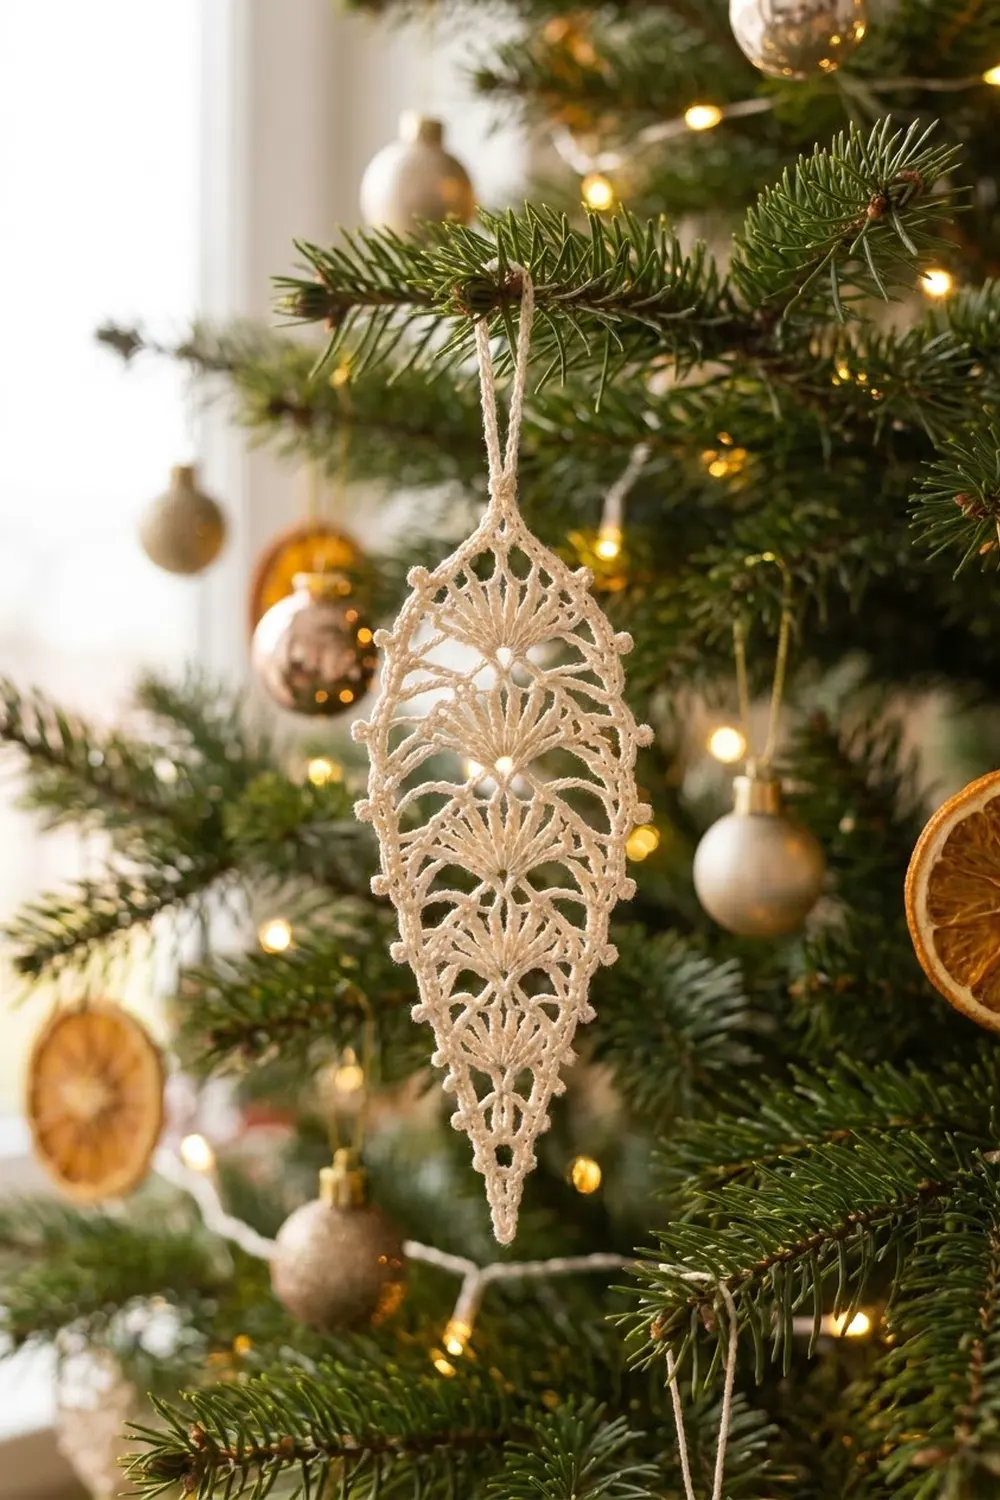
The Frosted Fan Lace Ornament is a long, slim lace drop that looks lovely on a Christmas tree. Its center is a column of five fans, each fanning downward from a single point. Chain arches link one fan to the next, and a shell rail and a row of tiny picots frame the outside.
It is worked in a single soft cream cotton thread, which gives it a vintage, frosted look. The picots catch the light like small beads, so the ornament looks finished without any extra trim.
This pattern uses US crochet terms. The finished ornament is 2.25 in (5.7 cm) wide and 5.5 in (14.0 cm) long, plus a 1 in (2.5 cm) hanging loop, for a total length of 6.5 in (16.5 cm).
It is made in one piece, worked in rows from the top point down. You start with a small ring and the first fan. Each new fan grows out of a V-stitch, and shells along both edges hold the outline. The rows narrow into a sharp tip. One border round then adds the picots and the hanging loop. There is no sewing and no joining.
Finished Size and Construction
- Finished size: 2.25 in (5.7 cm) wide x 5.5 in (14.0 cm) long, without the loop
- Total length with loop: 6.5 in (16.5 cm)
- Skill level: Intermediate (comfortable with thread and chain spaces)
- Terminology: US crochet terms
- Yarn weight: Size 3 crochet thread (about Lace/0)
- Hook: 2.25 mm (US B-1)
- Number of pieces: 1
- Layout: One vertical column of 5 fans, framed by edge shells
- Piece size before border: 2 in (5.1 cm) wide x 5.25 in (13.3 cm) long
- Border depth: about 0.125 in (0.3 cm) along each side; the tip picot adds about 0.25 in (0.6 cm)
Materials
Thread: Use a mercerized cotton crochet thread in size 3. Mercerized cotton holds crisp stitch definition, blocks sharply and does not stretch out of shape when it hangs. A size 10 thread will also work, but the ornament comes out smaller (see Gauge).
- Cream / ivory: 10 g, about 16 m (17.5 yd)
That is enough for one ornament. To make a matching pair like the ones in the photos, double it.
Tools:
- 2.25 mm (US B-1) crochet hook
- Tapestry needle with a small eye
- Scissors
- Rustproof pins and a foam blocking board
- Fabric stiffener or spray starch (optional, but recommended)
- Ruler or tape measure
Note: The thread amounts include a margin of about 25% for your gauge swatch and weaving in ends.
Abbreviations (US Terms)
- ch – chain
- sl st – slip stitch
- sc – single crochet
- dc – double crochet
- dc2tog – double crochet 2 together
- sp(s) – space(s)
- st(s) – stitch(es)
- tch – turning chain
- rep – repeat
Special stitches:
- Shell: (2 dc, ch 2, 2 dc) all in the same stitch or space.
- Beginning shell: ch 3 (counts as dc), then (dc, ch 2, 2 dc) in the same stitch or space.
- V-st: (dc, ch 3, dc) in the same stitch. In Row 12 it is worked with ch 2 instead.
- Picot: ch 3, then sl st in the 3rd ch from the hook.
Throughout the pattern, the ch 3 at the start of a row counts as a dc.
Gauge and Checkpoints
In thread lace, gauge is measured by the size of the piece at each stage, not by a square. Work Rows 1–4 first as your test, then measure before you go on.
Gauge: Rows 1–4 measure 1.25 in (3.2 cm) long, and Fan 2 (Row 4) measures 1.75 in (4.4 cm) across, both measured flat without stretching.
Checkpoints:
- After Row 1: the fan is about 1 in (2.5 cm) wide and 0.5 in (1.3 cm) tall, including the ring.
- After Row 4: 1.25 in (3.2 cm) long x 1.75 in (4.4 cm) wide.
- After Row 8: 2.5 in (6.4 cm) long x 2 in (5.1 cm) wide at Fan 3, the widest point.
- After Row 14: 4.5 in (11.4 cm) long.
- After Row 17: 5.25 in (13.3 cm) long x 2 in (5.1 cm) wide.
- After the border and blocking: 5.5 in (14.0 cm) x 2.25 in (5.7 cm), plus the 1 in (2.5 cm) loop.
If your piece is too big: go down to a 2.0 mm hook, or keep your chain arches tighter. Loose chains are the most common reason lace ends up oversized.
If your piece is too small: go up to a 2.5 mm hook. With size 10 thread and a 1.5 mm hook, expect an ornament of about 1.5 in (3.8 cm) x 3.5 in (8.9 cm). That is still pretty, just smaller.
Pattern: Ornament Body
Turn at the end of every row. The fans open downward as you work.
Top Ring and Fan 1
Ring: Ch 6, sl st in the first ch to form a ring.
Row 1 (Fan 1): Ch 3, 8 dc in the ring. Turn. (9 dc)
The dc sit around the lower part of the ring. The bare top of the ring becomes the top point of the ornament.
Row 2 (frame row): Beginning shell in the first dc, ch 3, skip the next 3 dc, sc in the next dc (the 5th, center dc), ch 3, skip the next 3 dc, shell in the top of the tch. Turn.
(2 shells = 8 dc, 1 sc, 2 ch-3 sps)
Tier 2: Fan 2
Row 3 (base row): Sl st in the next dc and in the ch-2 sp, beginning shell in the same sp, ch 3, sc in the next ch-3 sp, ch 2, V-st in the sc, ch 2, sc in the next ch-3 sp, ch 3, shell in the ch-2 sp of the last shell. Turn.
(10 dc: 8 in shells + 2 in V-st; 2 sc)
Row 4 (Fan 2): Sl st in the next dc and in the ch-2 sp, beginning shell in the same sp, ch 4, skip the next ch-3 sp, sc and ch-2 sp, 11 dc in the ch-3 sp of the V-st, ch 4, skip the next ch-2 sp, sc and ch-3 sp, shell in the last shell’s ch-2 sp. Turn.
(19 dc: 8 in shells + 11 in the fan; 2 ch-4 sps)
Check the gauge now.
Row 5 (frame row): Sl st in the next dc and in the ch-2 sp, beginning shell in the same sp, ch 4, skip the ch-4 sp and the next 5 dc, sc in the 6th (center) dc of the fan, ch 4, skip the next 5 dc and the ch-4 sp, shell in the last shell’s ch-2 sp. Turn.
(8 dc, 1 sc, 2 ch-4 sps)
Tier 3: Fan 3 (Widest)
Row 6 (base row): Sl st in the next dc and in the ch-2 sp, beginning shell in the same sp, ch 4, sc in the next ch-4 sp, ch 2, V-st in the sc, ch 2, sc in the next ch-4 sp, ch 4, shell in the last shell’s ch-2 sp. Turn.
(10 dc, 2 sc)
Row 7 (Fan 3): Sl st in the next dc and in the ch-2 sp, beginning shell in the same sp, ch 5, skip to the V-st, 11 dc in the V-st’s ch-3 sp, ch 5, shell in the last shell’s ch-2 sp. Turn.
(19 dc, 2 ch-5 sps)
Row 8 (frame row): Work as Row 5, with the sc in the 6th dc of Fan 3.
(8 dc, 1 sc, 2 ch-4 sps)
Tier 4: Fan 4 (Starting to Taper)
Row 9 (base row): Sl st in the next dc and in the ch-2 sp, beginning shell in the same sp, ch 3, sc in the next ch-4 sp, ch 2, V-st in the sc, ch 2, sc in the next ch-4 sp, ch 3, shell in the last shell’s ch-2 sp. Turn.
(10 dc, 2 sc)
Row 10 (Fan 4): Sl st in the next dc and in the ch-2 sp, beginning shell in the same sp, ch 3, 9 dc in the V-st’s ch-3 sp, ch 3, shell in the last shell’s ch-2 sp. Turn.
(17 dc: 8 in shells + 9 in the fan)
Row 11 (frame row): Sl st in the next dc and in the ch-2 sp, beginning shell in the same sp, ch 3, skip the next 4 dc, sc in the 5th (center) dc, ch 3, skip the next 4 dc, shell in the last shell’s ch-2 sp. Turn.
(8 dc, 1 sc, 2 ch-3 sps)
Tier 5: Fan 5 (Smallest)
Row 12 (base row): Sl st in the next dc and in the ch-2 sp, beginning shell in the same sp, ch 2, sc in the next ch-3 sp, ch 1, (dc, ch 2, dc) in the sc, ch 1, sc in the next ch-3 sp, ch 2, shell in the last shell’s ch-2 sp. Turn.
(10 dc, 2 sc)
Row 13 (Fan 5): Sl st in the next dc and in the ch-2 sp, beginning shell in the same sp, ch 2, 7 dc in the V-st’s ch-2 sp, ch 2, shell in the last shell’s ch-2 sp. Turn.
(15 dc: 8 in shells + 7 in the fan)
Row 14 (frame row): Sl st in the next dc and in the ch-2 sp, beginning shell in the same sp, ch 2, skip the next 3 dc, sc in the 4th (center) dc, ch 2, skip the next 3 dc, shell in the last shell’s ch-2 sp. Turn.
(8 dc, 1 sc, 2 ch-2 sps)
The Tip
Row 15: Sl st in the next dc and in the ch-2 sp, ch 3, dc in the same sp, ch 2, sc in the sc, ch 2, 2 dc in the last shell’s ch-2 sp. Turn.
(4 dc, 1 sc)
Row 16: Ch 2, dc in the next dc (counts as dc2tog), ch 2, skip the ch-2 sp, sc and ch-2 sp, dc2tog over the last 2 dc. Turn.
(2 dc2tog)
Row 17: Ch 2, skip the ch-2 sp, dc in the last dc2tog (counts as dc2tog). This forms the tip.
(1 st)
Do not fasten off. The piece should now measure 5.25 in (13.3 cm) x 2 in (5.1 cm).
Border
Border gauge: 2 sc per row end, which is about 7 sc per 1 in (2.5 cm) along the side edge.
Border round: Ch 1. Work (sc, picot, sc) in the tip (Row 17).
- Side 1: working up the side into the row ends of Rows 16 through 1, 2 sc in the next row end, 2 sc in the next row end, picot; rep from * 8 times.
(32 sc, 8 picots)* - Top and hanging loop: sc in the bare top of the ring. Ch 18, sl st in the sc just made to form the loop. Work 24 sc into the loop, sl st in the base sc, then work 1 more sc in the ring.
(2 sc at the top, 24 sc on the loop) - Side 2: working down the other side into the row ends of Rows 1 through 16, 2 sc in the next row end, 2 sc in the next row end, picot; rep from * 8 times.
(32 sc, 8 picots)*
Sl st in the first sc of the round. Fasten off.
Totals for the round:
- 68 sc on the ornament: 32 + 32 on the sides, 2 at the tip, 2 at the top
- 24 sc on the loop
- 17 picots: 8 per side, 1 at the tip
Why the math works: Each row end is one dc tall, about the height of 2 sc, so 2 sc per row end lies flat without ruffling or pulling in. All 16 side rows end at the same height, so each side gets exactly 16 x 2 = 32 sc. With a picot after every 4 sc, the picots are evenly spaced and land at Rows 15, 13, 11, 9, 7, 5, 3 and 1. That puts one picot next to each fan level and one at the top shoulder, just like the beaded edge in the photos. The 24 sc on the loop cover the 18 chains firmly, so the loop becomes a smooth cord that keeps its shape.
Final Blocking
- Weave in both ends along the shell rail, not through the fans. Do not trim them yet.
- Wet the ornament in cool water and press out the excess water with a towel.
- If you want a firm ornament, soak it in fabric stiffener, or spray it heavily with starch.
- Pin it flat on the board. Pin the tip first, then the top of the ring, and stretch it to 5.5 in (14.0 cm) long.
- Pin the widest point at Fan 3 to 2.25 in (5.7 cm). Taper the sides evenly so the shape matches on both halves.
- Pin out every picot, and open each fan so its ribs fan out evenly.
- Lay the loop straight up from the top.
- Let it dry completely. That takes 12–24 hours. Then unpin it and trim the ends.
Final Quality-Control Checklist
- There is exactly one piece, with 5 fans stacked in a straight center line.
- The fan counts are 9, 11, 11, 9 and 7 dc, from top to bottom.
- Fan 3 is the widest point, at 2.25 in (5.7 cm).
- The edge shells line up in a clean rail on both sides.
- There are 8 picots per side and 1 picot at the tip.
- The tip comes to a sharp point and is not blunt.
- The loop is firmly covered and sits centered on the top point.
- The size is 5.5 in (14.0 cm) x 2.25 in (5.7 cm), plus a 1 in (2.5 cm) loop.
Troubleshooting
Fans cup or curl: your chain arches are too short or too tight. Try a looser chain, and block the piece firmly.
The ornament leans to one side: you probably skipped the wrong number of dc in a frame row. Count to the center dc again: the 6th of 11, the 5th of 9, or the 4th of 7.
The edge ruffles: you have more than 2 sc in some row ends. Recount each side; it should be 32 sc.
The edge pulls in: some row ends got only 1 sc. Add the missing sc.
The tip is blunt: pull the dc2tog stitches in Rows 16–17 snug.
The loop twists: pack the 24 sc evenly, and block the loop straight.
Care
Hand wash in cool water with mild soap, press it dry in a towel, and pin it flat to re-block. If you used stiffener, you may need to reapply it after washing.
Final Notes
The measurement chain is simple to follow:
- Rows 1–4 measure 1.25 in (3.2 cm) x 1.75 in (4.4 cm).
- Row 8 reaches 2.5 in (6.4 cm) long at the 2 in (5.1 cm) widest point.
- Row 14 reaches 4.5 in (11.4 cm).
- Row 17 finishes the body at 5.25 in (13.3 cm).
- The border and blocking bring it to 5.5 in (14.0 cm) x 2.25 in (5.7 cm), and the loop adds 1 in (2.5 cm).
If you check each stage, the finished ornament will hang straight and keep its frosted fan shape for many seasons. Make one for every branch, or a pair to give as a gift.
Happy crocheting!