

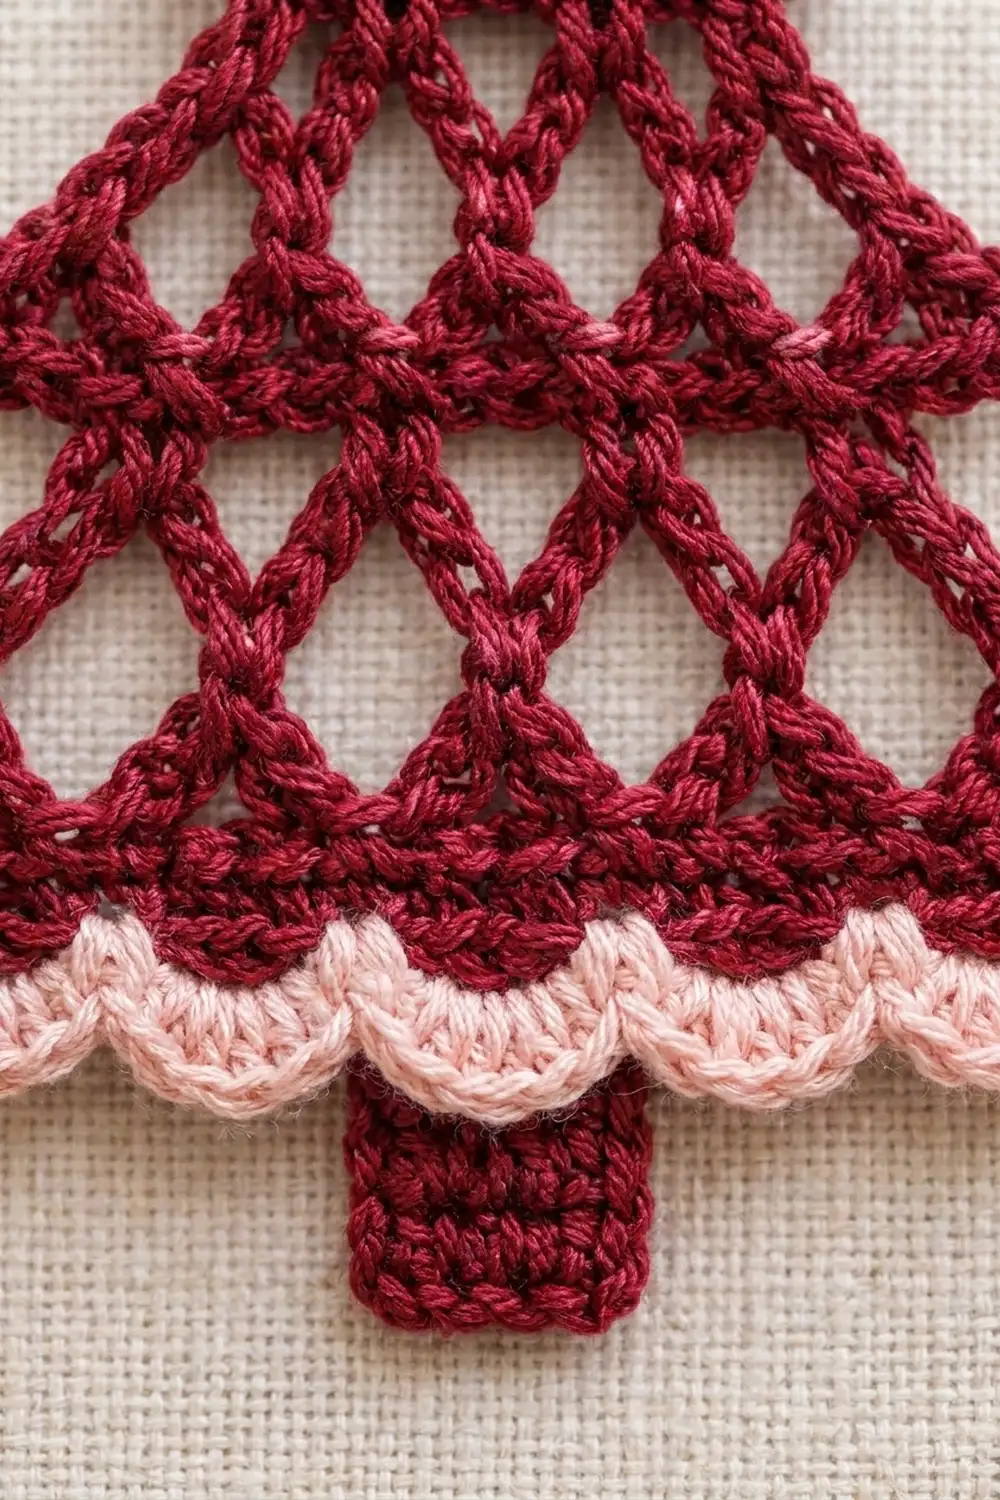
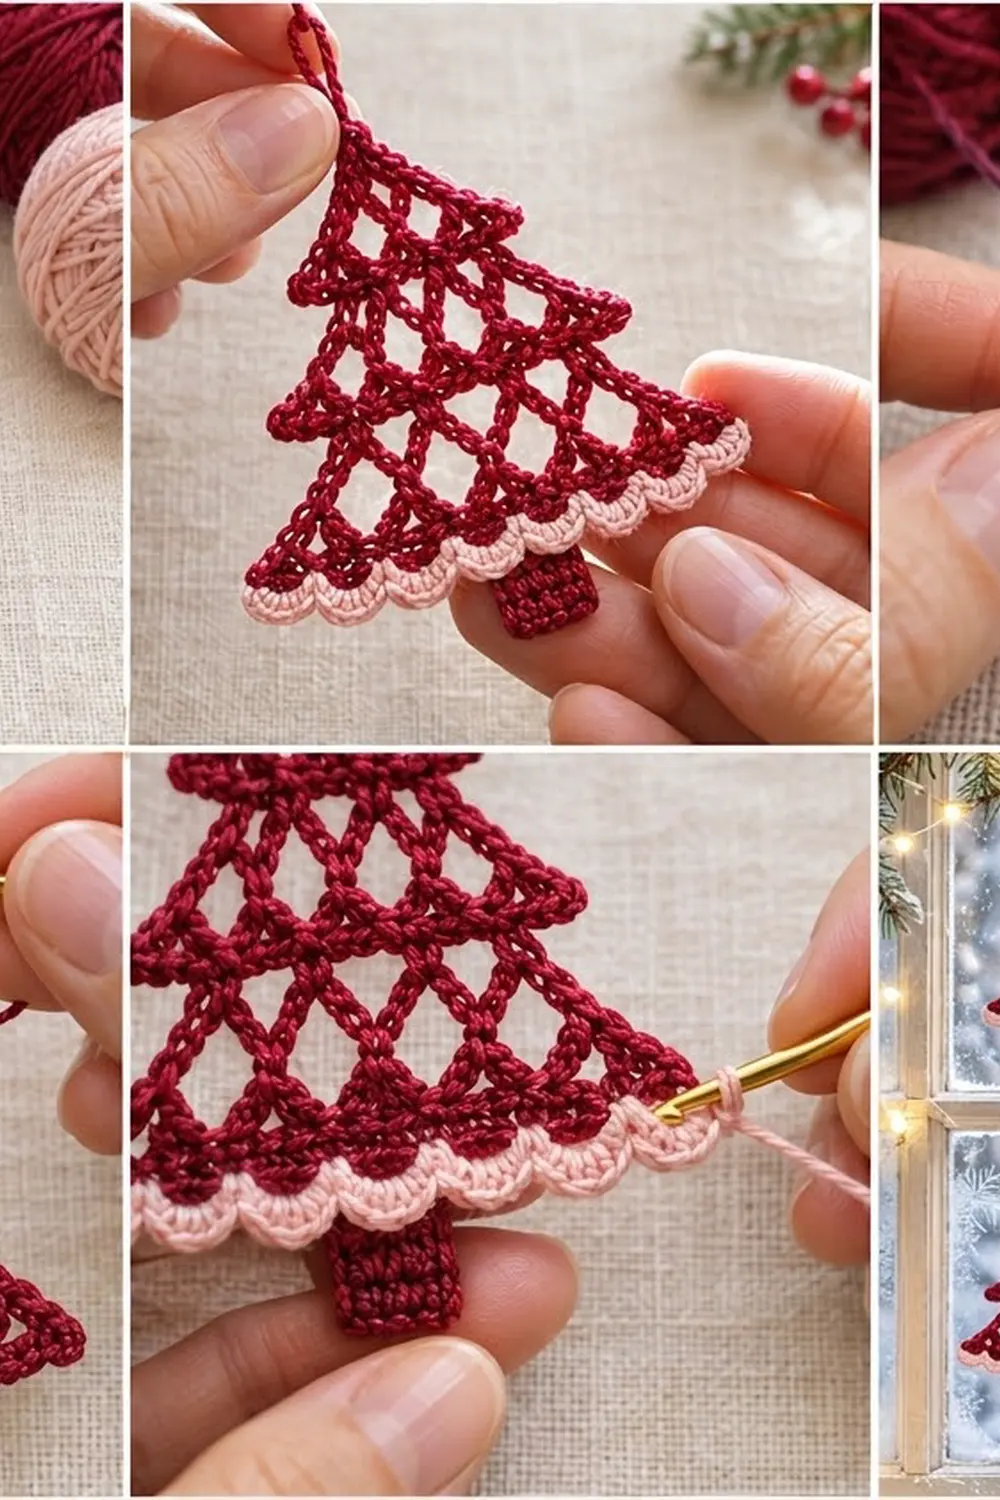
This little tree ornament is made of open diamond lattice in a deep cranberry red. It has three stepped tiers, a blush-pink scalloped hem and a solid burgundy trunk. The lace lets light through, so it looks good on a tree branch, a gift box or a window.
The pattern uses two colors: cranberry for the tree, outline and trunk, and pale pink for the scallops. The style is classic thread lace with a clean, graphic outline. All instructions use US crochet terms.
The finished ornament measures 4 1/4 in (10.8 cm) wide and 4 5/8 in (11.7 cm) tall from tip to the bottom of the trunk, not counting the hanging loop. The loop adds about 1 1/4 in (3.2 cm).
You work the tree in one piece from the tip down. Each tier grows by one lattice loop per row and ends with a solid ledge row. The next tier starts inset on that ledge, which creates the step. A single outline round tidies the sides and forms the hanging loop. Then you add the pink scallops and work the trunk off the back loops of the bottom edge.
Finished Size and Construction
- Finished size: 4 1/4 in (10.8 cm) wide × 4 5/8 in (11.7 cm) tall
- Skill level: Easy-intermediate
- Terminology: US crochet terms
- Yarn weight: Size 3 crochet cotton thread (super fine, #1)
- Hook: 2.25 mm (US B-1)
- Number of pieces: 1
- Layout: Single three-tier tree motif
- Body size before border: 4 in (10.2 cm) wide × 3 1/2 in (8.9 cm) tall
- Border depth: Outline 1/8 in (0.3 cm) on the sides; scallops 1/4 in (0.6 cm) on the bottom
- Trunk: 7/8 in (2.2 cm) wide; 3/4 in (1.9 cm) shows below the scallops
Materials
Use a mercerized cotton thread. It gives crisp stitch definition, keeps the diamonds open and blocks well. Avoid fuzzy or very stretchy fibers, which blur the lattice.
- Main color (MC), cranberry/burgundy: 6 g, about 30 m (33 yd)
- Contrast color (CC), pale blush pink: 2 g, about 10 m (11 yd)
These quantities include a margin for the gauge swatch and weaving in ends.
Tools:
– 2.25 mm (US B-1) crochet hook
– Tapestry needle
– Scissors
– Rustproof pins and a blocking mat or folded towel
– Spray bottle with water
– Optional: spray starch for a firmer ornament
Abbreviations (US Terms)
- ch – chain
- sl st – slip stitch
- sc – single crochet
- dc – double crochet
- sk – skip
- sp – space
- st(s) – stitch(es)
- FLO – front loop only
- BLO – back loop only
- rem – remaining
- MC / CC – main color / contrast color
Special stitch: standing sc. Start with a slip knot on the hook. Insert the hook in the stitch, yarn over and pull up a loop, then yarn over and pull through both loops. This joins new yarn without a separate sl st and chain.
Gauge and Checkpoints
Gauge: 33 sc = 4 in (10.2 cm) with a 2.25 mm hook.
Test one piece first. Chain 34. Sc in the 2nd ch from the hook and in each ch across (33 sc). Work 5 more rows of sc, then measure. The swatch should be 4 in (10.2 cm) wide.
Checkpoints during the tree:
– After Row 6 (Tier 1 ledge, 17 sts): about 2 in (5.1 cm) wide and 1 in (2.5 cm) tall
– After Row 12 (Tier 2 ledge, 25 sts): about 3 in (7.6 cm) wide and 2 1/8 in (5.4 cm) tall
– After Row 19 (Tier 3 ledge, 33 sts): 4 in (10.2 cm) wide and 3 1/2 in (8.9 cm) tall
– After the outline: 4 1/4 in (10.8 cm) wide and 3 5/8 in (9.2 cm) tall
– After the scallops: 3 7/8 in (9.8 cm) tall
– After the trunk: 4 5/8 in (11.7 cm) tall
If your piece is too big, go down to a 2.0 mm hook. If it is too small, go up to a 2.5 mm hook. The stitch counts stay the same; only the size changes.
Tier 1 (Top Tier)
Use MC.
Row 1: Ch 2, 3 sc in 2nd ch from hook. Turn. (3 sc)
Row 2: Ch 1, 2 sc in first sc, sc in next sc, 2 sc in last sc. Turn. (5 sc)
Row 3 (first lattice row): Ch 1, sc in first sc, (ch 3, sk 1, sc in next sc) twice. Turn. (3 sc, 2 ch-3 loops)
Check: 1 + (2 × 2) = 5 stitches used, which matches Row 2.
Lattice Increase Row (used throughout): Ch 1, turn. Sc in first sc, ch 3, sc in first ch-3 sp, (ch 3, sc in next ch-3 sp) across to the last ch-3 sp, ch 3, sc in last sc.
Each Lattice Increase Row has one more loop than the row before. If the previous row had L loops, this row has L + 1 loops and L + 2 sc. The loops in each new row sit between the loops of the row before, which forms the diamonds.
Row 4: Work Lattice Increase Row. (4 sc, 3 ch-3 loops)
Row 5: Work Lattice Increase Row. (5 sc, 4 ch-3 loops)
Row 6 (Tier 1 ledge): Ch 1, turn. Sc in first sc, (3 sc in next ch-3 sp, sc in next sc) 4 times. (17 sc)
This is a conversion row: 5 sc worked 1-per-stitch + (4 loops × 3 sc) = 17 sc.
Checkpoint: about 2 in (5.1 cm) wide.
Tier 2 (Middle Tier)
Row 7: Turn. Sl st in each of the first 5 sts. Ch 1, sc in the same st as the last sl st (st 5), (ch 3, sk 3, sc in next st) twice. Leave the rem 4 sts unworked. (3 sc, 2 ch-3 loops)
Check: 4 sts are left at each end (sts 1–4 and 14–17), and the tier is centered on sts 5–13 (4 + 9 + 4 = 17). Those 4 sts on each side form the ledge that sticks out past the top of the tier below.
Row 8: Work Lattice Increase Row. (4 sc, 3 loops)
Row 9: Work Lattice Increase Row. (5 sc, 4 loops)
Row 10: Work Lattice Increase Row. (6 sc, 5 loops)
Row 11: Work Lattice Increase Row. (7 sc, 6 loops)
Row 12 (Tier 2 ledge): Ch 1, turn. Sc in first sc, (3 sc in next ch-3 sp, sc in next sc) 6 times. (25 sc)
Conversion count: 7 sc + (6 × 3) = 25 sc.
Checkpoint: about 3 in (7.6 cm) wide and 2 1/8 in (5.4 cm) tall.
Tier 3 (Bottom Tier)
Row 13: Turn. Sl st in each of the first 7 sts. Ch 1, sc in the same st (st 7), (ch 3, sk 3, sc in next st) 3 times. Leave the rem 6 sts unworked. (4 sc, 3 loops)
Check: the sc land in sts 7, 11, 15 and 19, leaving 6 sts at each end (6 + 13 + 6 = 25).
Row 14: Work Lattice Increase Row. (5 sc, 4 loops)
Row 15: Work Lattice Increase Row. (6 sc, 5 loops)
Row 16: Work Lattice Increase Row. (7 sc, 6 loops)
Row 17: Work Lattice Increase Row. (8 sc, 7 loops)
Row 18: Work Lattice Increase Row. (9 sc, 8 loops)
Row 19 (Tier 3 ledge): Ch 1, turn. Sc in first sc, (3 sc in next ch-3 sp, sc in next sc) 8 times. (33 sc)
Conversion count: 9 sc + (8 × 3) = 33 sc.
Checkpoint: 4 in (10.2 cm) wide and 3 1/2 in (8.9 cm) tall. Do not fasten off.
Border
Border gauge: The outline adds about 1/8 in (0.3 cm) to each side. The scallops add 1/4 in (0.6 cm) of depth. Each scallop is 4 sts wide, so the 33-st bottom edge holds exactly 8 scallops.
Outline Round (MC)
This round runs up one side, around the tip and down the other side. It does not cover the bottom edge.
Do not turn after Row 19. Ch 1 and work up the side as follows.
First side (43 sc):
1. 1 sc in the side of Row 19.
2. 2 sc in the side of each of Rows 18–13 (12 sc).
3. Along the underside of the Tier 2 ledge, sc in each of the 6 exposed sts of Row 12, working outward. On the side where you slip-stitched, insert the hook under the sl st and the stitch top together (6 sc).
4. 1 sc in the side of Row 12.
5. 2 sc in the side of each of Rows 11–7 (10 sc).
6. Sc in each of the 4 exposed sts of Row 6, working outward (4 sc).
7. 1 sc in the side of Row 6.
8. 2 sc in the side of each of Rows 5–3 (6 sc).
9. 1 sc in the side of each of Rows 2 and 1 (2 sc).
Side total: 1 + 12 + 6 + 1 + 10 + 4 + 1 + 6 + 2 = 43 sc.
Tip and hanging loop: Work (sc, ch 25, sc) in the tip of Row 1.
Second side (43 sc): Mirror the first side, working down.
1. 1 sc in the side of each of Rows 1 and 2.
2. 2 sc in the side of each of Rows 3–5.
3. 1 sc in the side of Row 6, then sc in each of the 4 exposed sts of Row 6, working inward.
4. 2 sc in the side of each of Rows 7–11.
5. 1 sc in the side of Row 12, then sc in each of the 6 exposed sts of Row 12, working inward.
6. 2 sc in the side of each of Rows 13–18.
7. 1 sc in the side of Row 19.
Sl st to the first st of Row 19. Fasten off.
Round total: 43 + 2 + 43 = 88 sc, plus the ch-25 loop.
Why the math works: Each lattice row is about twice as tall as an sc row, so 2 sc per lattice row edge and 1 sc per solid row edge keep the sides flat without ruffling or pulling.
Scallop Edging (CC)
Work into Row 19 from its right side, FLO only, so the back loops stay free for the trunk.
Scallop Row: Join CC with a standing sc in FLO of the first st. Then (sk 1, 5 dc in FLO of next st, sk 1, sc in FLO of next st) 8 times. Fasten off. (8 scallops: 9 sc + 40 dc)
Why the math works: Each repeat uses 4 sts, and the row begins with 1 sc, so 1 + (8 × 4) = 33, which uses every Row 19 stitch. The sc land in sts 1, 5, 9, 13, 17, 21, 25, 29 and 33, so the center scallop pattern is symmetrical around st 17.
Trunk (MC)
Row 1: Turn the ornament upside down. Join MC with a standing sc in BLO of st 14 of Row 19, then sc in BLO of the next 6 sts (sts 15–20). (7 sc)
The trunk is centered on st 17, with 13 sts on each side (13 + 7 + 13 = 33).
Rows 2–8: Ch 1, turn, sc in each st across. (7 sc)
Fasten off. The trunk is 7/8 in (2.2 cm) wide. It hangs down behind the scallops, with 3/4 in (1.9 cm) visible below them.
Final Blocking
- Weave in all ends along solid sc edges, not through the lattice. Trim close.
- Spritz the ornament until it is evenly damp, or dip it and press out the water in a towel.
- Pin the tip, the four ledge corners and the bottom two corners onto your mat.
- Check the size: 4 1/4 in (10.8 cm) wide and 4 5/8 in (11.7 cm) tall.
- Pin into each diamond to open the lattice evenly.
- Pin each scallop into a round arch. Straighten the trunk into a neat rectangle.
- Optional: mist with spray starch for a stiffer ornament.
- Let it dry fully before unpinning, usually 4–6 hours.
Final Quality-Control Checklist
- [ ] Row 6 = 17 sc, Row 12 = 25 sc, Row 19 = 33 sc
- [ ] 4 exposed ledge sts on each side of Tier 1, and 6 on each side of Tier 2
- [ ] The outline has 43 sc on each side
- [ ] The hanging loop is centered at the tip
- [ ] 8 even pink scallops
- [ ] The trunk is centered on st 17 and has 7 sts
- [ ] Width 4 1/4 in (10.8 cm), height 4 5/8 in (11.7 cm)
- [ ] All ends are hidden in solid sc areas
Troubleshooting
Diamonds look uneven or slanted. Check that each Lattice Increase Row starts and ends with an sc in the edge sc. A missed edge stitch shifts the whole lattice.
Ledge counts are wrong. Recount the loops in the row before the ledge. Ledge sc = (loops × 4) + 1.
The step doesn’t stick out. Make sure you slip-stitched over 4 sts (Tier 2) or 6 sts (Tier 3) before starting. Starting too far out removes the step.
Outline ruffles. Use a smaller hook for the outline only, or work 1 sc instead of 2 in every other lattice row edge on both sides.
Outline pulls in. Work a little looser, or go up half a hook size for this round.
Scallops flare. Change the 5 dc in each scallop to 4 dc. The count still works, since each repeat stays 4 sts wide.
Trunk is off-center. Count again from the edge: the trunk starts in st 14.
Care
Hand wash in cool water with mild soap, press out water in a towel and dry flat. Re-block and re-starch as needed after washing.
Final Notes
The measurement chain is simple. Gauge is 33 sc to 4 in (10.2 cm). That makes the ledges 2 in (5.1 cm), 3 in (7.6 cm) and 4 in (10.2 cm) wide. The outline adds 1/8 in (0.3 cm) per side for a 4 1/4 in (10.8 cm) width. The scallops bring the height to 3 7/8 in (9.8 cm), and the trunk finishes it at 4 5/8 in (11.7 cm). If your three ledge checkpoints match, the rest of the ornament will too.
Happy crocheting!