

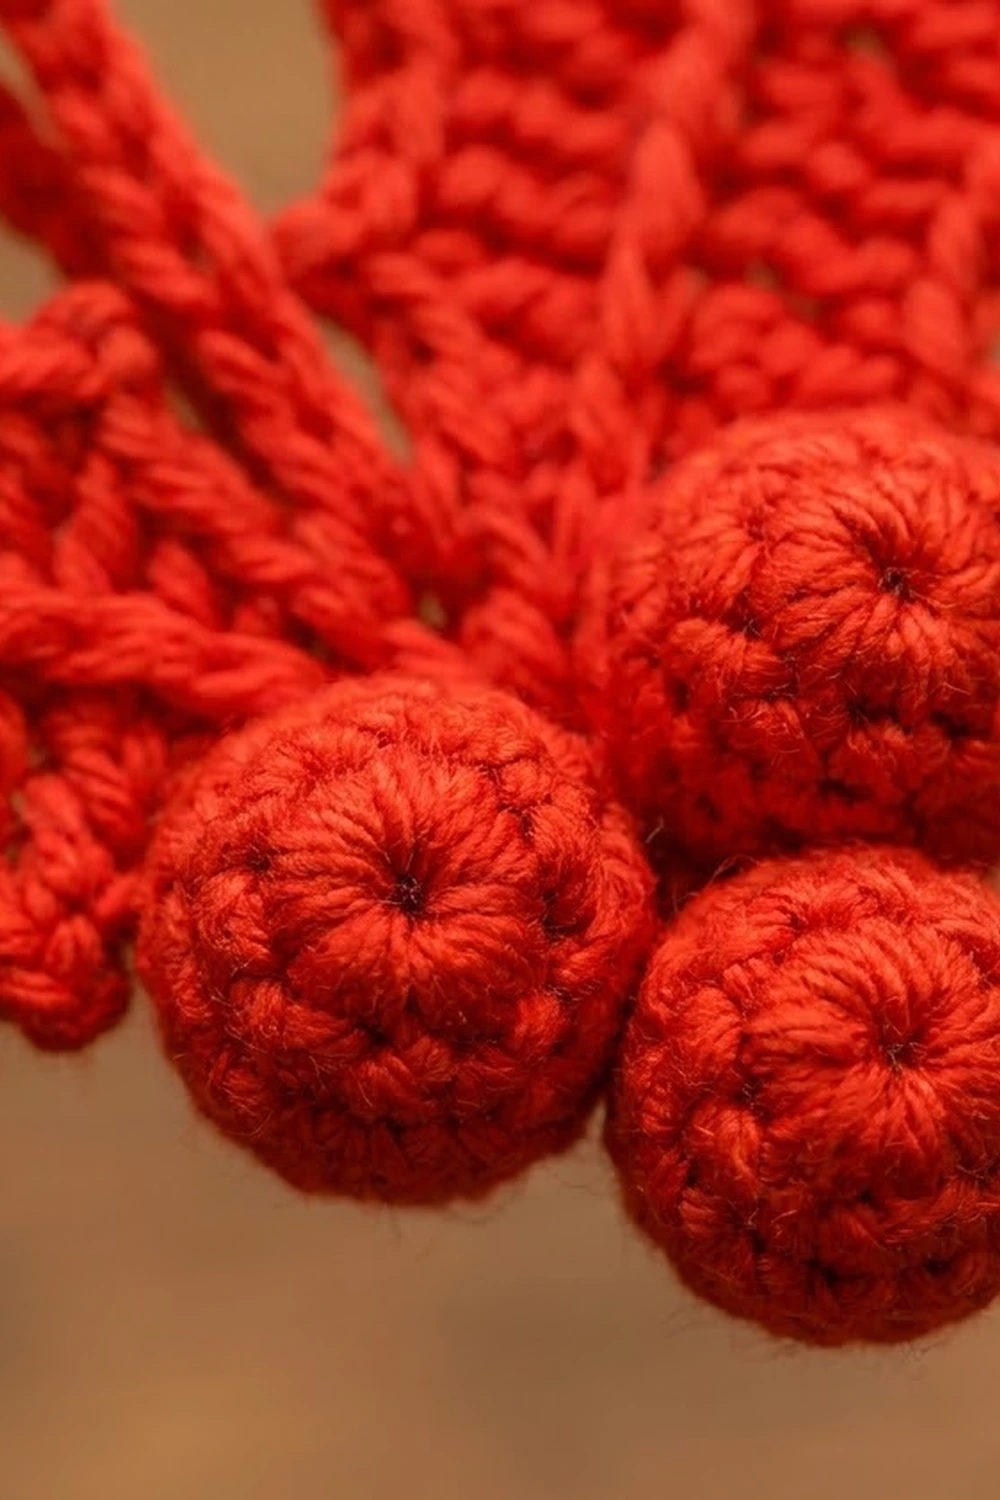
The Ember Holly Ornament is a small, bold holiday decoration with two pointed holly leaves, three plump berries and a sturdy hanging loop. Everything is worked in one warm orange-red, so the shape and texture do all the work: crisp leaf points, a raised center vein on each leaf, and berries with a little spiral at the front.
The style is simple and graphic. It looks good on a tree, tied to a gift, or hung in a window. You only need one color, so it’s a good way to use up leftover DK yarn.
This pattern uses US crochet terms. The finished ornament measures about 5.5 in (14.0 cm) wide and 3.5 in (8.9 cm) tall, with a loop rising about 1.5 in (3.8 cm) above.
Each leaf is worked in rounds around a foundation chain, then finished with a pointed border round and a surface slip-stitch vein. The berries are small stuffed spheres. The hanger is a slip-stitch cord. All six parts are then sewn into one ornament.
Finished Size and Construction
- Finished size: 5.5 in (14.0 cm) wide x 3.5 in (8.9 cm) tall, plus a 1.5 in (3.8 cm) loop
- Skill level: Easy+ (worked around a chain, simple amigurumi, sewing)
- Terminology: US crochet terms
- Yarn weight: DK (#3, light)
- Hook: 3.5 mm (E-4)
- Number of pieces: 6 (2 leaves, 3 berries, 1 hanging cord)
- Layout: leaves in a shallow V, with berries in a 2-over-1 triangle at the center
- Piece size: each leaf is 3 in (7.6 cm) long x 1.75 in (4.4 cm) wide at the points; each berry is 0.9 in (2.3 cm) across
- Leaf size before border: 2.75 in (7.0 cm) x 1.25 in (3.2 cm)
- Border depth: about 0.25 in (0.6 cm) at the points
Materials
Yarn: Use a smooth DK yarn in cotton, a cotton blend or acrylic. Smooth, tightly plied yarn shows off the leaf points and vein best. Fuzzy yarn will blur the edges.
- Orange-red: 15 g, about 35 m (38 yd)
Approximate use per part: each leaf takes 3 g / 7 m, each berry 1.5 g / 3.5 m, and the cord 0.5 g / 1 m. That adds up to about 11 g / 25.5 m. The quantity listed above includes a margin for swatching and sewing tails.
Tools:
– 3.5 mm (E-4) crochet hook
– Tapestry needle
– A small amount of polyester fiberfill
– Stitch marker
– Scissors
– Pins
– Spray bottle and a blocking mat or folded towel
Abbreviations (US Terms)
- ch – chain
- sl st – slip stitch
- sc – single crochet
- hdc – half double crochet
- dc – double crochet
- sc2tog – single crochet 2 together
- MR – magic ring
- st(s) – stitch(es)
- RS – right side
Special stitches:
– Point: (hdc, ch 3, sl st in 3rd ch from hook, hdc) all in the same st.
– Tip point: (dc, ch 3, sl st in 3rd ch from hook, dc) all in the same st.
– Surface sl st: With the yarn held behind the work, insert the hook from front to back through the fabric, pull up a loop, and draw it through the loop on the hook.
Gauge and Checkpoints
Gauge: 20 sc x 22 rows = 4 in (10.2 cm) in sc. That works out to 5 sts per inch (2.5 cm).
Make one leaf before anything else. It is your gauge swatch, and it will tell you more than a flat square would.
Checkpoints:
– Leaf after Rnd 1: 2.5 in (6.4 cm) long x 1 in (2.5 cm) wide
– Leaf after Rnd 2: 2.75 in (7.0 cm) x 1.25 in (3.2 cm)
– Leaf after border: 3 in (7.6 cm) x 1.75 in (4.4 cm)
– Berry after stuffing: 0.9 in (2.3 cm) across
– Cord: 4 in (10.2 cm) long before folding
If your leaf is too big: go down to a 3.25 mm or 3 mm hook.
If it is too small: go up to a 3.75 mm hook.
The berries should be firm, with no stuffing showing through. If you can see fiberfill between the stitches, make the berries with a hook 0.25 mm smaller than the one you used for the leaves.
Holly Leaf (make 2)
Each leaf is worked in rounds on both sides of a foundation chain. The stitches get taller toward the middle, which gives the leaf its oval shape.
Number the 13 usable chains W1 to W13. W1 is the 2nd ch from the hook, at the base of the leaf. W13 is the last chain, at the tip.
Foundation: Ch 14.
Rnd 1: Working along the first side of the chain: sc in 2nd ch from hook (W1), hdc in next ch (W2), dc in next 8 ch (W3–W10), hdc in next ch (W11), sc in next ch (W12), 3 sc in last ch (W13, the tip).
Rotate the work and continue along the opposite loops of the chain: sc in W12, hdc in W11, dc in W10–W3 (8 dc), hdc in W2, sc in W1 (the same ch as the first sc). Join with sl st to the first sc.
Count: 12 sts on side A + 3 tip sc + 12 sts on side B = 27 sts.
Place a marker in the center sc of the 3-sc tip group.
Checkpoint: 2.5 in (6.4 cm) x 1 in (2.5 cm).
Rnd 2: Ch 1. Sc in the same st as the join and in the next 11 sts (12 sc). Sc in the first tip sc, 3 sc in the marked center tip sc, sc in the third tip sc. Sc in the next 12 sts. Join with sl st to the first sc.
Count: 29 sts.
Move the marker to the center sc of the new 3-sc tip group. For the border, the round is split into three sections:
– Side A: 13 sts (the 12 side sts plus the first tip sc)
– Tip group: 3 sts
– Side B: 13 sts
Checkpoint: 2.75 in (7.0 cm) x 1.25 in (3.2 cm).
Rnd 3 (border): Without fastening off, work the pointed border round now. It is given in the Border section below. Then come back here for the vein.
Center vein: Hold the leaf RS up with the base toward you. Join the yarn at W1 on the foundation line. Work 13 surface sl sts up the foundation chain, one per chain (W1 to W13), ending at the tip. Keep these stitches slightly loose so the vein stays raised and rope-like. Fasten off and weave the tail to the back.
The vein runs straight from the base to the tip, matching the ridge on the finished ornament.
Berries (make 3)
Rnd 1: MR, 5 sc into the ring. Pull the ring tight. (5 sts)
Rnd 2: 2 sc in each st. (10 sts)
Rnd 3: [Sc in next st, 2 sc in next st] 5 times. (15 sts)
Rnds 4–5: Sc in each st. (15 sts each round)
Rnd 6: [Sc in next st, sc2tog] 5 times. (10 sts)
Stuff firmly. Shape the berry into a ball between your fingers.
Rnd 7: Sc2tog 5 times. (5 sts)
Fasten off, leaving an 8 in (20.3 cm) tail. Thread the tail through the front loops of the last 5 sts and pull tight. Keep the tail for sewing.
The magic-ring side becomes the front of the berry. Its tight center gives the small star or spiral seen on the finished berries.
Checkpoint: 0.9 in (2.3 cm) across.
Hanging Cord (make 1)
Foundation: Ch 21.
Row 1: Sl st in the back bump of the 2nd ch from hook and in each ch across. (20 sl sts)
Fasten off, leaving a 10 in (25.4 cm) tail.
Checkpoint: 4 in (10.2 cm) long. The cord should feel firm and slightly twisted, not stretchy.
Make All Pieces
This ornament uses one color, so every part is made in orange-red:
- Leaves: 2, each with the border and vein finished (about 6 g total)
- Berries: 3, stuffed and closed (about 4.5 g total)
- Hanging cord: 1 (about 0.5 g)
Layout grid (front view):
            [ loop ]
              |  |
  [Leaf 1]  \  ||  /  [Leaf 2]
   tip up-left  \/  tip up-right
             (B1)(B2)
               (B3)
The leaf bases meet at the center, with the tips angled upward about 25 degrees from horizontal. Berries 1 and 2 sit side by side over the leaf junction. Berry 3 sits centered below them.
Joining
The ornament is assembled by whipstitching with the yarn tails, working through the back of the pieces so the front stays clean.
1. Join the leaves. Lay both leaves RS up, with their bases overlapping by 0.5 in (1.3 cm). Leaf 2’s base goes slightly under Leaf 1’s base.
Pin them. On the back, whipstitch through the 3 base sts of each leaf’s Rnd 3 edge: the base sl st and the 1st st of each side. Each stitch should match up with a stitch directly opposite it on the other leaf. Then add 2 to 3 stitches through the overlapping layers to stop them from pivoting.
2. Check the angle. The leaf tips should sit about 5.5 in (14.0 cm) apart and about 1.25 in (3.2 cm) above the joined base. Adjust before going on.
3. Attach the upper berries. Place Berry 1 and Berry 2 over the leaf junction, ring centers facing forward. Using each berry’s tail, sew through 3 sts on the back half of the berry and into the leaf fabric beneath it. Then sew the two berries to each other through 2 sts where they touch.
4. Attach the lower berry. Center Berry 3 below the other two, so it slightly overlaps the leaf base. Sew it through 2 sts into each upper berry and 2 sts into the leaf base.
5. Attach the loop. Fold the cord in half. Lay the two ends against the back of the leaf junction, extending 0.5 in (1.3 cm) down onto the leaves. Stitch both ends down securely. The visible loop should be about 1.5 in (3.8 cm) tall.
Tension: Make each sewing stitch snug, but not tight enough to pucker the leaf fabric. If the leaves start to cup toward the berries, loosen your stitches.
Size checkpoint: 5.5 in (14.0 cm) wide x 3.5 in (8.9 cm) tall, not counting the loop.
Border (Leaf Rnd 3)
Work this round on each leaf directly after Rnd 2, before adding the vein.
Border gauge: At 5 sts per inch (2.5 cm), each 4-st repeat spans 0.8 in (2.0 cm). That puts one point roughly every 0.8 in (2.0 cm) along each side.
Rnd 3: Ch 1.
- Side A (13 sts): Sl st in the first st. Sc in next st, hdc in next st, point in next st, sl st in next st. Repeat from * to * 2 more times.
This uses 1 + (3 x 4) = 13 sts and makes 3 points. - Tip group (3 sts): Sc in next st, tip point in the marked center st, sc in next st.
This uses 3 sts and makes 1 tip point. - Side B (13 sts): Sl st in next st, point in next st, hdc in next st, sc in next st. Repeat from * to * 2 more times. Sl st in the last st.
This uses (3 x 4) + 1 = 13 sts and makes 3 points.
Join with sl st to the first sl st. Fasten off and weave in the tail.
Count: 29 sts worked 1 per existing st + 7 extra sts (one extra in each point) = 36 sts, plus 7 picots.
Why the math works: Each side of Rnd 2 has 13 sts, which is exactly 1 + 3 x 4. The single sl st anchors the base. Each 4-st repeat climbs from a low sl st, through sc and hdc, up to the point. That climb creates the curved dips between points. Side B is the same sequence in reverse, so both sides are mirror images, and the 3-st tip group centers the tip point on the leaf’s axis.
Final Blocking
- Lightly mist each leaf with water, or pin and steam it from a distance. If you used acrylic, never press the iron onto it.
- Pin each leaf to 3 in (7.6 cm) x 1.75 in (4.4 cm).
- Put one pin through each picot, pulling it outward so all 7 points are sharp.
- Gently press the vein upward from the back so it stays raised.
- Leave the leaves to dry completely.
- Do not wet the berries. Roll them between your palms to round them out.
- After assembly, steam lightly once more if the leaf junction has shifted. Hold the ornament by its loop to check that it hangs straight.
Final Quality-Control Checklist
- Each leaf has 7 crisp points: 3 per side plus 1 tip.
- Both leaves measure 3 in (7.6 cm) x 1.75 in (4.4 cm).
- The vein runs straight from base to tip and is clearly raised.
- Each berry is firm, 0.9 in (2.3 cm) across, with its ring center facing forward.
- Berries sit in a neat 2-over-1 triangle.
- The ornament is 5.5 in (14.0 cm) wide x 3.5 in (8.9 cm) tall.
- The loop is about 1.5 in (3.8 cm) and is centered.
- No stuffing or yarn tails show on the front.
Troubleshooting
Leaf curls or ruffles: Your tension changed between rounds. Re-check Rnd 2, which should have 29 sts. If it has more, frog it and rework the round.
The sides of the leaf don’t match: Make sure Side B is worked as the reverse of Side A, and that the tip point sits in the marked st.
Points look floppy: Pull each picot sl st snug and pin it hard when blocking.
Vein disappears into the fabric: Work the surface sl sts more loosely, or use a hook 0.5 mm larger for the vein only.
Berries look lumpy: Add more stuffing a little at a time and shape the ball before Rnd 7.
Ornament tilts when hung: Re-center the loop ends on the back of the leaf junction.
Care
Spot clean or hand wash cool and lay flat to dry, reshaping the points while damp. Store the ornament flat, or hang it by its loop, so the leaves don’t get crushed.

Final Notes
Each measurement builds on the one before it:
- At a gauge of 5 sts per 1 in (2.5 cm), the 13-ch base gives a leaf 2.5 in (6.4 cm) long after Rnd 1 and 2.75 in (7.0 cm) after Rnd 2.
- The border adds about 0.25 in (0.6 cm) at the points, for a finished leaf of 3 in (7.6 cm) x 1.75 in (4.4 cm).
- Two leaves set in a shallow V span 5.5 in (14.0 cm).
- Three 0.9 in (2.3 cm) berries bring the height to 3.5 in (8.9 cm).
- A 4 in (10.2 cm) cord, folded, makes a 1.5 in (3.8 cm) loop.
If you hit each checkpoint, the finished ornament will come out right. Happy crocheting!