

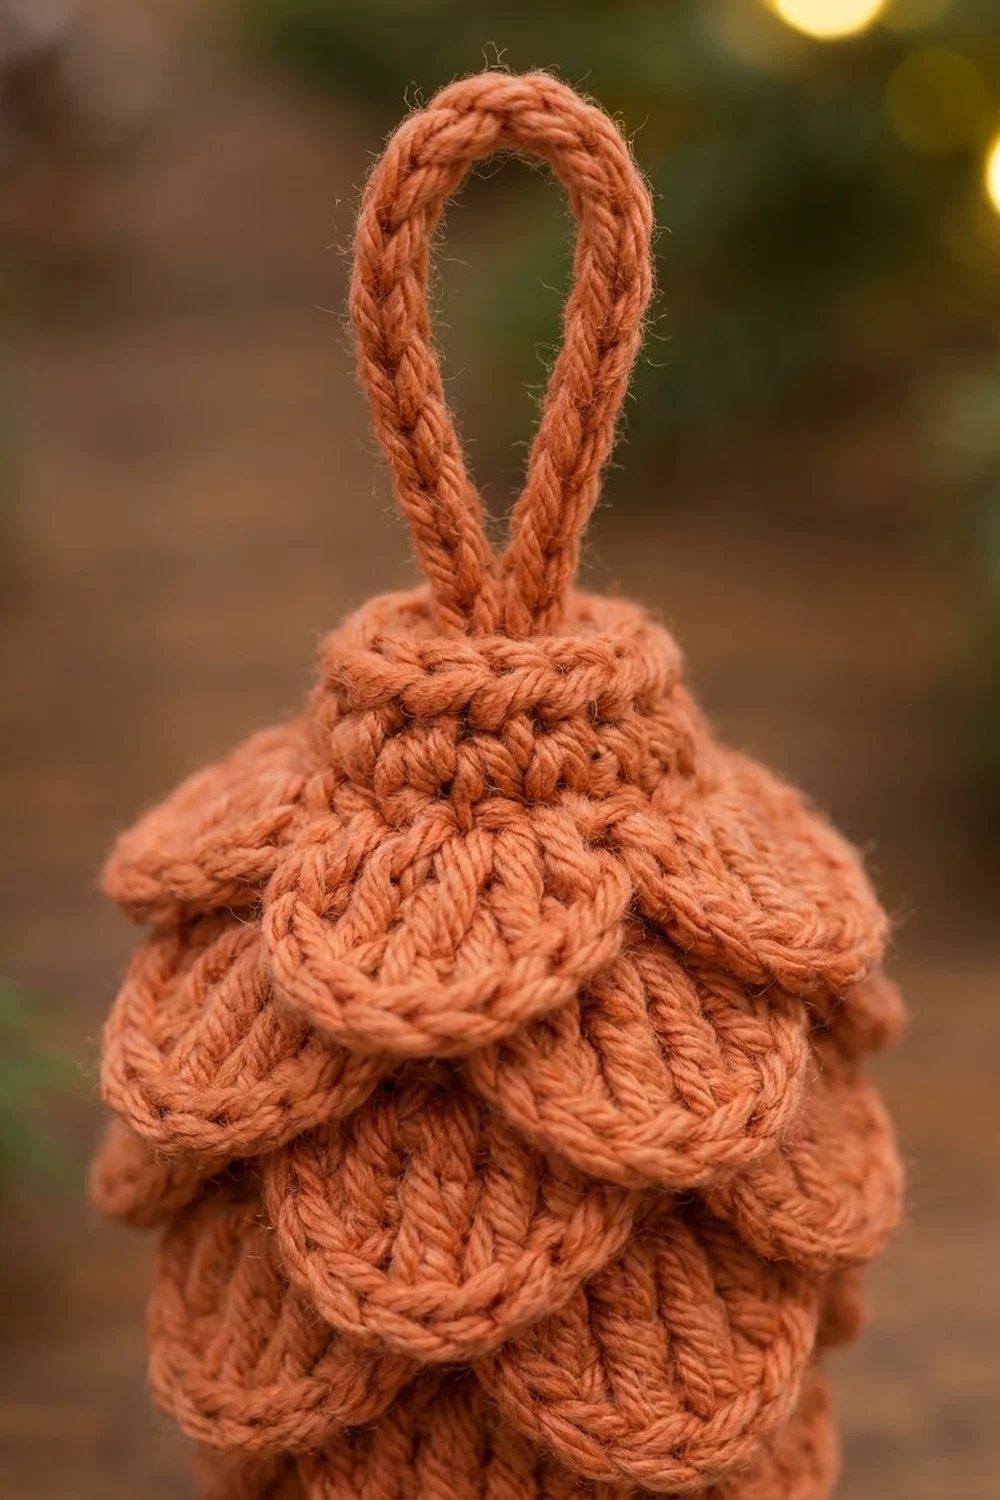
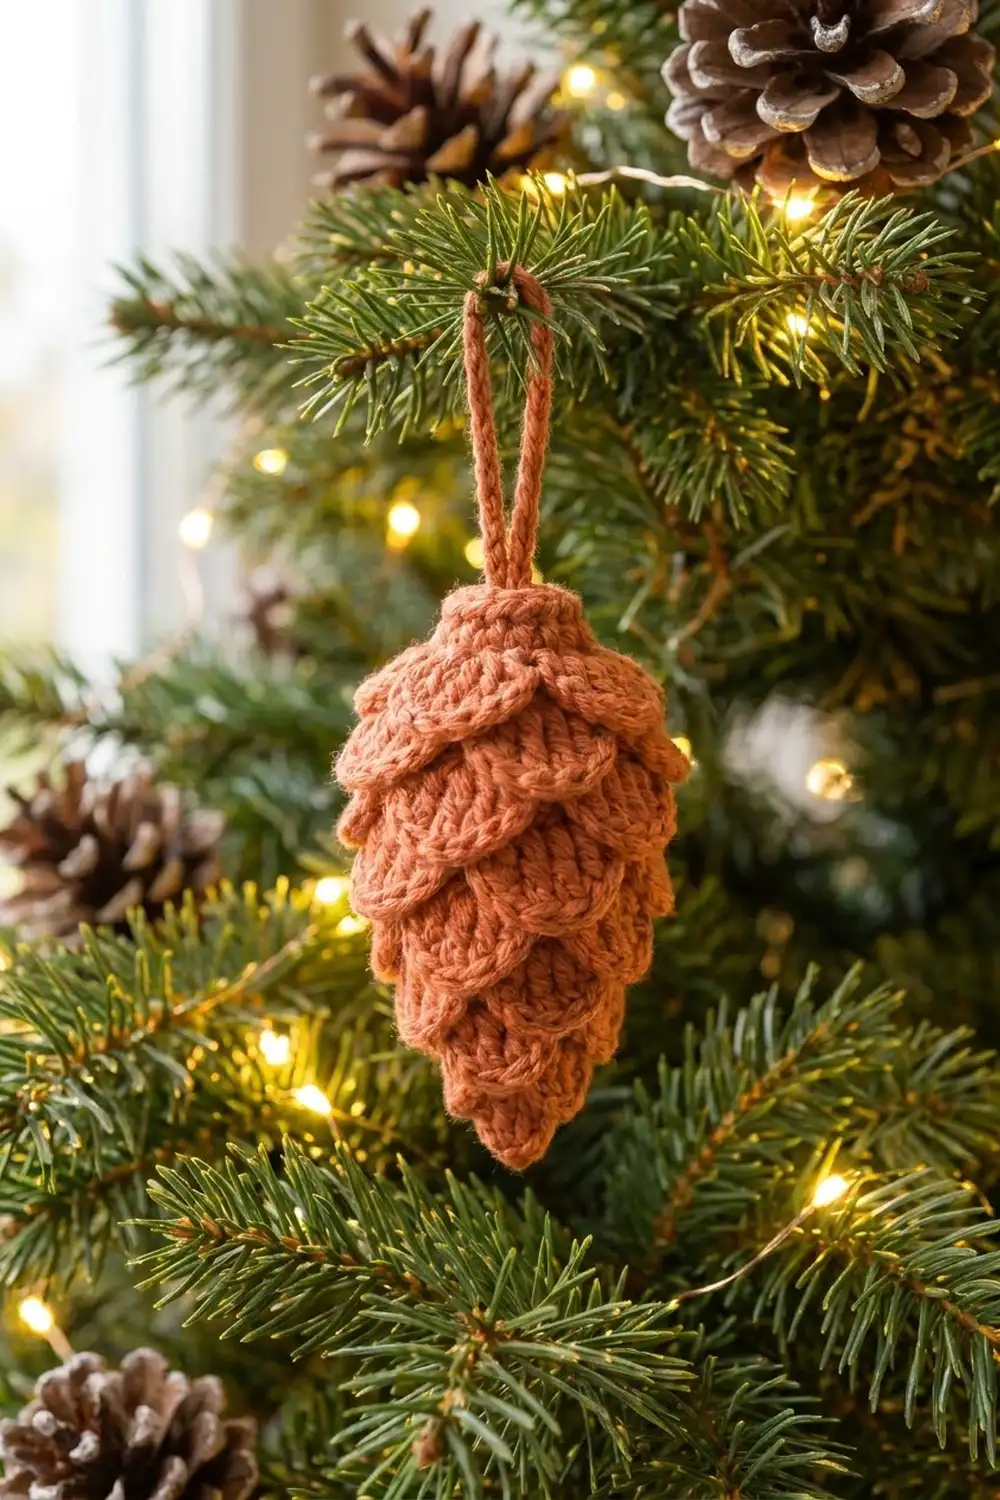
The Ember Cone is a small, three-dimensional pinecone ornament covered in overlapping, rounded scales. It is worked in one warm terracotta color that looks like a sun-baked cone, and it hangs from a sturdy slip-stitch cord loop. It looks lovely on a tree, tied to a gift, or grouped in a bowl on the table.
The style is rustic and natural, with a neat, tailored finish. Every scale is a little fan of half double and double crochet. The tiers are staggered so each row of scales covers the base of the row below, just like a real cone.
This pattern uses US crochet terms. The finished ornament measures about 2 in (5.1 cm) wide and 3.8 in (9.7 cm) tall, or about 5.3 in (13.5 cm) including the hanging loop.
The construction is simple to follow. You crochet a stuffed single crochet cone from the bottom tip up, working some rounds in back loops only to leave rings of free front loops. Then you work the scales into those front loops, tier by tier from bottom to top, and finish with the hanging loop. There is no sewing of separate parts.
Finished Size and Construction
- Finished size: 2 in (5.1 cm) wide x 3.8 in (9.7 cm) tall; 5.3 in (13.5 cm) with loop
- Skill level: Easy-intermediate
- Terminology: US crochet terms
- Yarn weight: DK (#3, light)
- Hook: 3.5 mm (E/4)
- Number of pieces: 1 (one ornament, worked in one piece)
- Layout: Single stuffed cone with 9 scale tiers and a top collar
- Body size (before scales): 1.1 in (2.8 cm) across at the widest point, 3.6 in (9.1 cm) around
- Scale “border” depth: scales stand out about 0.45 in (1.1 cm) on each side
- Hanging loop: about 1.5 in (3.8 cm) tall
Materials
Choose a smooth DK yarn with good stitch definition. Cotton or a cotton blend shows the scales crisply and holds their curve. Soft acrylic also works and is a little lighter on the branch.
- Terracotta (burnt orange) DK yarn: 10 g, about 25 m (27 yd)
- Polyester fiberfill: a small handful, about 3 g
- 3.5 mm (E/4) crochet hook
- Stitch markers (at least 2)
- Tapestry needle
- Scissors
The yarn amount includes a margin of about 25% for your test rounds and tails.
Abbreviations (US Terms)
- MR – magic ring
- ch – chain
- sl st – slip stitch
- sc – single crochet
- inc – 2 sc in the same stitch
- dec – single crochet 2 together (invisible decrease recommended)
- hdc – half double crochet
- dc – double crochet
- BLO – back loop only
- FL – free front loop
- st(s) – stitch(es)
Special stitches:
- Small scale (uses 3 FL): sl st in next FL, (hdc, dc) in next FL, (dc, hdc) in next FL. Makes 4 petal sts plus 1 sl st.
- Scale (uses 3 FL): sl st in next FL, (hdc, 2 dc) in next FL, (2 dc, hdc) in next FL. Makes 6 petal sts plus 1 sl st.
Gauge and Checkpoints
Gauge in single crochet in the round: 5 sc and 6 rounds = 1 in (2.5 cm). Work tightly enough that stuffing does not show between stitches.
Treat Rounds 1–9 as your test piece, and measure before going further.
- After Round 8: 18 sts measure 3.6 in (9.1 cm) around, about 1.1 in (2.8 cm) across when gently flattened.
- After Round 9: the cone measures 1.5 in (3.8 cm) from tip to working edge.
- After Round 15: 2.5 in (6.4 cm) from tip.
- After Round 23: about 3.8 in (9.7 cm) from tip to top.
- One regular scale: about 0.6 in (1.5 cm) wide and 0.5 in (1.3 cm) long.
If your cone is too big, go down to a 3.25 mm hook. If it is too small or stiff, go up to a 3.75 mm hook. Change hooks before you stuff, because the scales depend on the body being the right size.
Part 1: Body (Bottom Tip to Top)
Work in continuous spirals, and move a marker up to the first stitch of each round. Each round worked in BLO leaves a ring of free front loops on the round below. The scales go into these rings.
Round 1: MR, 6 sc in ring. (6)
Round 2: (sc, inc) 3 times. (9)
Round 3: BLO sc in each st around. (9) Round 2 now has 9 FL free (Tier 1).
Round 4: (2 sc, inc) 3 times. (12)
Round 5: BLO sc around. (12) Round 4 has 12 FL free (Tier 2).
Round 6: (3 sc, inc) 3 times. (15)
Round 7: BLO sc around. (15) Round 6 has 15 FL free (Tier 3).
Round 8: (4 sc, inc) 3 times. (18)
Round 9: BLO sc around. (18) Round 8 has 18 FL free (Tier 4).
Checkpoint: 3.6 in (9.1 cm) around and 1.5 in (3.8 cm) tall.
Round 10: Sc around. (18)
Round 11: BLO sc around. (18) Round 10 has 18 FL free (Tier 5).
Round 12: Sc around. (18)
Round 13: BLO sc around. (18) Round 12 has 18 FL free (Tier 6).
Round 14: Sc around. (18)
Round 15: BLO sc around. (18) Round 14 has 18 FL free (Tier 7).
Checkpoint: 2.5 in (6.4 cm) tall. Start stuffing lightly from the tip up. Aim for a firm, smooth cone, not a round ball.
Round 16: (4 sc, dec) 3 times. (15)
Round 17: BLO sc around. (15) Round 16 has 15 FL free (Tier 8).
Round 18: (3 sc, dec) 3 times. (12)
Round 19: BLO sc around. (12) Round 18 has 12 FL free (Tier 9).
Part 2: Top Collar and Closing
These plain rounds form the short collar that shows above the top scale tier.
Round 20: (2 sc, dec) 3 times. (9)
Round 21: Sc around. (9)
Round 22: Sc around. (9)
Finish stuffing now. Push fiberfill firmly into the top so the collar stays round.
Round 23: (sc, dec) 3 times. (6)
Fasten off with an 8 in (20.3 cm) tail. Thread the tail through the front loops of the 6 sts, pull to close, and weave in.
Checkpoint: the bare body is about 3.8 in (9.7 cm) tall and 1.1 in (2.8 cm) wide at its widest point.
Border: Scale Tiers
On this ornament, the scales are the outer edging that covers the body. Work each tier into its own ring of free front loops. Start at the bottom with Tier 1 and finish at the top with Tier 9, so each new tier lies over the base of the tier below.
Border gauge: each scale uses exactly 3 FL, so one scale is 0.6 in (1.5 cm) wide at 5 sts per inch. Each tier’s scale count is always its FL count divided by 3.
To work each tier: hold the cone tip-down. Join yarn with a sl st in a FL that sits above the center of a scale in the tier below (for Tier 1, use any FL). This first sl st counts as the sl st of the first scale. Work around, then sl st into the first sl st to close the tier. Either fasten off, or carry the yarn up by pulling a loop through the next ring of FL two rounds above. The carried strand stays hidden under the next tier.
Tier 1 (Round 2 FL, 9 FL): 3 small scales. (12 petal sts + 3 sl st)
Tier 2 (Round 4 FL, 12 FL): 4 small scales. (16 petal sts + 4 sl st)
Tier 3 (Round 6 FL, 15 FL): 5 scales. (30 petal sts + 5 sl st)
Tier 4 (Round 8 FL, 18 FL): 6 scales. (36 petal sts + 6 sl st)
Tier 5 (Round 10 FL, 18 FL): 6 scales. (36 petal sts + 6 sl st)
Tier 6 (Round 12 FL, 18 FL): 6 scales. (36 petal sts + 6 sl st)
Tier 7 (Round 14 FL, 18 FL): 6 scales. (36 petal sts + 6 sl st)
Tier 8 (Round 16 FL, 15 FL): 5 scales. (30 petal sts + 5 sl st)
Tier 9 (Round 18 FL, 12 FL): 4 scales. (24 petal sts + 4 sl st)
Total: 7 small scales and 38 regular scales, 45 scales in all.
Why the math works: every FL ring has a stitch count that is a multiple of 3 (9, 12, 15, 18, 18, 18, 18, 15, 12). Each scale uses exactly 3 FL, so every tier closes with no leftover or skipped loops. The tiers are 2 rounds apart, about 0.33 in (0.8 cm). Each regular scale is about 0.5 in (1.3 cm) long, so every tier overlaps the one below by about 0.17 in (0.4 cm). That overlap gives the shingled look and hides the body completely. The small scales at the tip keep the point narrow instead of blunt.
After all tiers are done, the ornament measures about 2 in (5.1 cm) at its widest: 1.1 in (2.8 cm) of body plus about 0.45 in (1.1 cm) of scale on each side.
Hanging Loop
Join yarn with a sl st in any st of Round 22, just below the closed top. Ch 22. Sl st in the 2nd ch from hook and in each ch across. (21 sl st) The cord measures about 3.25 in (8.3 cm).
Sl st into the Round 22 stitch directly opposite your joining stitch, about 4 sts away, so the cord arches over the top. Fasten off and weave both tails into the collar. The loop stands about 1.5 in (3.8 cm) tall.
Final Blocking
- Lightly mist the ornament with water, or hold a steam iron about 1 in (2.5 cm) above it. Never press it.
- With your fingertips, curve each scale gently down and outward so it sits over the tier below.
- Roll the cone between your palms to even out the shape.
- Check the tip: pinch Tiers 1 and 2 together so the point is neat.
- Straighten the hanging loop and let it dry over a pencil or hook so it stays upright.
- Let everything dry fully, about 2 hours, before hanging.
Final Quality-Control Checklist
- Body measures about 3.8 in (9.7 cm) tall, not counting the loop.
- Widest point measures about 2 in (5.1 cm) across the scales.
- Every tier has the right scale count: 3, 4, 5, 6, 6, 6, 6, 5, 4.
- Scales in each tier are staggered against the tier below.
- No stuffing or body stitches show between the scales.
- The collar is round and firm, and the top is closed neatly.
- The loop is secure and about 1.5 in (3.8 cm) tall.
- All tails are woven in and trimmed.
Troubleshooting
Stuffing shows through the body. Go down a hook size or tighten your tension, and use an invisible decrease.
A tier has a leftover loop. Recount the FL ring; it should be a multiple of 3. If a loop was skipped in the body, work an extra sl st into it rather than squeezing a petal in.
Scales stand straight out. Steam them and curve them down. If they are still too stiff, replace the 2 dc in each half of the scale with (dc, hdc) to make them shorter.
Scales line up in columns. Start each tier above the center of a scale below, not above a sl st.
The cone looks round instead of tapered. Stuff less in the lower half and more in the top, and check your gauge at Round 9.
The loop flops over. Work the slip stitches a little tighter, and attach the far end exactly opposite the start.
The ornament is too heavy for a thin branch. Switch to acrylic yarn and stuff a little more lightly.
Care
Spot clean or hand wash in cool water. Press out the water in a towel, reshape the scales while damp, and store the ornament flat or hanging so the scales keep their curve.
Final Notes
Every measurement in this ornament follows from the gauge. At 5 sc and 6 rounds per inch, the 18-stitch body is 3.6 in (9.1 cm) around and 1.1 in (2.8 cm) across. Twenty-three rounds make a body 3.8 in (9.7 cm) tall. The free-loop rings, all multiples of 3, hold 45 scales that add 0.45 in (1.1 cm) on each side, for a finished width of 2 in (5.1 cm). A 21-stitch cord adds a 1.5 in (3.8 cm) loop, for a total height of 5.3 in (13.5 cm).
If you check these numbers at each stage, every Ember Cone you make will come out the same size, whether you make one or a whole basket.
Happy crocheting!