

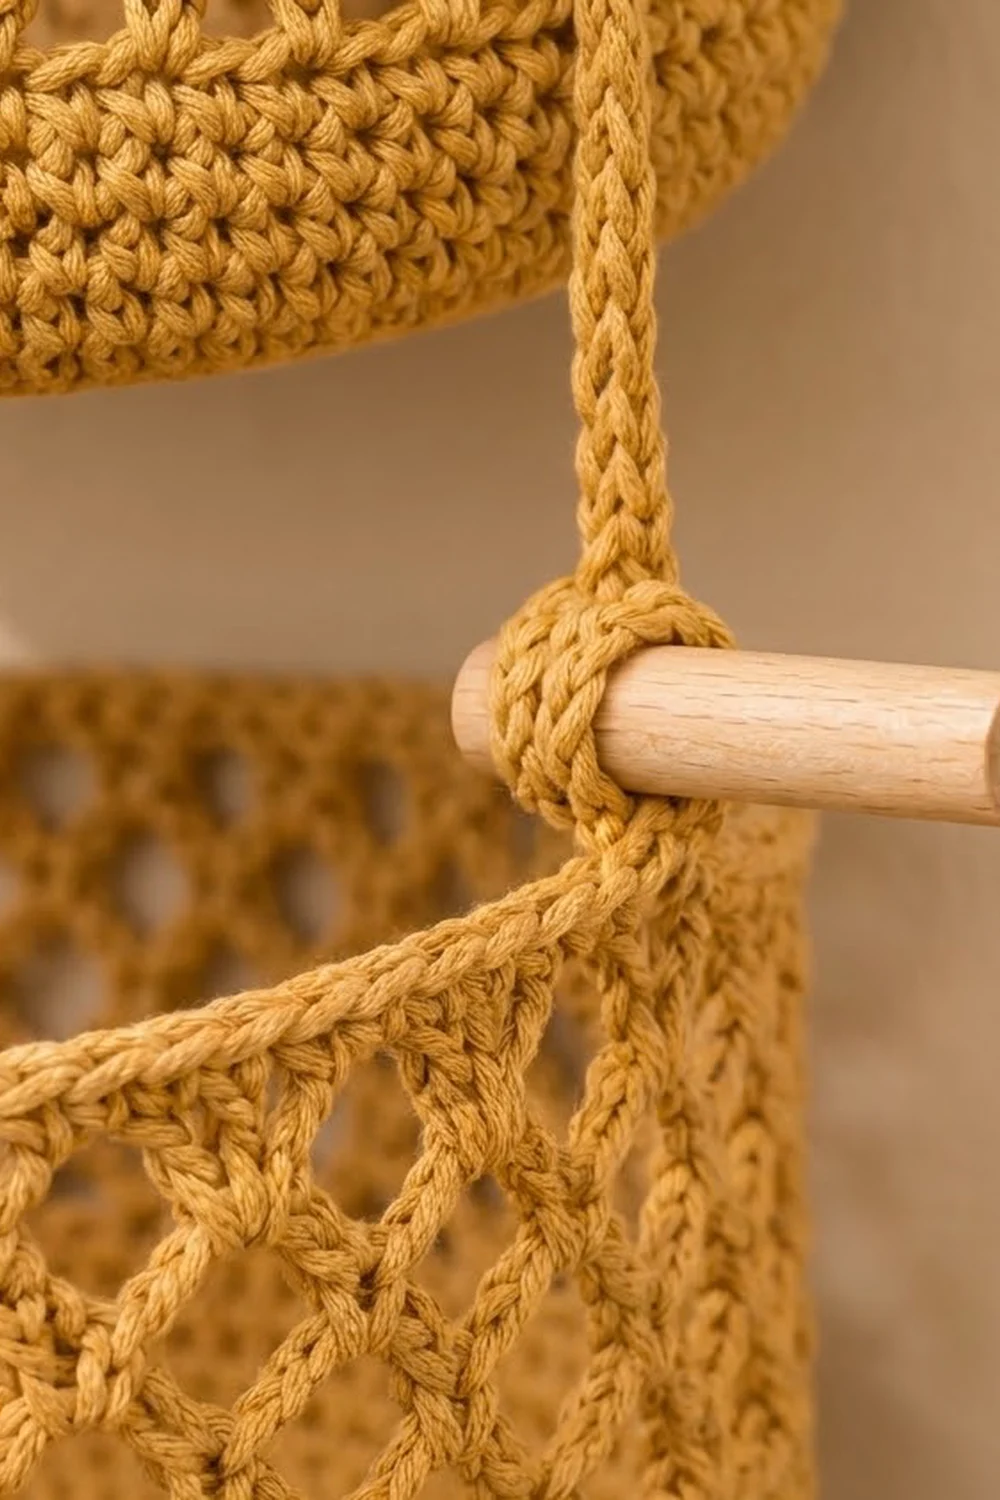
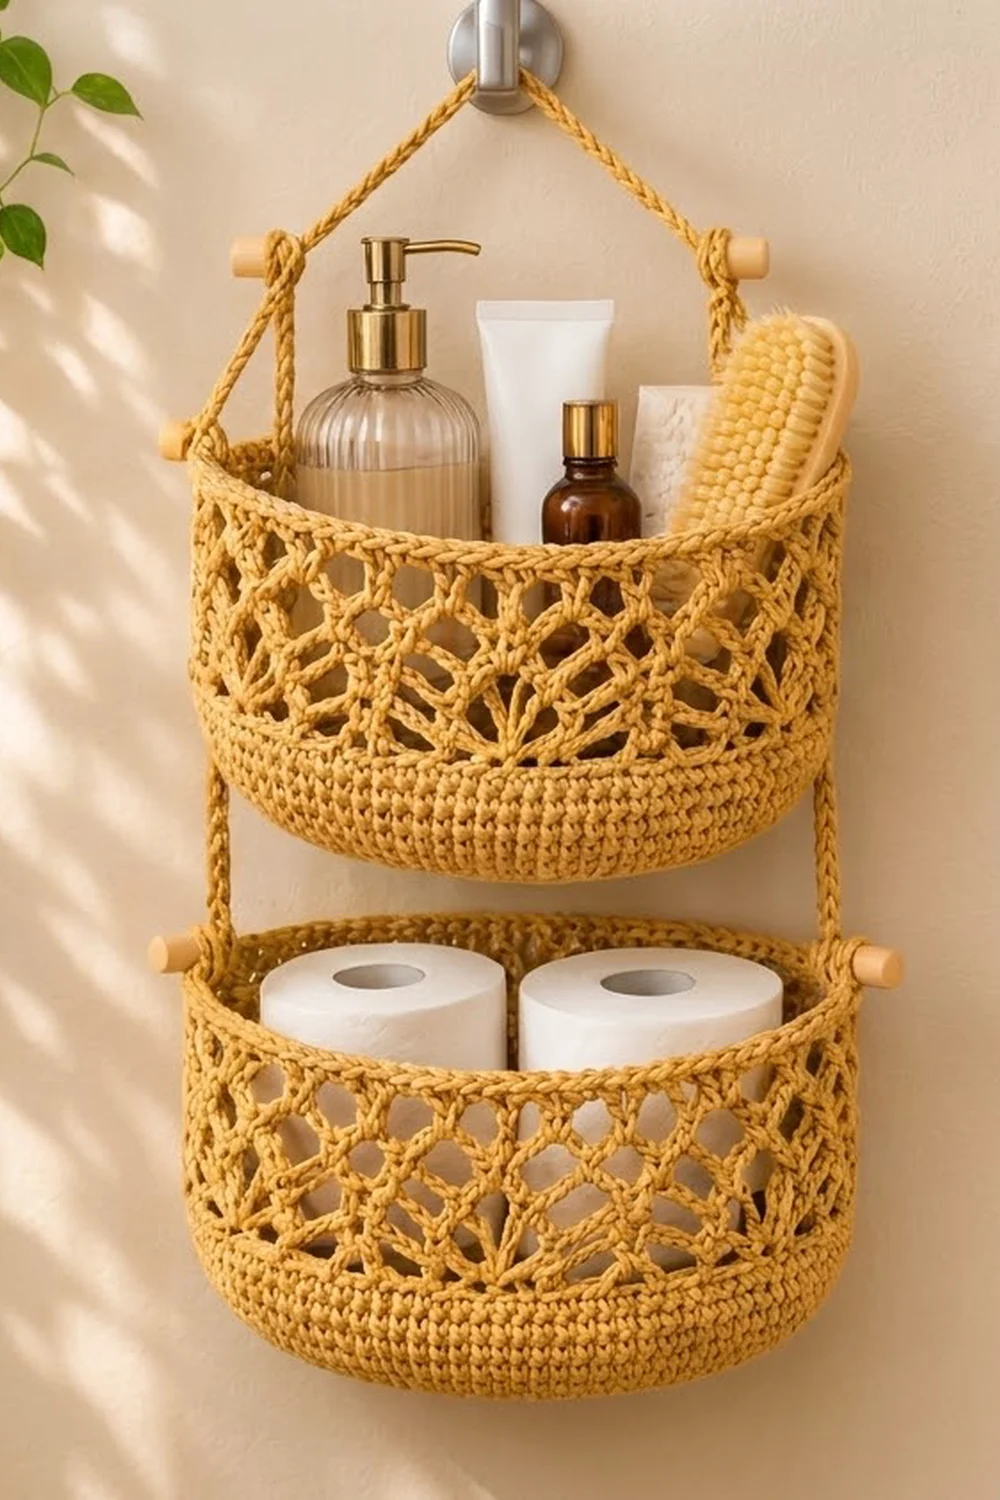
This two-tier hanging organizer is made of two round crochet baskets with an open diamond lattice. Each basket has a solid single crochet base and lower wall, a band of chain-loop mesh, and a firm rim with a braided-looking top edge. One crocheted cord holds the baskets in a vertical stack, and small wooden dowels sit at the side points.
Everything is worked in one warm golden mustard cotton, which gives a calm, natural look. It suits a bathroom, entryway, or nursery. The top basket holds bottles and brushes, and the bottom basket fits two standard toilet paper rolls side by side.
The pattern uses US crochet terms. Each finished basket measures 9 in (22.9 cm) across and 5 in (12.7 cm) tall. The full organizer is about 20 in (50.8 cm) long, from the top of the hanging loop to the bottom of the lower basket.
The construction is simple. Each basket is worked from the bottom up in joined rounds: a flat base, a back-loop turning round, solid wall rounds, six mesh rounds, and a three-round rim. Then you make one long slip-stitch cord and attach both baskets with four wooden dowel toggles.
Finished Size and Construction
- Finished basket size: 9 in (22.9 cm) diameter x 5 in (12.7 cm) tall
- Overall hanging length: about 20 in (50.8 cm)
- Skill level: Easy (confident beginner)
- Terminology: US crochet terms
- Yarn weight: worsted weight (#4) cotton
- Hook: 4.0 mm (G-6)
- Number of pieces: 2 identical baskets, 1 hanging cord, 4 wooden dowels
- Layout: 1 column x 2 baskets, stacked vertically
- Basket size before rim: 9 in (22.9 cm) across x 4.3 in (10.9 cm) tall
- Rim depth: 0.7 in (1.8 cm), 3 rounds
Materials
Yarn: Use a smooth, firm 100% cotton or cotton-blend yarn in worsted weight. Cotton holds the basket shape, shows the lattice clearly, and handles bathroom humidity well. Avoid soft acrylics, because they make the walls slump.
- Golden mustard: 300 g, approx. 570 m (623 yd)
- each basket: about 120 g
- cord: about 15 g
These quantities include a margin of about 15 percent for your gauge swatch and small differences in tension.
Tools:
- 4.0 mm (G-6) crochet hook
- 4 wooden dowels, 2 in (5.1 cm) long and 3/8 in (1.0 cm) diameter, ends sanded
- Stitch markers
- Tapestry needle
- Scissors
- Measuring tape
- Spray bottle and blocking pins
- A round form for blocking (a bowl or pot about 9 in / 22.9 cm across)
Abbreviations (US Terms)
- ch – chain
- sc – single crochet
- sl st – slip stitch
- inc – 2 sc in the same stitch
- BLO – back loop only
- st(s) – stitch(es)
- sk – skip
- ch-5 loop – the space made by 5 chains
- rnd – round
Special stitch – Mesh loop: ch 5, then sc into the next stitch or loop named in the pattern. Stacked rounds of mesh loops form the diamond lattice.
Gauge and Checkpoints
Gauge: 16 sc and 18 rnds = 4 in (10.2 cm) in sc, worked in joined rounds.
Use the first basket as your test piece. Stop after Rnd 10 of the base and measure. The base should be 4.5 in (11.4 cm) across. If it is, keep going.
Measurement checkpoints:
- After Rnd 5: 2.25 in (5.7 cm) across
- After Rnd 10: 4.5 in (11.4 cm) across
- After Rnd 15: 6.75 in (17.1 cm) across
- After Rnd 20: 9 in (22.9 cm) across, 30 in (76.2 cm) around
- After the solid wall: 1.3 in (3.3 cm) of wall
- After the mesh: 4.3 in (10.9 cm) of wall
- After the rim: 5 in (12.7 cm) of wall
Too big? Use a hook 0.5 mm smaller. A loose base makes a floppy basket.
Too small? Use a hook 0.5 mm larger. Two toilet paper rolls, each about 4.25 in (10.8 cm) across, need the full 9 in (22.9 cm) base.
Base ruffles? Your rounds are shorter than gauge. Use a hook one size larger for the base only.
Base cups? Your rounds are taller than gauge. Use a hook one size smaller for the base only.
Basket Pattern (Make 2)
Join every round with a sl st to the first sc. The ch 1 at the start of each round does not count as a stitch. Place a marker in the first sc of every round.
Base
Rnd 1: Make a magic ring, work 6 sc in the ring, join. (6 sts)
Rnd 2: Inc in each st around. (12 sts)
Rnd 3: Sc 1, inc 6 times. (18 sts)
Rnd 4: Sc 1, inc, sc 1 6 times. (24 sts)
Rnd 5: Sc 3, inc 6 times. (30 sts)
Keep increasing 6 sts in every round. Each repeat has one more plain sc than in the round before. On even rounds, split the plain stitches so the inc falls in the middle of the repeat. This keeps the circle round instead of hexagonal.
Rnd 6: 36 sts. Rnd 7: 42 sts. Rnd 8: 48 sts. Rnd 9: 54 sts. Rnd 10: 60 sts.
Checkpoint: 4.5 in (11.4 cm) across.
Rnd 11: 66 sts. Rnd 12: 72 sts. Rnd 13: 78 sts. Rnd 14: 84 sts. Rnd 15: 90 sts.
Checkpoint: 6.75 in (17.1 cm) across.
Rnd 16: 96 sts. Rnd 17: 102 sts. Rnd 18: 108 sts. Rnd 19: 114 sts.
Rnd 20: Sc 18, inc 6 times. (120 sts)
Checkpoint: 9 in (22.9 cm) across and 30 in (76.2 cm) around. The base should lie completely flat.
Solid Lower Wall
Rnd 21: Ch 1, sc in BLO of each st around, join. (120 sts) The unused front loops make a neat ridge where the base turns up into the wall.
Rnds 22–26: Ch 1, sc in each st around, join. (120 sts)
Checkpoint: 1.3 in (3.3 cm) of wall. The walls should stand up on their own.
Diamond Lattice Mesh
Rnd 27 (set-up): Ch 1, sc in first st, ch 5, sk 2 sts, sc in next st 39 times, ch 5, sk 2 sts, join with sl st to first sc. (40 sc, 40 ch-5 loops)
The math: each repeat uses 3 stitches (1 sc + 2 skipped). 120 ÷ 3 = exactly 40 loops, with no stitches left over.
Rnd 28: Sl st in each of the first 3 ch of the first loop to reach its center. Ch 1, sc in the same loop. Ch 5, sc in next ch-5 loop 39 times, ch 5, join to first sc. (40 sc, 40 ch-5 loops)
Rnds 29–32: Repeat Rnd 28. (40 ch-5 loops in each round)
Each sc is anchored in the center of a loop from the round below. The loops shift by half a loop every round, so the chains form a diamond lattice. Pull each sc snug so the lattice stands straight.
Checkpoint: 4.3 in (10.9 cm) of wall in total. The six mesh rounds add about 3 in (7.6 cm).
Rim
The rim instructions are in the Border and Rim section below. Finish the rim on each basket before assembly.
Hanging Cord (Make 1)
Chain gauge: 9 sl sts along the cord = 2 in (5.1 cm).
Leave a 6 in (15.2 cm) tail and ch 190.
Row 1: Sl st in the back bump of the 2nd ch from the hook and in the back bump of each ch across. (189 sl sts)
Fasten off, leaving a 6 in (15.2 cm) tail.
Checkpoint: 189 sts ÷ 4.5 sts per inch = 42 in (106.7 cm). Each half of the cord is 21 in (53.3 cm). That covers 8 in (20.3 cm) from the hook to the top basket, 7 in (17.8 cm) from the top basket to the bottom basket, the dowel wraps, and a finishing tail.
Keep your slip stitches even and not too tight. A tight cord twists and curls.
Make All Pieces
All pieces use golden mustard.
- Baskets: 2, about 120 g each
- Cord: 1, about 15 g
- Wooden dowels: 4 (not crocheted)
Layout grid (front view, wall behind):
           [ hook ]
            /    \
         cord    cord
          /        \
   [dowel]-[ TOP BASKET ]-[dowel]
      |                      |
     cord                  cord
      |                      |
   [dowel]-[BOTTOM BASKET]-[dowel]
Joining (Assembly)
Method: dowel toggles with clove hitches. At each side point, the cord passes through the rim and then wraps around a dowel lying against the outside of the basket.
Stitch-to-stitch logic: The rim has 120 sts. Place one marker in st 1 and another in st 61. These are the left and right side points, exactly opposite each other. That leaves 60 sts on the front half and 60 sts on the back half, so the basket hangs level. Turn each basket so its join line faces the wall.
Attaching the top basket:
- Fold the cord in half and mark the center. This is the hanging point.
- Measure 8 in (20.3 cm) down one half from the center.
- At that point, push the cord from outside to inside under rim Rnd 33 at st 1. Bring it back out through the mesh opening directly below.
- Lay a dowel horizontally against the outside of the wall, just under the rim and centered on st 1.
- Wrap the cord 4 times around the center of the dowel, then finish with a clove hitch. The wraps should cover about 0.5 in (1.3 cm) of the dowel.
- Let the rest of the cord hang down. Repeat with the other half of the cord at st 61.
Attaching the bottom basket:
- Measure 7 in (17.8 cm) down each half of the cord from the top basket’s dowel.
- Attach the cord at st 1 and st 61 of the bottom basket in the same way.
- After the clove hitch, tie the tail around the cord with a square knot. Weave the tail into the rim on the inside and trim it.
Tension advice: Pull each wrap snug enough to hold the dowel firmly, but not so hard that the rim puckers. Both dowels on a basket should sit at the same height.
Size checkpoint: Hang the organizer on a hook. The space between the baskets should be about 2 in (5.1 cm), and the total length should be about 20 in (50.8 cm). If either basket tilts, adjust a clove hitch now.
Border and Rim
The rim acts as the border. It turns the open loops back into a solid edge and gives the dowels a firm edge to sit against.
Border gauge: 16 sc = 4 in (10.2 cm), the same as the base.
Rnd 33 (conversion round): Ch 1. Sc in each sc of Rnd 32 and work 2 sc in each ch-5 loop. Join.
Count: 40 sc (1 in each existing sc) + 80 sc (2 in each of the 40 loops) = 120 sts
- Front half: 60 sts (20 sc + 40 sc in 20 loops)
- Back half: 60 sts (20 sc + 40 sc in 20 loops)
Rnd 34: Ch 1, sc in each st around, join. (120 sts; 60 per half)
Rnd 35: Sl st loosely in each st around. Join and fasten off. (120 sl sts; 60 per half) The slip stitches make the braided chain line along the top edge.
Why the math works: The rim count matches the base count. Rnd 20 has 120 sts. The mesh divides those 120 sts by 3 to make 40 loops. The conversion round puts 3 sts back for each loop (1 sc + 2 sc): 40 x 3 = 120. So the rim circumference equals the wall circumference, 30 in (76.2 cm), and the rim neither flares nor pulls in. The 60/60 split also places st 1 and st 61 exactly opposite each other for the dowels.
Weave in all ends on the inside of each basket.
Final Blocking
- Block each basket before assembly. If you have already assembled the organizer, remove the cord and dowels first.
- Spray the basket until it is damp but not dripping.
- Turn the basket upside down over a bowl or pot about 9 in (22.9 cm) across.
- Smooth the base flat and pull the walls straight down.
- Ease the mesh so every diamond is the same size. Pin the rim if it waves.
- Let it dry completely, at least 24 hours.
- Measure again: 9 in (22.9 cm) across and 5 in (12.7 cm) tall.
- Attach the cord and dowels as described in the Joining section.
Final Quality-Control Checklist
- Base lies flat with no ruffles or cupping
- Each base has 120 sts after Rnd 20
- The front-loop ridge runs evenly around the base
- Solid wall is 1.3 in (3.3 cm) tall on both baskets
- Each mesh round has 40 ch-5 loops
- Diamonds line up vertically all the way around
- Rim has 120 sts, 60 per half
- Both baskets measure 9 in (22.9 cm) x 5 in (12.7 cm)
- Cord measures 42 in (106.7 cm)
- Dowels sit level at st 1 and st 61
- Gap between baskets is about 2 in (5.1 cm)
- All ends are woven in on the inside
Troubleshooting
Base looks like a hexagon: Your increases are stacking. Stagger them on even rounds as described.
Walls lean outward: Your tension loosened after the base. Use a hook 0.5 mm smaller for the wall rounds.
Mesh twists or spirals: You may have skipped the sl sts to the loop center. Each round must start at the center of a loop.
Too many or too few loops: Count your stitches before Rnd 27. You need exactly 120 sts before you start the mesh.
Rim flares: You worked 3 sc in some loops. Use exactly 2 sc in each loop.
Basket tilts when hung: The dowels are not opposite each other. Count again and place them at st 1 and st 61.
Cord curls: Your slip stitches are too tight. Remake the cord with a hook one size larger.
Care
Hand wash in cool water with mild soap and reshape the baskets while they are damp. Dry them flat or over a bowl, away from direct heat.
Final Notes
Each measurement leads to the next. A gauge of 16 sc = 4 in (10.2 cm) gives a 120-st base that is 9 in (22.9 cm) across. Those 120 sts divide into 40 mesh loops. The rim turns the 40 loops back into 120 sts, so the top edge matches the base. A 42 in (106.7 cm) cord holds both 5 in (12.7 cm) baskets in an organizer about 20 in (50.8 cm) long.
Check each step as you go and the finished organizer will hang straight. Happy crocheting!