

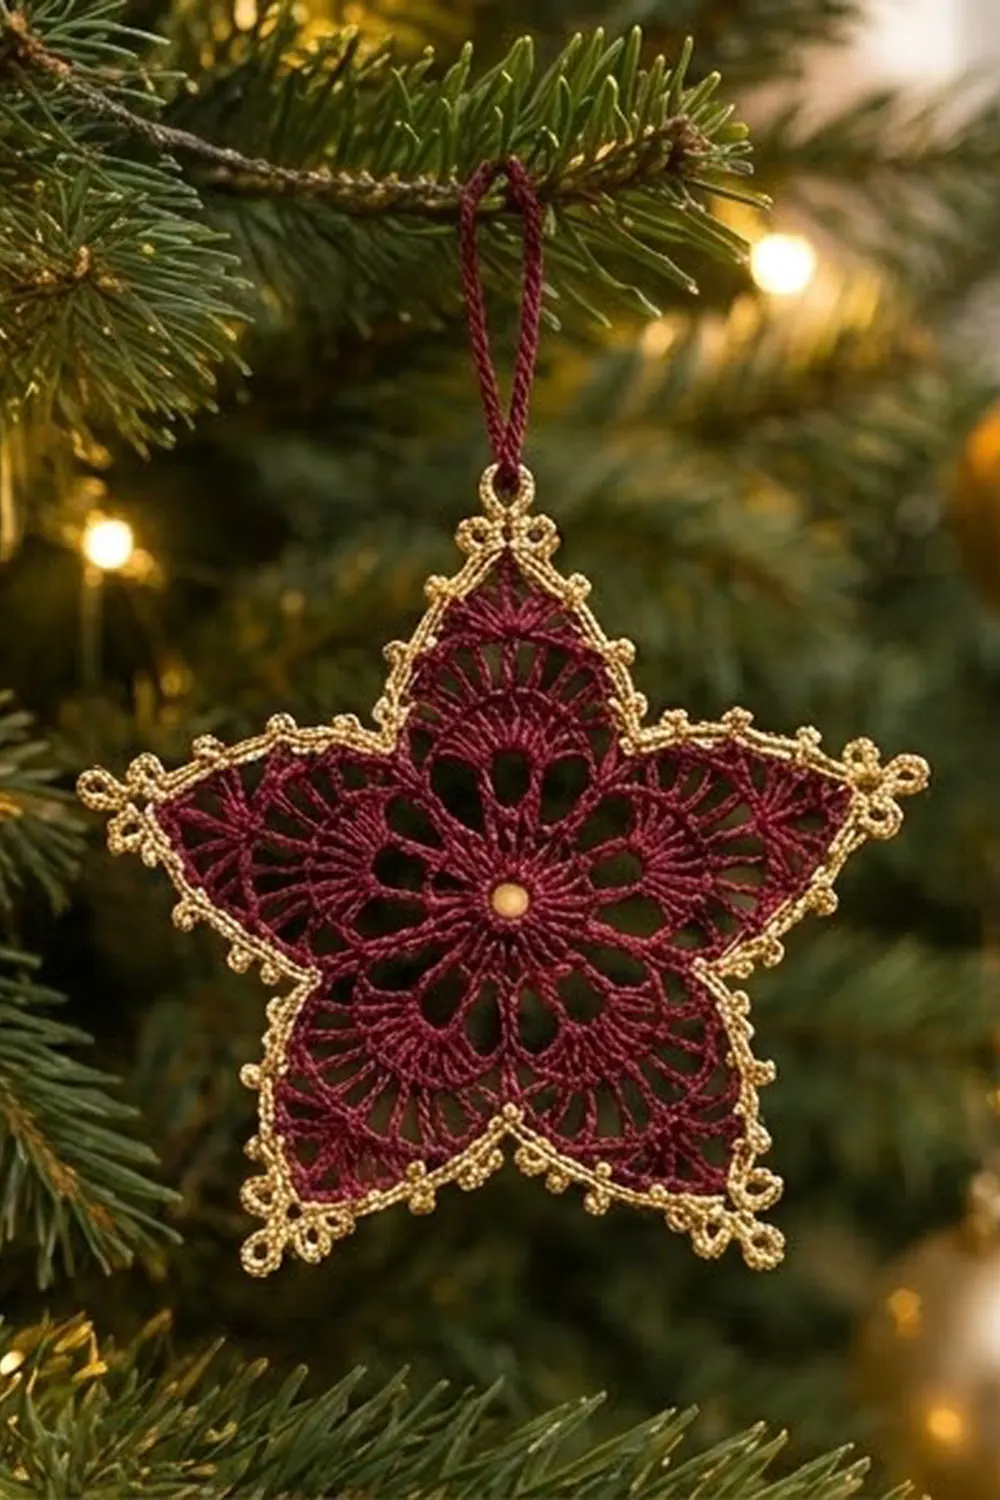
The Ruby Lace Star is a small, heirloom-style thread crochet ornament. It has a wine-red lace center, five fan-shaped points, and a gold picot edge that catches the light on the tree. It is delicate but still sturdy enough to hang year after year.
The star uses two colors. The body is burgundy cotton thread and the border is gold metallic thread. The burgundy lace gives depth, and the gold outline makes the five points stand out. A burgundy hanging loop at the top point finishes the piece.
The pattern uses US crochet terms throughout. The finished star measures 4 in (10.2 cm) across the widest points after blocking, plus a 1.75 in (4.4 cm) hanging loop.
Construction is simple. You work six rounds in burgundy from a center ring to build the lace star. Then you add two gold border rounds: a single crochet base and a picot round. Finally, you attach the hanging loop and starch-block the star into crisp points.
Finished Size and Construction
- Finished size: 4 in (10.2 cm) across the widest points, not counting the loop
- Skill level: Intermediate (thread crochet, picots, chain-loop lace)
- Terminology: US crochet terms
- Yarn weight: Size 10 crochet thread (lace weight, category 0)
- Hook: 1.5 mm steel hook (US steel size 8)
- Number of pieces: 1
- Layout: Single motif, worked in the round
- Piece size: 4 in (10.2 cm) across after the border
- Size before border: 3.5 in (8.9 cm) across after Round 6
- Border depth: 0.25 in (0.6 cm) on each edge, 2 rounds
Materials
Choose a mercerized cotton size 10 thread for the body. Mercerized cotton has a slight sheen, holds starch well, and keeps the lace looking sharp. For the border, use a size 10 metallic thread, or a cotton thread with a metallic strand, in a similar weight so the edge does not ruffle or pull.
- Burgundy (Color A): 5 g, about 26 m, size 10 cotton thread
- Gold metallic (Color B): 3 g, about 15 m, size 10 metallic thread
Both quantities include a margin for a gauge swatch and weaving in ends.
Tools:
- 1.5 mm (US steel 8) crochet hook
- Fine tapestry needle or beading needle with a large eye
- Small sharp scissors
- Fabric stiffener or spray starch
- Blocking board or foam, with rust-proof pins
- Plastic wrap
- A paper star template, 4 in (10.2 cm) across
Abbreviations (US Terms)
- ch: chain
- sl st: slip stitch
- sc: single crochet
- dc: double crochet
- tr: treble crochet
- sp: space
- lp: loop
- st(s): stitch(es)
- rep: repeat
- beg: beginning
Special stitches
- Picot: Ch 3, then sl st into the 3rd ch from the hook. This makes a small closed bump about 0.125 in (0.3 cm) tall.
- Standing sc: With a slip knot on the hook, insert the hook into the stitch and complete a sc as normal. This attaches the new color without a chain.
Gauge and Checkpoints
The star is a single piece. Your test piece is simply the first few rounds. Work Rounds 1–3 and measure them before going on. Thread crochet varies a lot from one person’s tension to the next, so this check matters.
Measure flat and lightly pressed, before blocking:
- After Round 1: 0.5 in (1.3 cm) across
- After Round 3: 1.25 in (3.2 cm) across
- After Round 4: 2 in (5.1 cm) across the fans
- After Round 5: 3 in (7.6 cm) across the widest points
- After Round 6: 3.5 in (8.9 cm) across the widest points
- After Round 8 and blocking: 4 in (10.2 cm) across the widest points
If your piece is too big: Change to a 1.25 mm hook and keep the chain loops snug.
If your piece is too small: Change to a 1.75 mm hook. Small stars often come from tight chains, so check that each chain is as tall as the loop on your hook.
It is better to fix gauge at Round 3 than at Round 6. A center that is off by 0.125 in (0.3 cm) grows to about 0.375 in (1.0 cm) by the outer edge.
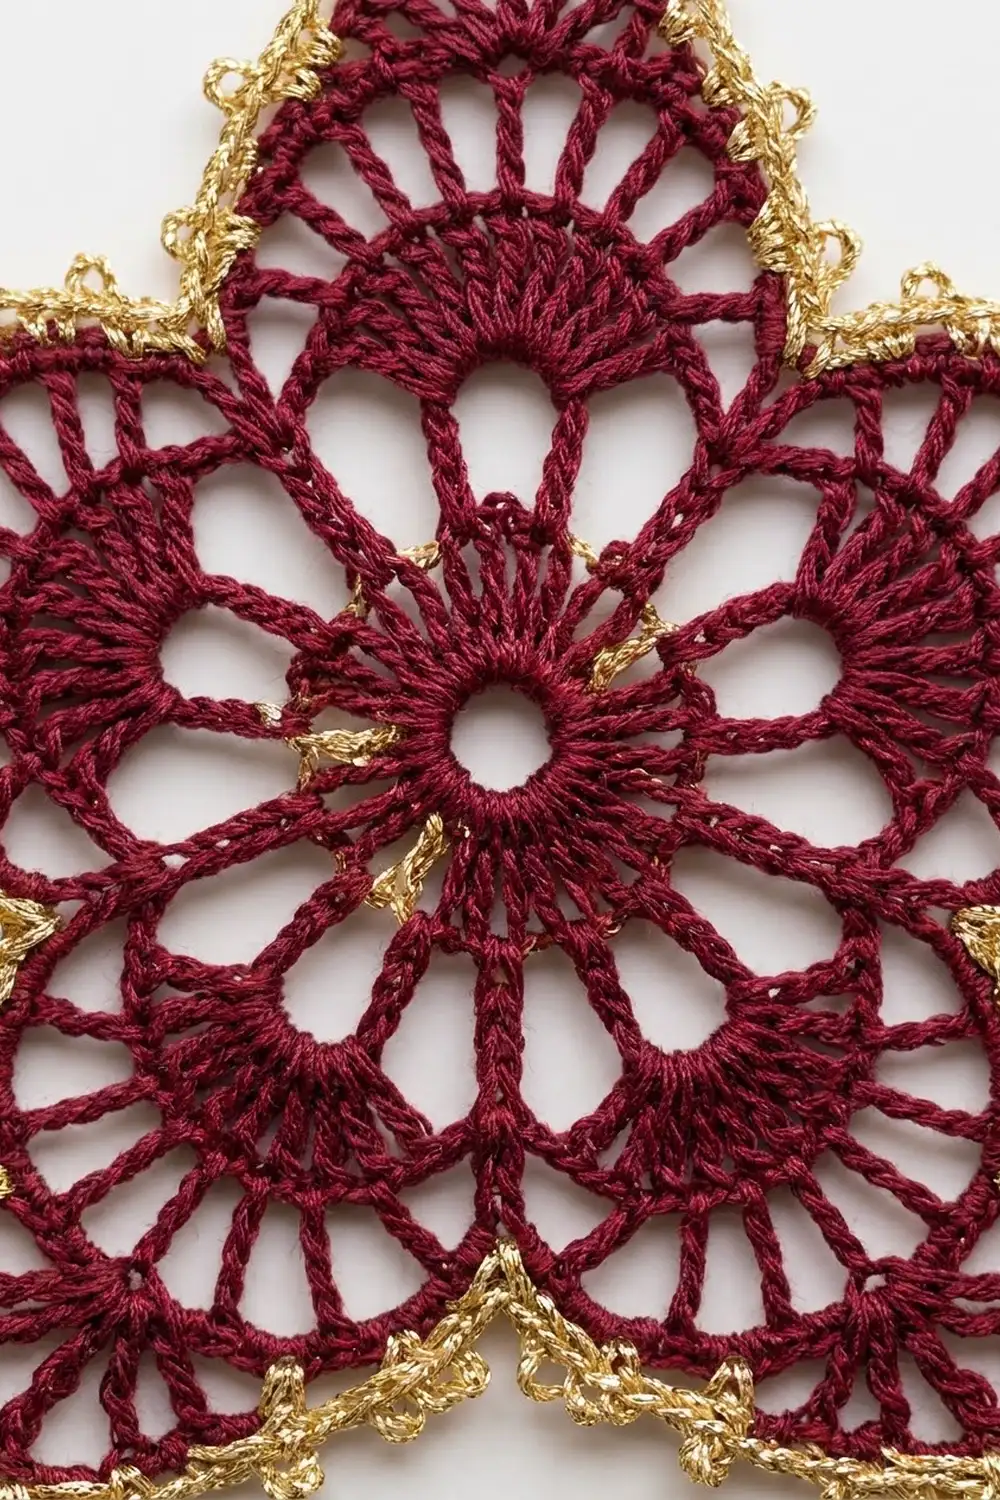
Star Body (Color A, Burgundy)
Foundation: With Color A, ch 5 and sl st to the first ch to form a ring.
Round 1: Ch 3 (counts as dc), work 14 dc into the ring, then sl st to the top of the beg ch-3. (15 dc)
Pull the starting tail gently to close the center to a small open hole, about 0.125 in (0.3 cm) across.
Round 2: Ch 5 (counts as dc + ch 2). (Dc in next dc, ch 2) 14 times. Sl st to the 3rd ch of the beg ch-5. (15 dc, 15 ch-2 sps)
This round makes the spoke ring at the center.
Round 3: Sl st into the first ch-2 sp, then ch 1 and sc in the same sp. (Ch 4, sc in next ch-2 sp) 14 times. Ch 4 and sl st to the first sc. (15 sc, 15 ch-4 lps)
You now have 15 loops: 3 loops for each of the 5 points.
Round 4 (fan bases): Sl st into the first ch-4 lp. Ch 3 (counts as dc) and work 7 dc in the same lp, for an 8-dc fan. Ch 2, sc in the next lp, ch 5, sc in the next lp, ch 2.
Work 8 dc in the next lp, ch 2, sc in the next lp, ch 5, sc in the next lp, ch 2. Rep from * to * 3 more times. Sl st to the top of the beg ch-3.
(40 dc in 5 fans of 8, 10 sc, 5 ch-5 lps, 10 ch-2 sps)
Each fan becomes one star point. Each ch-5 loop becomes a valley between points.
Round 5 (open fans):
- Ch 4 (counts as tr), then (ch 1, tr in next dc) 7 times. This gives 8 tr and 7 ch-1 sps across the first fan.
- Ch 3, skip the ch-2 sp, sc in the ch-5 valley lp, ch 3.
- Tr in the first dc of the next fan, (ch 1, tr in next dc) 7 times. Ch 3, sc in the ch-5 lp, ch 3. Rep from * to * 3 more times.
- Sl st to the 4th ch of the beg ch-4.
(40 tr, 35 ch-1 sps, 5 valley sc, 10 ch-3 sps)
The trebles fan out like ribs, which creates the radiating texture in each point.
Round 6 (arched point outline):
- Sl st into the first ch-1 sp, ch 1, and sc in the same sp.
- (Ch 3, sc in next ch-1 sp) twice.
- Ch 3, then work (sc, ch 5, sc) in the 4th ch-1 sp, which is the center sp. This is the tip.
- (Ch 3, sc in next ch-1 sp) 3 times.
- Ch 2, sc in the valley sc, ch 2.
- Sc in the first ch-1 sp of the next fan. (Ch 3, sc in next ch-1 sp) twice. Ch 3, (sc, ch 5, sc) in the center sp. (Ch 3, sc in next ch-1 sp) 3 times. Ch 2, sc in the valley sc, ch 2. Rep from * to * 3 more times.
- Sl st to the first sc and fasten off.
(Per point: 8 sc, 6 ch-3 lps, 1 ch-5 tip lp. Totals: 45 sc, 30 ch-3 lps, 5 ch-5 tip lps, 10 ch-2 sps)
Checkpoint: The star should measure 3.5 in (8.9 cm) across the widest points. Each point has 3 arches on each side of a ch-5 tip loop. The short ch-2 spaces pull the valleys in, which is what turns the round shape into a star.
Border (Color B, Gold)
Border gauge: In gold thread, 13 sc measure about 1.25 in (3.2 cm) along one edge, valley to tip, before blocking. The border adds 0.25 in (0.6 cm) on each side of the star.
Each point has two edges, so the star has 10 edges in total. “Per edge” below means from a valley sc to a tip, and it does not include the shared valley stitch.
Round 7 (sc base):
- Join Color B with a standing sc in any valley sc.
- Work 2 sc in the next ch-2 sp and 3 sc in each of the next 3 ch-3 lps. That makes 11 sc so far on this edge.
- In the ch-5 tip lp, work (2 sc, ch 3, 2 sc). The first 2 sc complete the edge at 13 sc. The last 2 sc start the next edge.
- Work 3 sc in each of the next 3 ch-3 lps and 2 sc in the next ch-2 sp. That is 11 more sc, so this edge also has 13 sc.
- Sc in the next valley sc.
- Rep steps 2–5 around. On the last point, skip the final valley sc and sl st to the first standing sc instead, since that sc is the 5th valley stitch.
Work over the sc stitches of Round 6 and don’t stitch into them.
(Per edge: 13 sc. Totals: 10 edges × 13 = 130 sc, plus 5 valley sc = 135 sc, and 5 ch-3 tip sps)
Round 8 (picot edge):
- Ch 1 and sc in the same valley sc.
- Rising edge: (Sc in the next 3 sc, picot) 4 times, then sc in the next sc. (13 sc, 4 picots)
- Tip: In the ch-3 tip sp, work (sc, picot, sc, picot, sc, picot, sc). (4 sc, 3 picots)
- Falling edge: Sc in the next sc, then (picot, sc in the next 3 sc) 4 times. (13 sc, 4 picots)
- Sc in the valley sc.
- Rep steps 2–5 around. End the last falling edge with a sl st to the first sc instead of working the valley sc again.
- Fasten off.
(Per point: 26 edge sc + 4 tip sc + 1 valley sc = 31 sc, and 11 picots. Totals: 155 sc, 55 picots)
Why the math works: Each edge has 13 sc. Thirteen is 4 groups of 3 plus 1 extra stitch (4 × 3 + 1 = 13), so 4 picots fit evenly along every edge. The extra stitch sits at the tip end on the rising edge and at the tip end on the falling edge, which keeps the two sides of each point symmetrical.
The valley sc never gets a picot, so the valleys stay deep and clean. Because the ch-3 tip space is not counted in the edge sc, it can hold the 3-picot cluster without stealing stitches from either side.
Hanging Loop (Color A)
- Join Color A with a sl st in the center picot of the top point.
- Ch 25 and sl st in the same picot.
- Ch 1 and work 35 sc over the ch-25 loop, packing them tightly so the loop looks like a cord.
- Sl st into the picot and fasten off.
Checkpoint: The loop should measure 1.75 in (4.4 cm) from the tip to the top of the loop.
Final Blocking
- Weave in all ends along the back of the stitches in their own color. Trim them close, but leave about 0.125 in (0.3 cm).
- Draw a five-pointed star 4 in (10.2 cm) across on paper. Cover it with plastic wrap and lay it on your blocking board.
- Soak the ornament in fabric stiffener, or dampen it and spray it well with starch.
- Press out the excess with a towel. Do not wring it.
- Pin the center first, then put one pin in each of the 5 tips, matching the tips to the template.
- Pin each valley in toward the center so the points look sharp.
- Open the picots with a pin tip. Put one pin in each tip picot cluster to spread the 3 picots into a trefoil.
- Straighten the trebles of Round 5 so they radiate evenly.
- Let the star dry completely, for 12–24 hours, before you unpin it.
Final Quality-Control Checklist
- The star measures 4 in (10.2 cm) across the widest points.
- All 5 points are the same length and the same width.
- Each point has 8 trebles fanning from its center.
- Each edge has exactly 4 picots, and each tip has 3.
- Each valley is clean, with no picot.
- The gold border lies flat without ruffling or cupping.
- The center hole is small and round.
- The hanging loop is 1.75 in (4.4 cm) and centered on the top point.
- All ends are secure and hidden.
- The star holds its shape when it hangs.
Troubleshooting
Star cups or bowls: Your chains are too tight. Loosen the ch-3 and ch-5 loops, or go up one hook size.
Border ruffles: The gold thread is thicker than the burgundy. Work only 2 sc in each ch-3 loop in Round 7 (10 sc per edge). Then work (sc in next 3 sc, picot) 3 times and sc in the next sc, for 3 picots per edge.
Points look rounded: Pull the valley ch-2 spaces snug in Round 6, then block with the valleys pinned in firmly.
Uneven picots: Make every picot chain the same height, and always sl st into the 3rd ch from the hook.
Picot count doesn’t fit: Count Round 7 again. Every edge must have 13 sc, not counting the tip chain or the valley sc.
Metallic thread splits or frays: Use a smooth hook, work slowly, and cut shorter lengths of about 36 in (91.4 cm).
Care
Spot clean gently with cool water, then re-starch and re-block if needed. Store the star flat in tissue paper so the points don’t get crushed.
Final Notes
Here is the full measurement chain. The center measures 1.25 in (3.2 cm) after Round 3 and grows to 2 in (5.1 cm) after the Round 4 fans. Round 5 opens the star to 3 in (7.6 cm), and Round 6 finishes the burgundy star at 3.5 in (8.9 cm). The two gold border rounds add 0.25 in (0.6 cm) per side, which brings the finished star to 4 in (10.2 cm) across, plus a 1.75 in (4.4 cm) hanging loop.
Check each stage as you go, and the finished star will come out the right size with sharp, even points. Make one for the tree, or a few as gifts.
Happy crocheting!