

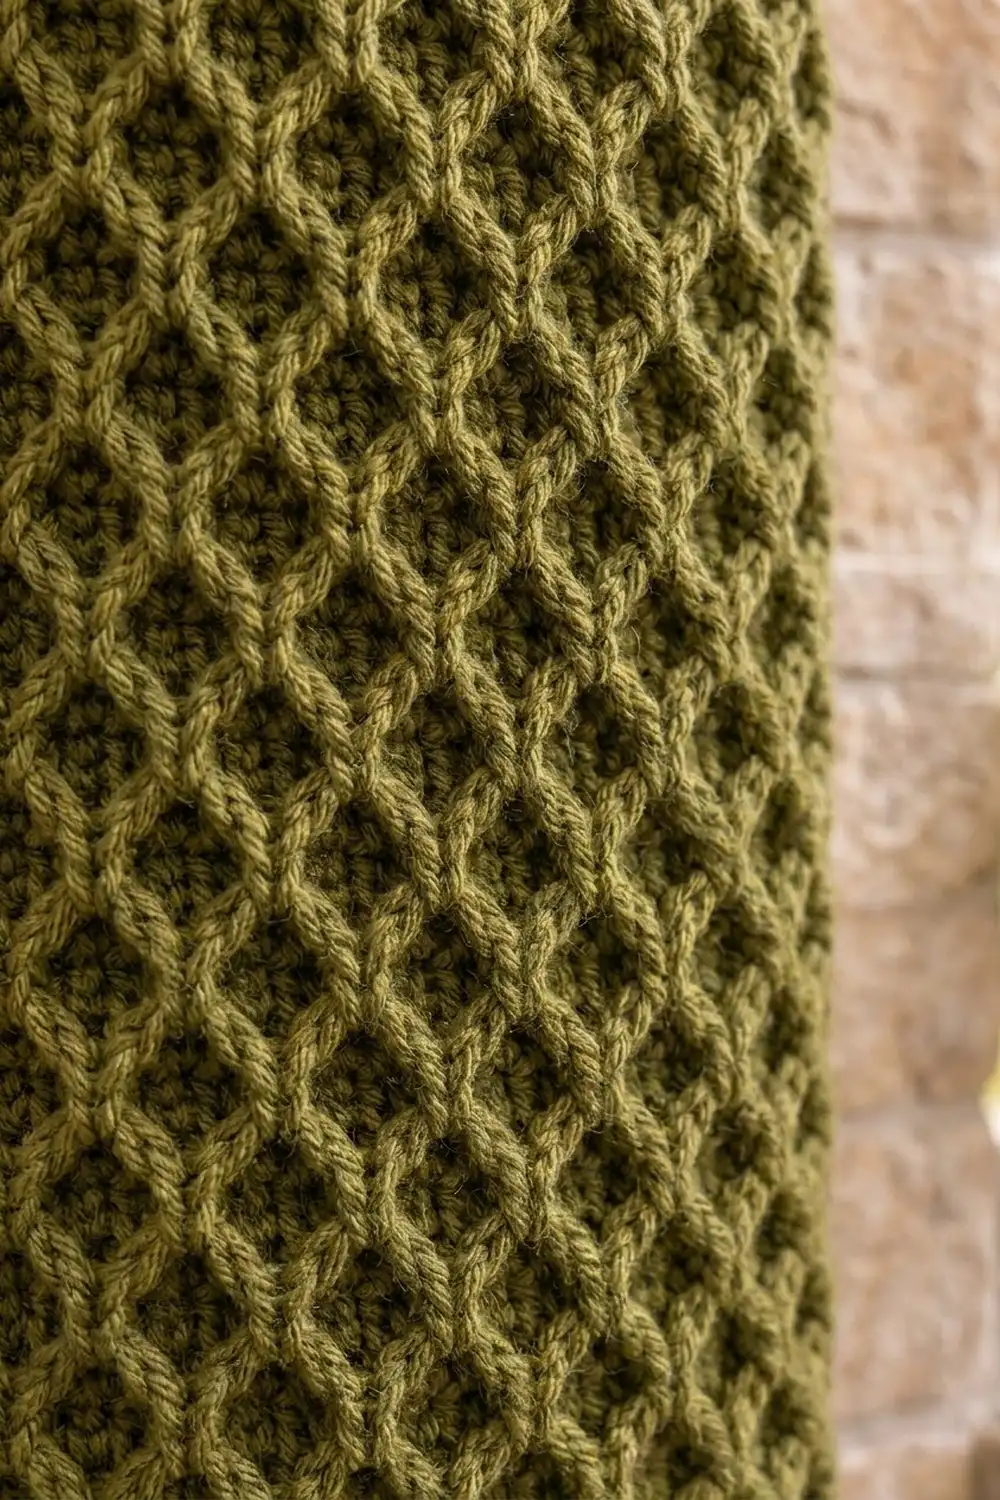
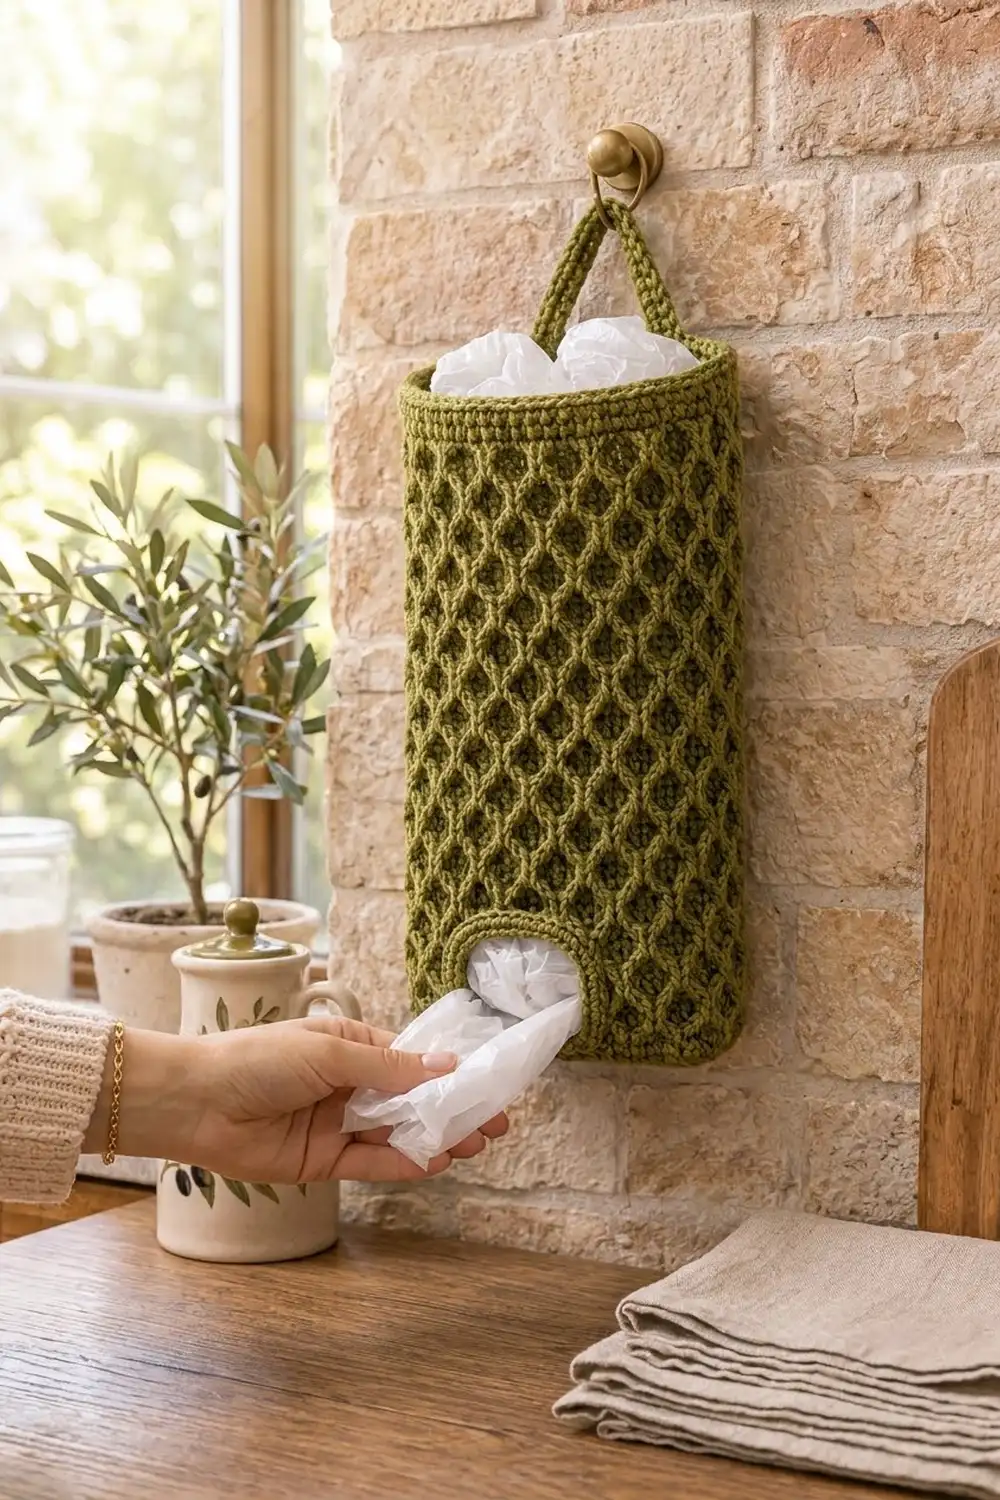
This hanging bag holder turns a messy pile of grocery bags into something you’re happy to leave on the kitchen wall. A raised diamond lattice covers the whole body and a plain band finishes the top rim. A rounded opening near the bottom lets you pull bags out one at a time.
The sample is olive green, which suits wood, stone and cream kitchens. Deep plum, slate blue or oatmeal work just as well. It’s one color with no seams, so the look stays clean and simple.
The pattern uses US crochet terms. The finished holder is 6.75 in (17.1 cm) wide across the oval base, 2.25 in (5.7 cm) deep and 14.25 in (36.2 cm) tall. The strap rises about 4 in (10.2 cm) above the rim.
You start with an oval base and work the body upward in joined rounds. For the opening you switch to rows for a short section, then chain across the gap and go back to rounds. A single-crochet band, an edging around the opening and a strap worked off the rim finish the piece.
Finished Size and Construction
- Finished size: 6.75 in (17.1 cm) wide x 2.25 in (5.7 cm) deep x 14.25 in (36.2 cm) tall; 16 in (40.6 cm) around
- Flattened width: 8 in (20.3 cm)
- Skill level: Intermediate
- Terminology: US
- Yarn weight: Worsted (#4)
- Hook: 5.0 mm (H-8)
- Number of pieces: 1 (strap worked directly off the rim)
- Layout: Vertical tube on an oval base, with the opening centered on the front face
- Body height before top band: 13.25 in (33.7 cm)
- Top band depth: 1 in (2.5 cm)
- Finished opening: about 2.5 in (6.4 cm) wide x 2 in (5.1 cm) tall
Materials
Use a smooth worsted yarn with good stitch definition so the post stitches stand out. A cotton-acrylic blend holds its shape well and stands up to daily use.
- Olive Green: 200 g, about 380 m (416 yd)
This amount includes a margin of roughly 10–15% for checking gauge and for differences in tension.
Tools:
– 5.0 mm (H-8) crochet hook
– 4 locking stitch markers
– Tapestry needle
– Scissors
– Measuring tape
– Spray bottle, plus a tall box or rolled towel for blocking
Abbreviations (US Terms)
- ch – chain
- sl st – slip stitch
- sc – single crochet
- hdc – half double crochet
- FPdc – front post double crochet
- BPdc – back post double crochet
- BLO – back loop only
- sc3tog – single crochet 3 together
- st(s) – stitch(es)
- rnd – round
- RS / WS – right side / wrong side
- rep – repeat
Traveling FPdc (special stitch): Work the FPdc around the nearest raised post in the round below, which is always one column to the left or right. Skip the stitch directly behind it. The stitch count stays the same, and each line of posts shifts one column per round, which forms the diamonds. If there’s no raised post one column over, work around the stitch directly below instead. This happens beside the opening and above the chained gap.
Columns: Each round has 64 sts. Column 1 is the first st of Rnd 6, and each later stitch sits directly above the stitch in the same column. Every 4 columns make one repeat.
Gauge and Checkpoints
- Lattice pattern: 16 sts and 12 rnds = 4 in (10.2 cm)
- Single crochet: 16 sts and 16 rnds = 4 in (10.2 cm)
There’s no separate swatch: the base and first rounds are your test piece. Check these measurements as you go:
- After Rnd 5: the oval base measures 6.75 in (17.1 cm) x 2.25 in (5.7 cm).
- After Rnd 10: the tube is 1.6 in (4.1 cm) tall from the base fold and 8 in (20.3 cm) wide when flattened.
- After Row 19: 4.6 in (11.7 cm) tall.
- After Rnd 45: 13.25 in (33.7 cm) tall.
If your piece is bigger than these, go down half a hook size. If it’s smaller, go up half a size. Tight posts pull the tube in, so pull each FPdc up to the same height as the hdc beside it.
Base
Rnd 1: Ch 21. Sc in 2nd ch from hook and in next 18 ch, then 3 sc in last ch. Working along the other side of the chain, sc in next 18 ch, then 2 sc in the last ch (the same ch as the first sc). Join with sl st to the first sc. (42 sts: 18 on each side, 3 at each end)
Rnd 2: Ch 1. 2 sc in first st, sc in next 18 sts, 2 sc in each of next 3 sts, sc in next 18 sts, 2 sc in each of last 2 sts. Join. (48 sts)
Rnd 3: Ch 1. Sc in first st, 2 sc in next st, sc in next 18 sts, [sc in next st, 2 sc in next st] 3 times, sc in next 18 sts, [sc in next st, 2 sc in next st] twice. Join. (54 sts)
Rnd 4: Ch 1. Sc in next 2 sts, 2 sc in next st, sc in next 18 sts, [sc in next 2 sts, 2 sc in next st] 3 times, sc in next 18 sts, [sc in next 2 sts, 2 sc in next st] twice. Join. (60 sts)
Rnd 5: Ch 1. Sc in next 3 sts, 2 sc in next st, sc in next 18 sts, [sc in next 5 sts, 2 sc in next st] twice, sc in next 18 sts, sc in next 7 sts, 2 sc in next st. Join. (64 sts)
In Rnd 5, columns 6–23 form the back, columns 24–37 form one narrow end, and columns 38–55 form the front. Columns 56–64 and 1–5 form the other end.
Body
Rnd 6: Ch 1. Sc in BLO of each st around. Join. (64 sts) This creates the fold where the walls turn up.
Rnd 7: Ch 2 (doesn’t count, here or in any later round or row). Hdc in each st around. Join to first hdc. (64 sts)
Rnd 8 (Pattern A): Ch 2. *FPdc around next st, hdc in next 2 sts, FPdc around next st; rep from * 15 more times. Join. (64 sts: 32 FPdc, 32 hdc) These first posts go around the hdc directly below.
Rnd 9 (Pattern B): Ch 2. *Hdc in next st, traveling FPdc twice, hdc in next st; rep from * 15 more times. Join. (64 sts)
Rnd 10 (Pattern A): Ch 2. *Traveling FPdc, hdc in next 2 sts, traveling FPdc; rep from * 15 more times. Join. (64 sts) Fasten off.
Place a marker in column 40 and another in column 53. Columns 40–53 (14 columns) become the opening.
Opening Section (Rows)
Work back and forth over columns 54–64 and 1–39 (50 sts), leaving columns 40–53 unworked. On WS rows, work BPdc instead of FPdc so the ridges stay raised on the RS.
Row 11 (RS, Pattern B): With RS facing, join yarn in column 54. Ch 2. Traveling FPdc twice, hdc in next st, *hdc in next st, traveling FPdc twice, hdc in next st; rep from * 10 more times, hdc in next st, traveling FPdc twice. Turn. (50 sts)
Row 12 (WS, Pattern A): Ch 2. Hdc in next 2 sts, traveling BPdc, *traveling BPdc, hdc in next 2 sts, traveling BPdc; rep from * 10 more times, traveling BPdc, hdc in next 2 sts. Turn. (50 sts)
Rows 13–19: Repeat Rows 11 and 12 three more times, then work Row 11 once more. In Rows 13, 15, 17 and 19, the edge posts next to the opening go around the stitch directly below them. Don’t turn after Row 19. (50 sts per row; 9 rows total)
Close the gap: Ch 14, skip the opening, and sl st to the top of the first st of Row 19 (column 54). From now on, rounds begin at column 54.
Upper Body (Rounds)
Rnd 20 (Pattern A): Ch 2. Hdc in next 2 sts, traveling FPdc, *traveling FPdc, hdc in next 2 sts, traveling FPdc; rep from * 10 more times, traveling FPdc, hdc in next 2 sts, then hdc in each of the 14 ch. Join. (64 sts: 50 + 14)
Rnd 21 (Pattern B): Ch 2. Traveling FPdc twice, hdc in next st, *hdc in next st, traveling FPdc twice, hdc in next st; rep from * 14 more times, hdc in next st. Join. (64 sts) Above the chain, the posts go around the hdc directly below.
Rnd 22 (Pattern A): Ch 2. Hdc in next 2 sts, traveling FPdc, *traveling FPdc, hdc in next 2 sts, traveling FPdc; rep from * 14 more times, traveling FPdc. Join. (64 sts)
Rnds 23–45: Repeat Rnds 21 and 22, ending with Rnd 45 (Pattern B). (64 sts per round)
Checkpoint: 13.25 in (33.7 cm) from the fold.
Border
The border has three parts: the top band, the opening edging and the strap. All three are worked in sc at 16 sts and 16 rnds = 4 in (10.2 cm).
Top Band
Rnds 46–49: Ch 1. Sc in each st around. Join. (64 sts per round) Fasten off after Rnd 49.
Why the math works: Working 1 sc into each of the 64 lattice sts keeps the 16 in (40.6 cm) circumference, so the band neither flares nor pulls in. At 4 rnds per inch, 4 rounds give a 1 in (2.5 cm) band. That brings the height from 13.25 in (33.7 cm) to 14.25 in (36.2 cm).
Opening Edging
With RS facing, join yarn in the free st of Rnd 10 at column 40.
Rnd 1: Ch 1. Sc in each of the 14 free sts along the bottom, then 1 sc in the corner. Work 12 sc evenly along the 9 row ends of the side, then 1 sc in the corner. Sc in the free loop of each of the 14 ch along the top, then 1 sc in the corner. Work 12 sc along the other side, then 1 sc in the last corner. Join. (56 sts: 14 + 1 + 12 + 1 + 14 + 1 + 12 + 1)
Rnd 2: Ch 1. Sc in each st around, but work a sc3tog centered on each top corner sc and a plain sc in each bottom corner. Join and fasten off. (52 sts: bottom 14, sides 11 each, top 12, corners 1 each)
Why the math works: The 9 rows measure 3 in (7.6 cm), which matches 12 sc at sc gauge. Because this round runs around the inside of a hole, it needs fewer stitches than the edge it’s worked into. The two sc3tog remove 4 sts and round the top into an arch, while the bottom corners stay flat. Two rounds shrink the 3.5 in (8.9 cm) x 3 in (7.6 cm) gap to about 2.5 in (6.4 cm) x 2 in (5.1 cm).
Strap
Count from the Rnd 49 join (column 54). The 21st st is column 10 and the 28th st is column 17. Both sit on the back, evenly spaced on either side of its center.
Row 1: With RS facing, join yarn in the 21st st. Ch 1, sc in the same st and in the next 2 sts. Turn. (3 sts)
Rows 2–32: Ch 1, sc in each st. Turn. (3 sts)
Check: the strap is 8 in (20.3 cm) long and 0.75 in (1.9 cm) wide.
Without twisting the strap, line up Row 32 with the 28th–30th sts of Rnd 49. Sl st through both layers, joining each strap st to its rim st (3 sl sts), then fasten off. The strap stands about 4 in (10.2 cm) above the rim.
Final Blocking
- Weave in all ends on the WS along the post ridges.
- Insert a box or rolled towel about 6.75 in (17.1 cm) x 2.25 in (5.7 cm).
- Mist until damp, not wet.
- Shape the opening into a flat bottom with an even arch, and pat the band straight.
- Let it dry completely on the form.
- Measure again: 14.25 in (36.2 cm) tall and 8 in (20.3 cm) wide when flattened.
Final Quality-Control Checklist
- Every round from Rnd 6 through Rnd 49 has 64 sts.
- The diamonds line up all the way around, with no doubled or skipped columns.
- The ridges are raised on the RS throughout the opening section.
- The opening is centered on the front, starting 1.6 in (4.1 cm) above the fold.
- The opening edging has 52 sts.
- The band lies flat at 1 in (2.5 cm), and the strap is untwisted.
Troubleshooting
- Diamonds drift: You went around the wrong post. Always use the nearest raised post, one column away.
- Stitch count changes: You worked into the stitch behind a post. Skip it every time.
- Tube narrows: Your posts are too short. Pull up taller loops.
- Flat ridges in the opening section: Use BPdc on Rows 12, 14, 16 and 18.
- Edging ripples: Rework with exactly 12 sc per side.
- Band flares: Go down half a hook size for Rnds 46–49.
Care
Hand wash in cool water and dry flat or over the blocking form. Don’t tumble dry.
Final Notes
The 6.75 in (17.1 cm) base gives 64 sts and a 16 in (40.6 cm) circumference. The lattice keeps those 64 sts at 12 rounds per 4 in, up to 13.25 in (33.7 cm). The 1 in (2.5 cm) band brings the height to 14.25 in (36.2 cm). Two edging rounds turn the 14-column gap into a 2.5 in (6.4 cm) arch.
Happy crocheting!