

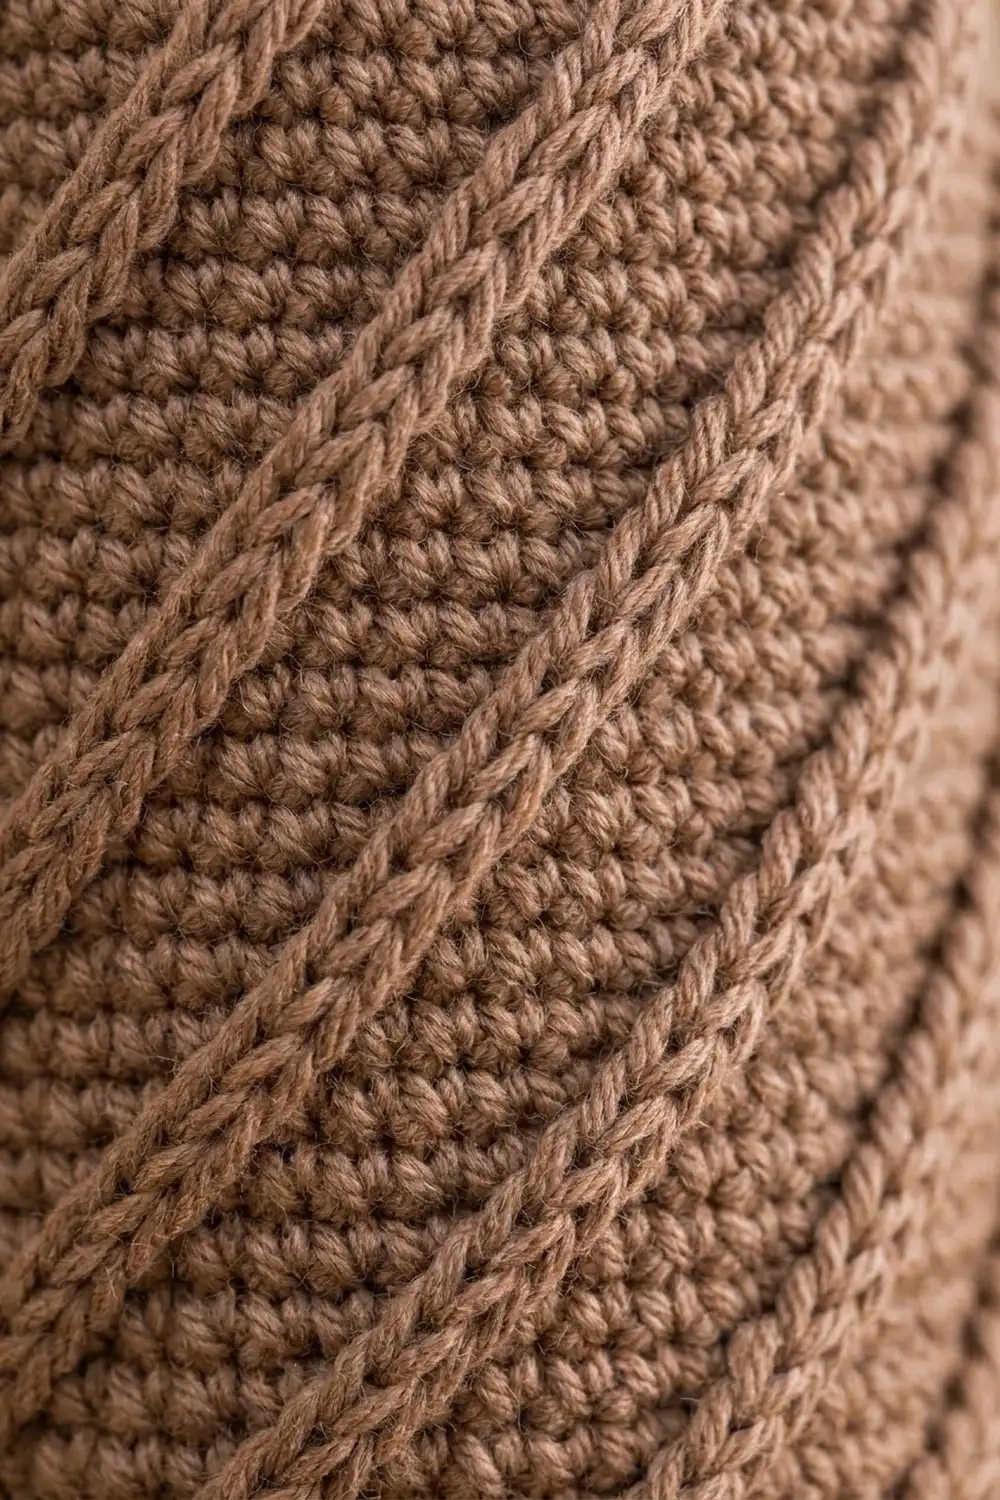
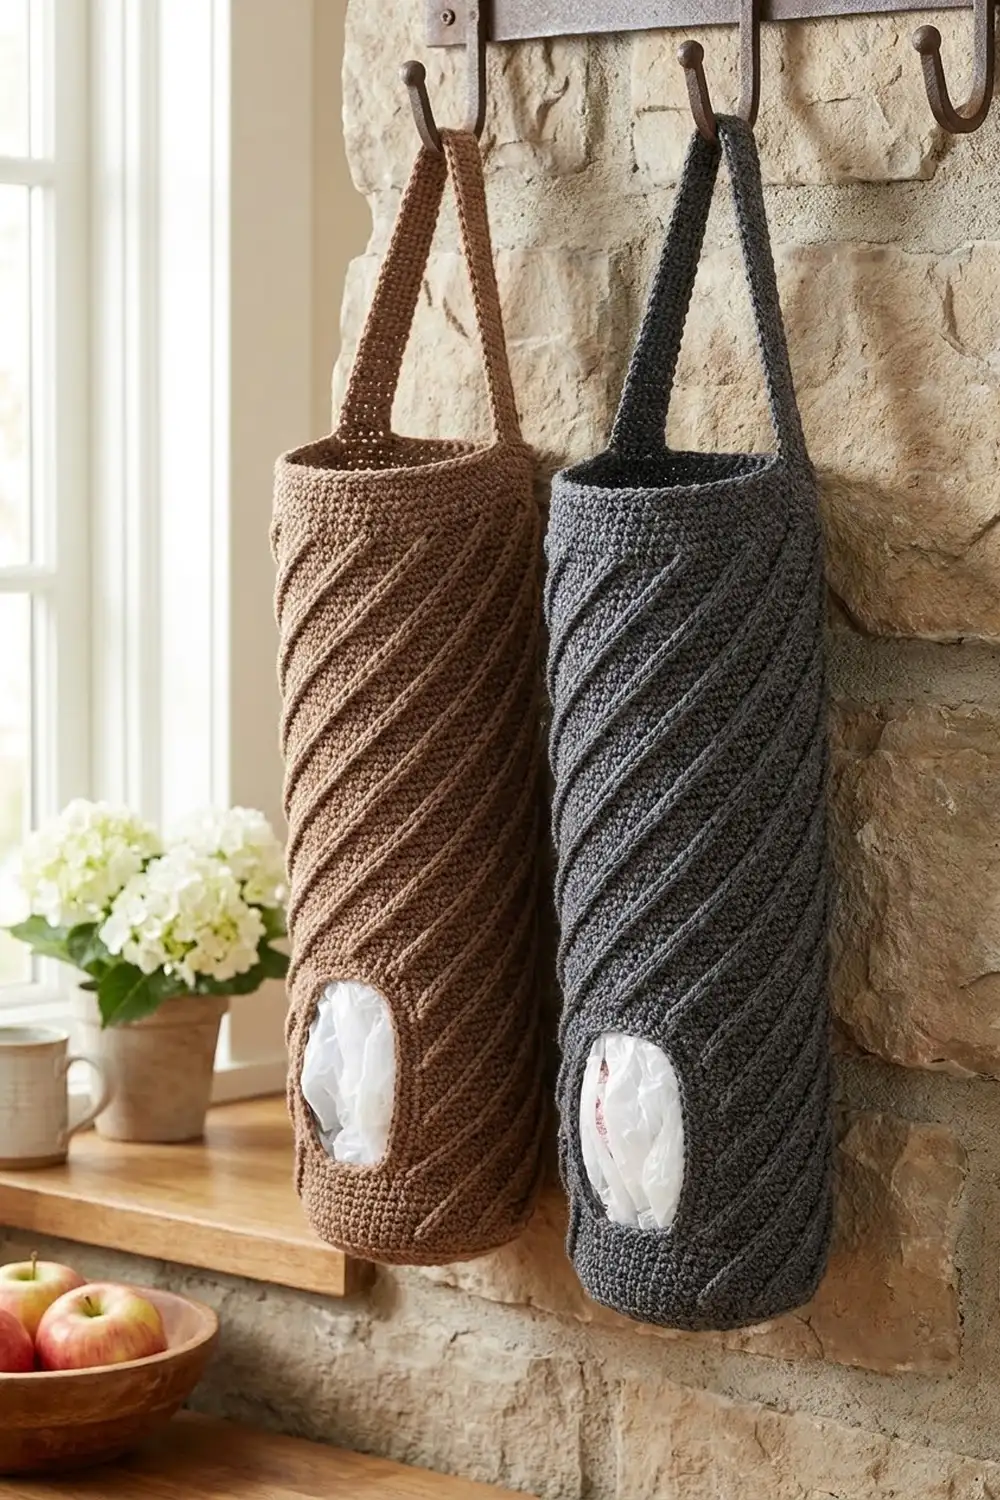
The Mocha Twist Bag Holder tidies away a pile of plastic grocery bags. You stuff bags in at the open top and pull them out one at a time through a low slot on the front. Raised ribs spiral around the tube at a steady diagonal, which makes a plain household item look like decor.
The sample is a warm mocha brown, and the same pattern works well in charcoal gray. A cotton or cotton-blend yarn gives clear rib definition and a firm fabric that keeps its shape when full of bags.
This pattern uses US crochet terms. The finished holder is 7 in (17.8 cm) wide when flat and 15 in (38.1 cm) tall. The hanging loop adds about 3 in (7.6 cm), for a total hanging length of about 18 in (45.7 cm).
You work the whole holder as one piece. You start with an oval base, turn up the sides with a back-loop round, and work spiral-rib rounds that include a chain-and-skip dispenser slot. Two plain rounds finish the top. Last, you work a short tapered strap and loop at center back and edge the slot.
Finished Size and Construction
- Finished size: 7 in (17.8 cm) wide flat × 15 in (38.1 cm) tall, plus a 3 in (7.6 cm) loop
- Circumference: 14 in (35.6 cm), 56 stitches
- Skill level: Intermediate (front post stitches, stitch placement tracking)
- Terminology: US
- Yarn weight: Worsted (#4)
- Hook: 5.0 mm (H-8)
- Number of pieces: 1
- Layout: One tube with a closed oval base, one front opening and one back loop
- Base size: 6.25 × 1.75 in (15.9 × 4.4 cm)
- Body before top edge: 14.5 in (36.8 cm) tall (Rnds 4–61)
- Top edge depth: 0.5 in (1.3 cm) (Rnds 62–63)
Materials
- Yarn: Worsted-weight cotton or cotton blend. Pick a smooth, tightly plied yarn so the post stitches stand out.
- Mocha brown (shown): about 190 g / 320 yd (293 m)
- Charcoal gray option: the same amount, if you want a second holder
- 5.0 mm (H-8) crochet hook
- 1 locking stitch marker for the beginning of the round, plus 2 extra markers
- Tapestry needle
- Scissors
- Measuring tape
- Pins and a spray bottle for blocking
The quantities include a margin of about 10% for your gauge swatch and small tension differences.
Abbreviations (US Terms)
- ch: chain
- sl st: slip stitch
- sc: single crochet
- sc2tog: single crochet 2 together
- BLO: back loop only
- st(s): stitch(es)
- Rnd(s): round(s)
- FPdc: front post double crochet
Special stitch: FPdc. Yarn over and insert the hook from front to back to front around the post of the stitch named. Yarn over and pull up a loop, then [yarn over and pull through 2 loops] twice. Always skip the stitch behind the FPdc, so each FPdc counts as one stitch.
Gauge and Checkpoints
Gauge: 16 sts and 16 rnds = 4 in (10.2 cm) in the spiral rib pattern, worked in the round.
That is 4 sts and 4 rnds per inch (2.5 cm). Because stitch width and round height are equal, each rib moves over 1 st (0.25 in / 0.6 cm) as it rises 1 rnd (0.25 in / 0.6 cm). That gives the 45-degree slant.
Treat the base as your gauge test. Work Rnds 1–3 and measure them before you go further.
- After Rnd 3 (base): 6.25 × 1.75 in (15.9 × 4.4 cm). The outer edge should measure 14 in (35.6 cm).
- After Rnd 23: the body is 5 in (12.7 cm) tall from the base fold.
- After Rnd 43: the body is 10 in (25.4 cm) tall.
- After Rnd 63: the body is 15 in (38.1 cm) tall.
If the base is longer than 6.5 in (16.5 cm), go down to a 4.5 mm hook. If it’s shorter than 6 in (15.2 cm), go up to a 5.5 mm hook. If the stitches are right but the rounds are short, add 1 plain spiral round for every 0.25 in (0.6 cm) you’re missing before the top edge.
Base
Ch 22.
Rnd 1: Sc in 2nd ch from hook (st 1), sc in next 19 ch, 3 sc in last ch. Working along the other side of the chain, sc in next 19 ch, then 2 sc in the same ch as st 1. Don’t join; place a marker in st 1. (44 sts)
Rnd 2: 2 sc in next st, sc in next 19 sts, 2 sc in each of next 3 sts, sc in next 19 sts, 2 sc in each of next 2 sts. (50 sts)
Rnd 3: Sc in next st, 2 sc in next st, sc in next 19 sts, [sc in next st, 2 sc in next st] 3 times, sc in next 19 sts, [sc in next st, 2 sc in next st] 2 times. (56 sts)
Each end of the oval now has 9 sts and each long side has 19 sts (9 + 19 + 9 + 19 = 56). Sts 4–22 form the back side and sts 32–50 form the front side. Keep the marker in st 1 for the rest of the holder, and move it up each round.
Body
The body is worked in continuous spiral rounds. Every round has 56 sts.
Rnd 4: Sc BLO in each st around. (56 sts) The unused front loops make a crisp fold, so the sides stand up from the base.
Rnd 5 (rib set-up): [FPdc around next st, sc in next 7 sts] 7 times. (56 sts: 7 FPdc + 49 sc) The FPdc sit at sts 1, 9, 17, 25, 33, 41 and 49.
Spiral rib rule (Rnds 6–61): Each time you reach the top of an FPdc from the round below, work this sequence: sc in the top of the FPdc, FPdc around the post of that same FPdc, and skip the next st. Work sc in every other st. Each rib moves 1 st to the left every round, and every round keeps 7 FPdc with exactly 7 sc between ribs.
Quick position check: On Rnd 5 the first FPdc is at st 1. On every later round it moves forward 1 st, so it’s at st 2 on Rnd 6, st 3 on Rnd 7, and so on up to st 8 on Rnd 12. On Rnd 13 it’s back at st 1. The other ribs always follow every 8 sts after the first.
Rnds 6–8: Work in the spiral rib rule. (56 sts each: 7 FPdc + 49 sc) On Rnd 8 the FPdc are at sts 4, 12, 20, 28, 36, 44 and 52.
Dispenser Opening
Rnd 9 (slot round): Work sts 1–34 in pattern, ch 12, skip the next 12 sts (sts 35–46), then work sts 47–56 in pattern. (44 sts + 12 ch = 56)
This round normally places FPdc at sts 5, 13, 21, 29, 37, 45 and 53. The ones at 37 and 45 fall inside the skipped section, so leave them out. Those 2 ribs end at the opening. Rnd 9 has 5 FPdc + 39 sc + 12 ch.
Rnd 10: Work sts 1–34 in pattern, sc in each of the 12 ch, then work sts 47–56 in pattern. (56 sts: 5 FPdc + 51 sc) The FPdc are at sts 6, 14, 22, 30 and 54.
Rnd 11 (restart round): Work in pattern, with FPdc at sts 7, 15, 23, 31 and 55. Also start 2 new ribs: at st 39 and st 47, work an FPdc around the post of the sc directly below instead of a sc. (56 sts: 7 FPdc + 49 sc)
The spacing is back to 7 ribs, 8 sts apart. The ribs above the opening carry on the same diagonal as the ribs that ended below it.
Checkpoint: The slot is 3 in (7.6 cm) wide (12 sts × 0.25 in). Its lower edge sits 1.25 in (3.2 cm) above the base fold, because Rnds 4–8 are 5 rnds × 0.25 in.
Upper Body
Rnds 12–61: Work in the spiral rib rule. (56 sts each: 7 FPdc + 49 sc)
Check the height after Rnd 23 at 5 in (12.7 cm) and after Rnd 43 at 10 in (25.4 cm). After Rnd 61, Rnds 4–61 add up to 58 rnds, or 14.5 in (36.8 cm).
Border: Top Edge, Loop and Opening
Border gauge: The top edge is worked in plain sc at the same 4 sts per inch. Because you work 1 sc in each st, the circumference stays at 14 in (35.6 cm). When the holder is flat, each side has 28 sts, which gives the 7 in (17.8 cm) width.
Rnd 62: Sc in each st around, including the tops of the FPdc. (56 sts: 28 front + 28 back)
Rnd 63: Sc in each st around. (56 sts) Sl st in the next st to smooth the step at the end of the spiral. Don’t fasten off.
Why the math works: Neither round increases or decreases. The ribs simply stop under a firm 0.5 in (1.3 cm) band. The top edge stays the same width as the body, so it won’t flare or pull in.
Hanging Loop
Count back from the marker and find sts 9–16 of Rnd 63. They are the center 8 sts of the back side. Fasten off the main yarn, then join new yarn in st 9 with a sl st. Work in rows.
Row 1: Ch 1, sc in sts 9–16, turn. (8 sts)
Row 2: Ch 1, sc2tog, sc in next 4 sts, sc2tog, turn. (6 sts)
Row 3: Ch 1, sc2tog, sc in next 2 sts, sc2tog, turn. (4 sts)
Rows 4–9: Ch 1, sc in each st across, turn. (4 sts each)
Loop: Ch 14, then sl st in the first sc of Row 9 to form a ring. Work 20 sc into the ring, sl st in the last sc of Row 9, and fasten off.
The 9 rows add about 2 in (5.1 cm), and the ring adds about 1 in (2.5 cm). Together that’s the 3 in (7.6 cm) extension.
Opening Edge
Join yarn at the lower right corner of the slot.
Opening round: Sc in each of the 12 skipped Rnd 8 sts and 1 sc in the side gap. Then sc in the other side of each of the 12 chains and 1 sc in the other side gap. Sl st to the first sc and fasten off. (26 sts = 12 + 1 + 12 + 1)
Using 1 st per row edge at each side keeps the corners rounded without bunching. The opening becomes the soft rounded rectangle shown in the photo.
Final Blocking
- Weave in all ends on the inside, following the direction of the ribs.
- Spray the holder evenly until it’s damp but not dripping.
- Stuff it firmly with plastic bags or a rolled towel to fill out the tube.
- Gently shape the base into a smooth oval of 6.25 × 1.75 in (15.9 × 4.4 cm).
- Pat the body to 15 in (38.1 cm) tall from the base fold to the top edge.
- Ease the ribs into straight diagonals, nudging any that wander back into line.
- Pin the opening into a rounded rectangle about 3 in (7.6 cm) wide.
- Hang the holder by its loop to dry, so the strap sets straight.
Final Quality-Control Checklist
- [ ] The base is 6.25 × 1.75 in (15.9 × 4.4 cm) and lies flat with no ruffling.
- [ ] Every round from Rnd 5 to Rnd 63 has 56 sts.
- [ ] Rnds 5–8 and 11–61 each have 7 FPdc, 8 sts apart.
- [ ] The ribs slant at about 45° and have no breaks except at the opening.
- [ ] The opening is 3 in (7.6 cm) wide and centered on the front.
- [ ] The flat width is 7 in (17.8 cm) and the height is 15 in (38.1 cm).
- [ ] The strap is centered on the back, opposite the opening.
- [ ] The loop is firm, with 20 sc covering the chain.
- [ ] All ends are hidden inside.
Troubleshooting
Ribs go straight up instead of slanting: You’re working the FPdc around the post directly below. Always sc in the top of the old FPdc first, then work the new FPdc around that same post.
Stitch count grows: You aren’t skipping the st behind each FPdc. Count each round in groups of 8.
Holder is wider than 7.5 in (19.1 cm) when flat: Your tension is too loose. Go down a hook size and start again from the base.
Opening gapes or sags: Make the chain a little tighter. Also check that the opening round has exactly 26 sc.
Top edge flares: Keep Rnds 62–63 at exactly 56 sc. If it still flares, work them with a hook 0.5 mm smaller.
Loop stretches over time: Work the 20 sc on the loop more tightly, or add a second round of sl sts on the loop.
Care
Hand wash or machine wash cold on a gentle cycle. Reshape the holder and hang it to dry by its loop.
Final Notes
The measurements build on each other in this order:
- A gauge of 4 sts and 4 rnds per inch (2.5 cm) gives a 6.25 × 1.75 in (15.9 × 4.4 cm) base with 56 sts.
- Those 56 sts make a 14 in (35.6 cm) tube that measures 7 in (17.8 cm) wide when flat.
- The 3 in (7.6 cm) slot sits 1.25 in (3.2 cm) above the base.
- Rnds 4–61 give 14.5 in (36.8 cm) of body.
- The 0.5 in (1.3 cm) top edge brings the height to 15 in (38.1 cm).
- The 3 in (7.6 cm) strap and loop bring the total hanging length to 18 in (45.7 cm).
If each checkpoint matches, the finished holder will too.
Happy crocheting!