

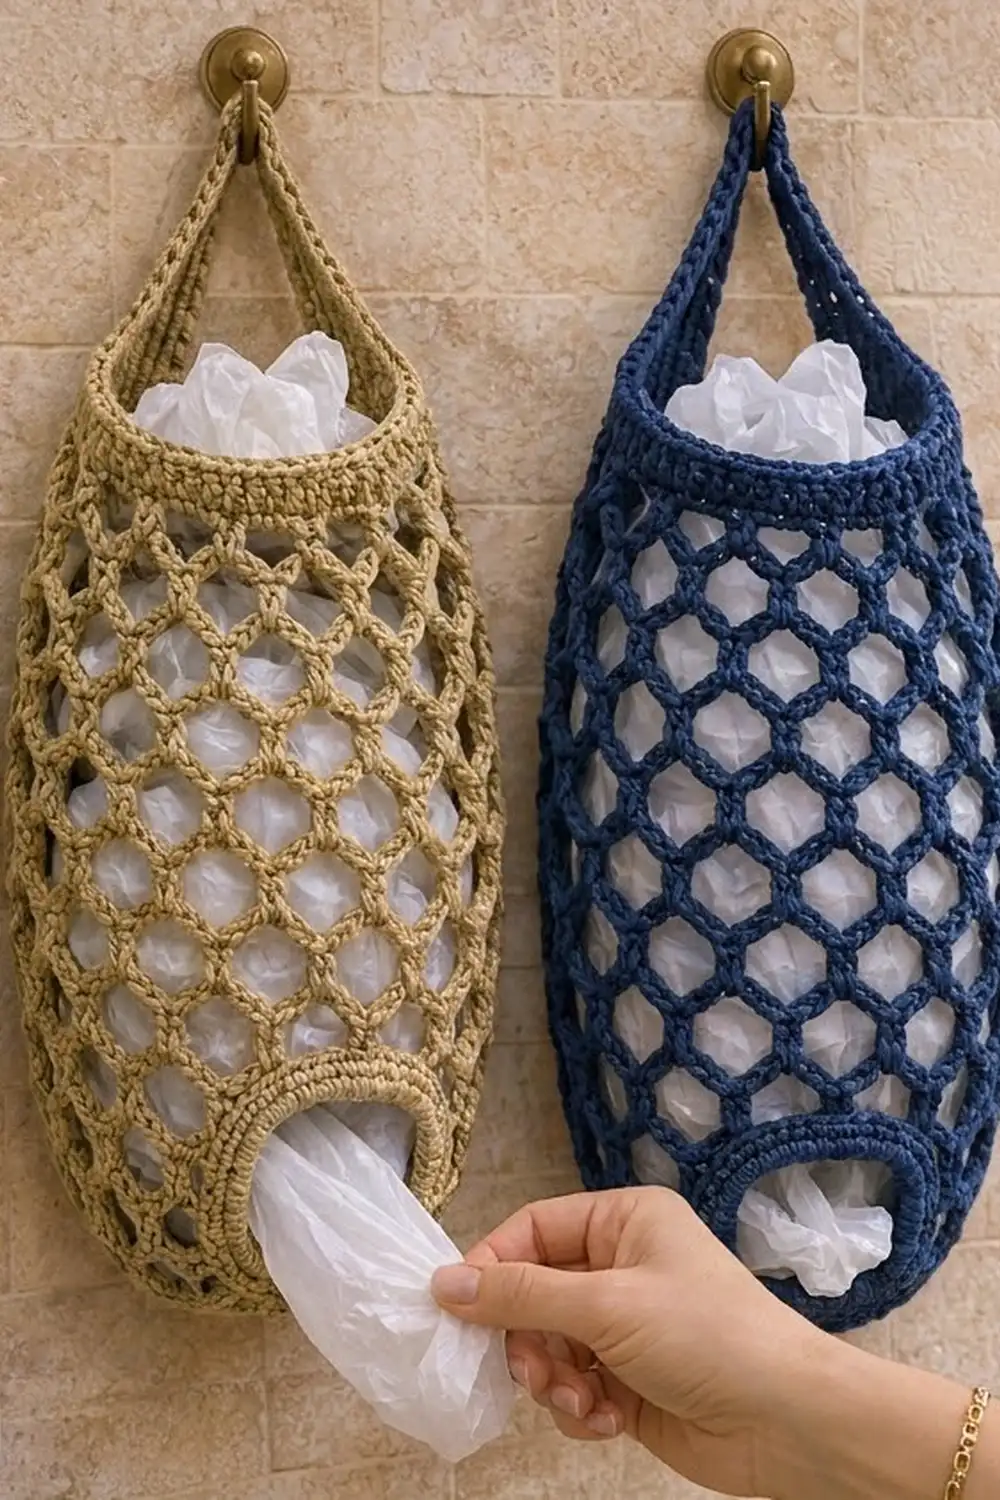
The Pantry Net bag holder is a tall, softly rounded pod with an open diamond mesh. It holds a whole stash of plastic grocery bags. You push the bags in at the top and pull them out one at a time through a framed opening near the bottom.
The sample is in a warm tan cotton that suits stone, wood and cream kitchen colors. It also looks crisp in navy. The mesh lets the white bags show through, so the holder looks light and tidy.
This pattern uses US crochet terms. The finished holder measures about 8 in (20.3 cm) wide when flat and 16 in (40.6 cm) tall, plus an 8 in (20.3 cm) hanging strap.
You work the whole holder as one piece from the bottom up:
- A solid oval base in double crochet
- A solid band of single crochet with a dispensing opening built in
- 16 rounds of chain-loop mesh
- A gathered single-crochet rim
- A strap worked straight off the rim
There is no sewing beyond weaving in ends.
Finished Size and Construction
- Finished size: 8 in (20.3 cm) wide when flat × 16 in (40.6 cm) tall, not counting the strap
- Strap: 1.25 in (3.2 cm) wide × 8 in (20.3 cm) long
- Skill level: Easy-intermediate
- Terminology: US
- Yarn weight: Worsted (#4), cotton or cotton blend
- Hook: 5.0 mm (H-8)
- Number of pieces: 1 (the strap is worked on, not sewn)
- Layout: One vertical tube with the opening centered on the front
- Base size: 5.75 in (14.6 cm) × 3 in (7.6 cm)
- Size before rim: 8 in (20.3 cm) wide when flat × 14.9 in (37.8 cm) tall (base fold to top of the mesh)
- Rim depth: 1.1 in (2.8 cm), which is 5 rounds
Materials
Choose a smooth, firm cotton or cotton-acrylic blend in worsted weight. Cotton holds the mesh shape and doesn’t stretch out under the weight of the bags. Avoid very soft acrylics, because the net will sag.
- Tan / khaki (main color): 100 g, about 160 m (175 yd)
- Alternative colorway: the same amount in navy or any single color
Tools:
- 5.0 mm (H-8) crochet hook
- 4 locking stitch markers
- Tapestry needle
- Scissors
- Tape measure
- Rust-proof pins and a spray bottle for blocking
The yarn amounts include a margin of about 25% for your gauge swatch and tension differences.
Abbreviations (US Terms)
- ch: chain
- sl st: slip stitch
- sc: single crochet
- dc: double crochet
- BLO: back loop only
- sc2tog: single crochet 2 together
- st(s): stitch(es)
- lp: loop
- RS / WS: right side / wrong side
Special stitch: standing sc. Start with a slip knot on the hook. Insert the hook into the stitch, yarn over and pull up a loop, then yarn over and pull through both loops.
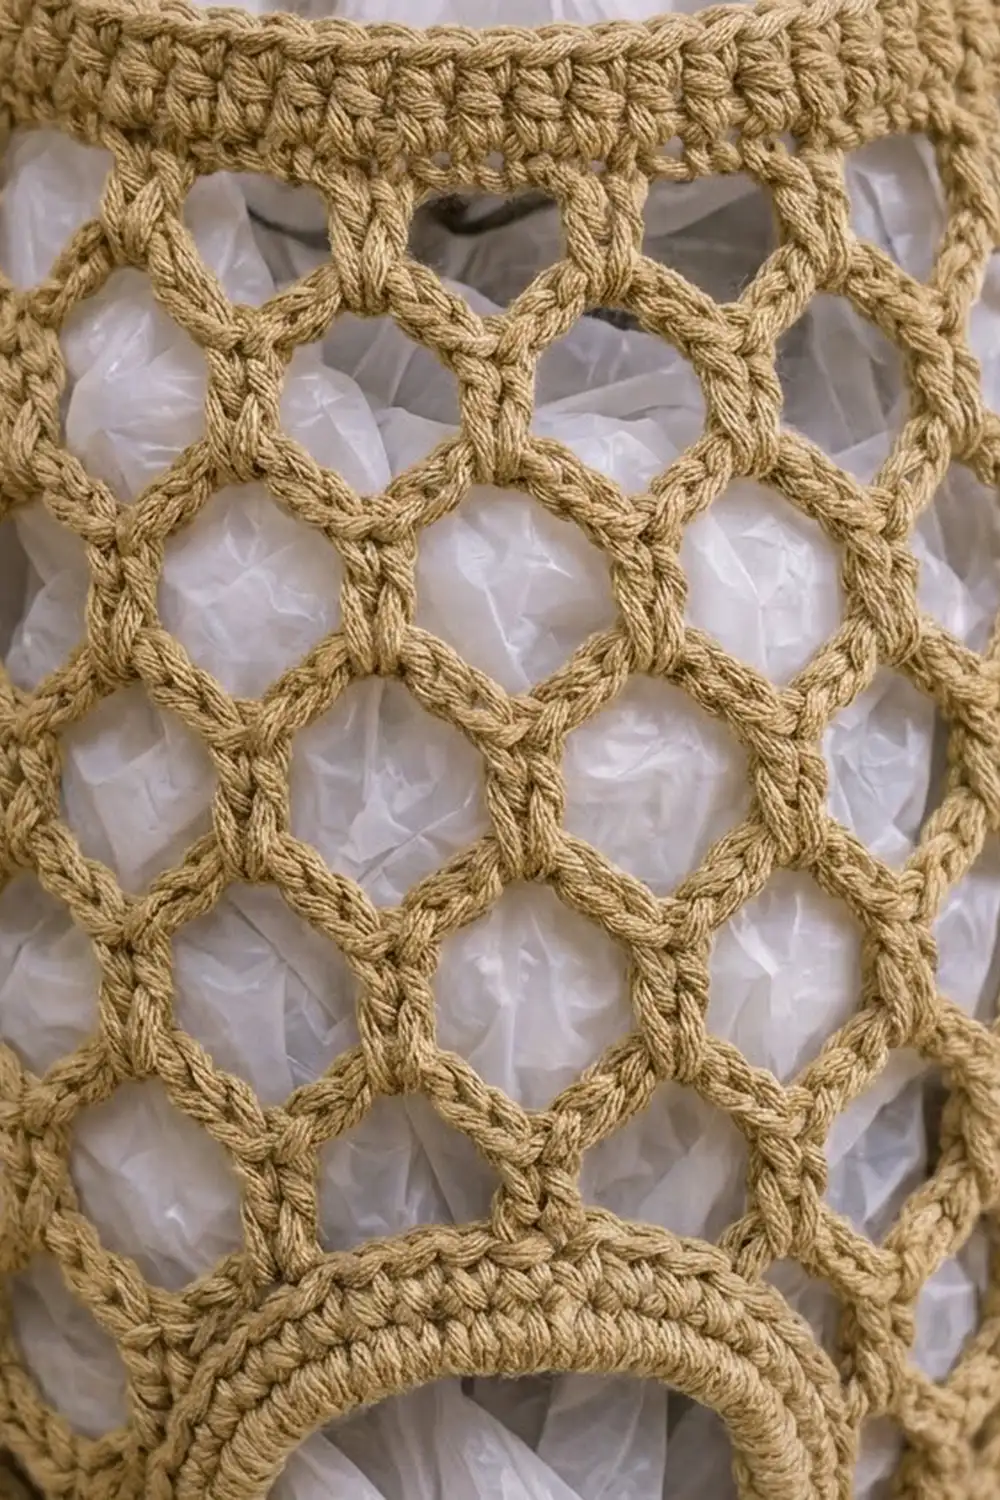
Mesh loop: A “ch-5 loop” is the chain arch between two sc. The last loop of each mesh round is made with ch 2 plus dc into the first sc. It counts as a ch-5 loop and puts your hook in the middle of the loop, ready for the next round.
Gauge and Checkpoints
- Single crochet: 16 sc and 18 rows = 4 in (10.2 cm)
- Double crochet: 16 dc and 8 rows = 4 in (10.2 cm)
- Mesh: 4 mesh rounds = 3 in (7.6 cm) tall, and one ch-5 loop is about 1 in (2.5 cm) wide (unstretched)
Test the base first. It works as your gauge swatch. Check these measurements as you go:
- After Rnd 3: the base measures 5.75 in (14.6 cm) × 3 in (7.6 cm).
- After Rnd 16: the circumference is 16 in (40.6 cm), so the holder is 8 in (20.3 cm) wide when flat. The solid band is 2.9 in (7.4 cm) tall.
- After Rnd 32: the mesh section is 12 in (30.5 cm) tall when hung and lightly stretched.
- After Rnd 37: the top circumference is 12 in (30.5 cm), so the top is 6 in (15.2 cm) wide when flat.
If your pieces are too big: go down half a hook size (4.5 mm) and work the base again.
If your pieces are too small: go up to 5.5 mm (I-9).
If the mesh is the only part that’s off, keep the hook and change the chain length. Use ch 4 for a mesh that’s too loose, or ch 6 for one that’s too tight.
Base
Ch 15.
Rnd 1: 3 dc in 3rd ch from hook (the skipped chs don’t count), dc in next 11 ch, 6 dc in last ch. Rotate and work along the opposite side of the foundation: dc in next 11 ch, 3 dc in the same ch as the first 3 dc. Join with sl st to the first dc. (34 dc)
Rnd 2: Ch 2 (doesn’t count as a st), 2 dc in each of the next 3 sts, dc in next 11 sts, 2 dc in each of the next 6 sts, dc in next 11 sts, 2 dc in each of the last 3 sts. Join. (46 dc)
Rnd 3: Ch 2, (dc in next st, 2 dc in next st) 3 times, dc in next 11 sts, (dc in next st, 2 dc in next st) 6 times, dc in next 11 sts, (dc in next st, 2 dc in next st) 3 times. Join. (58 dc)
Checkpoint: the base measures 5.75 in × 3 in (14.6 cm × 7.6 cm). Each round adds 12 sts, all of them at the two curved ends.
Lower Band with Dispensing Opening
Rnd 4 (turning round): Ch 1, sc in the BLO of each st around. Join. (58 sc)
The front loops left unworked form a crisp ridge, and the sides start to rise.
Rnd 5 (conversion round): Ch 1, (sc in next 8 sts, 2 sc in next st) 6 times, sc in last 4 sts. Join.
Count: 58 sts worked once each + 6 extra = 64 sc
Rnd 6: Ch 1, sc in each st around. Join. (64 sc) Fasten off.
Mark the opening:
- Flatten the holder so the long straight sides of the base become the front and back.
- Find the center of the front.
- Place a marker in the 7th st to the right of center and another in the 7th st to the left.
- The 14 sts from marker to marker are the opening. The other 50 sts carry the rows.
Row 7 (RS): Make a standing sc in the first st after the marked group, then sc in the next 49 sts. You stop at the st just before the marked group. Turn. (50 sc)
Rows 8–14: Ch 1, sc in each st across. Turn. (50 sc)
You finish after a WS row, which is 8 rows in total. The 14 marked sts stay unworked.
Rnd 15 (bridge round, RS): Ch 1, sc in each of the 50 sts. Ch 14 across the gap, then join with sl st to the first sc. (50 sc + 14 ch)
Rnd 16: Ch 1, sc in each sc and in each ch. Join. (64 sc)
Checkpoint: the opening is 14 sts wide, 3.5 in (8.9 cm), and 8 rows tall, about 1.8 in (4.6 cm). The solid band from the base ridge to here measures 2.9 in (7.4 cm).
Mesh Body
Rnd 17 (mesh setup):
- Ch 1, sc in the first st.
- Ch 5, skip 3 sts, sc in next st. Repeat from * 14 more times (15 repeats in total).
- Ch 2, skip the last 3 sts, and dc in the first sc to close.
This gives 16 ch-5 loops: 15 repeats plus the closing loop. The math works because 64 sts ÷ 4 sts per loop = 16 loops.
Rnds 18–32:
- Ch 1, sc around the post of the closing dc below.
- Ch 5, sc in next ch-5 lp. Repeat from * 14 more times.
- Ch 2, dc in the first sc.
Each round has 16 loops.
Each new sc sits in the center of a loop below, so the loops stagger into the diamond net. You work 16 mesh rounds in total.
Checkpoint: hang the holder from your finger. The mesh should measure about 12 in (30.5 cm) and the circumference should still be about 16 in (40.6 cm). If the net flares, your chains are too loose. If it pulls in, your chains are too tight.
Rim, Strap and Edgings (Border)
Border gauge: the same as the sc gauge, 4 sc and 4.5 rows per 1 in (2.5 cm).
Rnd 33 (rim conversion): Ch 1, 3 sc in the closing loop (around the dc and ch-2), then 3 sc in each remaining ch-5 lp. Join.
Count: 16 loops × 3 sc = 48 sc
This gathers the top from 16 in to 12 in (40.6 cm to 30.5 cm) around, so the bags don’t spill out of the top.
Rnds 34–37: Ch 1, sc in each st around. Join. (48 sc) Fasten off after Rnd 37.
The rim is 5 rounds, 1.1 in (2.8 cm) deep.
Mark the strap:
- Flatten the holder with the opening centered on the front.
- At each side fold, mark the 5 sts centered on the fold.
- Check the count per side: 19 front + 5 side + 19 back + 5 side = 48.
Strap:
- Row 1: Make a standing sc in the first marked st on the right side fold, then sc in the next 4 sts. Turn. (5 sc)
- Rows 2–36: Ch 1, sc in each st. Turn. (5 sc)
The strap measures 8 in (20.3 cm), because 36 rows ÷ 4.5 rows per in = 8 in.
To attach the strap:
- Lay the strap over the top of the holder without twisting it.
- Hold Row 36 against the 5 marked sts on the left side fold.
- Sl st through both layers in each of the 5 st pairs.
- Fasten off.
Strap edging (front and back):
- Join with a sl st at one end of the front rim.
- Sl st in each of the 19 front rim sts.
- Continue with 1 sl st in each of the 36 row ends along the strap’s front edge. Join. (55 sl st)
- Repeat on the back: 19 + 36 = 55 sl st.
The rim edge is worked 1 st per st and the strap edge 1 st per row end, so neither side gains or loses length. The edges stay flat and don’t ruffle.
Opening edging:
- Join with a sc at the lower right corner of the opening.
- Sc in each of the 14 free sts of Rnd 6 (the bottom edge of the opening).
- Work 8 sc up the side, 1 in each row end.
- Sc in the free loops of each of the 14 bridge chains.
- Work 8 sc down the other side.
- At each of the 4 corners, sc2tog the last st of one edge with the first st of the next.
- Join.
Count: 44 sts worked 1-per-stitch or row end − 4 = 40 sc
The 4 corner decreases round the rectangle into the soft, framed opening. At rest it measures about 3 in (7.6 cm) wide and 1.25 in (3.2 cm) tall, and it stretches as you pull bags through.
Final Blocking
- Weave in all ends along solid sc sections, never through the mesh chains.
- Mist the whole holder until it is damp, but not soaked.
- Stuff it loosely with plastic bags or a rolled towel so it is 8 in (20.3 cm) wide when flat.
- Pin the base flat into its oval and smooth the opening frame into a rounded shape.
- Hang it by the strap and gently tug the mesh downward so the diamonds open evenly.
- Let it dry completely while hanging, then check that the body measures 16 in (40.6 cm).
Final Quality-Control Checklist
- The base is flat and oval, 5.75 in × 3 in (14.6 cm × 7.6 cm), and the BLO ridge shows clearly.
- The lower band has 64 sts and the opening is centered on the front.
- There are 16 loops in every mesh round, and none were skipped or doubled.
- The rim has 48 sts with 19 on the front and 19 on the back.
- The strap sits square at both side folds and isn’t twisted.
- The opening edging lies flat with rounded corners.
- All ends are woven into solid areas.
Troubleshooting
The base cups upward. Your increases are too tight. Go up one hook size for Rnds 1–3 only.
The base ripples. Your dc are too loose. Work the base with a hook half a size smaller.
The mesh spirals or leans. Make sure each round starts with the sc around the post of the closing dc, not into the dc top.
The loop count drifts. Place a marker in the closing loop of every round and count 16 loops before you join.
The opening gapes or puckers. If it gapes, add a fifth sc2tog at the bottom center of the opening edging. If it puckers, leave out the corner decreases.
The strap stretches. Work it with a hook half a size smaller, or add a sl st edging on both long sides.
Care
Hand wash in cool water and lay it flat or hang it to dry. Reshape the oval base and the opening while it is damp.
Final Notes
The size of the finished holder is set by a short chain of measurements, so check each one in turn:
- The 58-st base sets the bottom at 14.5 in (36.8 cm) around.
- The conversion round opens the body to 64 sts, or 16 in (40.6 cm) around.
- 64 sts become exactly 16 mesh loops.
- 16 loops gather to a 48-st rim, 12 in (30.5 cm) around.
- The 5-st strap fits the marked side folds.
Measure at each checkpoint and the holder will finish at 8 in × 16 in (20.3 cm × 40.6 cm).
Happy crocheting!