

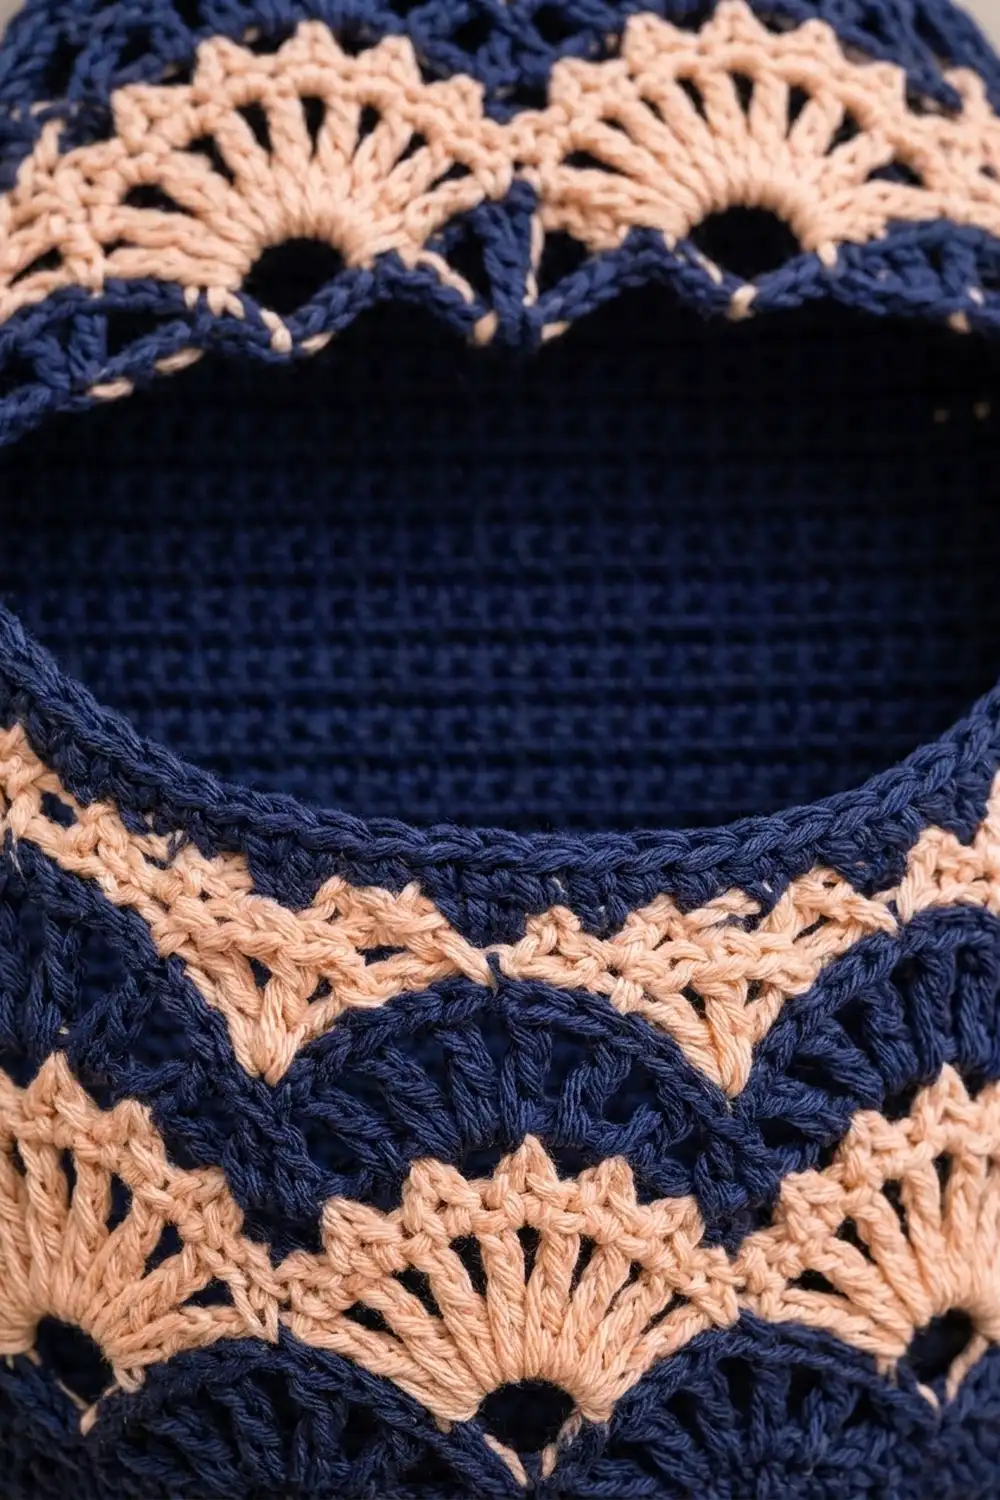
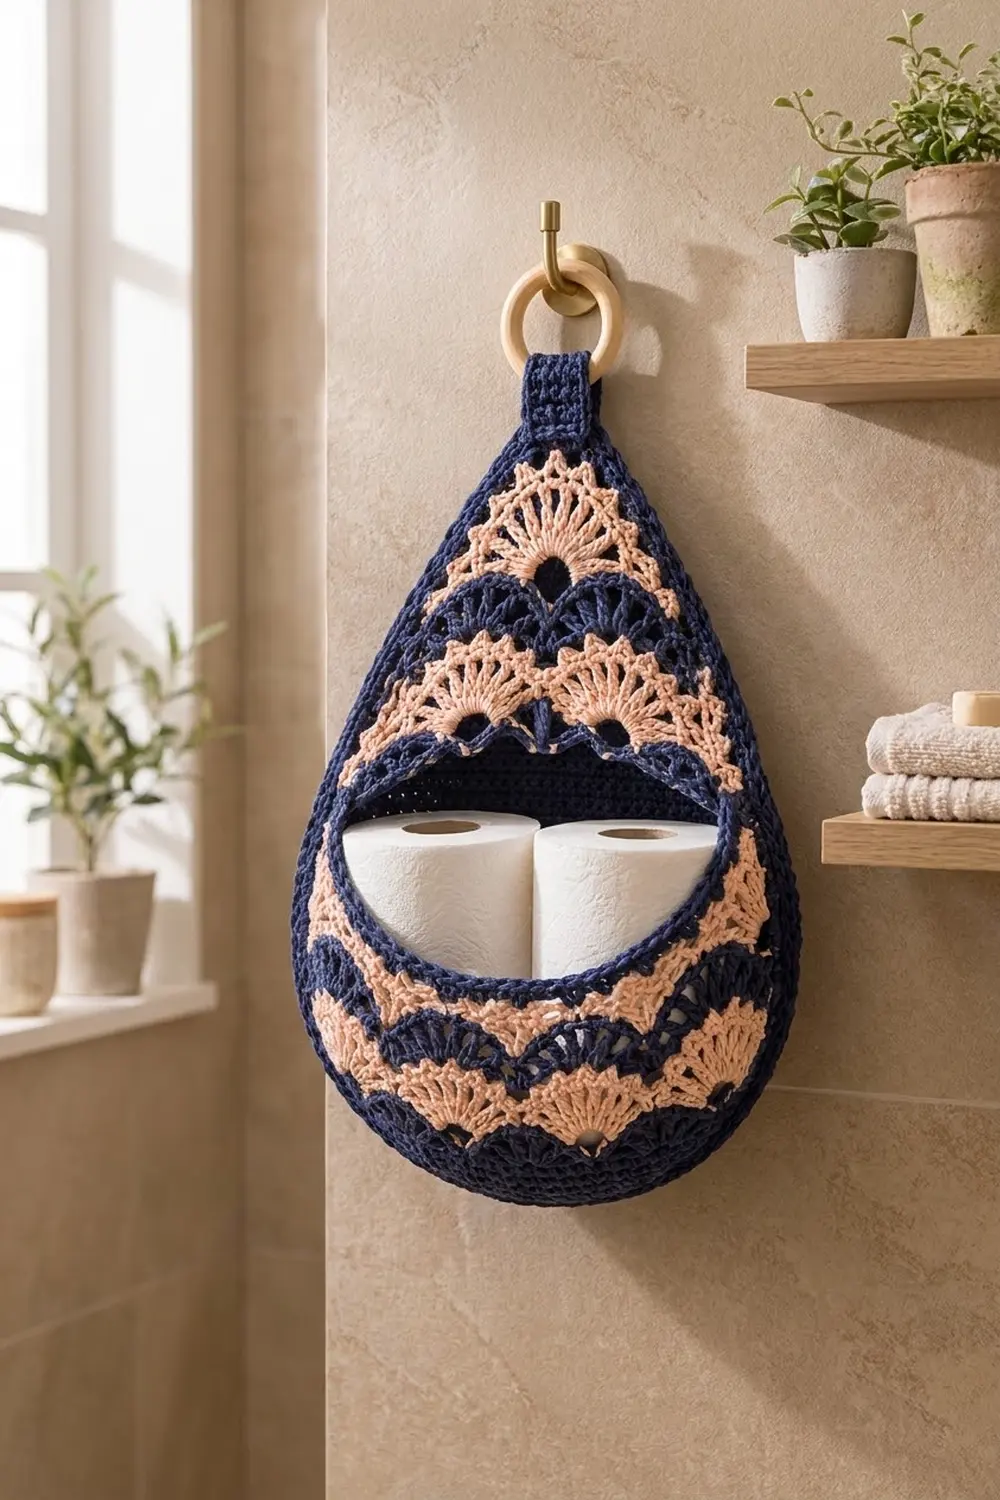
This teardrop holder hangs on a hook and holds two spare toilet rolls in a lace pocket. The front has rows of peach fan shells, each capped with navy chain arches, over a solid navy back. A raised rope border finishes the edge, and a wooden ring at the top keeps it hanging straight.
The two colors are deep navy and soft peach. The navy holds the shape and outlines everything, and the peach fans add a seashell look that suits a calm, spa-style bathroom.
This pattern uses US crochet terms. The finished holder is 11.5 in (29.2 cm) wide and 16 in (40.6 cm) tall, not counting the tab and ring.
Here is how it goes together. You work a solid back panel in rows. Then you work two lace front sections, a lower pocket and an upper cap, and trim their opening edges. You sew the front sections onto the back and work a two-round border through all layers. Last, you fold a short tab over a wooden ring and sew it to the point.
Finished Size and Construction
- Finished size: 11.5 in x 16 in (29.2 cm x 40.6 cm), not counting the tab
- Skill level: Intermediate
- Terminology: US
- Yarn weight: Worsted (#4) cotton
- Hook: 4.0 mm (G-6)
- Number of pieces: 4 (back, pocket, cap, tab) plus 1 wooden ring
- Layout: pocket over back rows 1–29, open gap over rows 30–42, cap over rows 43–70
- Back panel before border: 11 in x 15.5 in (27.9 cm x 39.4 cm)
- Pocket: 10.75 in (27.3 cm) wide x 6.5 in (16.5 cm) tall
- Cap: 7.75 in (19.7 cm) wide at the base x about 6 in (15.2 cm) tall
- Border depth: 0.25 in (0.6 cm) on every edge
Materials
Use a smooth, firm worsted-weight cotton or cotton blend. Cotton keeps the fans crisp and doesn’t stretch much under the weight of the rolls. Avoid fuzzy or very soft acrylics, because the pocket will sag.
- Navy (Color A): 250 g / about 425 m
- Peach (Color B): 100 g / about 170 m
These quantities include a margin of about 15% for your swatch and for weaving in ends.
Tools:
– 4.0 mm (G-6) crochet hook
– One 2.75 in (7.0 cm) natural wooden ring
– Tapestry needle
– 8–10 locking stitch markers
– Rust-proof pins
– Measuring tape
– Blocking mat and spray bottle
Abbreviations (US Terms)
- ch – chain
- sl st – slip stitch
- sc – single crochet
- dc – double crochet
- sc2tog – single crochet 2 together
- rev sc – reverse single crochet (crab stitch)
- sp – space
- st(s) – stitch(es)
- RS / WS – right side / wrong side
Special stitch – Fan: sk 2 sts, 7 dc in the next st, sk 2 sts. Each fan uses 6 base stitches, counting the sc that follows it. Spreading 7 dc from one stitch leaves the small open center at the base of each shell.
Rev sc: Working from left to right (right-handers), insert the hook into the next st to the right, pull up a loop, yo, and draw through both loops. This makes the raised rope edge.
Gauge and Checkpoints
- Solid sc: 16 sts and 18 rows = 4 in (10.2 cm)
- Lace: 1 fan repeat (6 sts) = 1.5 in (3.8 cm), and 1 band (fan row, arch row, and sc row) = 1 in (2.5 cm)
Test one piece first. Chain 26 in navy and work Rows 1–7 of the Pocket. The swatch should measure 6.25 in (15.9 cm) across Row 1 and about 2.25 in (5.7 cm) tall, with 31 sts in Row 4.
If the swatch is too big, go down half a hook size. If it is too small, go up half a size. Change the hook, not your hand tension, so the back and front stay matched.
Checkpoints:
– Back, Row 16: 11 in (27.9 cm) wide, 3.5 in (8.9 cm) tall
– Back, Row 30: 6.75 in (17.1 cm) tall
– Back, Row 42: 8 in (20.3 cm) wide, 9.25 in (23.5 cm) tall
– Back, Row 70: 15.5 in (39.4 cm) tall
– Pocket after Row 20: 10.75 in x 6.5 in (27.3 cm x 16.5 cm)
Back Panel (Navy)
Turn at the end of every row. Ch 1 at the start of a row does not count as a stitch.
Row 1: Ch 25, sc in 2nd ch from hook and in each ch across. (24 sts) This is 6 in (15.2 cm).
Rows 2–6: Ch 1, 2 sc in first st, sc across to last st, 2 sc in last st. (Row 2: 26, Row 3: 28, Row 4: 30, Row 5: 32, Row 6: 34 sts)
Row 7: Ch 1, sc in each st across. (34 sts)
Rows 8–16: Repeat Row 2 on even rows and Row 7 on odd rows. (Row 8: 36, Row 10: 38, Row 12: 40, Row 14: 42, Row 16: 44 sts)
These rows give the teardrop its round bottom. Checkpoint: 11 in (27.9 cm) wide.
Rows 17–30: Ch 1, sc in each st across. (44 sts) This is the widest section.
Row 31: Ch 1, sc2tog, sc across to last 2 sts, sc2tog. (42 sts)
Row 32: Ch 1, sc in each st across. (42 sts)
Rows 33–70: Repeat Rows 31–32. Decrease on every odd row and work even on every even row.
Counts after each decrease row: Row 33: 40, Row 35: 38, Row 37: 36, Row 39: 34, Row 41: 32, Row 43: 30, Row 45: 28, Row 47: 26, Row 49: 24, Row 51: 22, Row 53: 20, Row 55: 18, Row 57: 16, Row 59: 14, Row 61: 12, Row 63: 10, Row 65: 8, Row 67: 6, Row 69: 4 sts. Row 70 has 4 sts.
There are 20 decrease rows in total (Rows 31–69), and 44 − 40 = 4. Fasten off.
Place markers in the side edges at Rows 29, 30, 42, and 43.
Lace Front: The Three-Row Band
Both lace sections are built from repeating bands. Each band has three rows, and k is the number of fans in the band.
- Fan row (peach, RS): Over 6k + 1 sts, sc in first st, Fan, sc in next st, repeat k times. (8k + 1 sts: k fans and k + 1 sc)
- Arch row (navy, WS): Ch 1, sc in first sc, ch 3, sk 3 dc, sc in 4th (center) dc, ch 3, sk 3 dc, sc in next sc, repeat k times. (2k + 1 sc and 2k ch-3 sps)
- Sc row (navy, RS): Ch 1, sc in first sc, 2 sc in ch-3 sp, sc in next sc, repeat across. (6k + 1 sts)
Color handling. Every sc row ends at the same edge, which we’ll call edge X. Leave navy there. Start each fan row at the opposite edge (edge Y) with a standing sc in peach. Work across with the RS still facing, then fasten off the peach, leaving a 6 in (15.2 cm) tail. Pick the navy back up at edge X for the arch row.
Pocket (Lower Front Section)
Row 1 (navy): Ch 26, sc in 2nd ch from hook and across. (25 sts, k = 4)
Row 2 (peach): Fan row. (4 fans, 33 sts)
Row 3 (navy): Arch row.
Row 4 (navy, increase): This is a sc row with 3 extra sts at each end.
– Ch 1, 3 sc in first sc, 3 sc in first ch-3 sp, sc in next sc.
– Work the band pattern across to the last ch-3 sp.
– 3 sc in last ch-3 sp, 3 sc in last sc.
That is 25 worked in pattern + 6 added = 31 sts (k = 5).
Rows 5–7: Fan row (5 fans), arch row, increase row as Row 4. (25 + 6 = 31 becomes 31 + 6 = 37 sts, k = 6)
Rows 8–10: Fan row (6 fans), arch row, increase row. (37 + 6 = 43 sts, k = 7)
Rows 11–19: Work the three-row band three times with no increases. (Sc rows: 43 sts. Fan rows: 7 fans, 57 sts.)
Row 20 (navy): Ch 1, rev sc in each st across. (43 sts) This makes the rope trim on the bottom edge of the opening.
The pocket has 6 peach fan rows. Checkpoint: 10.75 in x 6.5 in (27.3 cm x 16.5 cm). Fasten off.
Cap (Upper Front Section)
Fan rows in the cap step in by 3 stitches at each end. This shapes the taper without decreasing in the sc rows.
Step-in fan row: Join peach with a standing sc in the 4th st from edge Y. Work Fan, sc in next st (k − 1) times, leaving the last 3 sts unworked.
That uses 3 + 6(k − 1) + 1 + 3 = 6k + 1 sts, so it fits exactly.
Arch row after a step-in: Pick up navy at edge X, sl st in the 3 unworked sts, ch 1, then work the arch row as usual.
Row 1 (navy): Ch 32, sc in 2nd ch from hook and across. (31 sts, k = 5)
Rows 2–4: Full fan row (5 fans), arch row, sc row. (31 sts)
Rows 5–7: Step-in fan row (4 fans), arch row, sc row. (25 sts)
Rows 8–10: Step-in fan row (3 fans), arch row, sc row. (19 sts)
Rows 11–13: Step-in fan row (2 fans), arch row, sc row. (13 sts)
Rows 14–16: Step-in fan row (1 fan), arch row, sc row. (7 sts)
Row 17 (navy): Ch 1, sc2tog, sc 3, sc2tog. (5 sts)
Row 18 (navy): Ch 1, sc2tog, sc 1, sc2tog. (3 sts) Fasten off.
The cap has 5 peach fan rows.
Bottom edge trim:
– Row 1: With RS facing, join navy in the first foundation ch loop. Ch 1, sc in each loop across. (31 sts)
– Row 2: Ch 1, rev sc in each st across. (31 sts) Fasten off.
Checkpoint: about 7.75 in (19.7 cm) wide at the base and about 6 in (15.2 cm) tall.
Make All Pieces
| Piece | Qty | Colors |
|---|---|---|
| Back panel | 1 | Navy only |
| 1 | Navy + 6 peach fan rows | |
| Cap | 1 | Navy + 5 peach fan rows |
| Tab | 1 | Navy only |
Tab: Ch 7, sc in 2nd ch from hook and across. (6 sts) Work 15 more rows of sc, for 16 rows total, about 3.5 in x 1.5 in (8.9 cm x 3.8 cm). Fasten off, leaving a 12 in (30.5 cm) tail.
Layout (front view, RS):
           [ TAB + RING ]
              /    \
             / CAP  \        back Rows 43–70
            |--------|
            | OPENING|       back Rows 30–42
            |--------|
            | POCKET |       back Rows 1–29
             \______/
     BACK PANEL behind everything, Rows 1–70
Joining
Lay the back RS down, then lay the pocket and cap on top with their RS facing up, so the wrong sides are together.
Pocket:
1. Pin the pocket’s Row 1 to the back’s Row 1.
2. Pin the pocket’s top corners to the back markers at Row 29, and pin the widest point of the pocket to back Row 16.
3. Whipstitch with navy, making 1 stitch in each back row end up each side (29 per side) and 1 stitch in each back foundation st across the bottom (24).
4. The pocket has 25 bottom sts against the back’s 24, so ease the extra stitch in at the center.
Cap:
1. Pin the cap’s trimmed base to the back markers at Row 43 and the cap’s tip to back Row 70.
2. Whipstitch 1 stitch per back row end, 28 per side, and 1 stitch in each of the back’s 4 top sts.
Tension. Pull each whipstitch just snug. If you pull too tight, the lace edges ripple. If you leave them loose, the front gaps away from the back. The 3-st steps at the sides of the cap fall inside the seam and won’t show.
Checkpoint: The joined piece still measures 11 in x 15.5 in (27.9 cm x 39.4 cm). Leave the opening unsewn from back Row 30 to Row 42. Measured flat, it is about 2.75 in (7.0 cm) tall at the sides, and it opens into a crescent once the rolls are inside.
Border
Border gauge: Work 1 sc per back stitch along the top and bottom edges, and 1 sc per back row end along the sides. The sides are angled, so each one is longer than its height. That’s why 1 sc per row end (4.5 per inch, compared with the 4 per inch sc gauge) lies flat instead of ruffling.
Round 1 (navy): Work through both layers wherever the front is present.
– Join at the bottom right. Work 2 sc in the first foundation st, sc in the next 22 sts, and 2 sc in the last st. (26 sts)
– Sc in each of the 70 row ends up the left side. (70 sts)
– Across the top, work 2 sc in the first st, sc in the next 2 sts, and 2 sc in the last st. (6 sts)
– Sc in each of the 70 row ends down the right side. (70 sts)
– Sl st to the first sc. (26 + 70 + 6 + 70 = 172 sts)
Round 2: Ch 1, rev sc in each st around. (172 sts) Sl st to join and fasten off.
Why the math works. Each side count comes straight from the back panel: 24 bottom sts, 70 rows per side, and 4 top sts. The only extra stitches are the 4 rounding increases at the bottom curve and the tip, so 24 + 70 + 4 + 70 + 4 = 172. Round 2 has no increases. Two rounds add 0.25 in (0.6 cm) to each edge, so 11 in becomes 11.5 in (29.2 cm) and 15.5 in becomes 16 in (40.6 cm).
Tab: Fold the tab over the wooden ring so the ends meet. Sew one end to the back of the point and the other to the front of the cap’s tip, overlapping 1 in (2.5 cm) on each side.
Final Blocking
- Weave in all ends along the navy rows so no peach tails show through the lace.
- Mist the holder with water until it is evenly damp. Don’t soak it.
- Lay it flat on a blocking mat, RS up.
- Pin the outline to 11.5 in x 16 in (29.2 cm x 40.6 cm).
- Open each fan with your fingertips and pin the center dc of the top fans so they stand up.
- Pin the opening edges straight, but don’t stretch them.
- Slip a folded towel into the pocket so it dries with a slight curve.
- Let it dry completely, then unpin it.
Final Quality-Control Checklist
- [ ] Back: 44 sts at the widest point and 4 sts at the tip
- [ ] Pocket: 43 sts at the top, with 6 peach fan rows
- [ ] Cap: 31 sts at the base and 3 sts at the tip, with 5 peach fan rows
- [ ] Both opening edges trimmed with rev sc
- [ ] Border: 172 sts in each round
- [ ] Finished size: 11.5 in x 16 in (29.2 cm x 40.6 cm)
- [ ] Tab sewn securely through both layers with the ring centered
- [ ] Two 4.5 in (11.4 cm) rolls fit side by side
Troubleshooting
Fans curl or cup. Your dc are too tight. Loosen them, or go up half a size for the peach rows only.
Pocket wider than the back. Check that Row 4, Row 7, and Row 10 each added exactly 6 sts. If the count is right, ease the extra width evenly into the side seams.
Cap stair-steps show. Tuck the 3-st steps under the whipstitch and catch them again in border Round 1.
Border ruffles on the sides. Skip 1 row end every 10 rows in Round 1. If you do, subtract the same number of sts from the side counts.
Holder tilts when hung. The tab is off-center. Re-sew it so it sits directly over the tip.
Pocket sags. Your yarn has too much stretch. Rework it in a firmer cotton, or line the back with felt.
Care
Hand wash in cool water with mild soap, press out the water in a towel, and dry it flat in shape. Keep it away from direct shower spray so the cotton dries between uses.
Final Notes
Here is the measurement chain:
1. The sc gauge of 16 sts = 4 in (10.2 cm) sets the back at 11 in x 15.5 in (27.9 cm x 39.4 cm).
2. The lace gauge of 1 fan = 1.5 in (3.8 cm) makes the 43-st pocket 10.75 in (27.3 cm) wide and the 31-st cap 7.75 in (19.7 cm) wide.
3. Whipstitching at 1 stitch per back row end keeps the layers aligned.
4. The 172-st border adds 0.25 in (0.6 cm) on every edge, for a finished size of 11.5 in x 16 in (29.2 cm x 40.6 cm).
Check each stage before moving on, and the holder will hang flat and hold its rolls neatly.
Happy crocheting!