

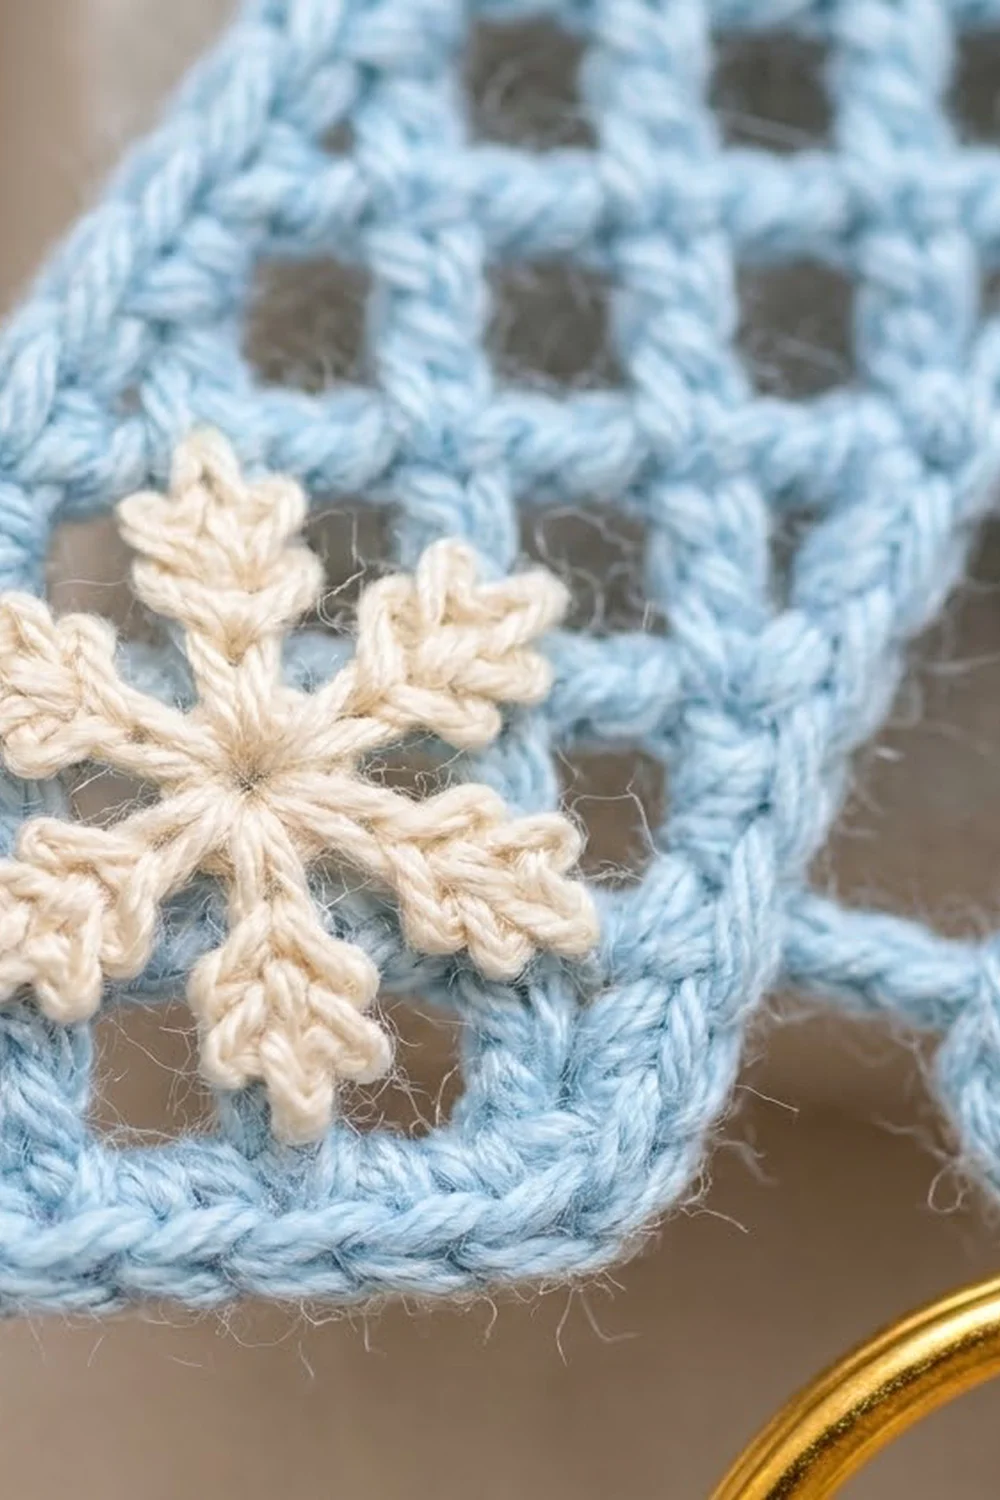
This pretty initial ornament is a capital letter Y worked in open filet mesh. It uses a soft powder-blue cotton, and each arm has a small cream snowflake sewn on. A neat single crochet edge goes all the way around the letter, and a gold ring hangs from a small loop at the bottom of the V.
The style is quiet and wintry. Hang it on a tree, a gift bag, a window latch, or a doorknob, or put it on a key ring for someone whose name starts with Y.
The pattern uses US crochet terms. The finished ornament measures 3.9 in (9.9 cm) wide by 4.3 in (10.9 cm) tall, not counting the ring.
You work the letter in one piece from the bottom up. The stem comes first, then a widening row, and then the two arms are worked separately. A single round of sc border goes around everything and makes the hanging loop as it passes. Last of all, you crochet two tiny snowflakes and sew them on.
Finished Size and Construction
- Finished size: 3.9 in (9.9 cm) wide x 4.3 in (10.9 cm) tall
- Skill level: Easy-intermediate (you should know basic filet mesh)
- Terminology: US
- Yarn weight: Sport (2) for the letter, fingering (1) for the snowflakes
- Hook: 3.0 mm for the letter, 2.25 mm for the snowflakes
- Number of pieces: 1 letter plus 2 small appliqués
- Layout: 10 mesh rows on a 9-mesh-wide grid
- Mesh size: 0.4 in (1.0 cm) square
- Size before border: 3.6 in (9.1 cm) x 4 in (10.2 cm)
- Border depth: 0.15 in (0.4 cm) on every side
Materials
Use a smooth, mercerized cotton or cotton blend. It gives crisp, square meshes and blocks well. Fuzzy or very stretchy yarn will blur the grid.
- Color A, powder blue: sport-weight cotton, 8 g / 24 m (26 yd)
- Color B, cream: fingering-weight cotton, 2 g / 6 m (7 yd)
Tools:
– 3.0 mm crochet hook
– 2.25 mm crochet hook
– Tapestry needle
– Scissors
– Rust-proof pins and a foam blocking mat
– Spray bottle with water
– One gold split key ring, 1 in (2.5 cm) across
– One gold jump ring, 6 mm, and two small pliers
The quantities above include a margin of about 25% for swatching and tails.
Abbreviations (US Terms)
- ch – chain
- sl st – slip stitch
- sc – single crochet
- dc – double crochet
- dtr – double treble crochet (yo 3 times, insert hook, pull up a loop, [yo, pull through 2 loops] 4 times)
- sp – space
- sk – skip
- st(s) – stitch(es)
- RS – right side
Special techniques:
- Mesh: a ch-2 space framed by a dc on each side. The dcs are called “posts.” A row of n meshes has n + 1 posts.
- Beginning increase (beg inc): Ch 7, then dc in the first dc (the post at the base of the chain). This adds one mesh at the start of the row. In the ch-7, chains 1–2 form the bottom of the new mesh, chains 3–5 form its outer post, and chains 6–7 form its top. The 5th ch is the top of that outer post.
- End increase (end inc): After the last dc of the row, ch 2, then dtr in the same st as that last dc. This adds one mesh at the end of the row.
Gauge and Checkpoints
Gauge: 5 meshes and 5 rows = 2 in (5.1 cm) square, measured after blocking, using the 3.0 mm hook. One mesh = 0.4 in (1.0 cm).
The stem works as your gauge swatch. Measure at each checkpoint before going on:
- After Row 1: 3 meshes = 1.2 in (3.0 cm) wide.
- After Row 5: stem = 1.2 in (3.0 cm) wide x 2 in (5.1 cm) tall.
- After Row 7: stem = 2.8 in (7.1 cm) tall.
- After Row 8: widest stem row = 2 in (5.1 cm) wide; total height 3.2 in (8.1 cm).
- After Row 10: full letter = 3.6 in (9.1 cm) wide x 4 in (10.2 cm) tall.
- After border: 3.9 in (9.9 cm) x 4.3 in (10.9 cm).
If the stem is too big: drop to a 2.75 mm hook and start again. If it’s too small: go up to a 3.25 mm hook.
If the meshes are taller than they are wide, your dcs are loose. Pull each dc’s last loop snug, or make the ch-2 sections slightly looser.
The Letter Y
Use Color A and the 3.0 mm hook.
Stem
Foundation and Row 1: Ch 14. Dc in 8th ch from hook. [Ch 2, sk 2 ch, dc in next ch] twice. Turn.
(3 meshes, 4 posts.)
The 7 skipped chains at the start of Row 1 act as its turning chain and first mesh. The 5th of those chains, counted from the first dc, is the top of that edge post.
Row 2: Ch 5 (counts as dc + ch 2). Dc in next dc, ch 2, dc in next dc, ch 2, dc in 5th ch of the 7 skipped chains. Turn.
(3 meshes, 4 posts.)
Rows 3–7: Ch 5 (counts as dc + ch 2). [Dc in next dc, ch 2] twice, dc in 3rd ch of turning ch-5. Turn.
(3 meshes, 4 posts, in each row.)
Checkpoint: the stem should measure 1.2 in (3.0 cm) wide x 2.8 in (7.1 cm) tall.
Widening Row
You need names for the two side edges. Side A is the edge where Row 7 ended, so you start Row 8 there. Side B is the opposite edge.
Row 8: Beg inc (ch 7, dc in first dc). [Ch 2, dc in next dc] twice, ch 2, dc in 3rd ch of turning ch-5, then end inc (ch 2, dtr in same st). Turn.
(5 meshes, 6 posts.)
Name the Row 8 posts for the arm rows, starting from Side B:
- Q0: the dtr at Side B
- Q1, Q2, Q3, Q4: the four dcs
- Q5: the ch-7 post at Side A (its 5th ch)
The center mesh of this row sits between Q2 and Q3. It becomes the floor of the V-notch.
Arm 1 (Side B)
Row 9: Beg inc (ch 7, dc in first dc, which is the top of the Q0 dtr). Ch 2, dc in Q1, ch 2, dc in Q2. Turn.
(3 meshes, 4 posts.)
You stop at Q2, so the center mesh stays open.
Row 10: Sl st in each of next 2 ch and in next dc. This moves you one mesh outward and creates the inner step of the V. Ch 5 (counts as dc + ch 2), dc in next dc, ch 2, dc in 5th ch of the Row 9 ch-7, then end inc (ch 2, dtr in same st).
(3 meshes, 4 posts.)
Fasten off.
Arm 2 (Side A)
Row 9: With the same side facing as for Arm 1’s Row 9, join Color A with a sl st in Q3. Ch 5 (counts as dc + ch 2), dc in Q4, ch 2, dc in 5th ch of the Row 8 ch-7 (Q5), then end inc (ch 2, dtr in same st). Turn.
(3 meshes, 4 posts.)
Row 10: Beg inc (ch 7, dc in top of dtr). [Ch 2, dc in next dc] twice. Stop here, leaving the inner mesh of Row 9 uncovered.
(3 meshes, 4 posts.)
Fasten off.
Grid Check
Lay the letter flat and count the meshes in each row. Columns are numbered 1–9 across:
Row 10:  ■ ■ ■ · · · ■ ■ ■     cols 1–3 and 7–9
Row 9:   · ■ ■ ■ · ■ ■ ■ ·     cols 2–4 and 6–8
Row 8:   · · ■ ■ ■ ■ ■ · ·     cols 3–7
Rows 1–7:· · · ■ ■ ■ · · ·     cols 4–6
Each arm moves outward one mesh per row, with three meshes on every arm row. Each side of the V steps inward by one mesh, down to the single-mesh notch floor. That gives the diagonal arms and the flat arm tops seen in the photo.
Weave in all tails now, before the border.
Border
Border gauge: 3 sc along every mesh edge, which is 0.4 in (1.0 cm). Work these 3 sc into the ch-2 space, around the edge post, or along the underside of an increase mesh, whichever edge you are covering.
Corners: The outline has two kinds of corner.
- Outer corners point outward. Work 1 extra sc in each one.
- Inner corners turn into the shape. Work no extra st there; go straight on to the next edge and keep the yarn snug.
Rnd 1 (RS): With RS facing and the 3.0 mm hook, join Color A with a sc in the bottom-left corner of the stem. Work around the letter counterclockwise. A corner sc is counted in the section it starts.
- Stem bottom: 9 sc across the 3 foundation meshes, then 1 sc in the corner. With the joining sc, this section has 11 sc.
- Right stem side: 3 sc around each of the 7 row ends = 21 sc.
- Right shoulder steps: this edge has 6 mesh edges (3 under extensions, 3 up row ends) and 3 outer corners.
- 3 sc under the Row 8 extension, 1 corner sc, 3 sc up the Row 8 edge.
- 3 sc under the Row 9 extension, 1 corner sc, 3 sc up the Row 9 edge.
- 3 sc under the Row 10 extension, 1 corner sc, 3 sc up the Row 10 edge.
- Section total: 21 sc.
- Right arm top: 1 corner sc, 9 sc across 3 meshes, 1 corner sc = 11 sc.
- V-notch:
- 3 sc down the inner Row 10 post.
- 3 sc in the exposed Row 9 ch-2 sp, 1 corner sc.
- 3 sc down the inner Row 9 post.
- Notch floor: sc in the center Row 8 ch-2 sp. Ch 6, sl st in the sc just made to form a loop. Work 10 sc into the ch-6 loop, then sl st in the same sc. Work 2 more sc in the same ch-2 sp.
- 3 sc up the inner Row 9 post, 1 corner sc.
- 3 sc in the exposed Row 9 ch-2 sp.
- 3 sc up the inner Row 10 post.
- Section total: 23 sc, plus the loop (ch 6 + 10 sc), which is not counted.
- Left arm top: 1 corner sc, 9 sc, 1 corner sc = 11 sc.
- Left shoulder steps: this mirrors section 3.
- 3 sc down the Row 10 edge, 1 corner sc, 3 sc under the Row 10 extension.
- 3 sc down the Row 9 edge, 1 corner sc, 3 sc under the Row 9 extension.
- 3 sc down the Row 8 edge, 1 corner sc, 3 sc under the Row 8 extension.
- Section total: 21 sc.
- Left stem side: 21 sc.
Sl st to the first sc. Total: 140 sc (11 + 21 + 21 + 11 + 23 + 11 + 21 + 21). Fasten off and weave in the ends.
Why the math works: The outline is made of 42 mesh-length edges:
- stem bottom: 3
- stem sides: 7 + 7
- shoulder steps: 6 + 6
- arm tops: 3 + 3
- notch: 7
At 3 sc per edge that gives 126 sc. The outline has 14 outer corners, and each one gets 1 extra sc, adding 14 for a total of 140. The 10 inner corners get nothing extra, because an inside turn needs less length. This keeps the edge flat with no ruffling or puckering.
The sc round adds 0.15 in (0.4 cm) to each side. So 3.6 in (9.1 cm) becomes 3.9 in (9.9 cm), and 4 in (10.2 cm) becomes 4.3 in (10.9 cm).
Snowflake Appliqués (Make 2)
Use Color B and the 2.25 mm hook.
Rnd 1: Magic ring, ch 1, 6 sc in ring. Sl st to first sc. Pull the ring tight.
(6 sc.)
Rnd 2: Make 6 arms, one for each sc of Rnd 1, by repeating these steps 6 times:
- Ch 4 for the arm stem.
- Make 3 picots: [ch 3, sl st in 3rd ch from hook] 3 times.
- Sl st in the 4th ch of the stem to close the three-picot tip.
- Sl st in each of the remaining 3 stem ch, back toward the center.
- Sl st in the next sc.
(6 arms, each with a three-picot tip.)
Fasten off and leave an 8 in (20.3 cm) tail. Each snowflake measures about 0.8 in (2.0 cm) across.
Attach: Center one snowflake on the top two rows of each arm. Thread the tail onto the tapestry needle and stitch the center down to the mesh bars underneath. Then tack each arm tip with one small stitch. Weave the tail in on the back.
Hardware
Open the 6 mm jump ring with two pliers by twisting the ends sideways, never by pulling them apart. Slip it through the crocheted loop and the gold split ring, then close it fully.
Final Blocking
- Wet the ornament in cool water, or spray it until it is damp all the way through.
- Press out the extra water in a towel. Don’t wring it.
- Lay it RS up on the foam mat.
- Pin the two outer corners at the base of the stem, 1.2 in (3.0 cm) apart plus the border, so the pins are 1.5 in (3.8 cm) apart.
- Pin the outer top corner of each arm so the full width is 3.9 in (9.9 cm).
- Pin the arm tops level with each other, 4.3 in (10.9 cm) above the stem base.
- Pin the outer step corners of each arm so the diagonals look even.
- Nudge each mesh square with a fingertip or blunt needle.
- Let it dry completely, then unpin.
Final Quality-Control Checklist
- [ ] The stem has 3 meshes across in each of the 7 rows.
- [ ] Row 8 has 5 meshes, and each arm has 3 meshes in Rows 9 and 10.
- [ ] The V-notch has a single-mesh floor with two even steps on each side.
- [ ] The border has 140 sc, and the hanging loop sits at the notch floor.
- [ ] The finished size is 3.9 in (9.9 cm) x 4.3 in (10.9 cm).
- [ ] Both snowflakes sit level and centered, and the arm tips are tacked down.
- [ ] The jump ring is fully closed with no gap.
- [ ] All tails are woven in on the back.
Troubleshooting
The meshes are rectangles, not squares. Change the height of your dc, not the chain length. Use a tighter yo, or a half-size smaller hook.
The beginning increase mesh is floppy. That’s normal before the border. The sc round and blocking firm it up. Pull the ch-7 snug before working the next dc.
The border ruffles. You probably worked extra sc at the inner corners. Check them: only the 14 outer corners get an extra sc.
The border puckers. You may have skipped the outer-corner sc, or worked fewer than 3 sc on some edges. Count section by section.
The arms lean. Block again, and pin each step corner of the arms.
The snowflake curls. Steam it lightly before sewing, or tack down all six tips.
Care
Hand wash in cool water with mild soap and dry flat. Re-pin to shape if needed. Remove the metal rings before washing.

Final Notes
The measurement chain is:
- one mesh is 0.4 in (1.0 cm);
- the 3-mesh stem is 1.2 in (3.0 cm) wide;
- 10 rows make 4 in (10.2 cm) of height;
- the 9-mesh grid is 3.6 in (9.1 cm) wide;
- the 140-sc border adds 0.15 in (0.4 cm) on each side, finishing at 3.9 in (9.9 cm) x 4.3 in (10.9 cm).
If you match the gauge at the stem, everything after it falls into place. Two cream snowflakes and a gold ring finish the letter.
Happy crocheting!