

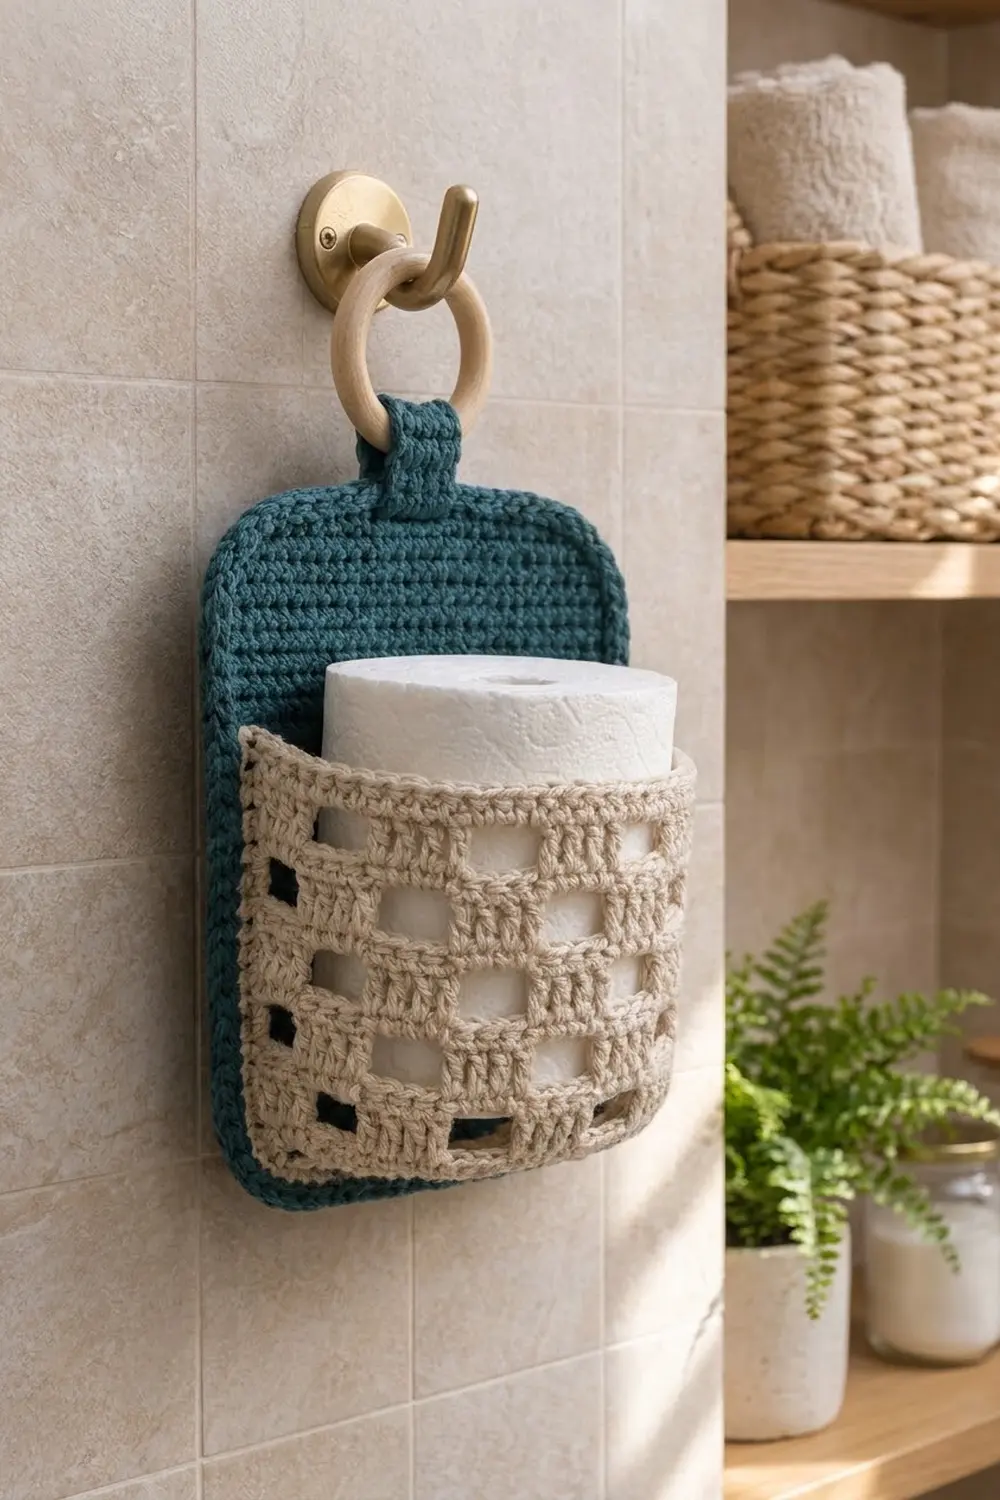
The Teal Harbor holder stores a spare roll of toilet paper on the wall. A solid teal back panel hangs from a wooden ring, and a cream filet pocket holds one standard roll upright where you can reach it.
The colors are deep teal and soft natural cream. The dense single crochet panel contrasts with the open checkerboard of the filet pocket, which gives the holder a calm, spa-like look that suits beige tile, wood accents and green plants.
This pattern uses US crochet terms. The finished holder measures 8 in (20.3 cm) wide by 11 in (27.9 cm) tall, not counting the hanging tab. The pocket holds a roll about 4 1/2 in (11.4 cm) across and about 4 in (10.2 cm) tall.
Construction is simple. You work the panel in single crochet rows and add a two-round border with softened corners. You crochet the pocket in the round from an oval base and add filet walls on top. The tab is a short single crochet strip. Then you sew the pieces together and loop the tab through the ring.
Finished Size and Construction
- Finished size: 8 in × 11 in (20.3 cm × 27.9 cm), panel with border
- Skill level: Easy+
- Terminology: US crochet terms
- Yarn weight: worsted (#4), cotton or cotton blend
- Hook: 5.0 mm (H-8)
- Number of pieces: 3 crocheted pieces (panel, pocket, tab) + 1 wooden ring
- Layout: tab centered at the top; pocket centered on the lower half of the panel
- Panel body before border: 7 in × 10 in (17.8 cm × 25.4 cm)
- Border depth: about 1/2 in (1.3 cm) per side
- Pocket: 18 in (45.7 cm) around, walls about 3 1/2 in (8.9 cm) tall
- Tab: 1 1/2 in × 6 in (3.8 cm × 15.2 cm)
Materials
Use a smooth worsted-weight cotton. Cotton holds its shape, handles bathroom humidity well, and shows the filet windows crisply. Avoid fuzzy or very stretchy yarn, because the pocket will sag under the roll.
- Color A, Teal: 90 g, about 153 m (panel, border, tab)
- Color B, Cream: 65 g, about 110 m (pocket)
These quantities include a margin of about 15–20% for gauge differences and the gauge swatch.
Tools:
– 5.0 mm (H-8) crochet hook
– Wooden ring, 2 in (5.1 cm) outer diameter
– Tapestry needle
– 4 locking stitch markers
– Rustproof pins and a blocking mat
– Measuring tape
– Scissors
Abbreviations (US Terms)
- ch – chain
- sl st – slip stitch
- sc – single crochet
- dc – double crochet
- BLO – back loop only
- sk – skip
- sp – space
- st(s) – stitch(es)
- rnd – round
- inc – 2 sc in the same stitch
Special stitch – Filet block and window: A block is 3 dc side by side. A window is ch 3 worked across 3 skipped stitches, or across a block in the round below. Each block and each window counts as 3 stitches.
Gauge and Checkpoints
Single crochet gauge: 16 sc × 18 rows = 4 in (10.2 cm).
Filet gauge: 16 sts (blocks and windows) × 8 rnds = 4 in (10.2 cm), so each filet round adds 1/2 in (1.3 cm).
Work a 20-stitch sc swatch for 20 rows before you start. Gauge matters most for the pocket, because its circumference has to fit the roll.
Checkpoints:
– Panel after Row 10: about 7 in (17.8 cm) wide and 2.2 in (5.6 cm) tall.
– Panel after Row 45: 7 in × 10 in (17.8 cm × 25.4 cm).
– Panel after the border: 8 in × 11 in (20.3 cm × 27.9 cm).
– Pocket base after Rnd 10: about 6 1/4 in × 4 3/4 in (15.9 cm × 12.1 cm).
– Pocket walls after Rnd 17: about 3 in (7.6 cm) tall from the turning ridge.
If your piece is too big, go down 0.5 mm in hook size. If it is too small, go up 0.5 mm. Don’t change the stitch counts: the border and pocket math depend on them.
Back Panel
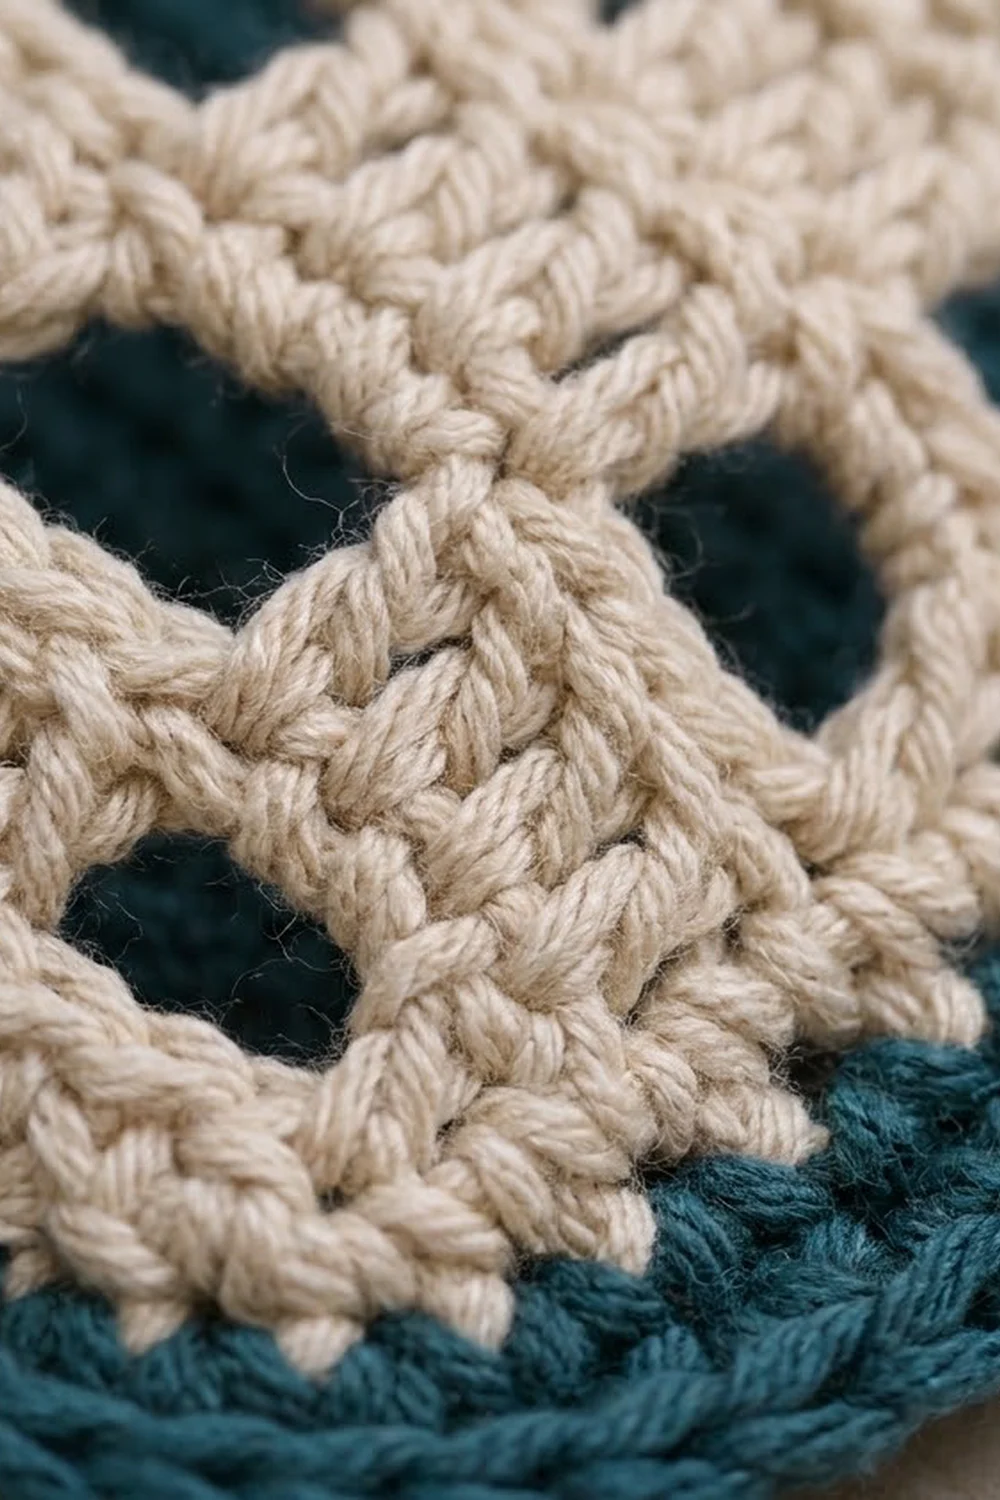
With Color A:
Row 1: Ch 29. Sc in 2nd ch from hook and in each ch across. (28 sc)
Rows 2–45: Ch 1 (does not count as a st), turn, sc in each st across. (28 sc)
Check: 7 in × 10 in (17.8 cm × 25.4 cm). Don’t fasten off; continue straight into the border.
With Color B. The pocket is worked in joined rounds. Don’t turn. Join each round with a sl st to the first stitch, then ch 1 (sc rounds) or ch 3 (filet rounds). Keep the joins lined up, because they will become the hidden back center of the pocket.
Oval Base
The base has two straight sections of 6 sts each and two rounded ends. The ends grow by 3 sts each round, so each round adds 6 sts in total.
Rnd 1: Ch 9. Sc in 2nd ch from hook, sc in next 6 ch, 3 sc in last ch. Working along the other side of the chain, sc in next 6 ch, 2 sc in the same ch as the first sc. Join. (18 sc: 2 straights of 6 + 2 ends of 3)
Rnd 2: Ch 1. Sc in the first st, then work 2 sc in each of the 3 end sts at each end and sc in each of the 6 straight sts on each side. Join. (24 sc: 6 + 6 + 6 + 6)
Rnds 3–10: Ch 1. On each straight, sc in each of the 6 sts. At each end, work [sc in next (R − 2) sts, inc] 3 times, where R is the number of the round you are working. Join.
Each end grows from 3 × (R − 1) sts to 3 × R sts. Totals for each round:
- Rnd 3: 30 sts
- Rnd 4: 36 sts
- Rnd 5: 42 sts
- Rnd 6: 48 sts
- Rnd 7: 54 sts
- Rnd 8: 60 sts
- Rnd 9: 66 sts
- Rnd 10: 72 sts (2 straights of 6 + 2 ends of 30)
Check: the base is about 6 1/4 in × 4 3/4 in (15.9 cm × 12.1 cm) and lies flat.
Walls
Rnd 11 (turning ridge): Ch 1. Sc BLO in each st around. Join. (72 sc)
Rnd 12: Ch 1. Sc in each st around. Join. (72 sc)
Rnd 13 (Filet A): Ch 3 (counts as dc), dc in next 2 sts, ch 3, sk 3. Dc in next 3 sts, ch 3, sk 3. Repeat from * 10 more times. Join to the top of the beginning ch-3. (12 blocks + 12 windows = 36 dc + 36 ch = 72 sts)
Rnd 14 (Filet B): Sl st in next 2 dc and into the next ch-3 sp. Ch 3 (counts as dc), 2 dc in the same sp, ch 3. 3 dc in next ch-3 sp, ch 3. Repeat from * 10 more times. Join. (12 blocks + 12 windows = 72 sts)
Each new block now sits over a window and each new window over a block, which gives the staggered checkerboard.
Rnds 15–17: Repeat Rnd 14. (72 sts each round)
Check: the walls are about 3 in (7.6 cm) tall from the turning ridge.
Rnd 18 (conversion): Ch 1. Sc in each dc and 3 sc in each ch-3 sp. Join. (36 sc in dc + 36 sc in spaces = 72 sc)
Rnd 19: Ch 1. Sc in each st around. Join. (72 sc) Fasten off and leave a 40 in (101.6 cm) tail for sewing.
Check: the walls are about 3 1/2 in (8.9 cm) tall, and the rim measures 18 in (45.7 cm) around.
Hanging Tab
With Color A:
Row 1: Ch 7. Sc in 2nd ch from hook and in each ch across. (6 sc)
Rows 2–27: Ch 1, turn, sc across. (6 sc)
Fasten off and leave a 16 in (40.6 cm) tail. Check: 1 1/2 in × 6 in (3.8 cm × 15.2 cm).
Make All Pieces
- Color A: 1 back panel (with border), 1 tab
- Color B: 1 pocket
Layout (front view):
        [ ring ]
        [ tab  ]
+----------------------+
|                      |
|     teal panel       |
|                      |
|  +----------------+  |
|  |  cream pocket  |  |
|  |  (filet walls) |  |
|  +----------------+  |
+----------------------+
Joining
Sew the pieces together after the panel border is finished and blocked (see the next two sections).
Pocket to panel:
1. Flatten the pocket so its round-joins line up at the back center. Put a marker 12 sts to each side of the join on Rnd 19. Those 24 sts, 6 in (15.2 cm) wide, form the back of the pocket.
2. Center the pocket on the panel. The base fold (Rnd 11) should sit 1 in (2.5 cm) above the inner edge of the border, with about 1 in (2.5 cm) of panel body showing at each side.
3. With the Color B tail, whipstitch the 24 back sts of Rnd 19 to the panel, one panel stitch per pocket stitch.
4. Sew down each side of the back section, working through the outer edge of each wall round into the panel.
5. Sew along the back half of the base fold.
Keep your tension snug but not tight. The stitching should hold the pocket firmly without puckering the panel. The front 48 sts stay free and bulge forward to hold the roll.
Tab to ring and panel:
1. Slide the tab through the ring and fold it in half so both short ends meet.
2. Center the ends on the back of the panel at the top edge, overlapping the panel by 1 1/2 in (3.8 cm).
3. Whipstitch around the overlapped edges through both tab layers and the panel’s wrong side only, so the stitching doesn’t show on the front.
Check: about 1 1/2 in (3.8 cm) of folded tab rises above the panel, including the part wrapped around the ring.
Border
Work this border on the panel before you sew anything on. Border gauge is the same as the body: 16 sc = 4 in (10.2 cm). Along the sides, work 8 sc for every 9 rows (16 sts ÷ 18 rows).
Rnd 1: Ch 1. Do not turn. Work 3 sc in the first st of Row 45 (corner), sc in the next 26 sts, 3 sc in the last st (corner).
– Down the side: work 40 sc evenly across the 45 row ends.
– Bottom: 3 sc in the first foundation ch (corner), sc in the next 26 ch, 3 sc in the last ch (corner).
– Up the other side: 40 sc evenly across the row ends.
– Join to the first sc.
(144 sc: 26 top + 26 bottom + 40 + 40 sides + 4 corners of 3)
Counting side by side with the shared corner stitches: top and bottom are 30 sts each and the sides are 44 sts each. Then 30 + 30 + 44 + 44 − 4 shared corners = 144.
Rnd 2: Ch 1. Sc in each straight st. At each 3-st corner, work 2 sc in the first st, 1 sc in the center st and 2 sc in the third st. Join. (152 sc: 26 + 26 + 40 + 40 + 4 corners of 5)
Fasten off and weave in the ends.
Why the math works: The top and bottom take 1 sc per stitch, so they stay exactly 7 in (17.8 cm) between corners. The sides take 40 sc over 45 rows, the same 8-for-9 ratio as the gauge, so they lie flat. A square corner needs 2 extra sts per round. Rnd 2 spreads those 2 sts across 3 stitches instead of piling them on the center, which rounds the corner off. The two rounds add about 1/2 in (1.3 cm) per side, so 7 in × 10 in becomes 8 in × 11 in (20.3 cm × 27.9 cm).
Final Blocking
- Block the panel before joining. Pin it right side up to 8 in × 11 in (20.3 cm × 27.9 cm), shaping the corners into smooth curves.
- Spray it with water until damp and let it dry completely.
- Mist the pocket and stuff it firmly with a towel-wrapped roll, or a jar about 4 1/2 in (11.4 cm) across. Square up the filet windows with your fingers.
- Let the pocket dry on its form so the walls stand upright.
- After sewing, press the seams lightly with your fingers. Don’t iron the filet.
Final Quality-Control Checklist
- The panel measures 8 in × 11 in (20.3 cm × 27.9 cm) and lies flat.
- All four corners are evenly rounded.
- The pocket has 12 blocks and 12 windows per filet round, in a clean checkerboard.
- The rim measures 18 in (45.7 cm) and holds the roll without strain.
- The pocket is centered with about 1 in (2.5 cm) of teal at each side.
- The round-join seam is hidden against the panel.
- The tab is centered, firmly stitched, and invisible from the front.
- All ends are woven in securely.
Troubleshooting
- Panel edges wave: You worked too many sts down the sides. Redo Rnd 1 with exactly 40 sc per side.
- Panel edges pull in: You worked too few side sts, or your tension is tight. Check the count and relax your hand.
- Corners look pointed: You put the extra stitches in the corner center. Use the 2–1–2 split in Rnd 2.
- Base cups up: You missed increases. Count each round, which should add 6 sts.
- Base ruffles: You added extra increases, or your gauge is loose. Go down a hook size.
- Windows are lopsided: Check that every ch-3 skips exactly 3 sts in Rnd 13.
- Roll doesn’t fit: Your gauge is too tight. Remake the pocket with a larger hook.
- Pocket sags: Use a firmer cotton, or add a third sc round at the rim.
Care
Hand wash in cool water, press out the water in a towel, and dry flat while reshaping the pocket around a roll. Remove the wooden ring before washing.
Final Notes
The measurement chain is short. The gauge of 16 sc × 18 rows = 4 in (10.2 cm) gives a 7 in × 10 in (17.8 cm × 25.4 cm) panel body. The 152-st border brings it to 8 in × 11 in (20.3 cm × 27.9 cm). The 72-st pocket measures 18 in (45.7 cm) around and stands about 3 1/2 in (8.9 cm) tall. The 6 in (15.2 cm) tab loops the holder onto its ring. If each checkpoint matches, the finished holder will hang straight and hold the roll securely.
Happy crocheting!