

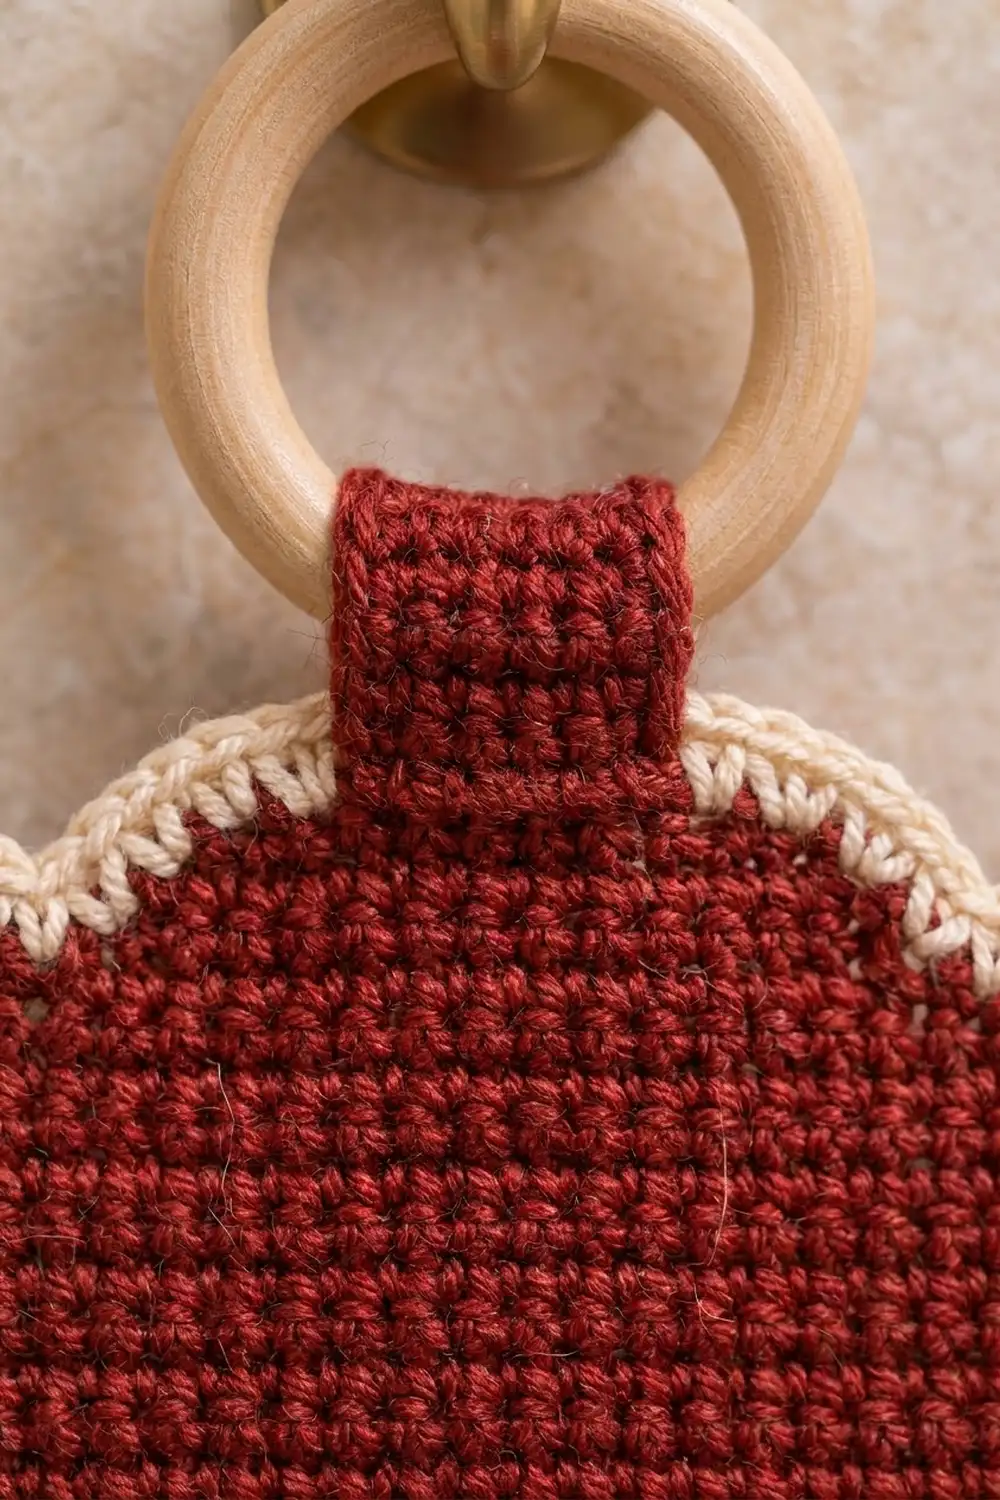
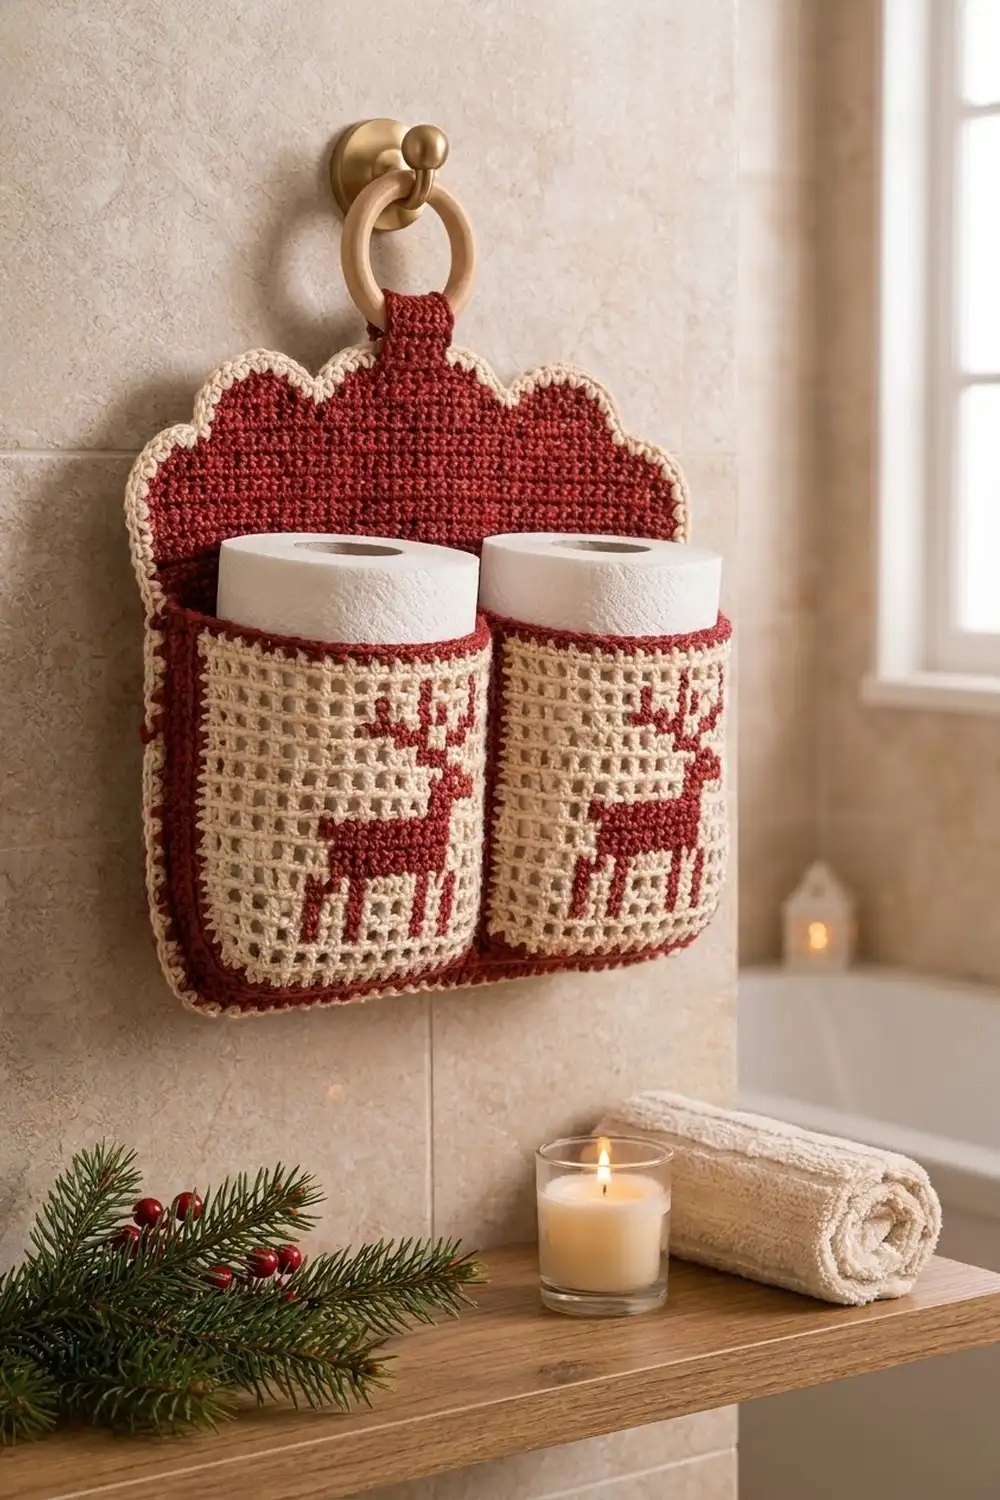
This wall-hanging holder brings a cozy Nordic Christmas look to the bathroom. A cranberry-red backing with a scalloped top holds two cream filet pockets, and each pocket has a solid red reindeer worked into the mesh. A beaded cream edge frames the backing, and a short red tab hangs it from a ring or hook.
The palette is two colors: deep red and warm cream. The filet mesh lets a little of the red backing show through, which makes the reindeer stand out on the plain red behind them.
This pattern uses US crochet terms. The finished holder measures 14.8 in (37.6 cm) wide by 11.2 in (28.4 cm) tall, not counting the tab loop. With the loop it is 12.5 in (31.8 cm) tall overall.
You’ll make four pieces: one backing in rows of single crochet with two shaped lobes, two filet pockets with built-in gussets, and one tab. You add a cream border to the backing, sew the pockets on, and stitch the tab over the top center.
Finished Size and Construction
- Finished size: 14.8 in x 11.2 in (37.6 cm x 28.4 cm), plus a 1.3 in (3.3 cm) tab loop
- Skill level: Intermediate
- Terminology: US
- Yarn weight: DK (#3)
- Hook: 4 mm (G-6)
- Number of pieces: 4 (1 backing, 2 pockets, 1 tab)
- Layout: 2 pockets side by side across the lower backing
- Pocket size: 6.6 in (16.8 cm) wide x 5.0 in (12.7 cm) tall, 1.8 in (4.6 cm) deep
- Backing size before border: 14 in x 10.4 in (35.6 cm x 26.4 cm)
- Border depth: 0.4 in (1.0 cm)
Materials
Use a smooth DK cotton or cotton blend. It shows the stitches clearly and holds up in a damp bathroom. The weights below assume about 230 m per 100 g.
- Red: 120 g / 276 m (backing, lobes, tab, pocket edging, gussets, reindeer)
- Cream: 40 g / 92 m (filet panels, backing border)
- 4 mm (G-6) hook
- Tapestry needle
- 6 stitch markers
- Rust-proof pins
- Small bobbins or yarn butterflies for the red sections
- Wooden ring, 2.5–3 in (6.4–7.6 cm) across (optional)
- Blocking mat and spray bottle
These quantities include a margin of about 15% for swatching and color changes.
Abbreviations (US Terms)
- ch – chain
- sc – single crochet
- dc – double crochet
- sc2tog – single crochet 2 together
- rev sc – reverse single crochet (crab stitch)
- BLO – back loop only
- sp – space
- st(s) – stitch(es)
- RS / WS – right side / wrong side
Special stitches:
– Open mesh: ch 1, skip 1 st or sp, dc in the next dc.
– Red block: working in red, dc in the ch-1 sp (or in the dc of the block below), then dc in the next dc. The dc that starts a run of blocks stays cream, which leaves a thin cream grid line on the left of each red section.
– Rev sc: work sc from left to right (right-handed), inserting the hook into the next st to the right.
Gauge and Checkpoints
- Sc: 20 sts and 22 rows = 4 in (10.2 cm)
- Filet: 15 meshes (31 sts) = 6.2 in (15.7 cm), and 10 rows = 4 in (10.2 cm)
Make one pocket panel first and treat it as your gauge swatch. Check these measurements as you go:
- Filet panel after Row 11: 6.2 in x 4.4 in (15.7 cm x 11.2 cm)
- Pocket after Round 1: 6.6 in x 4.8 in (16.8 cm x 12.2 cm)
- Gusset after Row 10: 1.8 in (4.6 cm) deep
- Backing after Row 1: 14 in (35.6 cm) wide
- Backing after Row 50: 9.1 in (23.1 cm) tall
- Each lobe: 1.3 in (3.3 cm) tall
If your piece is too big, go down one hook size. If it’s too small, go up one. Only the sc gauge controls the backing, so you can use a different hook for the pockets if just the filet gauge is off.
Pocket (Make 2)
Filet Panel
Use cream. Join red bobbins only where the chart shows blocks. When you change color, finish the last yarn over of the previous dc in the new color. Carry the cream inside the red dc so it stays continuous across the row. Each red section gets its own bobbin. Keep using a bobbin in the next row if that row’s red section starts right where it ended. Otherwise, cut it and start a new one.
Chart (X = red block, . = open mesh; columns 1–15 run left to right as seen from the RS)
R11  ...............
R10  .......X.X.X...
R9   .......XXXXX...
R8   .........XXXX..
R7   .........XX....
R6   .XXXXXXXXXX....
R5   ..XXXXXXXXX....
R4   ..XXXXXXXXX....
R3   ..X.X...X.X....
R2   ..X.X...X.X....
R1   ...............
Odd rows are RS: read the chart right to left. Even rows are WS: read it left to right.
Foundation: With cream, ch 34.
Row 1 (RS): Dc in the 6th ch from the hook. The 5 skipped ch count as the first dc, ch-1 sp, and skipped ch. Then ch 1, skip 1 ch, dc in next ch. Repeat from * across 14 times. (15 open meshes; 16 dc + 15 ch-1 sps = 31 sts)
Rows 2–11: Ch 4 (counts as dc + ch 1), turn. Work across following the chart: open mesh or red block for each of meshes 1–15. Work the last dc into the turning chain. On Row 2 that’s the 4th ch of the skipped ch-5; on later rows it’s the 3rd ch of the ch-4. (31 sts every row)
The edge columns are open on every row, so every row starts and ends with an open mesh.
Red blocks per row: Row 2: 4, Row 3: 4, Row 4: 9, Row 5: 9, Row 6: 10, Row 7: 2, Row 8: 4, Row 9: 5, Row 10: 3. That’s 50 blocks per pocket.
Checkpoint: 6.2 in x 4.4 in (15.7 cm x 11.2 cm). Fasten off cream.
Pocket Edging and Gusset
Round 1 (RS): Join red in the last st of Row 11. Ch 1, then work around the panel:
– Top: 31 sc, 1 in each dc and each ch-1 sp or block st. Ch 1 at the corner.
– Left side: 22 sc, 2 in each row end. Ch 1.
– Bottom: 31 sc in the free loops of the foundation ch. Ch 1.
– Right side: 22 sc. Ch 1 and join to the first sc.
Count: 31 + 22 + 31 + 22 = 106 sc, plus 4 corner ch-1 sps. Checkpoint: 6.6 in x 4.8 in (16.8 cm x 12.2 cm).
Gusset Row 1 (RS): Working in BLO, start at the first sc of the left side, just below the top-left corner sp:
– sc in each of the 22 left-side sts
– sc in the bottom-left corner sp
– sc in each of the 31 bottom sts
– sc in the bottom-right corner sp
– sc in each of the 22 right-side sts
Count: 22 + 1 + 31 + 1 + 22 = 77 sc. Do not work across the top.
Gusset Rows 2–10: Ch 1, turn, sc in each st. (77 sc) There are no increases, so the BLO ridge makes a crisp fold and the gusset stands at a right angle to the front. Checkpoint: 1.8 in (4.6 cm) deep. Fasten off and leave a 30 in (76.2 cm) tail for sewing.
Rim (RS): Join red at the top of the right gusset, at its outer end. Work:
– 10 sc across the gusset row ends
– sc in the top-right corner sp
– sc in BLO of each of the 31 top sts
– sc in the top-left corner sp
– 10 sc across the left gusset row ends
Count: 10 + 1 + 31 + 1 + 10 = 53 sc. Fasten off. The rim gives the pocket opening a double red band and brings the pocket to 5.0 in (12.7 cm) tall.
Backing
With red, ch 71.
Row 1 (RS): Sc in the 2nd ch from the hook and in each ch across. (70 sc) Checkpoint: 14 in (35.6 cm).
Rows 2–50: Ch 1, turn, sc in each st. (70 sc) Checkpoint: 9.1 in (23.1 cm). Fasten off.
Scallop Lobes
Mark the top-row sts in this order: 4 shoulder sts, 28 lobe sts (5–32), 6 center sts (33–38), 28 lobe sts (39–66), 4 shoulder sts. Count: 4 + 28 + 6 + 28 + 4 = 70.
First lobe:
– Row 1 (RS): Join red in st 5. Ch 1, sc in the same st and the next 27 sts. (28 sc)
– Row 2: Ch 1, turn, sc2tog, sc 24, sc2tog. (26)
– Row 3: Ch 1, turn, sc in each st. (26)
– Row 4: Ch 1, turn, sc2tog, sc 22, sc2tog. (24)
– Row 5: Ch 1, turn, sc2tog, sc 20, sc2tog. (22)
– Row 6: Ch 1, turn, sc2tog twice, sc 14, sc2tog twice. (18)
– Row 7: Ch 1, turn, sc2tog 3 times, sc 6, sc2tog 3 times. (12)
Fasten off. The lobe is 7 rows tall: 1.3 in (3.3 cm).
Second lobe: Join in st 39 and repeat Rows 1–7, ending at st 66.
Checkpoint: 14 in x 10.4 in (35.6 cm x 26.4 cm) measured to the lobe tops.
Hanging Tab
With red, ch 7.
Row 1: Sc in the 2nd ch from the hook and in each ch across. (6 sc)
Rows 2–24: Ch 1, turn, sc in each st. (6 sc)
Checkpoint: 1.2 in x 4.4 in (3.0 cm x 11.2 cm). Fasten off and leave a 20 in (50.8 cm) tail.
Make All Pieces
- Red: 1 backing, 1 tab, plus the edging, gusset, rim, and reindeer blocks on both pockets
- Cream: 2 filet panels, plus the backing border
Layout (front view):
 [shoulder][ LOBE ][ TAB ][ LOBE ][shoulder]
 [            red backing, 70 sts          ]
 [m2][  POCKET 1  ][  POCKET 2  ][m2]
       sts 3–35      sts 36–68
 [          backing Rows 1–3 below         ]
The “m2” blocks are 2-stitch margins of 0.4 in (1.0 cm). Both pockets have the reindeer facing right.
Joining
Use red and a flat whipstitch through the gusset’s last row (Row 10) and the backing’s front loops.
Bottom seam: Place Pocket 1’s bottom gusset section (33 sts: corner, 31, corner) along backing Row 4, sts 3–35, matching 1 st to 1 st. Both pieces work at 20 sc per 4 in, so they line up exactly. Place Pocket 2 along sts 36–68.
Side seams: Each 22-st side gusset section runs up 24 backing rows (Rows 5–28). Sew 1 st per row, and take 2 rows on the 11th and 22nd sts. That’s 22 sts over 24 rows, which matches 4.4 in (11.2 cm) of sts to 4.4 in (11.2 cm) of rows.
Sew Pocket 1’s right gusset along the st 35 column and Pocket 2’s left gusset along the st 36 column. The two gussets stand back to back and form the doubled red divider.
Tension: Pull each whipstitch just until it closes, so the backing doesn’t pucker. Pin both side seams before you sew.
Checkpoint: The pockets together span 13.2 in (33.5 cm), with 0.4 in (1.0 cm) of red showing on each side. The pocket tops sit about 5.5 in (14.0 cm) above the bottom edge of the backing.
Border
The border is worked on the backing only. The pockets sit 2 sts in from each side and above Row 3, so they add no stitches to any border side.
Border gauge: 5 sc per 1 in (2.5 cm), the same as the backing.
Round 1 (RS): Join cream at the bottom right corner and work around:
– Bottom: 3 sc in the first ch, 1 sc in each of the next 68 ch, 3 sc in the last ch. (74)
– Left side: 9 sc across every 10 row ends. (45)
– Top: (72)
– Shoulder: 2 sc in the corner st, then 1 sc in each of the next 3 sts. (5)
– First lobe: 7 sc up the lobe side, 2 sc in the first top st, 10 sc, 2 sc in the last top st, 7 sc down the other side. (7 + 14 + 7 = 28)
– Center: 6 sc. (6)
– Second lobe: same as the first. (28)
– Shoulder: 1 sc in each of 3 sts, 2 sc in the corner st. (5)
– Right side: 45 sc.
Join with a slip stitch. Total: 74 + 45 + 72 + 45 = 236 sc.
Round 2: Ch 1, then rev sc in each st around. (236) Join and fasten off. This gives the beaded cream edge. Border depth: 0.4 in (1.0 cm).
Why the math works:
– Bottom: 68 sts plus two 3-sc corners keep the 14 in (35.6 cm) width flat while turning the corners.
– Sides: At 9 sc per 10 rows, 5.5 rows per inch become 4.95 sc per inch, which matches the 5-per-inch gauge.
– Top: The extra stitches on the shoulders and lobe tops let the border curve around the scallops without cupping.
Finished size: 14.8 in x 11.2 in (37.6 cm x 28.4 cm).
Tab: Fold the tab through the ring. Sew one end to the front of the center 6 sts and the other end to the back. Each end overlaps 0.9 in (2.3 cm) from the outer edge of the border. That leaves 2.6 in (6.6 cm) of loop, which stands 1.3 in (3.3 cm) above the holder.
Final Blocking
- Spray the holder evenly until it’s damp, but not soaked.
- Lay it face up and pin the backing to 14.8 in x 11.2 in (37.6 cm x 28.4 cm).
- Pin each lobe into a smooth curve.
- Square each filet front so the mesh lines run straight.
- Stuff each pocket with a toilet roll wrapped in a plastic bag so the gussets dry upright.
- Leave it to dry completely, at least 12 hours.
Final Quality-Control Checklist
- [ ] Both reindeer face right, with 50 blocks each
- [ ] Every pocket round counts 106 sc, the gusset counts 77, and the rim counts 53
- [ ] The backing is 70 sts wide, and each lobe ends with 12 sts
- [ ] The border counts 236 sts and lies flat
- [ ] Both pockets are seated at sts 3–35 and 36–68
- [ ] The tab is centered, and both ends are sewn securely
- [ ] All ends are woven in on the WS
Troubleshooting
- The mesh slants: Your turning chain is too loose or too tight. Keep the ch-4 even with the dc height.
- Cream shows through the red blocks: Hold the carried strand flat against the top of the row, and pull the dc through snugly.
- The gusset flares: You added stitches at the corners. Recount to 77.
- The lobes are pointed: Your Rows 6–7 decreases are bunched up. Spread them as written.
- The border ruffles at the sides: Skip a row end more often, so you work 8 sc over 10 rows.
- The pockets sag: Pin and re-sew the side seams with firmer tension.
Care
Hand wash in cool water and lay flat to dry. Don’t wring or tumble dry.
Final Notes
Everything rests on the gauge chain:
– The 31-st filet panel measures 6.2 in (15.7 cm) and grows to 6.6 in (16.8 cm) with its edging.
– Two pockets fill 13.2 in (33.5 cm) of the 14 in (35.6 cm) backing.
– Each 0.4 in (1.0 cm) border edge brings the holder to 14.8 in x 11.2 in (37.6 cm x 28.4 cm).
Check every checkpoint, and the pieces will fit together. Happy crocheting!