

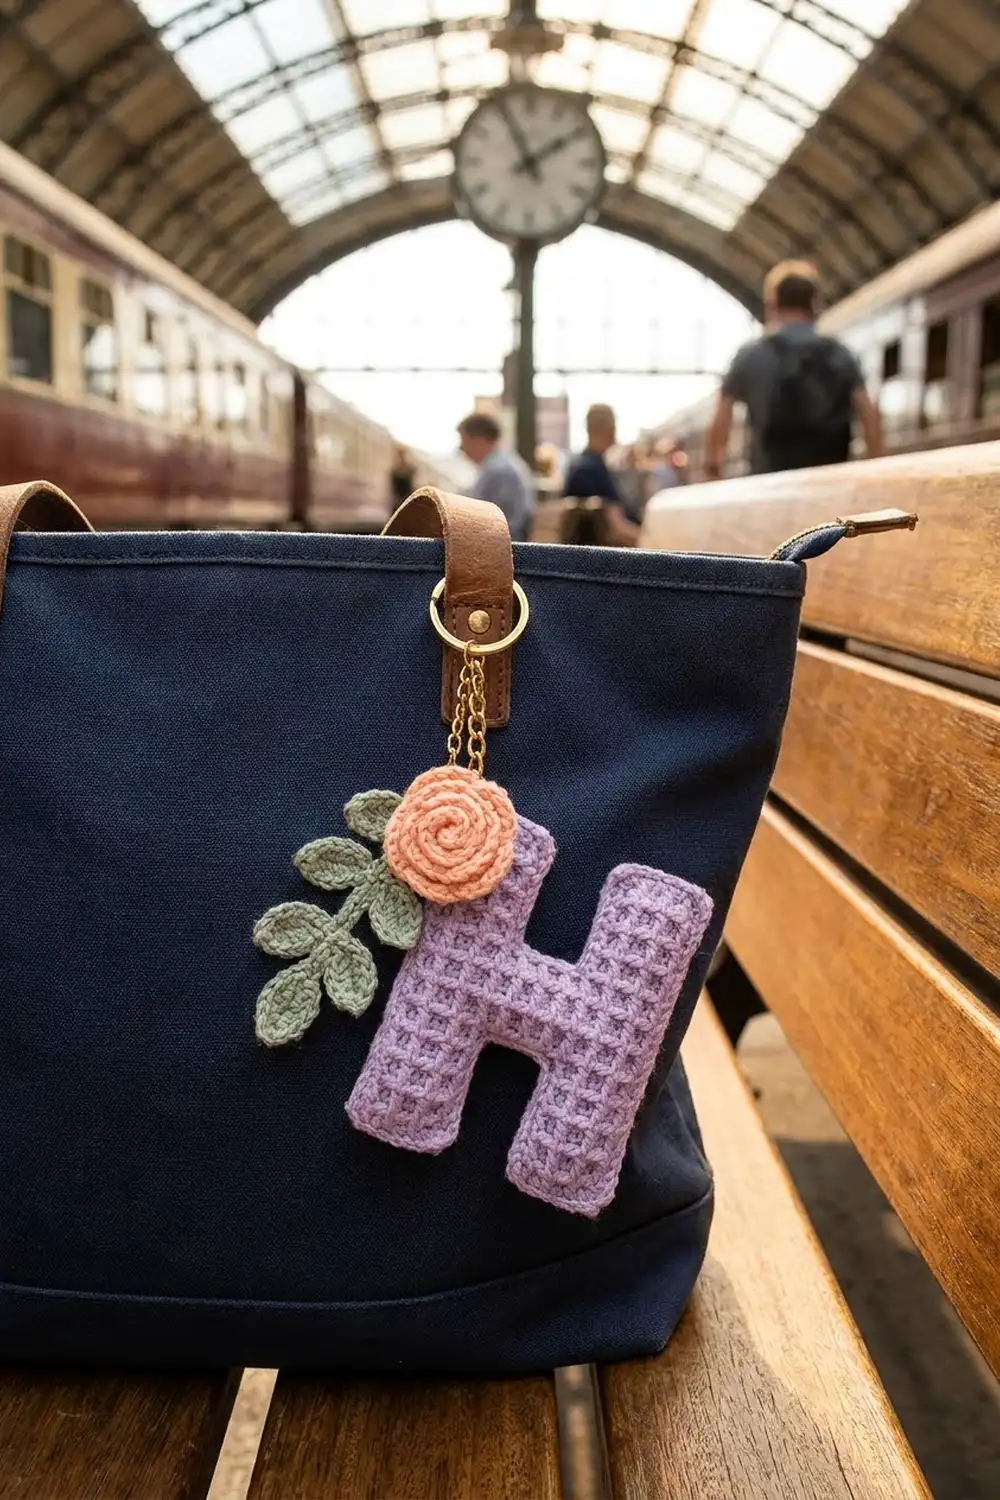
The Lavender Lattice Letter H is a small monogram charm with a crisp grid texture, a peach rolled rose and a sprig of sage leaves. You can clip it to a bag handle, a key ring or a zipper pull, and it makes a quick, personal gift.
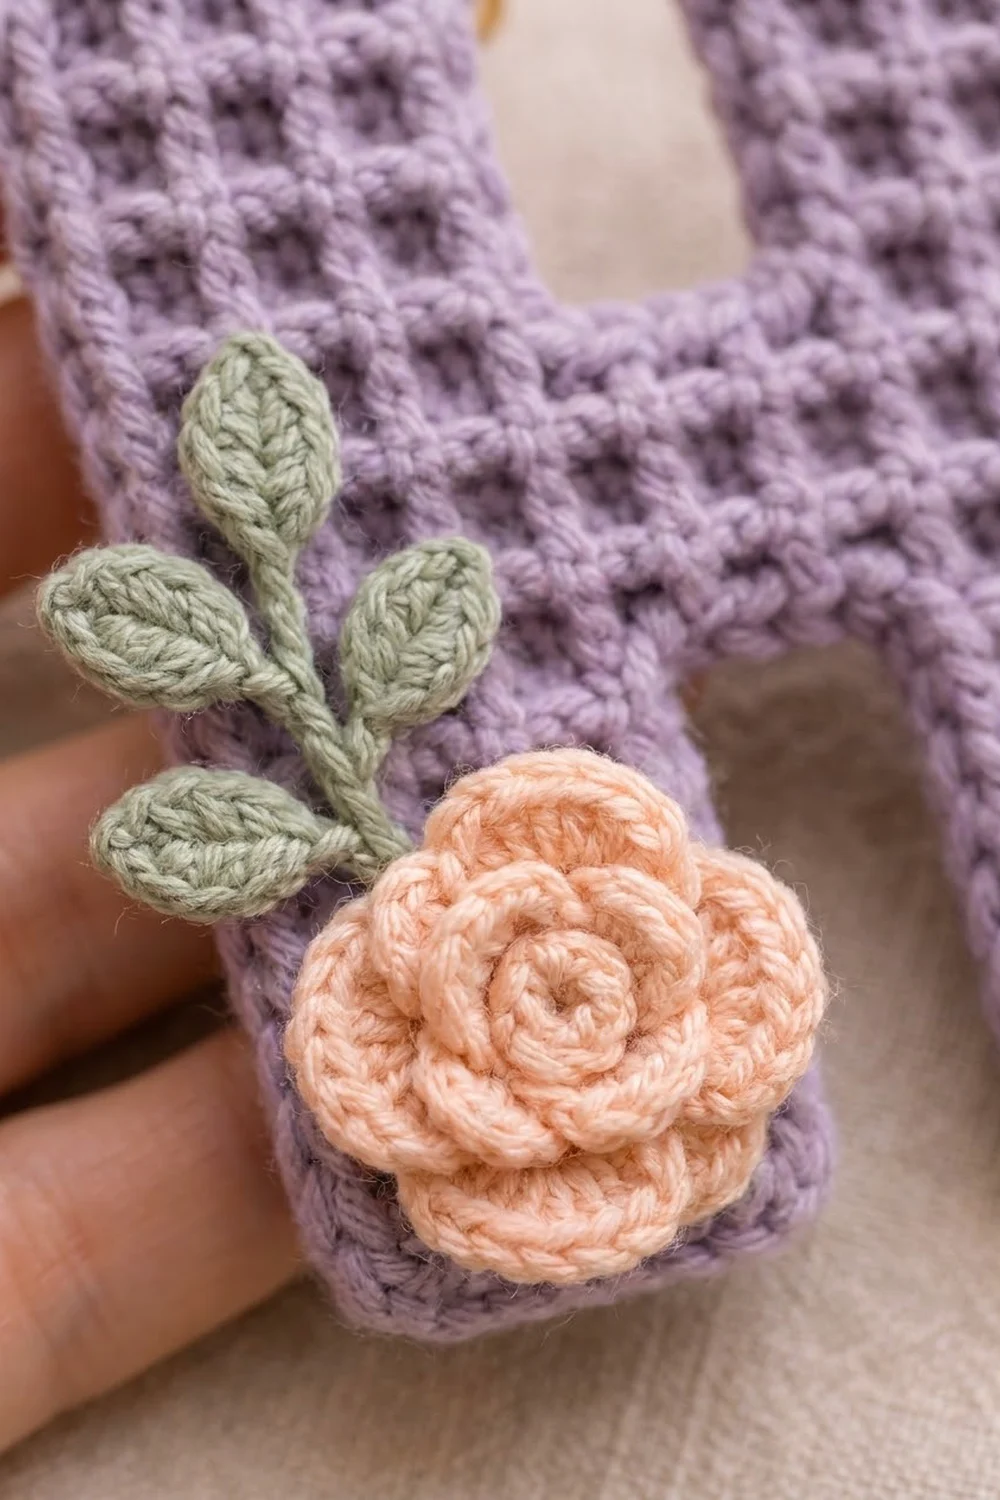
The letter is worked in soft lavender. The grid comes from tight filet mesh: rows of double crochet separated by single chains. Each cell looks like a small recessed square framed by raised ridges. A plump crab-stitch rim finishes the outline.
The pattern uses US crochet terms. The finished charm measures 3.5 in (8.9 cm) wide × 4.1 in (10.4 cm) tall, not counting the ring and chain.
You crochet the two lower legs separately, then join them with a chain bridge to start the crossbar. Next you work the two upper legs separately. Two border rounds go around the whole letter. Last, you add the rose, the sprig and the hardware.
Finished Size and Construction
- Finished size: 3.5 in (8.9 cm) wide × 4.1 in (10.4 cm) tall
- Skill level: Advanced beginner
- Terminology: US crochet terms
- Yarn weight: Fingering (super fine, #1) cotton
- Hook: 2.5 mm
- Number of pieces: 1 letter panel, plus 2 appliqués (rose and leaf sprig)
- Layout: One H, 10 mesh cells wide × 12 rows tall
- Leg width: 4 cells, 1.2 in (3.0 cm)
- Size before border: 3.0 in (7.6 cm) × 3.6 in (9.1 cm)
- Border depth: 0.25 in (0.6 cm) per side (2 rounds)
Materials
Choose a smooth cotton in fingering weight, either mercerized or matte. Cotton holds the square cells crisply and won’t fuzz over the grid. A yarn with about 170 m per 50 g works well.
- Color A, lavender: 8 g, about 27 m
- Color B, peach: 3 g, about 10 m
- Color C, sage green: 2 g, about 7 m
These amounts include a small margin for swatching and sewing tails.
Tools
- 2.5 mm crochet hook (or the size that gives you gauge)
- Tapestry needle
- 2 locking stitch markers
- Gold split key ring, 1 in (2.5 cm) diameter
- Gold chain, about 1 in (2.5 cm) long, with an open jump ring at one end
- Small flat-nose pliers
- Blocking mat, rustproof pins, spray bottle
- Optional: light spray starch
Abbreviations (US Terms)
- ch – chain
- sl st – slip stitch
- sc – single crochet
- hdc – half double crochet
- dc – double crochet
- tr – treble crochet
- sk – skip
- sp – space
- st(s) – stitch(es)
- tch – turning chain
- RS / WS – right side / wrong side
- rev sc – reverse single crochet (crab stitch)
Mesh cell: One dc plus one ch-1 space. Four cells are dc, (ch 1, dc) 4 times, which is 5 dc and 4 ch-1 sps, or 9 sts.
Rev sc: Work from left to right. Insert the hook into the next stitch to the right, yarn over and pull up a loop, then yarn over and pull through both loops.
Gauge and Checkpoints
Gauge: 10 mesh cells × 10 rows = 3 in (7.6 cm). Each cell is 0.3 in (0.8 cm) wide and each row is 0.3 in (0.8 cm) tall. Work tightly, so the cells look like small square dents rather than open holes.
Test one piece first. The Lower Right Leg is your gauge swatch. It should measure 1.2 in (3.0 cm) wide × 1.5 in (3.8 cm) tall.
Checkpoints:
- Each lower leg, after Row 5: 1.2 in (3.0 cm) × 1.5 in (3.8 cm)
- After Row 7: 3.0 in (7.6 cm) wide × 2.1 in (5.3 cm) tall
- After Row 12: 3.0 in (7.6 cm) × 3.6 in (9.1 cm)
- After Border Round 1: 3.25 in (8.3 cm) × 3.85 in (9.8 cm)
- After Border Round 2: 3.5 in (8.9 cm) × 4.1 in (10.4 cm)
If your swatch is too big, go down 0.25 mm in hook size. If it’s too small, go up 0.25 mm. If the width is right but the rows are too tall, pull up shorter loops on each dc. Don’t change the stitch counts, because the border math depends on them.
Letter Panel
Use Color A for the whole panel.
Lower Right Leg
Ch 11.
Row 1 (RS): Dc in 5th ch from hook (the 4 skipped chains count as dc, ch 1), (ch 1, sk next ch, dc in next ch) 3 times. (5 dc, 4 ch-1 sps = 9 sts; 4 cells)
Row 2 (WS): Ch 4 (counts as dc, ch 1 throughout), turn, sk first ch-1 sp, dc in next dc, (ch 1, sk next ch-1 sp, dc in next dc) 2 times, ch 1, sk last ch-1 sp, dc in 3rd ch of tch. (9 sts; 4 cells) On Row 2, the tch is the 4 skipped chains from Row 1.
Rows 3–5: Repeat Row 2. (9 sts; 4 cells)
Fasten off. Row 5 ends at this leg’s left edge, which will be the inner edge facing the gap.
Lower Left Leg
Work Rows 1–5 as for the Lower Right Leg. Don’t fasten off. The yarn is now at the left (outer) edge of this leg.
Crossbar
Lay both legs RS up, with the Left Leg (the one with yarn attached) on the left. Leave a gap of about 0.6 in (1.5 cm) between them.
Row 6 (WS): Ch 4, turn, sk first ch-1 sp, dc in next dc, (ch 1, sk next ch-1 sp, dc in next dc) 2 times, ch 1, sk last ch-1 sp, dc in 3rd ch of tch. Ch 3 for the bridge. With the WS of the Right Leg facing, dc in the last dc of its Row 5 (at its inner edge), (ch 1, sk next ch-1 sp, dc in next dc) 3 times, ch 1, sk last ch-1 sp, dc in 3rd ch of tch. (9 + 3 + 9 = 21 sts)
Row 7 (RS): Ch 4, turn, sk first ch-1 sp, dc in next dc, (ch 1, sk next ch-1 sp, dc in next dc) 2 times, ch 1, sk last ch-1 sp, dc in next dc. Over the bridge: ch 1, sk next bridge ch, dc in center bridge ch, ch 1, sk next bridge ch, dc in next dc. Then (ch 1, sk next ch-1 sp, dc in next dc) 3 times, ch 1, sk last ch-1 sp, dc in 3rd ch of tch. (11 dc, 10 ch-1 sps = 21 sts; 10 cells)
Checkpoint: 3.0 in (7.6 cm) × 2.1 in (5.3 cm).
Count from where Row 7 ended:
– Sts 1–9 are the Left Leg.
– Sts 10–12 are the gap (ch-1 sp, center dc, ch-1 sp).
– Sts 13–21 are the Right Leg.
Upper Left Leg
Row 8 (WS): Ch 4, turn, sk first ch-1 sp, dc in next dc, (ch 1, sk next ch-1 sp, dc in next dc) 2 times, ch 1, sk next ch-1 sp, dc in next dc. Leave the other 12 sts unworked. (9 sts; 4 cells)
Rows 9–12: Ch 4, turn, sk first ch-1 sp, dc in next dc, (ch 1, sk next ch-1 sp, dc in next dc) 2 times, ch 1, sk last ch-1 sp, dc in 3rd ch of tch. (9 sts; 4 cells)
Fasten off.
Upper Right Leg
Row 8 (WS): With WS facing, join Color A with a sl st in st 13 of Row 7. Ch 4, sk next ch-1 sp, dc in next dc, (ch 1, sk next ch-1 sp, dc in next dc) 2 times, ch 1, sk last ch-1 sp, dc in 3rd ch of tch. (9 sts; 4 cells)
Rows 9–12: Work as for the Upper Left Leg. (9 sts; 4 cells)
Fasten off. Weave in the tails along the ridges.
Checkpoint: 3.0 in (7.6 cm) × 3.6 in (9.1 cm). The crossbar is Rows 6–7, with 5 rows below it and 5 rows above it.
Border
Border gauge:
– Top and bottom edges: 1 sc per st, so 9 sc across 1.2 in (3.0 cm), or 7.5 sc per inch.
– Sides: 2 sc per row end, or about 6.7 sc per inch.
Both rates are close to a natural fingering-weight sc, so the edge lies flat.
Corner rule: At each outer corner, work 3 sc in the corner st. The middle sc of the 3 is the corner. Each top or bottom count below already includes both of its corner groups. At the 4 inner corners, don’t add stitches; just keep the tension snug.
Round 1 (RS): With RS facing, join Color A in the free loop of the foundation ch at the bottom-left corner of the Left Leg. Ch 1.
- Left Leg bottom: 3 sc in corner st, sc in next 7 sts, 3 sc in last st. (13 sc)
- Left Leg inner side, lower: 2 sc in each row end of Rows 1–5. (10 sc)
- Crossbar underside: Sc in the free loop of each of the 3 bridge chains. (3 sc)
- Right Leg inner side, lower: 2 sc in each row end of Rows 5–1. (10 sc)
- Right Leg bottom: 3 sc in corner st, sc in next 7, 3 sc in last st. (13 sc)
- Right Leg outer side: 2 sc in each row end of Rows 1–12. (24 sc)
- Right Leg top: 3 sc in corner st, sc in next 7, 3 sc in last st. (13 sc)
- Right Leg inner side, upper: 2 sc in each row end of Rows 12–8. (10 sc)
- Crossbar top: Sc in each of the 3 unworked gap sts of Row 7. (3 sc)
- Left Leg inner side, upper: 2 sc in each row end of Rows 8–12. (10 sc)
- Left Leg top: 3 sc in corner st, sc in next 7, 3 sc in last st. (13 sc)
- Left Leg outer side: 2 sc in each row end of Rows 12–1. (24 sc)
Join with a sl st to the first sc. Total: 146 sc (13 + 10 + 3 + 10 + 13 + 24 + 13 + 10 + 3 + 10 + 13 + 24).
Checkpoint: 3.25 in (8.3 cm) × 3.85 in (9.8 cm).
Round 2: Ch 1, rev sc in each sc around. (146 rev sc) Join and fasten off.
Why the math works:
– Each leg end has 9 sts, plus 2 extra sc at each of its 2 corners: 9 + 4 = 13.
– Each outer side is 12 rows × 2 = 24 sc.
– Each inner leg section is 5 rows × 2 = 10 sc.
– Each crossbar edge uses the 3 gap sts.
Round 2 is worked 1 to 1, so the count stays the same. Each round adds about 0.125 in (0.3 cm) per side, for 0.25 in (0.6 cm) in total.
Rolled Rose
Use Color B. Ch 30.
Row 1: Sc in 2nd ch from hook and in each ch across. (29 sc)
Row 2: Ch 1, turn, sc in first sc, [sk next sc, 5 hdc in next sc, sk next sc, sc in next sc] 2 times, [sk next sc, 5 dc in next sc, sk next sc, sc in next sc] 3 times, [sk next sc, 5 tr in next sc, sk next sc, sc in next sc] 2 times. (7 petals, 8 sc; 43 sts)
Fasten off, leaving a 10 in (25.4 cm) tail. Start at the small hdc end and roll the strip into a spiral with the petals facing up. Stitch through all the layers at the base to hold the shape. The rose is about 1.25 in (3.2 cm) across.
Leaf Sprig
Use Color C. Ch 19.
Top leaf: Sc in 2nd ch from hook, hdc in next ch, dc in next 2 ch, hdc in next ch, sc in next ch. (6 sts)
Stem and side leaves:
- Sl st in next 3 ch.
- Make a side leaf: ch 7, sc in 2nd ch from hook, hdc in next ch, dc in next 2 ch, hdc in next ch, sc in next ch, then sl st in the same stem ch as the last sl st.
- Repeat [sl st in next 2 ch, make a side leaf] 3 times.
- Sl st in last 3 ch.
(5 leaves; 12 stem sl sts)
Fasten off, leaving an 8 in (20.3 cm) tail. Arrange the side leaves so they alternate left and right. The sprig is about 1.75 in (4.4 cm) long, and each leaf is about 0.6 in (1.5 cm).
Assembly
- Place the rose over the lower-left corner of the Left Leg, about 0.25 in (0.6 cm) above the bottom rim. It should stick out slightly past the outer edge.
- Tuck the end of the stem under the upper-left side of the rose. Angle the sprig up and to the left so the top leaf sits near crossbar height.
- Sew the sprig down along the stem and the leaf centers. Sew the rose through its base and its outer petals.
- Open the chain’s jump ring with pliers. Pass it through the Round 1 border at the top inner corner of the Left Leg, close it firmly, and add the split ring to the top link.
Final Blocking
- Mist the letter until it’s just damp. Keep the rose dry.
- Pin the outer corners to 3.5 in (8.9 cm) × 4.1 in (10.4 cm).
- Pin each inner corner square.
- Smooth the grid with your fingers so every cell sits square.
- Optional: lightly starch the back.
- Let it dry completely before you unpin it.
Final Quality-Control Checklist
- Every leg row has 9 sts and 4 cells.
- Rows 6 and 7 each have 21 sts.
- The crossbar has 5 rows below it and 5 rows above it.
- Both border rounds have 146 sts.
- Size before the border is 3.0 in (7.6 cm) × 3.6 in (9.1 cm). Finished size is 3.5 in (8.9 cm) × 4.1 in (10.4 cm).
- The rose has 7 petals and the sprig has 5 leaves.
- The jump ring is fully closed.
- All tails are woven in.
Troubleshooting
The cells look like open holes. Your tension is loose. Go down a hook size.
The cells are taller than they are wide. Your dc are too tall. Pull up shorter loops.
The bridge twists. Make sure it’s exactly 3 chains and that Row 7 has a dc in the center bridge ch.
The inner corners pucker. Keep those sc snug and pin the corners square when blocking.
The rose unrolls. Add a few more stitches through all the layers at the base.
Care
Hand wash in cool water and lay flat to dry, reshaping the piece while it’s damp. Take off the ring before washing.
Final Notes
Here is how the measurements build on each other:
– One cell is 0.3 in (0.8 cm).
– Each leg is 4 cells wide, or 1.2 in (3.0 cm).
– Each lower leg is 5 rows tall, or 1.5 in (3.8 cm).
– The panel is 10 cells × 12 rows, or 3.0 in (7.6 cm) × 3.6 in (9.1 cm).
– Two border rounds of 146 sts add 0.25 in (0.6 cm) per side.
– The finished H is 3.5 in (8.9 cm) × 4.1 in (10.4 cm).
Check each stage before you move on, and your H will finish square and flat.
Happy crocheting!