

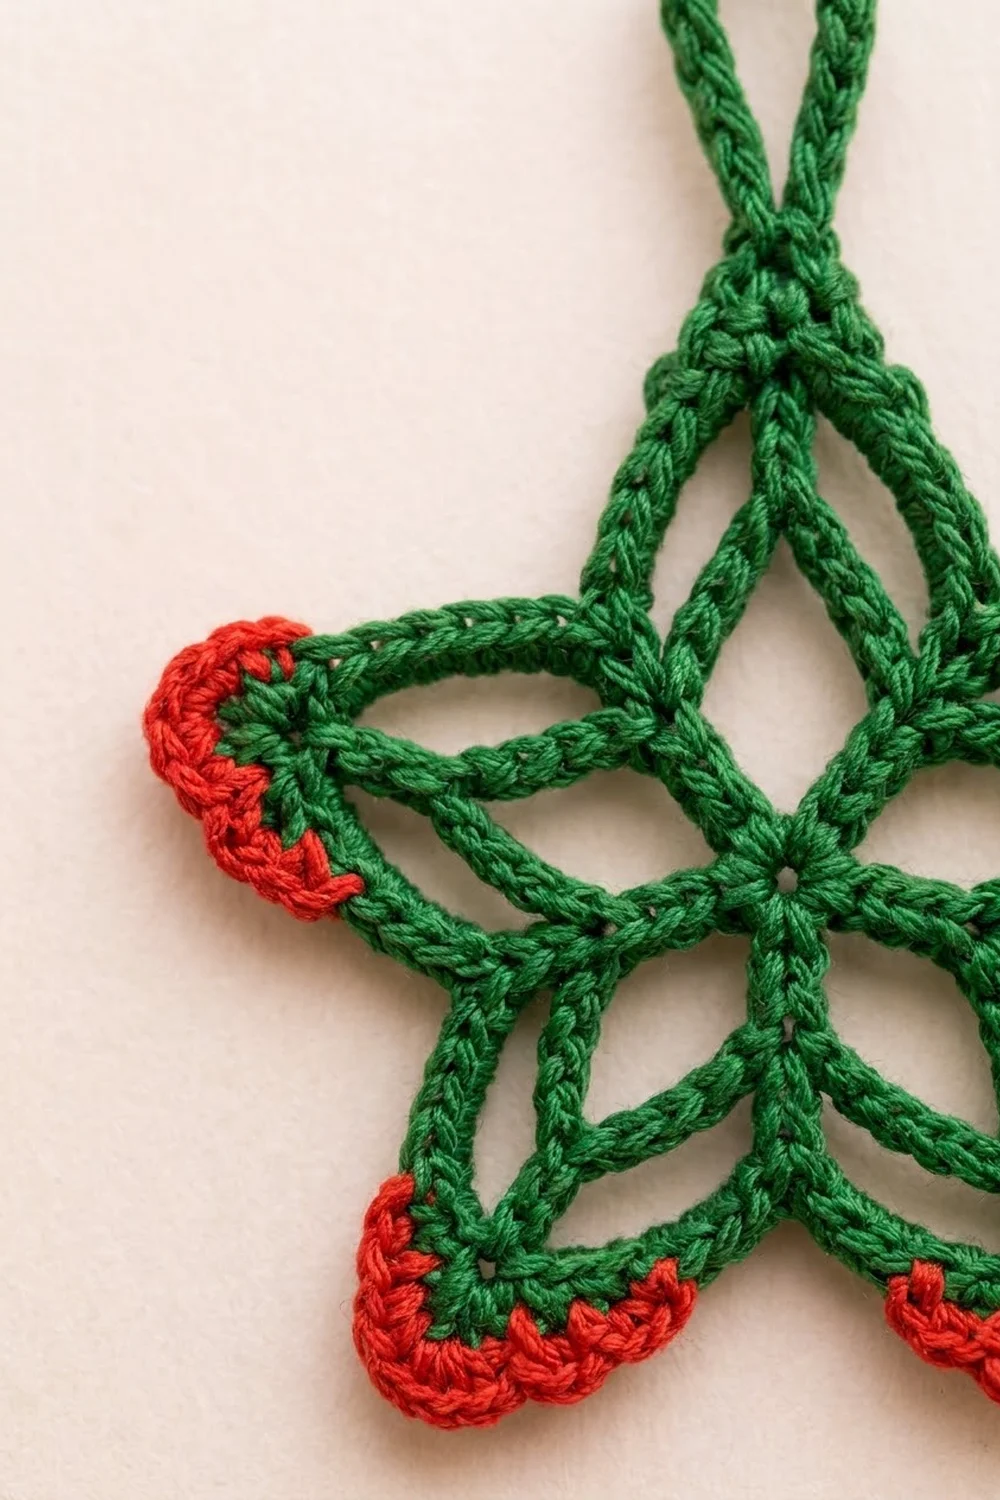
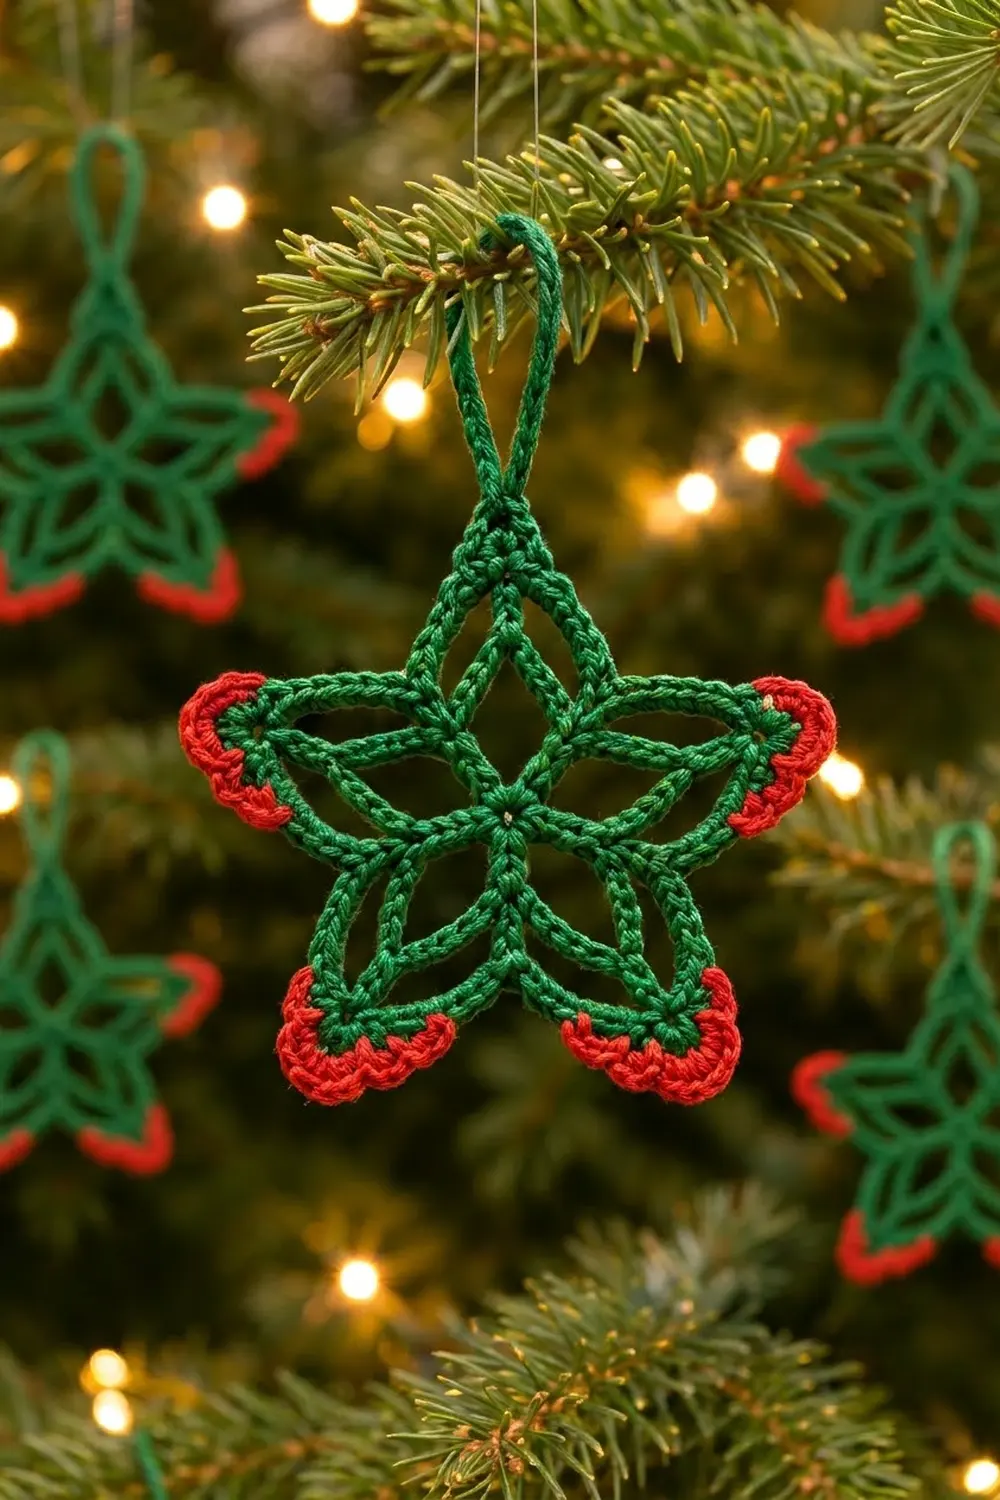
This little star is all about clean lines. Five narrow chain petals spread out from a tiny center ring, and a crisp single crochet outline traces the star. Four of the five points finish with a bright red scalloped tip. The top point carries a sturdy green hanging loop, so the ornament can go on the tree as soon as it is blocked.
The colors are classic Christmas: deep forest green for the whole star and cheerful holiday red for the tip trim. The style is open and airy, closer to a lace snowflake than a solid appliqué, so light shines through the petals when the star hangs on a lit tree.
The pattern uses US crochet terms. The finished star is 3.5 in (8.9 cm) wide from point to point and 3.25 in (8.3 cm) tall, not counting the hanging loop. With the loop, the total height is 4.5 in (11.4 cm).
You make the star in one piece. First you work a magic ring of single crochet, then add long and short chain loops in turn. Next you connect the loop tips into a star outline and cover that outline with single crochet. Last, you add the red tip scallops and the green hanging loop.
Finished Size and Construction
- Finished size: 3.5 in (8.9 cm) wide x 3.25 in (8.3 cm) tall; 4.5 in (11.4 cm) tall including the loop
- Skill level: Advanced beginner
- Terminology: US crochet terms
- Yarn weight: Sport weight (#2) mercerized cotton
- Hook: 3.0 mm (US C/2 or D/3, depending on brand)
- Number of pieces: 1 (single motif, no joining)
- Layout: One five-pointed star, top point up
- Piece size: 3.5 in (8.9 cm) wide x 3.25 in (8.3 cm) tall
- Size before border: 3 in (7.6 cm) wide after Round 3
- Border depth: about 1/8 in (0.3 cm) per side for the green edging, plus 1/8 in (0.3 cm) at each red tip
Materials
Choose a smooth, tightly plied mercerized cotton in sport weight. It gives the crisp, rope-like stitch definition this star needs and holds its shape after blocking. Avoid fuzzy or very soft acrylics, because the chain petals will droop and the points will lose their sharpness.
Choose a green that is deep enough to show up against tree branches, and a red bright enough to stand out at the tips. If you are making a batch, buy both colors from one dye lot.
- Color A, forest green: 5 g, about 16 m (17.5 yd)
- Color B, holiday red: 2 g, about 6 m (6.6 yd)
These amounts include extra for a gauge swatch and for weaving in ends. One standard ball of each color makes many stars.
Tools:
- 3.0 mm crochet hook
- Tapestry needle
- Scissors
- Rustproof pins and a foam blocking mat
- Spray bottle with water, plus optional light spray starch
- Ruler or tape measure
Abbreviations (US Terms)
- ch: chain
- sl st: slip stitch
- sc: single crochet
- dc: double crochet
- sk: skip
- sp: space
- st(s): stitch(es)
- MR: magic ring
- rep: repeat
Special stitch, Tip shell: (2 dc, ch 2, 2 dc), all worked into the same space.
Gauge and Checkpoints
Gauge: 6 ch = 1 in (2.5 cm), and 6 sc = 1 in (2.5 cm) in rows with a 3.0 mm hook. Gauge matters here because the chain lengths set the shape of the star.
To check, chain 13 and work a few rows of sc. Then lay a ruler along both the chain edge and a sc row.
Make one test star before you start a batch, and measure it at each checkpoint below.
- After Round 1: the ring is 0.5 in (1.3 cm) across.
- After Round 2: laid flat and gently straightened, each long petal loop reaches 1.25 in (3.2 cm) past the edge of the ring.
- After Round 3: the star is 3 in (7.6 cm) wide from point to point.
- After Round 4: the star is 3.25 in (8.3 cm) wide.
- After the red trim: the star is 3.5 in (8.9 cm) wide and 3.25 in (8.3 cm) tall.
If your star is too big: go down 0.25 mm in hook size, or work your chains more tightly. If it is too small: go up 0.25 mm. Keep the chain counts the same, because changing them changes how deep the valleys are compared with the points.
Pattern
Round 1: Center Ring
With Color A, make a MR.
Round 1: Ch 1, 10 sc in ring, pull the ring closed, sl st to first sc. (10 sc)
Pull the ring fully tight. The center should look like a small solid dot.
Round 2: Petals and Valley Spokes
This round alternates long petal loops and short spoke loops between neighboring sc.
Round 2: Ch 1, sc in first sc, ch 15, sc in next sc (petal loop made), ch 7, sc in next sc (spoke loop made); rep from * 4 more times. On the last repeat, end with sl st to first sc instead of the final “sc in next sc.” (10 sc, 5 ch-15 petal loops, 5 ch-7 spoke loops)
Each long loop starts and ends in neighboring stitches, so it folds into a narrow, pointed petal. The short loops sit between the petals and become the lines that run out to the star’s inner valleys.
Count your chains carefully. One extra chain in a petal makes that point visibly longer than the others. Counting chains in groups of five helps.
Round 3: Star Outline
Round 3: Sl st in each of the first 8 ch of the next ch-15 loop. You are now in the center ch of the petal, with 7 ch on each side. Ch 1, (sc, ch 4, sc) in the center ch of the petal, ch 6, sc in the center (4th) ch of the next ch-7 loop, ch 6; rep from * 4 more times, sl st to first sc. (15 sc, 5 ch-4 point sps, 10 ch-6 side sps)
The petal tips sit farther from the center than the spoke tips. That difference turns the outline into a star, with points at the petals and valleys at the spokes.
Checkpoint: lay the star flat and measure. It should be 3 in (7.6 cm) wide.
Border
The border has two parts. Round 4 is a green single crochet edging that covers the whole outline. Round 5 is a red scalloped trim on four of the five points. The hanging loop goes on last.
Border gauge: 7 sc fit snugly into each ch-6 sp. That is one more stitch than there are chains, which gives the outline just enough ease to lie flat without ruffling.
Round 4: Green Outline Edging
Choose which point will be the top, and start there. Work every sc around the chain space, not into the individual chains. This packs the stitches into a smooth, rope-like line like the one in the photo.
Round 4: Sl st into the ch-4 sp at the top point. Ch 1, (2 sc, ch 3, 2 sc) in same sp, sk next sc, 7 sc in next ch-6 sp, sc in valley sc, 7 sc in next ch-6 sp, sk next sc, (2 sc, ch 3, 2 sc) in next ch-4 sp; rep from * 3 more times. Then sk next sc, 7 sc in next ch-6 sp, sc in valley sc, 7 sc in last ch-6 sp, sk last sc, sl st to first sc. (95 sc, 5 ch-3 point sps)
Counts per side: each arm, from the ch-3 at one point to the ch-3 at the next point, holds 2 + 7 + 1 + 7 + 2 = 19 sc. Five arms x 19 sc = 95 sc.
Why the math works: the 2 sc on each side of every point frame the tip. The 7 sc in each ch-6 sp cover the chain with a little ease. The single sc in the valley sits right on the Round 3 valley sc, which keeps the valley sharp instead of rounded. Skipping the Round 3 tip sc keeps the points from bunching up.
Checkpoint: the star should now be 3.25 in (8.3 cm) wide. Fasten off Color A and weave in the tail.
Round 5: Red Scalloped Tips
Work this trim on the four points other than the top point. On each of those points, label the 5 sc before the ch-3 sp as A, B, C, D, E, with A farthest from the tip. A, B and C are the last 3 sc of the side, and D and E are the 2 point sc. Label the 5 sc after the sp the same way in mirror order: E’, D’, C’, B’, A’.
Round 5 (each of 4 points): Join Color B with sl st in A, sk B, 4 dc in C, sl st in D, sk E, tip shell in ch-3 sp, sk E’, sl st in D’, 4 dc in C’, sk B’, sl st in A’. Fasten off. (4 sl st, 12 dc, 1 ch-2 sp per point)
Counts per point: the trim covers 10 sc plus the ch-3 sp. Four points x 12 dc = 48 dc total.
This gives three red scallops per point: a small shell on each side and a pointed shell at the very tip. Together they wrap the point like a little cap.
Checkpoint: the star should now be 3.5 in (8.9 cm) wide and 3.25 in (8.3 cm) tall.
Hanging Loop
Loop: Join Color A with sl st in the ch-3 sp at the top point. Ch 16, sl st in same ch-3 sp. Work 22 sc over the ch-16 loop, sl st at the base of the loop. Fasten off and weave in. (22 sc)
The single crochet covering makes the loop firm and rope-like. It should stand 1.25 in (3.2 cm) above the top point, for a total height of 4.5 in (11.4 cm).
Final Blocking
Blocking makes a big difference on openwork. It straightens the chains, sharpens the points and sets the shape.
- Weave in all ends along the back of the outline. Keep them out of the open petals, where they would show.
- Mist the star evenly with water until it is damp but not dripping.
- Lay it face down on the blocking mat.
- Pin out all five points first. The two widest points should be 3.5 in (8.9 cm) apart.
- Check the height: 3.25 in (8.3 cm) from the top point to a line between the two bottom points.
- With a pin or your fingertip, straighten each petal so its tip points straight at its star point.
- Nudge each valley inward so it sits sharply between the points.
- Pin the hanging loop straight up.
- For a stiffer ornament, apply a light spray starch now.
- Let the star dry completely, at least 4 hours, before you remove the pins.
Final Quality-Control Checklist
- Round 1 has 10 sc, and the center is pulled fully closed.
- Round 2 has 5 long petals and 5 short spokes, alternating.
- Round 3 has 15 sc, 5 point sps and 10 side sps.
- Round 4 has 95 sc: 19 per arm.
- Four points have red trim, and the top point has the hanging loop.
- Each red point has 12 dc and looks the same on both sides.
- The star is 3.5 in (8.9 cm) wide and 3.25 in (8.3 cm) tall.
- The hanging loop is 1.25 in (3.2 cm).
- No tails show inside the openwork.
Troubleshooting
The star looks like a pentagon. The valleys are not dipping. Make sure the Round 3 sc goes into the center ch of each short spoke, and that Round 4 has only 1 sc in each valley.
The edging ruffles. Your sc are looser than your chains. Work 6 sc instead of 7 in each ch-6 sp. That gives 2 + 6 + 1 + 6 + 2 = 17 sc per arm and 85 sc total.
The edging cups or pulls the points in. Keep 7 sc per space, but loosen your tension or go up 0.25 mm for Round 4 only.
The petals twist. Chains often twist as you work. Before Round 3, untwist each long loop so the front of the chain faces you.
One point is longer than the others. A petal probably has 16 or 14 chains. Recount Round 2 before you start the outline.
The red tips are lopsided. Recount A through E before joining. Starting one stitch early or late shifts the whole trim.
The hanging loop is floppy. Pack the sc more tightly, and add 2 more sc if the chain still shows.
Care
Hand wash in cool water with mild soap, roll the star in a towel to press out the water, and pin it to dry again. Store it flat or hanging, away from direct sunlight, so the red does not fade.
Final Notes
Each stage of the star builds on the one before it, so check your measurements as you go:
- The 10 sc ring is 0.5 in (1.3 cm) across.
- The petals reach 1.25 in (3.2 cm) past the ring.
- The outline makes the star 3 in (7.6 cm) wide, and the green edging makes it 3.25 in (8.3 cm).
- With the red tips, the finished star is 3.5 in (8.9 cm) wide by 3.25 in (8.3 cm) tall.
- The hanging loop adds 1.25 in (3.2 cm), for a total height of 4.5 in (11.4 cm).
If your test star hits each of these checkpoints, the rest of the batch will match. Make one as a gift tag topper or a whole set for the tree.
Happy crocheting!