

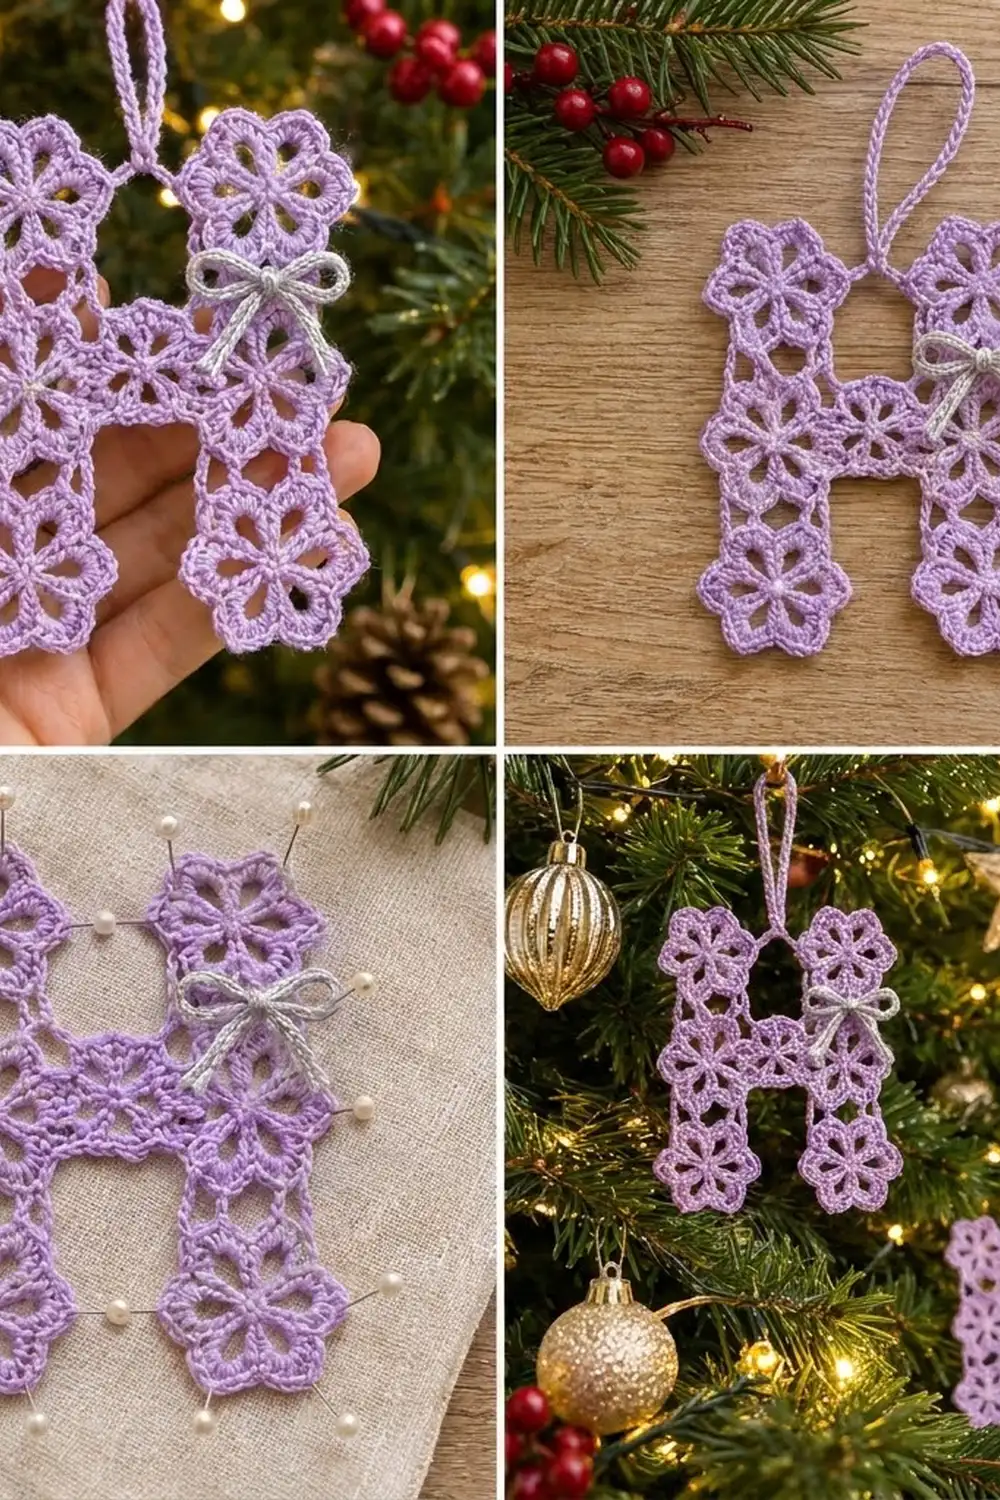
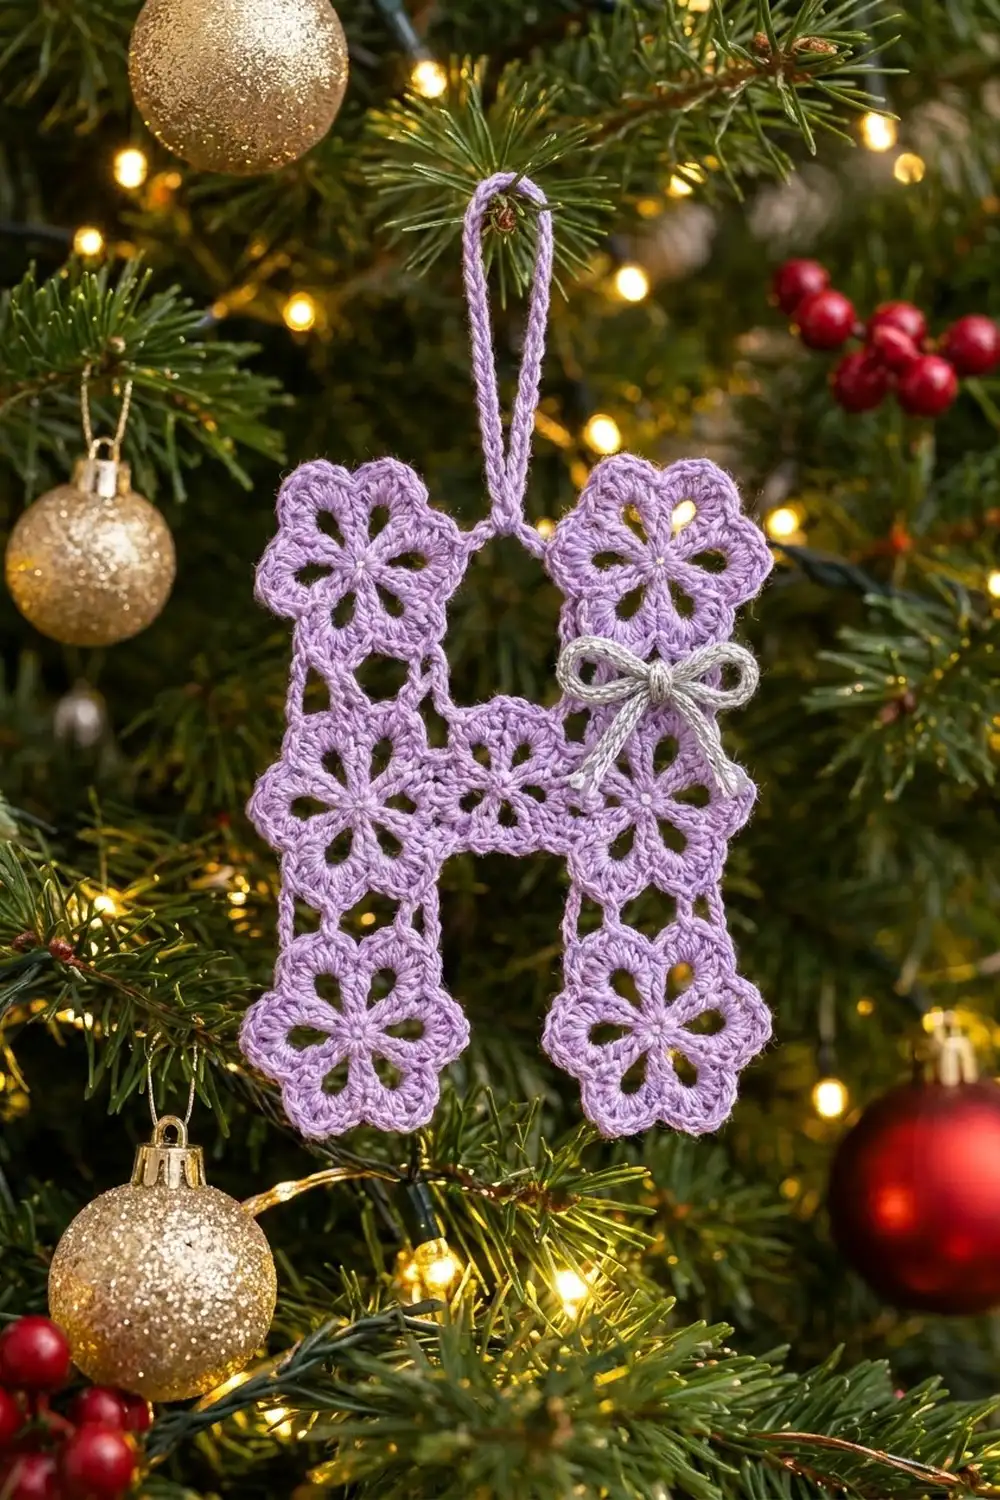
This Lavender Bloom Letter H is a delicate lace ornament made from seven small six-petal flowers joined into a capital “H”. Each flower has an open center, six airy petal windows and a crisp petal rim. A tiny pearl bead sits in each center, and a silver-gray bow on the upper right flower adds a festive touch.
The palette is soft and wintry: lavender cotton thread, a touch of silver-gray for the bow, and pearl-white seed beads. It looks lovely on a tree, tied to a gift, or hung in a window as a monogram.
The pattern uses US crochet terms. The finished letter measures about 4.5 in (11.4 cm) tall and 3.9 in (9.9 cm) wide, not counting the hanging loop. The loop adds about 2 in (5.1 cm) above the top edge.
You make the first flower, then join the other six as you go on their last round, connecting only at petal tips. Last, you add the hanging loop, the bow and the beads, then block the piece flat.
Finished Size and Construction
- Finished size: 4.5 in (11.4 cm) tall × 3.9 in (9.9 cm) wide, plus a 2 in (5.1 cm) loop
- Skill level: Easy-intermediate (fine thread, join-as-you-go)
- Terminology: US crochet terms
- Yarn weight: Size 3 cotton crochet thread (light fingering / lace)
- Hook: 2.25 mm (US B-1)
- Number of pieces: 7 flower motifs, joined into one piece
- Layout: Letter H: 3 motifs in the left upright, 3 in the right upright, 1 crossbar motif in the center
- Piece size: 1.5 in (3.8 cm) from petal tip to petal tip; 1.3 in (3.3 cm) across the flat sides
- Size before border: 4.5 in × 3.9 in (11.4 cm × 9.9 cm)
- Border depth: None. The scalloped petal round is the finished edge.
Materials
Choose a mercerized cotton thread in size 3. It holds crisp petal points, takes starch well, and doesn’t fuzz on the tree. Avoid acrylic: it won’t hold its shape after blocking.
- Lavender: 12 g / 45 m (49 yd), for the 7 motifs and the hanging loop
- Silver-gray (metallic or shiny cotton): 2 g / 3 m (3.3 yd), for the bow
Both quantities include a margin of about 25% for tails, swatching and the occasional frog-back.
Tools:
– 2.25 mm (US B-1) crochet hook
– 7 pearl-white seed beads, size 8/0
– Fine beading needle or sharp sewing needle
– Tapestry needle
– Rustproof pins and a blocking board or folded towel
– Spray starch or a fabric stiffener
– Small scissors
Abbreviations (US Terms)
- ch – chain
- sl st – slip stitch
- sc – single crochet
- hdc – half double crochet
- dc – double crochet
- sp – space
- st(s) – stitch(es)
- rnd – round
- RS – right side
Special stitch – Petal: In the same ch-5 space, work (sc, hdc, 3 dc, ch 2, 3 dc, hdc, sc). That makes 10 stitches plus one ch-2 tip per petal.
Special stitch – Joining Petal: In the same ch-5 space, work (sc, hdc, 3 dc, ch 1, sl st into the ch-2 tip of the neighboring motif’s matching petal, ch 1, 3 dc, hdc, sc). The ch 1, sl st, ch 1 replaces the ch-2 tip and still counts as one tip.
Gauge and Checkpoints
Make one complete motif before anything else. It is your gauge swatch, and you can use it later as the first motif (L1).
- After Rnd 1: 0.6 in (1.5 cm) across
- After Rnd 2: 1.0 in (2.5 cm) across the arches
- After Rnd 3: 1.5 in (3.8 cm) from petal tip to petal tip, and 1.3 in (3.3 cm) across the flat sides
Measure after a light press with your fingers, not after starching.
- If your motif is larger than 1.6 in (4.1 cm): go down to a 2.0 mm hook, or tighten your chains.
- If it is smaller than 1.4 in (3.6 cm): go up to a 2.5 mm hook.
A difference of 0.1 in (0.3 cm) per motif adds up to about 0.3 in (0.8 cm) across the height of the letter, so it is worth checking.
Flower Motif
Orientation: Work with the RS facing you. In Rnd 3 the petals are made in this order: top, upper-left, lower-left, bottom, lower-right, upper-right. These names are used in all the joining instructions below.
Rnd 1 (center): With lavender, ch 6 and sl st to the first ch to form a ring. Ch 3 (counts as dc), then work 17 dc into the ring. Sl st to the top of the beginning ch-3. (18 dc)
Rnd 2 (petal windows): Ch 1. Sc in the same st. Ch 5, skip 2 dc, sc in the next dc; repeat from * 4 more times. Ch 5, skip the last 2 dc, then sl st to the first sc. (6 sc and 6 ch-5 spaces)
Each ch-5 arch becomes one open petal window.
Rnd 3 (petal rims): Sl st into the first ch-5 space. Work a Petal in each of the 6 ch-5 spaces. Sl st to the first sc and fasten off, leaving a 4 in (10.2 cm) tail. (60 sts and 6 ch-2 tips)
The solid sc-hdc-dc rim wraps around each open window. The ch-2 at the top of each petal gives the slightly pointed tip you see along the edges of the H.
Center bead: With a beading needle and the tail, sew one pearl seed bead across the center ring so that it sits in the middle of the opening. Weave in the end.
Make All Pieces
You need 7 lavender motifs in total. Make the first one completely (Motif 1, L1). Work the other six through Rnd 2 and join each one on Rnd 3, as described in the next section.
- Lavender motifs: 7
- Silver-gray: used only for the bow
Layout grid (rows run top to bottom; “·” marks an empty position):
L1   ·   R1
L2   C   R2
L3   ·   R3
The letter is 3 motifs tall. Its middle row is 3 motifs wide, and the top and bottom rows each have a gap in the middle.
Joining (Join-As-You-Go)
Method: Each new motif is joined on its Rnd 3. When you reach a joining petal, work a Joining Petal instead of a plain Petal. All the other petals are worked as usual. Motifs connect at their petal tips only, so the lacy gaps stay open.
Stitch-to-stitch logic: Each join is one sl st into the ch-2 tip of the neighbor’s matching petal. No extra stitches are added, and each petal keeps its count of 10 sts plus 1 tip.
Joining order:
- L1: Make a complete motif with no joins.
- L2: Join its top petal to L1’s bottom petal. (1 tip)
- L3: Join its top petal to L2’s bottom petal. (1 tip)
- C: Join its upper-left petal to L2’s upper-right petal, and its lower-left petal to L2’s lower-right petal. (2 tips)
- R2: Join its upper-left petal to C’s upper-right petal, and its lower-left petal to C’s lower-right petal. (2 tips)
- R1: Join its bottom petal to R2’s top petal. (1 tip)
- R3: Join its top petal to R2’s bottom petal. (1 tip)
That makes 8 tip joins in total: four vertical joins with 1 tip each, and two horizontal joins with 2 tips each.
Why the shape works: With a petal pointing straight up, the side petals sit at 30° from horizontal.
- Vertical neighbors meet tip to tip, so their centers are one full motif width apart, 1.5 in (3.8 cm).
- Horizontal neighbors share two tips, so their centers are 1.3 in (3.3 cm) apart, which is the flat-side width.
That gives:
- Height: 3 × 1.5 in = 4.5 in (11.4 cm)
- Width: 3 × 1.3 in = 3.9 in (9.9 cm)
Tension advice: Keep each joining sl st snug but not tight. Pull up a little on the loop before the second ch 1 so the tip doesn’t pucker. Don’t twist the motif you’re joining to. Its RS should face you, just like the working motif.
Size checkpoint: Lay the joined piece flat.
- Each upright should be 4.5 in (11.4 cm) tall.
- The middle row should be 3.9 in (9.9 cm) wide.
- The top and bottom gaps between the uprights should each be about one motif wide.
Border (Edge Finish) and Hanging Loop
Border gauge: There is no added border round. The Rnd 3 petals are the finished edge, which is what gives the H its scalloped outline. A border round would fill in the gaps between motifs and blur the flower shapes.
Edge count:
- 7 motifs × 6 petals = 42 petals in total.
- The 8 joins merge 16 tips into 8 joined points, leaving 26 free petal tips around the outline.
- Each motif still has exactly 60 sts and 6 tips. The joins replace stitches instead of adding them, so every edge stays the same length and the outline lies flat.
Hanging loop:
- With the RS facing, join lavender with a sl st in the ch-2 tip of L1’s upper-right petal.
- Ch 7 for the first leg of the V.
- Ch 36, then sl st into the 7th ch of the first leg (the last ch made before the 36) to close the loop.
- Ch 7 for the second leg, then sl st into the ch-2 tip of R1’s upper-left petal.
- Fasten off and weave in the ends. (50 ch in total: 7 + 36 + 7)
Each leg is about 0.75 in (1.9 cm) long. The two legs form the V across the top gap, and the 36-ch loop rises about 2 in (5.1 cm) above it.
Bow:
- With silver-gray, ch 50, which makes a cord about 5.5 in (14.0 cm) long.
- Fasten off.
- Thread the cord through R1’s lower-left petal, close to where R1 joins R2.
- Tie a small bow about 1.25 in (3.2 cm) wide, then trim the ends evenly.
- Put a dot of fabric glue on the knot if you like.
Final Blocking
- Weave in every end. Leave the bow ends free.
- Pin the ornament to a blocking board, RS up. Put one pin in every free petal tip (26 pins) and one at each of the 8 joined points.
- Check the measurements: 4.5 in (11.4 cm) tall and 3.9 in (9.9 cm) wide. Make sure both uprights are straight and parallel.
- Use your fingertip to open each petal window into a neat oval.
- Spray generously with starch or brush on stiffener, then blot off the extra.
- Lay the hanging loop out in a smooth teardrop shape.
- Let it dry completely, usually 6 to 12 hours, before you unpin it.
- Fluff the bow loops once the piece is dry.
Final Quality-Control Checklist
- Each motif has 18 dc in Rnd 1, 6 arches in Rnd 2, and 6 complete petals in Rnd 3.
- All 8 joins are present, and each one uses the correct petals.
- No motif is flipped: every RS faces the same way.
- The letter measures 4.5 in × 3.9 in (11.4 cm × 9.9 cm).
- A bead sits in the center of each of the 7 motifs.
- The hanging loop is centered over the gap, with legs of equal length.
- The bow is firmly tied on R1’s lower-left area.
- All ends are woven in and nothing is poking out.
- The piece lies flat and is stiff enough to hang without sagging.
Troubleshooting
- Petals cup or ruffle: Your Rnd 2 chains are too long. Try ch 4 instead of ch 5, or go down a hook size for Rnd 2 only.
- Petal windows close up: Your Rnd 2 chains are too tight. Keep ch 5, but loosen your tension a little.
- The H leans or skews: A horizontal join has been made to the wrong pair of petals. Count the petals in working order again (top, upper-left, lower-left, bottom, lower-right, upper-right) and redo that motif’s Rnd 3.
- The tip puckers at a join: The joining sl st is too tight. Redo it with a slightly taller loop.
- The loop flops forward: Starch the loop along with the body, or make it shorter by working ch 30 instead of ch 36.
- The bead slides around: Sew across the ring twice, anchoring the thread on opposite sides of Rnd 1.
Care
Spot-clean gently with cool water and mild soap, then re-starch and pin flat to dry. Store the ornament flat in tissue paper so the petal tips and the bow keep their shape.
Final Notes
The measurements build on each other in a simple chain:
- Rnd 1 measures 0.6 in (1.5 cm).
- Rnd 2 measures 1.0 in (2.5 cm).
- Rnd 3 gives a 1.5 in (3.8 cm) flower that is 1.3 in (3.3 cm) across the flat sides.
- Three motifs stacked tip to tip make the 4.5 in (11.4 cm) height.
- Three motifs side by side across the middle make the 3.9 in (9.9 cm) width.
Get the first motif right and everything else follows. Make a whole alphabet in the same lavender, or switch colors for each initial.
Happy crocheting!