

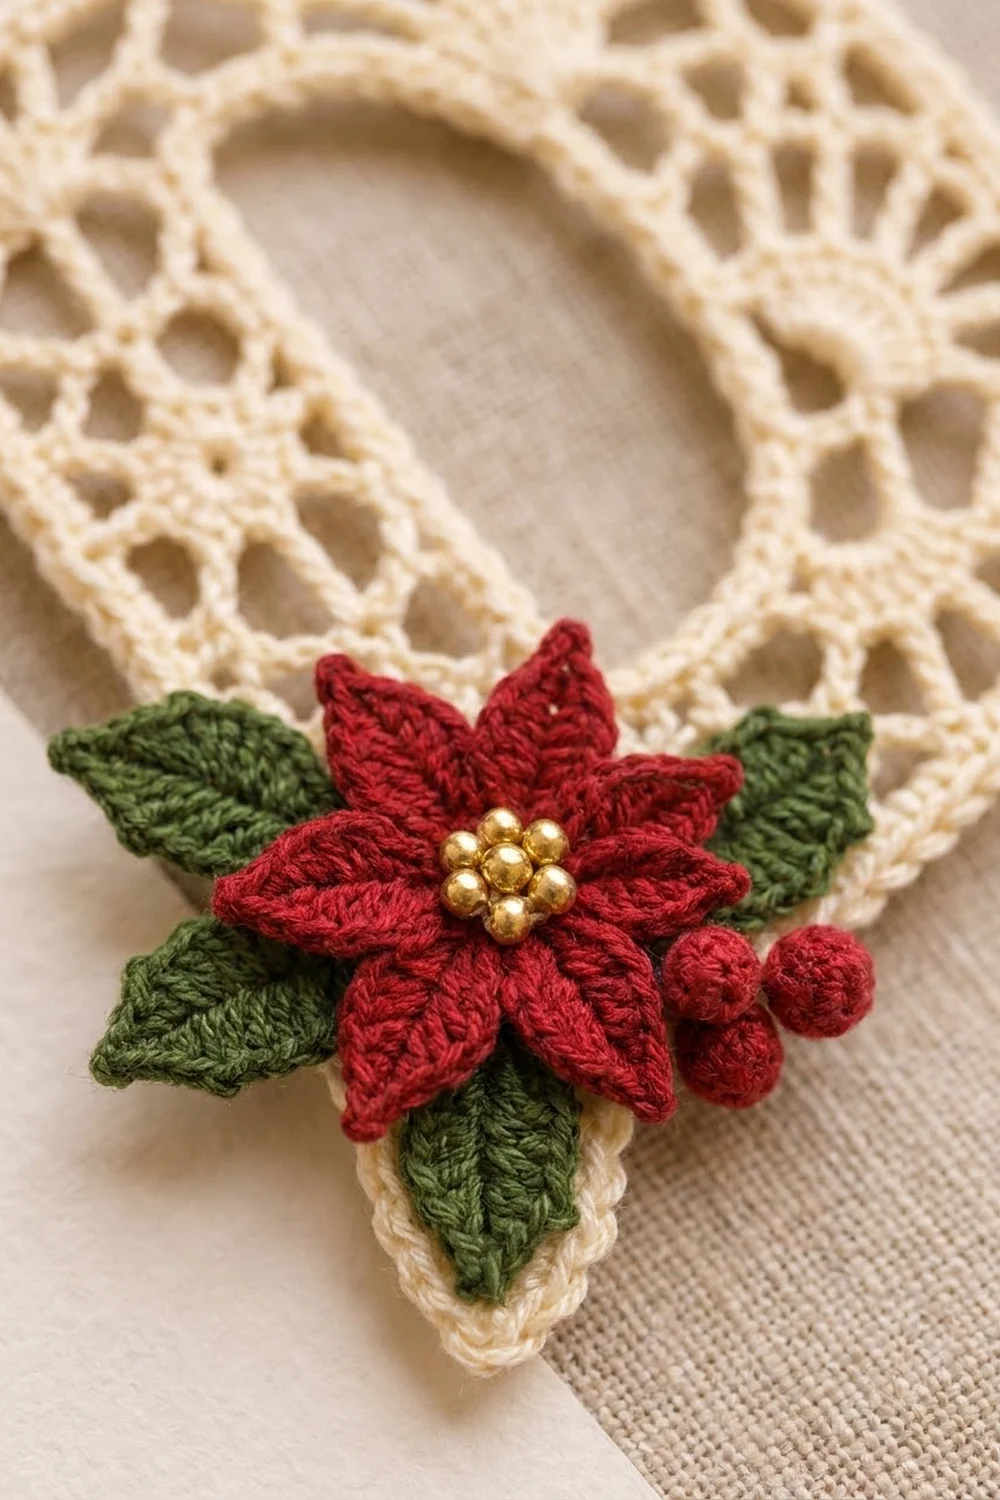
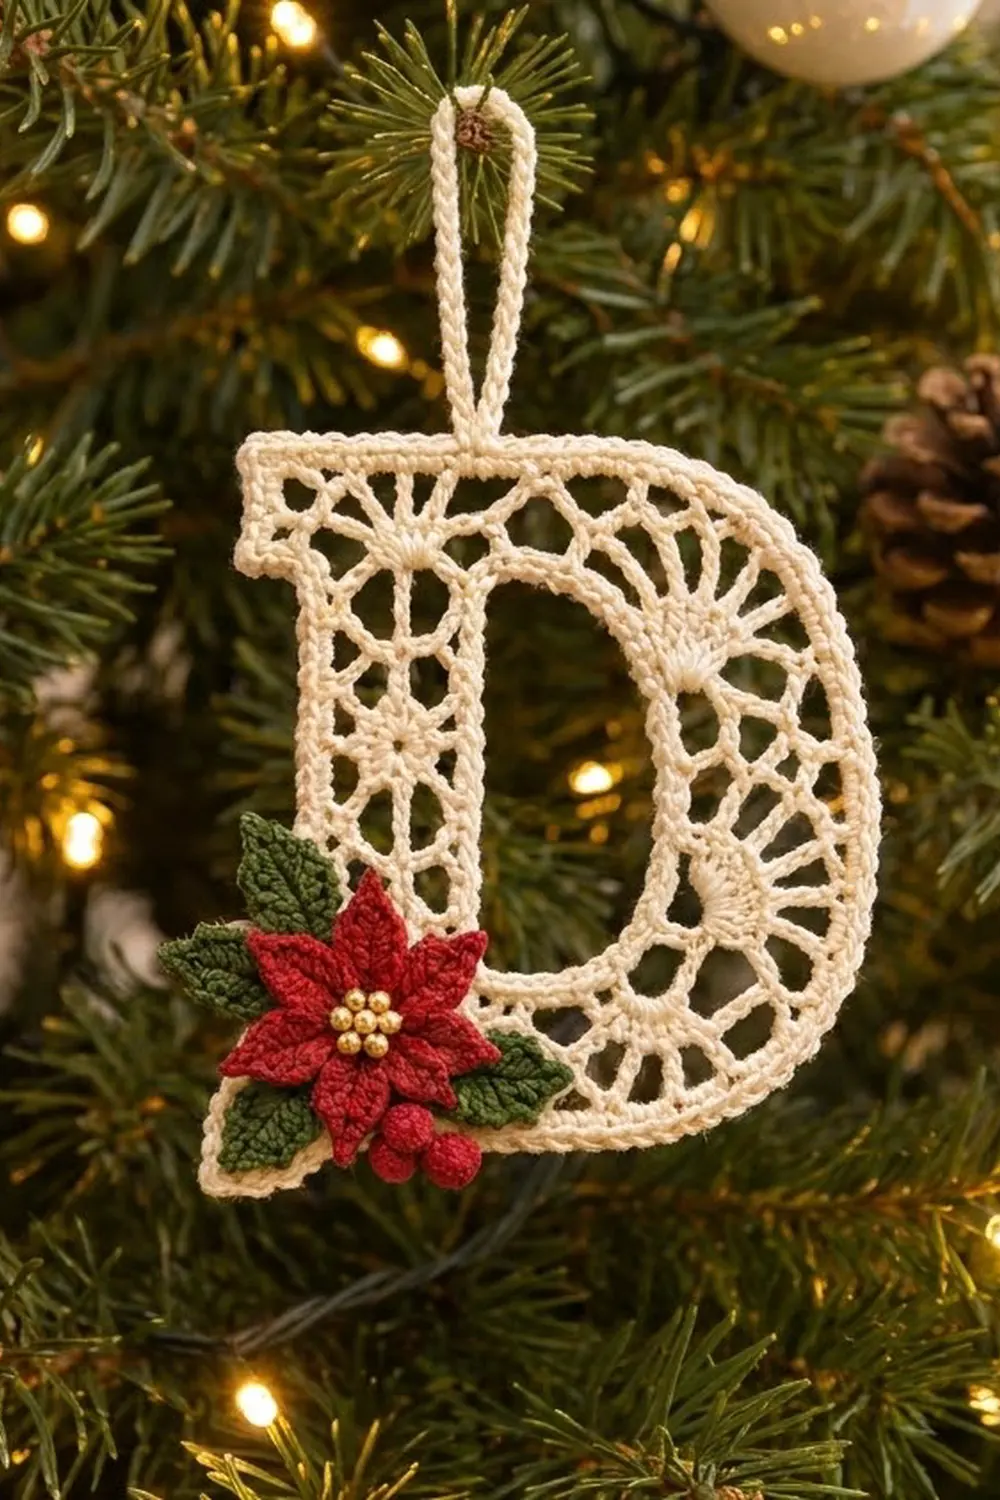
This ornament is a lacy cream letter D with a small red poinsettia sewn over the lower-left corner. The straight stem and the top and bottom bars are filled with an open lattice of mesh windows. The rounded bowl has radiating treble spokes topped by small shell fans. A firm corded edge outlines the whole letter, and a covered hanging loop rises from the top of the stem.
The colors are classic Christmas: warm cream for the lace, deep red for the poinsettia and berries, forest green for the leaves, and a cluster of gold seed beads in the flower center. It looks like heirloom thread lace but hangs easily on a tree, a gift bag, or a stocking.
All instructions use US crochet terms. The finished letter measures 4.0 in (10.2 cm) tall and 3.5 in (8.9 cm) wide, not counting the hanging loop.
You make the letter as one piece, working joined rounds outward from a chain ring. That ring becomes the D-shaped opening. Three lace rounds build the body, two border rounds add the corded edge, and the loop goes on last. You make the poinsettia, three leaves, and three berries separately and sew them on as a layered appliqué after blocking.
Finished Size and Construction
- Finished size: 4.0 in (10.2 cm) tall x 3.5 in (8.9 cm) wide
- Skill level: Intermediate
- Terminology: US crochet terms
- Yarn weight: Size 10 crochet cotton thread (Lace, weight 0)
- Hook: 1.75 mm steel hook (US steel 6)
- Number of pieces: 1 lace letter, plus a sewn appliqué of 1 poinsettia, 3 leaves, and 3 berries
- Layout: Single letter worked in rounds around a D-shaped opening
- Opening size: 2.3 in (5.8 cm) tall x 1.8 in (4.6 cm) wide
- Size before border: 3.6 in (9.1 cm) tall x 3.1 in (7.9 cm) wide
- Border depth: 0.2 in (0.5 cm), 2 rounds
- Hanging loop: 0.8 in (2.0 cm) tall
Materials
Use a mercerized cotton thread in size 10. Mercerized thread has a crisp sheen, holds starch well, and shows the lace clearly. Avoid fuzzy or soft-twist threads, because the mesh windows will close up.
- Cream: 8 g (about 42 m) for the letter, border, and loop
- Red: 3 g (about 16 m) for the poinsettia and berries
- Green: 2 g (about 10 m) for the leaves
These amounts include a comfortable margin for a gauge swatch and sewing tails.
Tools:
- 1.75 mm steel crochet hook (US steel 6)
- 6 locking stitch markers
- Tapestry needle (small eye) and a sharp sewing needle
- Beading needle and cream sewing thread
- 7 gold seed beads, size 8/0
- Blocking board or foam mat, rustproof pins
- Spray starch or diluted fabric stiffener
- Small scissors
Abbreviations (US Terms)
- ch: chain
- sl st: slip stitch
- sc: single crochet
- hdc: half double crochet
- dc: double crochet
- tr: treble crochet (yo twice, insert hook, yo and pull up a loop, [yo and pull through 2 loops] 3 times)
- sc2tog: single crochet 2 together
- rev sc: reverse single crochet
- sk: skip
- sp: space
- st(s): stitch(es)
- rep: repeat
- beg: beginning
Special stitch, reverse sc (rev sc): Work from left to right (if you crochet right-handed). Insert the hook into the next stitch to the right, yo and pull up a loop, then yo and pull through both loops. This makes the twisted, corded edge.
Gauge and Checkpoints
Gauge: 10 sc = 1 in (2.5 cm) with size 10 thread and a 1.75 mm hook. One tr round is 0.3 in (0.8 cm) tall, and one dc round is 0.25 in (0.6 cm) tall.
First work a small sc swatch. Then make the letter through Round 1 and measure it before you continue. The whole design depends on the opening and each round coming out at the right size.
Checkpoints (measured flat, lightly pressed with your fingers):
- After Round 1: 2.5 in (6.4 cm) tall x 2.0 in (5.1 cm) wide
- After Round 2: 3.1 in (7.9 cm) tall x 2.6 in (6.6 cm) wide
- After Round 3: 3.6 in (9.1 cm) tall x 3.1 in (7.9 cm) wide
- After Round 5: 4.0 in (10.2 cm) tall x 3.5 in (8.9 cm) wide
Too big? Go down to a 1.5 mm hook, or tighten your chains. Too small? Go up to a 2.0 mm hook. Thread lace relaxes a little when blocked, so aim for the checkpoint or up to 0.1 in (0.3 cm) under it, never over.
The Lace Letter
Foundation Ring
With cream, ch 72 loosely. Join with a sl st to the first ch to form a ring, making sure it isn’t twisted. The ring is about 7.2 in (18.3 cm) around and becomes the inside edge of the D.
Mark the ring into 6 segments, working clockwise from the joining point:
- Stem: 22 ch (the inside edge of the straight stem)
- Top-left corner: 1 ch
- Top bar: 6 ch
- Curve: 36 ch (the inside of the bowl)
- Bottom bar: 6 ch
- Bottom-left corner: 1 ch
Check: 22 + 1 + 6 + 36 + 6 + 1 = 72. Place a marker in each corner ch and at the first and last ch of the curve.
Round 1 (growth round: 80 sts)
Ch 1, then work the segments in order:
- Stem: sc in each of the 22 ch (22).
- Top-left corner: 3 sc in the corner ch (3).
- Top bar: sc in each of the 6 ch (6).
- Curve: (sc in next 8 ch, 2 sc in next ch) 4 times (40).
- Bottom bar: sc in each of the 6 ch (6).
- Bottom-left corner: 3 sc in the corner ch (3).
Join with a sl st to the first sc. Round 1 total: 80 sts (22 + 3 + 6 + 40 + 6 + 3). Move the markers up to the center sc of each corner group and to the first and last sc of the curve.
Round 2 (spoke round: 102 sts)
This round opens the mesh windows on the straight sections and starts the radiating spokes in the bowl.
- Stem: Ch 5 (counts as tr and ch 1), sk next st, (tr in next st, ch 1, sk next st) 10 times (22).
- Top-left corner: Tr in first corner sc, ch 1, (tr, ch 3, tr) in center sc, ch 1, tr in third corner sc, ch 1 (10).
- Top bar: (Tr in next st, ch 1, sk next st) 3 times (6).
- Curve: *(Tr in next st, ch 1, sk next st) twice, tr in next st, ch 1; rep from * 7 more times. Each repeat uses 5 sts and makes 3 tr and 3 ch (8 repeats = 48).
- Bottom bar: (Tr in next st, ch 1, sk next st) 3 times (6).
- Bottom-left corner: Work as the top-left corner (10).
Join with a sl st to the 4th ch of beg ch-5. Round 2 total: 102 sts (22 + 10 + 6 + 48 + 6 + 10).
Round 3 (fan and mesh round: 118 sts)
On the straight sections, this round stacks a second row of mesh windows over the first to create the lattice. In the bowl, it adds 8 small shell fans on top of the spokes.
- Stem: Ch 4 (counts as dc and ch 1), sk ch-1 sp, (dc in next tr, ch 1, sk ch-1 sp) 10 times (22).
- Top-left corner: Dc in first tr, ch 1, dc in next tr, ch 1, (dc, ch 3, dc) in ch-3 sp, ch 1, dc in next tr, ch 1, dc in next tr, ch 1 (14).
- Top bar: (Dc in next tr, ch 1, sk ch-1 sp) 3 times (6).
- Curve: *Sc in next tr, ch 1, sk ch-1 sp, 3 dc in next tr, ch 1, sk ch-1 sp, sc in next tr, sk ch-1 sp; rep from * 7 more times. Each repeat makes 7 sts and one fan (8 repeats = 56).
- Bottom bar: (Dc in next tr, ch 1, sk ch-1 sp) 3 times (6).
- Bottom-left corner: Work as the top-left corner (14).
Join with a sl st to the 3rd ch of beg ch-4. Round 3 total: 118 sts (22 + 14 + 6 + 56 + 6 + 14).
Check the size before the border: 3.6 in (9.1 cm) tall x 3.1 in (7.9 cm) wide. The band of lace around the opening is 0.65 in (1.7 cm) wide.
Poinsettia (make 1, red)
Ch 4, join with a sl st to form a ring.
Round 1: Ch 1, 12 sc in ring. Join to first sc (12).
Round 2 (petals): *Sc in next sc, ch 9, then work back along the chain: sl st in 2nd ch from hook, sc in next ch, hdc in next ch, dc in next 2 ch, hdc in next ch, sc in next ch, sl st in last ch; sk next sc; rep from * 5 more times. Join with a sl st to the first sc (6 pointed petals). Fasten off, leaving a 10 in (25.4 cm) tail.
Each petal uses 8 sts along its chain, and the skipped ch forms the pointed tip. The flower is about 1.6 in (4.1 cm) across.
Leaves (make 3, green)
Ch 11. Sc in 2nd ch from hook, hdc in next ch, dc in next 5 ch, hdc in next ch, sc in next ch (9 sts). Work (sc, ch 2, sc) in the last ch for the pointed tip. Working along the other side of the foundation chain: sc in next ch, hdc in next ch, dc in next 5 ch, hdc in next ch, sc in next ch (9 sts). Sl st to the first sc. Fasten off, leaving a tail.
Each leaf is a pointed oval about 0.9 in (2.3 cm) long.
Berries (make 3, red)
Round 1: Make a magic ring, 6 sc in ring (6).
Round 2: 2 sc in each st around (12).
Round 3: Sc2tog 6 times (6).
Tuck the starting tail inside as stuffing. Thread the end tail through the front loops of the last 6 sts and pull it closed. Each berry is about 0.3 in (0.8 cm) across.
Border
The border uses the same gauge as the swatch: 10 sc = 1 in (2.5 cm). Keep working in cream straight on from Round 3.
Round 4 (trim round: 126 sts)
Ch 1. Sc in each dc, sc, and ch-1 sp around, with these exceptions:
- Each corner ch-3 sp: 5 sc instead of 3, so each corner group has 16 sts (14 + 2).
- Curve: 2 sc in the center dc of fans 1, 3, 5, and 7, so the curve has 60 sts (56 + 4).
Side counts: stem 22, top-left corner 16, top bar 6, curve 60, bottom bar 6, bottom-left corner 16. Join with a sl st to the first sc.
Round 4 total: 118 sts worked 1 per existing stitch + 8 added stitches = 126 sts.
Round 5 (corded edge: 126 sts)
Ch 1. Rev sc in each st around (126). Join with a sl st to the first st. Fasten off.
Hanging Loop
Join cream with a sl st in the 12th st of the top-left corner group. This stitch sits on the top edge above the stem. Ch 20, sl st in the same st. Work 30 sc over the chain loop, then sl st in the base st. Fasten off. The covered loop stands 0.8 in (2.0 cm) tall.
Why the Border Math Works
The curve counts follow the outer edge of a half circle at each round. At 10 sts per inch, the 60-st curve on Round 4 equals 6.0 in (15.2 cm) of edge. The outer radius at that round is 1.9 in (4.8 cm): the 1.15 in (2.9 cm) inner radius plus 0.75 in (1.9 cm) of lace and border. A half circle with that radius measures 5.97 in (15.2 cm), so the curve lies flat without ruffling or cupping. The same logic holds on every earlier round.
The straight sections keep the same count every round because their length doesn’t change as you work outward. All the new edge length on the left side comes from the corner groups. That is why only the corners and the curve gain stitches.
Final Blocking
- Weave in all cream ends along the backs of the sc and dc stitches, never across the mesh windows.
- Soak the letter in cool water for 5 minutes, then press out the water in a towel.
- Pin it flat on the board, right side up, at 4.0 in (10.2 cm) tall x 3.5 in (8.9 cm) wide.
- Pin the two left corners square and the stem straight. Pin the bowl into a smooth half circle.
- Pin the tip of each fan outward so the spokes spread evenly.
- Spray with starch until damp and let it dry completely, at least 6 hours.
- Unpin. Lay the leaves and poinsettia on the lower-left corner: two leaves behind the flower pointing up and left, one leaf pointing down and right.
- Sew the leaves in place with the green tails. Then sew the poinsettia on top through its center and petal bases.
- Sew the 3 berries in a small cluster below the flower at the lower right.
- Sew 7 gold seed beads in a tight cluster in the flower center with cream thread.
Final Quality-Control Checklist
- Round counts match: 80, 102, 118, 126, 126.
- The letter measures 4.0 in (10.2 cm) x 3.5 in (8.9 cm).
- The opening is a clean D shape, 2.3 in (5.8 cm) x 1.8 in (4.6 cm).
- All mesh windows are open and evenly sized.
- The 8 fans are evenly spaced around the bowl.
- The rev sc edge is even and unbroken.
- The loop sits above the stem, and the ornament hangs straight.
- The appliqué is secure, with no stitches showing on the front.
Troubleshooting
The bowl ruffles. Your tension is loosening on the curve. Go down a hook size or tighten your trebles.
The bowl cups upward. You’re working the spokes too tightly. Loosen your tr stitches and keep the ch-1 spaces relaxed.
The corners round off. Make sure each ch-3 corner space has a full 3 chains, and pin the corners firmly when blocking.
The ring twisted. Undo it and chain again. A twisted ring can’t be blocked flat.
The ornament tilts when hung. Move the loop one stitch left or right until it hangs level.
The petals curl. Pin and starch the poinsettia separately before sewing it on.
Care
Hand wash in cool water with mild soap, press dry in a towel, and re-block with light starch. Store flat in tissue to protect the lace.
Final Notes
Here is the measurement chain. A 72-ch ring makes a 2.3 in (5.8 cm) x 1.8 in (4.6 cm) opening. Round 1 grows the letter to 2.5 in (6.4 cm) x 2.0 in (5.1 cm), Round 2 to 3.1 in (7.9 cm) x 2.6 in (6.6 cm), and Round 3 to 3.6 in (9.1 cm) x 3.1 in (7.9 cm). The 0.2 in (0.5 cm) border brings it to 4.0 in (10.2 cm) x 3.5 in (8.9 cm). Check each stage and your poinsettia letter will block crisp and square.
Happy crocheting!