
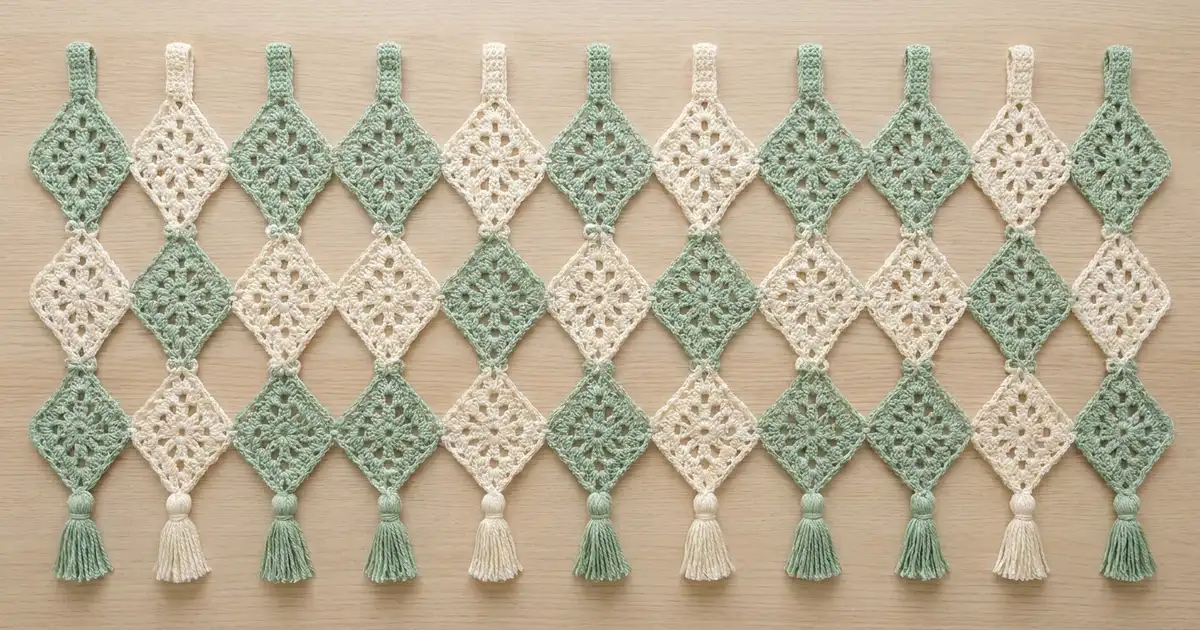
This valance is a light, airy lattice of granny squares turned on point. Sage green and cream diamonds alternate in a checkerboard and touch only at their tips, so daylight comes through every open space. A narrow tab at the top of each column slides onto a curtain rod, and a matching tassel finishes the bottom of each column.
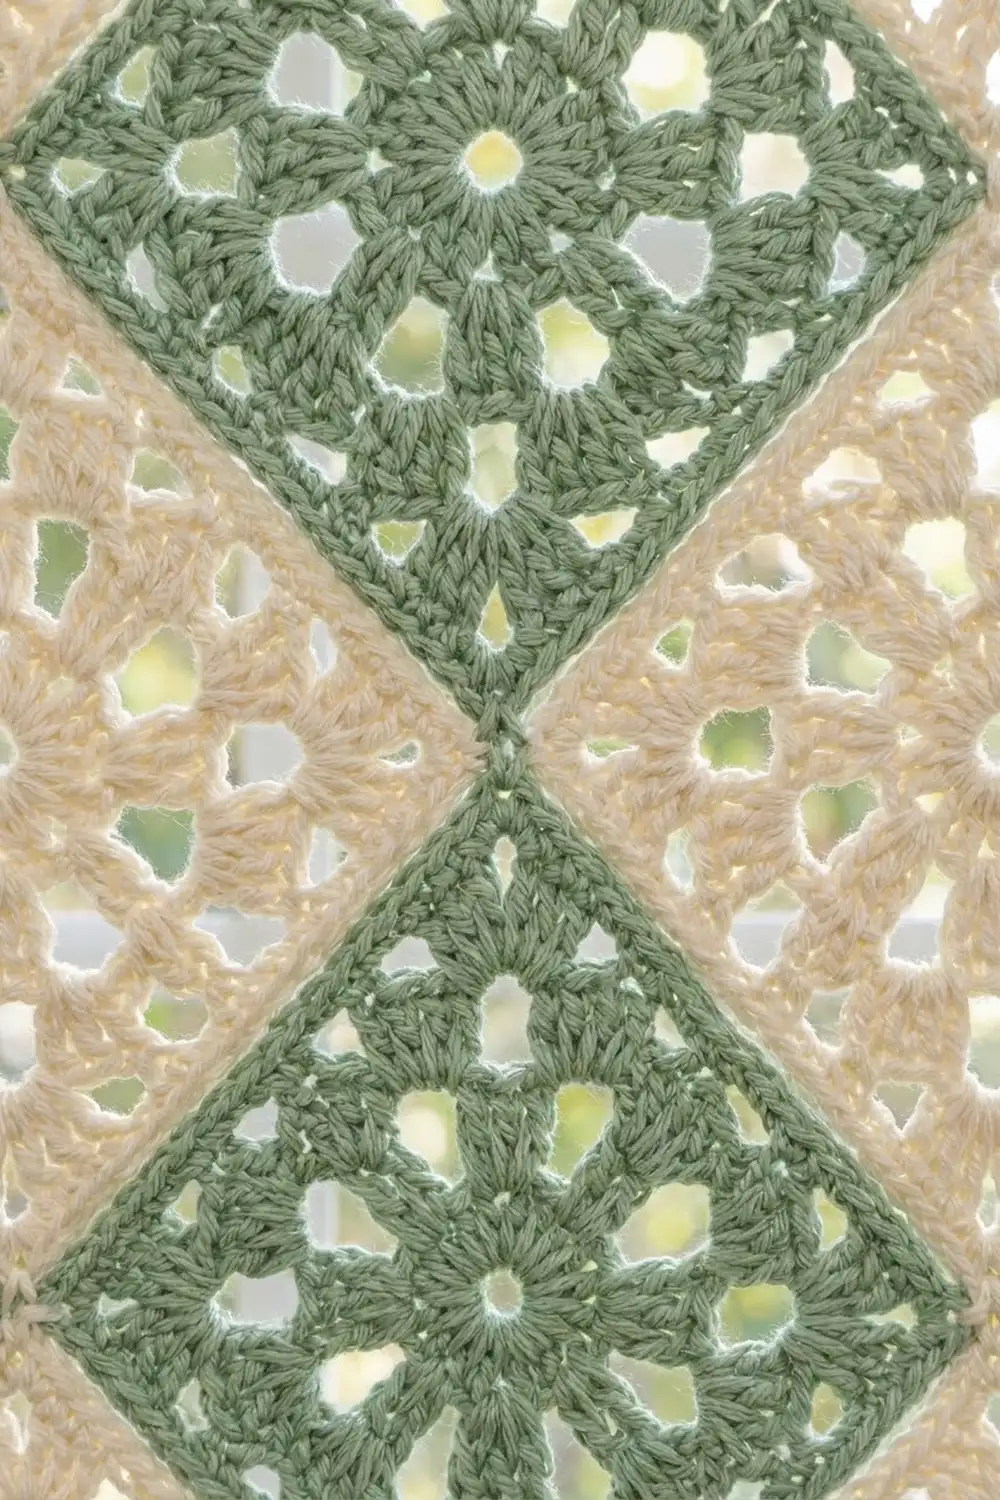
Each square starts with a small ring and eight paired-dc spokes. Two open granny rounds square it off, and a single-crochet edging round sharpens the corners into clean points. The look is soft and cottage-style, and it is easy to make: every square is identical, and only the color changes.
The pattern uses US crochet terms. The finished valance is 8 diamonds wide and 3 diamonds tall, about 51.2 in (130.0 cm) wide and 19.2 in (48.8 cm) tall from point to point. Tabs and tassels bring the total drop to about 23.7 in (60.2 cm).
Here is the order of work. You make 24 squares, sew them together point to point, and then add 8 top tabs and 8 bottom tassels. There is no straight outer border, because the outline of the valance is a zigzag of diamond points.
Finished Size and Construction
- Finished size: 51.2 in (130.0 cm) wide × 19.2 in (48.8 cm) tall, point to point
- Total drop, rod to tassel tips: about 23.7 in (60.2 cm)
- Skill level: Easy / advanced beginner
- Terminology: US crochet terms
- Yarn weight: Worsted (#4)
- Hook: 5.0 mm (H-8)
- Number of pieces: 24 squares, plus 8 tabs and 8 tassels
- Layout: 8 columns × 3 rows, squares turned on point and joined at their tips
- Square size: 4.5 in (11.4 cm) per side; about 6.4 in (16.3 cm) from point to point
- Size before edging (after Rnd 4): 4 in (10.2 cm) per side
- Edging depth (Rnd 5): 0.25 in (0.6 cm) on each side
Materials
Yarn: Use a smooth worsted-weight cotton or cotton blend with about 200 m per 100 g. Cotton holds the points sharply and hangs straight. Avoid fuzzy yarns, because they fill in the open spaces.
- Sage green: 150 g / 300 m (12 squares, 4 tabs, 4 tassels)
- Cream: 150 g / 300 m (12 squares, 4 tabs, 4 tassels, plus all joining)
These amounts include a margin of about 25% above the estimated use. That covers your gauge swatch and tassel trimming.
Tools:
– 5.0 mm (H-8) crochet hook
– Tapestry needle
– Stitch marker
– Sturdy cardboard, 3.5 in (8.9 cm) tall, for winding tassels
– Scissors
– Rust-proof pins and a blocking mat
– Spray bottle
– Measuring tape
Abbreviations (US Terms)
- ch – chain
- sl st – slip stitch
- sc – single crochet
- dc – double crochet
- sp(s) – space(s)
- st(s) – stitch(es)
- Rnd – round
- RS – right side
- Corner group – (3 dc, ch 2, 3 dc) worked into the same space
Special note: At the start of a round, ch 3 counts as the first dc. It is included in every stitch count.
Gauge and Checkpoints
Make one complete square (Rnds 1–5) before anything else and block it. That one square sets the size of the whole valance: every square is a fixed fraction of the width and height, so a small error repeats 24 times.
Square checkpoints (measured flat, lightly blocked):
– After Rnd 1: about 1.5 in (3.8 cm) across
– After Rnd 2: about 2.25 in (5.7 cm) across
– After Rnd 3: 3 in (7.6 cm) per side
– After Rnd 4: 4 in (10.2 cm) per side
– After Rnd 5: 4.5 in (11.4 cm) per side; about 6.4 in (16.3 cm) point to point
Tab gauge: 4 sc and 5 rows = 1 in (2.5 cm).
If your square is too big: go down to a 4.5 mm (G-7) hook. If it is only slightly over, keep the hook and tighten the ch-2 corners.
If your square is too small: go up to a 5.5 mm (I-9) hook.
Even a 0.25 in (0.6 cm) difference per side matters. It changes the point-to-point length by about 0.35 in (0.9 cm), and across 8 columns that adds up to almost 3 in (7.6 cm).
Granny Diamond Square (Make 24)
Work in the round with RS facing throughout. Do not turn.
Rnd 1: Make a magic ring. Ch 3 (counts as dc), work 15 dc into the ring, sl st to the top of ch-3. Pull the ring tight. (16 dc)
Rnd 2: Ch 3 (counts as dc), dc in next st, ch 2, dc in each of next 2 sts, ch 2; repeat from * 6 more times, sl st to top of ch-3. (16 dc in 8 pairs, 8 ch-2 sps)
This round makes the eight spokes. Its stitch count stays at 16; only the spacing changes.
Rnd 3 (squaring round): Sl st in next dc and into the next ch-2 sp. Ch 3 (counts as dc), (2 dc, ch 2, 3 dc) in the same sp for the first corner. Ch 1, 3 dc in next ch-2 sp, ch 1. Corner group in next ch-2 sp, ch 1, 3 dc in next ch-2 sp, ch 1; repeat from * 2 more times, sl st to top of ch-3. (36 dc: 4 corner groups × 6 dc = 24, plus 4 side groups × 3 dc = 12; also 4 ch-2 corner sps and 8 ch-1 sps)
Each side now has 9 dc between corner spaces. Checkpoint: 3 in (7.6 cm) per side.
Rnd 4: Sl st in next 2 dc and into the corner ch-2 sp. Ch 3 (counts as dc), (2 dc, ch 2, 3 dc) in the same sp, ch 1. [3 dc in next ch-1 sp, ch 1] twice. Corner group in next corner sp, ch 1, [3 dc in next ch-1 sp, ch 1] twice; repeat from * 2 more times, sl st to top of ch-3. (48 dc: 4 corner groups × 6 = 24, plus 8 side groups × 3 = 24; also 4 ch-2 corner sps and 12 ch-1 sps)
Each side now has 12 dc and 3 ch-1 sps between corner spaces. Checkpoint: 4 in (10.2 cm) per side.
Rnd 5 (edging): Ch 1, sc in the same st as the join and in the next 2 dc. (Sc, ch 2, sc) in the corner ch-2 sp. Sc in each dc and each ch-1 sp across to the next corner, (sc, ch 2, sc) in the corner sp; repeat from * 2 more times. Sc in each remaining dc and ch-1 sp, then sl st to the first sc. Fasten off and weave in the ends. (68 sc and 4 ch-2 corner sps)
Per-side count after Rnd 5: 1 corner sc + 12 sc over the dc + 3 sc in the ch-1 sps + 1 corner sc = 17 sc per side. This number already includes both corner sc. Each corner space holds 2 sc, one for each side it touches, so 4 sides × 17 = 68 sc with nothing counted twice.
Checkpoint: 4.5 in (11.4 cm) per side and about 6.4 in (16.3 cm) point to point.
Make All Pieces
- Sage green: 12 squares
- Cream: 12 squares
Block all 24 squares lightly before joining (see Final Blocking). Square, flat pieces make the points meet cleanly.
Layout grid (G = sage green, C = cream; every square is turned on point):
Row 1 (top):    G  C  G  C  G  C  G  C
Row 2:          C  G  C  G  C  G  C  G
Row 3 (bottom): G  C  G  C  G  C  G  C
Each column alternates colors from top to bottom, and so does each row from left to right. Row 1 and Row 3 match, so every column has the same color at its top tab and its bottom tassel.
Joining
Method: Sew the squares point to point with a tapestry needle and cream yarn. Every interior point meets exactly one other point, either the square above or below it or the square beside it.
Number of joins:
– Vertical joins: 8 columns × 2 = 16
– Horizontal joins: 3 rows × 7 = 21
– Total: 37 joins
Stitch-to-stitch logic: Lay two squares flat with RS up and their corners touching. Each join matches three points on one square to three points on the other:
- The last sc before the corner on square A goes to the matching sc on square B.
- The ch-2 corner sp goes to the ch-2 corner sp.
- The first sc after the corner goes to the matching sc.
Pass the needle twice through each matched pair, then knot on the back. Because the join only uses the existing corner stitches, it adds no stitches and no width. The squares touch tip to tip and do not overlap.
Tension: Make the sewing snug but not tight. If you pull too hard, the points pucker and the column gets shorter. If the stitches are too loose, the diamonds swing apart and the lattice gaps open up. A firm, flat cross-shaped knot at each point is the goal.
Order: Join each column first (top to middle to bottom), then join the columns to each other row by row.
Size checkpoint: Lay the panel flat. The width across the side points should be 8 × 6.4 in = 51.2 in (130.0 cm). The height from top point to bottom point should be 3 × 6.4 in = 19.2 in (48.8 cm).
Border: Top Tabs and Bottom Tassels
The valance has no continuous border. Its outer edges are a zigzag of diamond points, and a straight border band would hide the lattice shape. Instead, the finishing edge is one tab at each top point and one tassel at each bottom point. Each one is worked into the 17-sc edge of a single square.
Border gauge: 4 sc and 5 rows = 1 in (2.5 cm).
Top Tabs (make 8, one per top-row square, matching the square’s color)
Row 1: With RS facing, join yarn with a sc in the last sc before the top corner sp. Work 2 sc in the corner ch-2 sp, then sc in the next sc. (4 sc)
Rows 2–20: Ch 1, turn, sc in each sc across. (4 sc)
Fasten off and leave a 12 in (30.5 cm) tail.
Why the math works: Row 1 uses 4 stitches: 1 from each side’s edge plus 2 in the corner space. At 4 sc per inch, the tab is 1 in (2.5 cm) wide and sits centered on the point. Twenty rows at 5 rows per inch make the tab 4 in (10.2 cm) long.
Fold each tab toward the back over a rod up to 1 in (2.5 cm) in diameter. The circumference of that rod is about 3.1 in (7.9 cm), which leaves about 0.75 in (1.9 cm) of overlap. Whipstitch Row 20 to the back of the square across Rnds 4–5, just below the point. Once the tab is folded, the square’s point hangs about 1.5 in (3.8 cm) below the top of the rod.
Bottom Tassels (make 8, one per bottom-row square, matching the square’s color)
- Wrap yarn 30 times around a 3.5 in (8.9 cm) card.
- Slide an 8 in (20.3 cm) strand under the wraps at the top and tie it tightly.
- Cut through the wraps at the bottom edge.
- Wrap a second strand 4 times around the bundle 0.5 in (1.3 cm) below the top to form the head. Knot it and bury the ends inside the tassel.
- Trim the tassel to 3 in (7.6 cm).
- Thread the top tie ends through the bottom corner ch-2 sp of the square, knot them on the back, and weave them in.
Total drop: 1.5 in (3.8 cm) from rod to top point + 19.2 in (48.8 cm) of panel + 3 in (7.6 cm) of tassel = 23.7 in (60.2 cm).
Final Blocking
- Lay the joined valance flat on a blocking mat, RS up.
- Mist it evenly with water until it is damp but not soaked.
- Pin the four points of each diamond first, checking that each square is 4.5 in (11.4 cm) per side.
- Check the overall width, 51.2 in (130.0 cm), and height, 19.2 in (48.8 cm), and adjust the pins.
- Pin the tabs straight and flat.
- Comb the tassels straight with your fingers and mist them lightly.
- Leave everything to dry completely, then unpin.
Final Quality-Control Checklist
- 24 squares: 12 sage green and 12 cream, in the checkerboard layout
- Every square has 68 sc and 4 ch-2 corners (17 sc per side)
- Every square measures 4.5 in (11.4 cm) per side
- All 37 joins are sewn and knotted securely on the back
- No point overlaps or puckers
- 8 tabs, each 4 sc wide and 20 rows long, sewn down evenly
- 8 tassels, each 3 in (7.6 cm), matching the color of their square
- Panel measures 51.2 in × 19.2 in (130.0 cm × 48.8 cm)
- All ends are woven in and none show on the RS
Troubleshooting
The square cups or ruffles: Your Rnd 1 ring is too loose or your dc stitches are tight. Pull the ring closed firmly and loosen your dc.
The corners look rounded: Make sure the corner chain is really 2 chains in Rnds 3–5. Block the points firmly.
A side has more or fewer than 17 sc: Recount Rnd 4. Each side needs 12 dc and 3 ch-1 sps. A missing ch-1 sp is the usual cause.
The panel leans to one side: One column is shorter than the others. Re-block it, or redo any join that is pulled tight.
The tabs twist: Sew the full width of Row 20 to the back, not just its center.
The tassels look thin: Add 5 more wraps per tassel and keep the same card.
Care
Hand wash in cool water with a mild soap. Roll it in a towel to remove water, then lay it flat and re-pin the points while it dries.
Final Notes
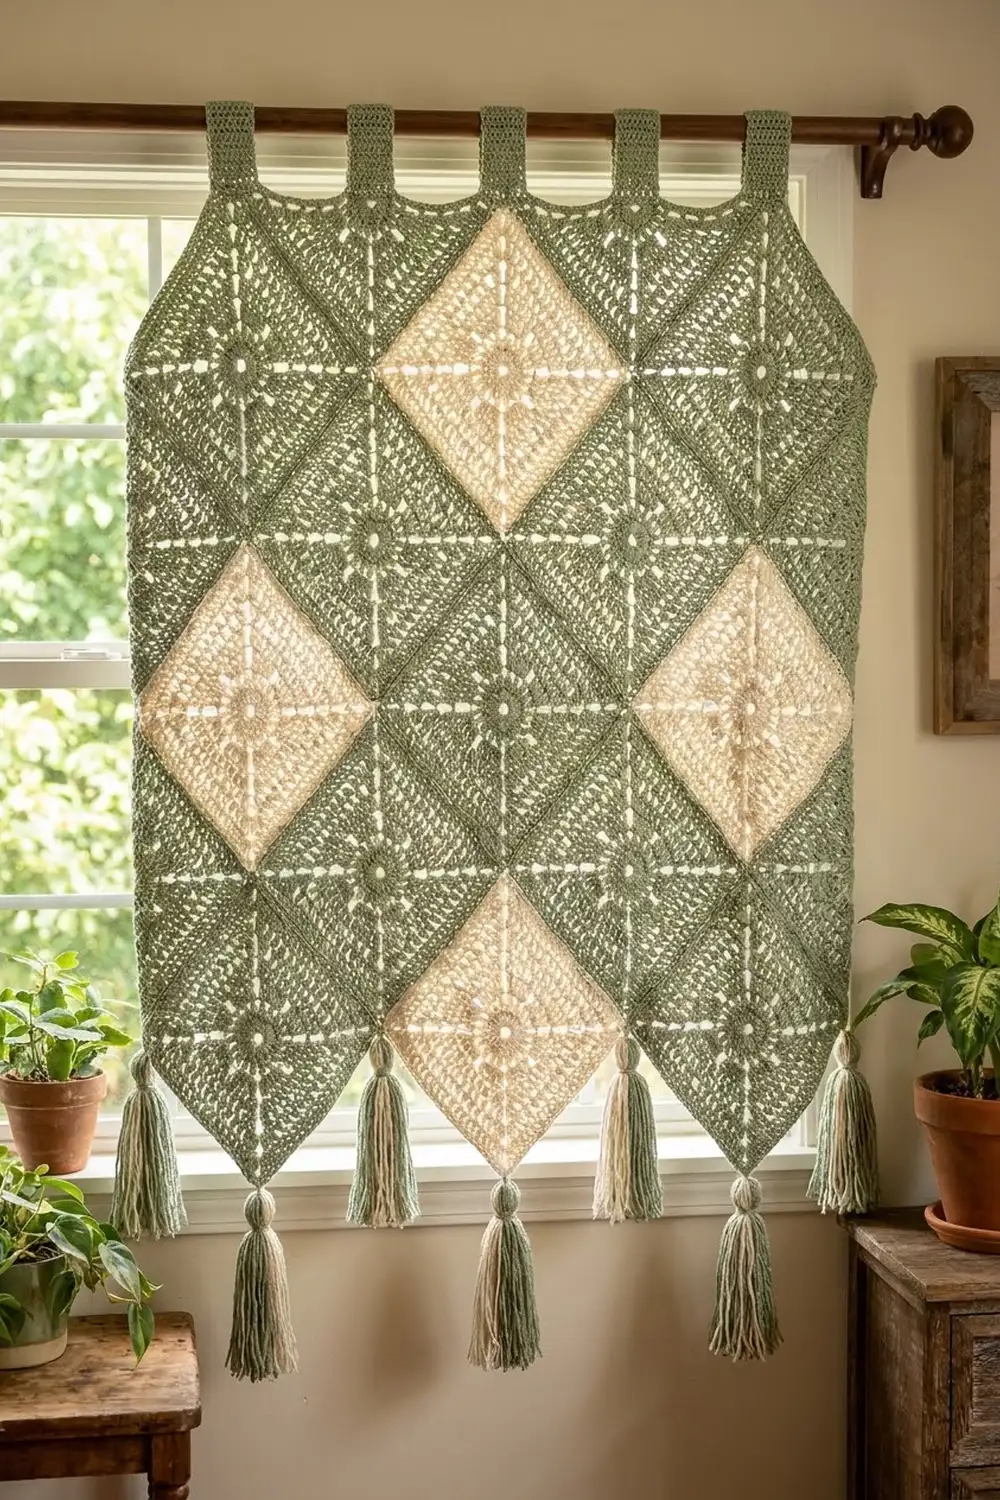
Everything in this pattern follows one measurement chain. A 4 in (10.2 cm) Rnd 4 square becomes a 4.5 in (11.4 cm) edged square with 17 sc per side. That gives a 6.4 in (16.3 cm) diamond from point to point. Eight diamonds make 51.2 in (130.0 cm) of width, and three make 19.2 in (48.8 cm) of height. Tabs and tassels bring the drop to 23.7 in (60.2 cm). Check your first square carefully, and the rest of the valance will come out to size.
Happy crocheting!