

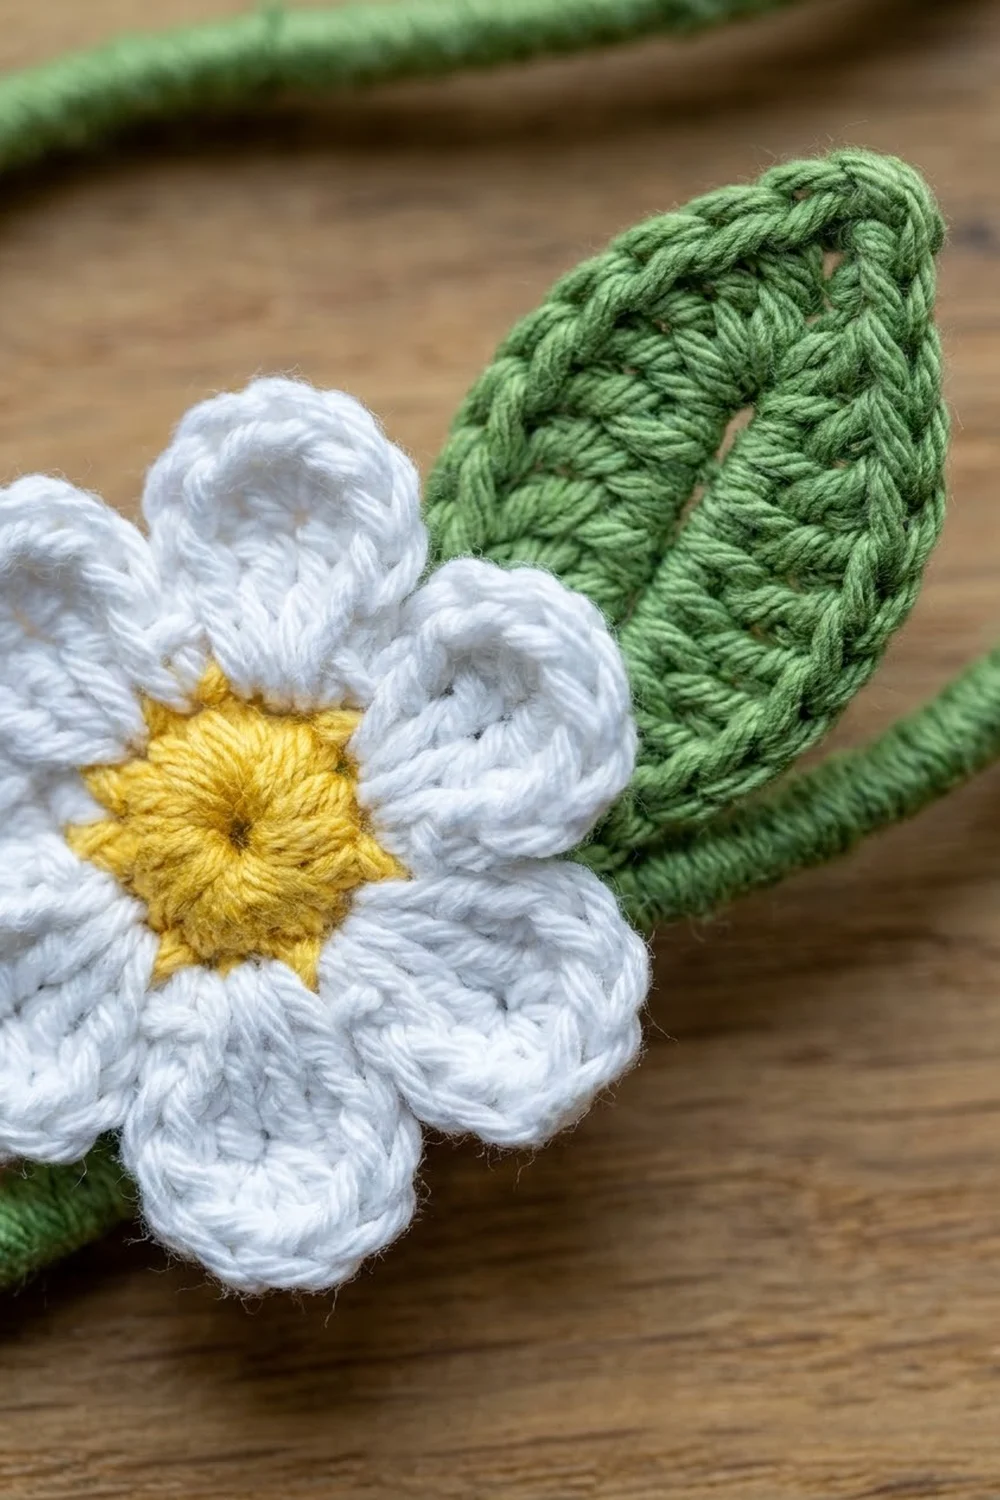
This curtain brings a meadow to your window. It has a wavy lace header in white and moss green. Nine slim green vines hang below it, each one dotted with white six-petal daisies and small pointed leaves.
The palette uses three colors: white, moss green, and a warm sunny yellow for the daisy centers. The look is cottage-style and light. Sun shines through the open mesh and between the vines, so the window still lets in plenty of light.
This pattern uses US crochet terms. The finished curtain is 30.5 in (77.5 cm) wide and 42 in (106.7 cm) long, measured from the top of the hanging tabs to the bottom of the vines.
You will work the header in rows as a ripple, starting at the white bottom edge, and finish it with a picot edge. Next you crochet nine slip-stitch vines straight off the bottom edge, then sew on 36 daisies and 36 leaves. Last comes a green sc border along the top and sides, plus five hanging tabs.
Finished Size and Construction
- Finished size: 30.5 in (77.5 cm) wide x 42 in (106.7 cm) long
- Skill level: Intermediate
- Terminology: US
- Yarn weight: Worsted (weight 4) cotton
- Hook: 5.0 mm (H-8)
- Number of pieces: 1 header, 9 vines (worked onto the header), 36 daisies, 36 leaves, 5 tabs (worked onto the border)
- Layout: 9 vines spaced evenly 3.75 in (9.5 cm) apart under a ripple header with 4 waves
- Header size (Rows 1–12): 30 in (76.2 cm) x 7.5 in (19.1 cm)
- Size before border (with picot edge): 30 in (76.2 cm) x 7.75 in (19.7 cm)
- Border depth: 0.25 in (0.6 cm) on the top and sides, plus tabs that rise 2 in (5.1 cm)
- Vine length: 32 in (81.3 cm)
- Daisy: 2.25 in (5.7 cm) across. Leaf: 2 in (5.1 cm) x 1 in (2.5 cm)
Materials
Pick a smooth mercerized or combed worsted cotton. Cotton holds the petal shapes crisply, keeps the ripple from stretching out of shape, and stands up to sun on a window.
- White: 120 g / 210 m (header lace and daisy petals)
- Moss green: 130 g / 230 m (header band, border, tabs, vines, leaves)
- Yellow: 25 g / 45 m (daisy centers)
These quantities include a margin of roughly 15%.
Tools:
– 5.0 mm (H-8) crochet hook
– Tapestry needle
– Stitch markers (at least 10)
– Rust-proof pins and a blocking surface
– Tape measure
– Scissors
Abbreviations (US Terms)
- ch – chain
- sl st – slip stitch
- sc – single crochet
- hdc – half double crochet
- dc – double crochet
- st(s) – stitch(es)
- sk – skip
- sp – space
- dc3tog – double crochet 3 together
- RS / WS – right side / wrong side
Special stitches
- dc3tog: (Yarn over, insert hook in next st or sp, pull up a loop, yarn over, pull through 2 loops) 3 times, then yarn over and pull through all 4 loops on hook. This uses up 3 sts and makes 1.
- Picot: Ch 3, sl st in the 3rd ch from hook.
- Mesh segment: (Ch 1, sk 1 st, dc in next st) 6 times, ch 1, sk 1 st. This uses up 13 sts and makes 13 (each ch-1 counts as a st).
In every row after Row 1, work into each st and each ch-1 sp. Each ch-1 sp counts as 1 st.
Gauge and Checkpoints
Gauge: In a plain dc swatch, 14 dc = 4 in (10.2 cm) and 8 rows = 5 in (12.7 cm). In the ripple, one wave (30 sts, measured peak to peak) is 7.5 in (19.1 cm) wide when measured straight across.
Test one piece first: make a single daisy. It should be 2.25 in (5.7 cm) across. If it is, your hook and tension suit the rest of the project.
Checkpoints:
– After header Row 4: 30 in (76.2 cm) wide, measured in a straight line from end peak to end peak
– After Row 12: 7.5 in (19.1 cm) deep, measured vertically through any wave
– After a vine: 32 in (81.3 cm) long, hanging freely
– Leaf: 2 in (5.1 cm) long
If your piece comes out too big, go down 0.5 mm in hook size. If it comes out too small, go up 0.5 mm. Do not change any stitch counts, because the wave positions depend on them.
Header
The header is a 121-stitch ripple. Each row has two-stitch end peaks, 3 inner peaks, and 4 valleys, so the stitch count stays at 121 in every row. The peaks become the tab points and the valleys hang lowest.
Foundation: With white, ch 124.
Row 1 (RS, white): Dc in the 4th ch from hook. The skipped 3 ch count as a dc, so these 2 sts form the end peak in base ch 1. Dc in next 13 ch, dc3tog over next 3 ch, dc in next 13 ch, 3 dc in next ch; repeat from * 2 more times. Dc in next 13 ch, dc3tog, dc in next 13 ch, 2 dc in last ch. Turn. (121 sts)
Row check: 2 + (13 + 1 + 13 + 3) x 3 + (13 + 1 + 13) + 2 = 121.
Row 2 (white, mesh): Ch 3 (counts as dc), dc in first st. Mesh segment, dc3tog, mesh segment, (dc, ch 1, dc) in next st; repeat from * 2 more times. Mesh segment, dc3tog, mesh segment, 2 dc in top of turning ch. Turn. (121 sts)
Each inner peak (dc, ch 1, dc) lands in the center of the peak below, and each dc3tog sits centered on the valley below. The dc of the mesh sit in the ch-1 sps of the row below, which gives a staggered lace net.
Rows 3–8 (white): Repeat Row 2. At the end of Row 8, change to green on the last yarn over. (121 sts each row)
Row 9 (green): Ch 3, dc in first st. Dc in next 13 sts, dc3tog, dc in next 13 sts, 3 dc in next st (the ch-1 sp at the peak); repeat from * 2 more times. Dc in next 13 sts, dc3tog, dc in next 13 sts, 2 dc in last st. Turn. (121 sts)
Rows 10–12 (green): Repeat Row 9, putting each 3-dc peak into the center dc of the peak below. Fasten off. (121 sts each row)
Checkpoint: 30 in (76.2 cm) x 7.5 in (19.1 cm).
Bottom Picot Edge (white): With the RS facing, join white in the free loop of base ch 1 (the opposite side of the foundation). Ch 1, sc in same ch. Picot, sc in next 2 ch; repeat from * 59 more times. Fasten off. (121 sc, 60 picots)
The math: 1 + (2 x 60) = 121, so the last sc lands exactly in the last base ch.
Daisy (make 36)
Rnd 1 (yellow): Magic ring, ch 1, 6 sc in ring. Join with sl st to first sc. (6 sc)
Rnd 2 (yellow): Ch 1, 2 sc in each st. Join and fasten off. (12 sc) The center is 0.75 in (1.9 cm) across.
Rnd 3 (white petals): Join white in any sc. Sc in next st, (hdc, 3 dc, hdc) in next st; repeat from * 5 more times. Join with sl st to first sc. (36 sts: 6 sc + 6 petals of 5 sts)
Each petal is a rounded fan, and a single sc separates it from the next. Fasten off and leave a 10 in (25.4 cm) white tail for sewing.
Leaf (make 36)
With green, ch 8.
Side 1: Sl st in 2nd ch from hook, sc in next ch, hdc in next ch, dc in next 2 ch, hdc in next ch, sc in last ch. (7 sts)
Base: Ch 1. Rotate to work along the other side of the foundation chain.
Side 2: Sc in first ch, hdc in next ch, dc in next 2 ch, hdc in next ch, sc in next ch, sl st in last ch. (7 sts)
Tip: Ch 2, sl st in the first sl st. Fasten off and leave an 8 in (20.3 cm) tail.
The foundation chain sits down the middle of the leaf as a raised center vein. The leaf comes to a point at the tip and is slightly rounded at the base.
Make All Pieces
- Daisies: 36 (yellow Rnds 1–2, white Rnd 3)
- Leaves: 36 (green)
- Vines: 9 (green, worked onto the header in the next section)
Layout grid (distances measured down from the picot edge; F = daisy, L = leaf):
Vine:      1    2    3    4    5    6    7    8    9
3 in       F    L    F    L    F    L    F    L    F
6.5 in     L    F    L    F    L    F    L    F    L
10 in      F    L    F    L    F    L    F    L    F
13.5 in    L    F    L    F    L    F    L    F    L
17 in      F    L    F    L    F    L    F    L    F
20.5 in    L    F    L    F    L    F    L    F    L
24 in      F    L    F    L    F    L    F    L    F
27.5 in    L    F    L    F    L    F    L    F    L
Metric positions: 3 in (7.6 cm), 6.5 in (16.5 cm), 10 in (25.4 cm), 13.5 in (34.3 cm), 17 in (43.2 cm), 20.5 in (52.1 cm), 24 in (61.0 cm), 27.5 in (69.9 cm). Each vine gets 4 daisies and 4 leaves, which adds up to 36 of each.
Joining
Vines onto the header: Lay the header RS up with the picot edge at the bottom. Place markers in the picot-edge sc that sit in base ch 1, 16, 31, 46, 61, 76, 91, 106, and 121. These are the 5 peaks and 4 valleys, each 15 sts apart.
For each marked sc: join green with a sl st, then ch 113. Sl st in the back bump of the 2nd ch from hook and in each ch back up to the header (112 sl st). Sl st into the marked sc and fasten off.
Slip-stitching into the back bumps gives each vine a firm, twisted, cord-like look. Keep the chain relaxed. If your sl sts are tight, the vine can shrink by 1 in (2.5 cm) or more.
Daisies and leaves: Follow the layout grid. Sew each daisy through its yellow center to the vine using its tail, so that the vine runs straight behind the flower. Sew each leaf at its base only, angled out about 45 degrees. Alternate the leaves left and right down each vine so the tips stay free.
Checkpoint: Hang the header and let the vines drop. All nine should end level at 32 in (81.3 cm) below the picot edge, and the gaps between vines should be 3.75 in (9.5 cm).
Border
Border gauge: 2 sc per dc row-end on the sides, and 1 sc per st on the top. One sc row adds 0.25 in (0.6 cm).
Border Row (green, RS): Join green at the bottom of the right side, at the end of Row 1.
- Right side: 2 sc in each of the 12 row-ends. (24 sc)
- Top edge: 3 sc in the first st of Row 12 (corner), sc in each of the next 119 sts, 3 sc in the last st (corner). (125 sc, including both 3-sc corner groups)
- Left side: 2 sc in each of the 12 row-ends. (24 sc)
Fasten off. (173 sc total)
Why the math works: the top edge has 121 sts, and each corner adds 2 extra sts, so 121 + 4 = 125. The sides have 12 dc-height rows, and 2 sc per row-end makes 24. That gives 24 + 125 + 24 = 173. Because the sc row follows the stitches exactly, it keeps the wave shape intact.
Tabs (make 5, green): Number the top-edge sc 1 to 125. Tabs go over sts 1–5, 31–35, 61–65, 91–95, and 121–125. These line up with the end corners and the 3 inner peaks (center sts 33, 63, and 93), so the layout is symmetrical around st 63.
- Row 1: Join green in the first st of the tab, ch 1, sc in the same st and the next 4 sts. (5 sc)
- Rows 2–18: Ch 1, turn, sc in each st. (5 sc)
Each tab measures 1.4 in (3.6 cm) x 4.5 in (11.4 cm). Fold it to the WS and whipstitch the last row to the back of the border row. The loop that forms stands 2 in (5.1 cm) tall and fits a rod up to 1.25 in (3.2 cm) across.
Final Blocking
- Before sewing on the daisies, wet the header and the vines in cool water, then press out the water in a towel.
- Pin the header to 30.5 in (77.5 cm) x 8 in (20.3 cm), including the border. Pin each peak and valley so the four waves match.
- Pin open each picot on the bottom edge.
- Hang the vines over a rail with a light weight, such as a clothespin, on each tail until they are dry and straight.
- Steam each daisy flat on a towel and shape the petals round with your fingers.
- Steam each leaf and pinch the tip into a point.
- Let everything dry completely, then sew on the daisies and leaves.
Final Quality-Control Checklist
- Every header row has 121 sts
- Peaks and valleys line up vertically through all 12 rows
- The picot edge has 121 sc and 60 picots
- 9 vines, each made from 112 sl sts and each 32 in (81.3 cm) long
- 36 daisies with 6 petals each, and 36 leaves
- Border: 24 + 125 + 24 = 173 sc
- 5 tabs, evenly spaced and securely sewn
- All ends woven in on the WS
Troubleshooting
- The waves drift sideways: You miscounted in a mesh segment. Check that every segment has six dc between the ch-1 sps.
- The header ruffles: Your tension is loose. Go down a hook size and check that each peak has only 3 sts.
- The header cups: Your dc3tog is pulled too tight. Loosen the final yarn over.
- A vine is shorter than the others: The sl sts were too tight. Rework that vine with a hook 0.5 mm larger, or add extra chains.
- The petals curl: Steam them flat, or use (hdc, 2 dc, hdc) for smaller petals.
- A tab twists: Whipstitch it straight across all 5 sts.
Care
Hand wash in cool water with mild soap and press out the water in a towel. Do not wring. Lay flat to dry, then reshape the waves and petals.

Final Notes
The measurement chain runs like this. Your gauge of 14 dc = 4 in (10.2 cm) gives a 30-st wave that is 7.5 in (19.1 cm) wide, and four waves make a 30 in (76.2 cm) header. Twelve rows give the header its 7.5 in (19.1 cm) depth. The picot edge brings it to 7.75 in (19.7 cm), and the border brings it to 30.5 in (77.5 cm) x 8 in (20.3 cm). The 2 in (5.1 cm) tabs and 32 in (81.3 cm) vines complete the 42 in (106.7 cm) length. Check each link in the chain as you go, and the curtain will hang straight and even.
Happy crocheting!