

The Lilac Meadow Curtain is a light, airy panel made from small flower squares. Each square has a soft yellow five-petal flower framed by lilac chain loops. Once the squares are joined, the lilac frames form an open lattice that lets the light through, with a yellow flower at every crossing.
The palette is just two colors, lilac and butter yellow. That keeps the curtain calm and springlike, and it works in a sunny living room, a bedroom, or a doorway. This pattern uses US crochet terms throughout.
The finished panel is about 49.5 in (125.7 cm) wide and 85.25 in (216.5 cm) long, not counting the tab loops. The tab loops stand about 2.25 in (5.7 cm) above the top edge.
You make 112 identical motifs, join them with slip stitches into a grid 8 motifs wide and 14 motifs long, add a two-round border, crochet ten tabs across the top, and finish the sides and bottom with a picot edge.
Finished Size and Construction
- Finished size: 49.5 in × 85.25 in (125.7 cm × 216.5 cm), plus tab loops
- Skill level: Intermediate (simple stitches, but many repeats)
- Terminology: US crochet terms
- Yarn weight: DK / light (#3) cotton or cotton blend
- Hook: 4 mm (G-6)
- Number of pieces: 112 motifs
- Layout: 8 motifs across × 14 motifs down
- Motif size: 6 in × 6 in (15.2 cm × 15.2 cm)
- Size before border: 48 in × 84 in (121.9 cm × 213.4 cm)
- Border depth: 0.5 in (1.3 cm) along the top; 0.75 in (1.9 cm) on the sides and bottom, including the picots
Materials
Choose a smooth mercerized cotton or a cotton blend. Cotton holds the petal shapes well, does not stretch much when hanging, and copes with sunlight better than most acrylics. All amounts below assume about 110 m per 50 g ball.
- Lilac: 750 g / 1,650 m (15 balls), for the motif frames, joining, border, and tabs
- Yellow: 200 g / 440 m (4 balls), for the flower centers
Tools:
- 4 mm (G-6) crochet hook
- Tapestry needle
- Stitch markers (at least 4)
- Blocking mats and rust-proof pins
- Spray bottle
- Measuring tape
The quantities include a margin of about 15% for gauge differences and for any motifs you need to remake.
Abbreviations (US Terms)
- ch – chain
- sl st – slip stitch
- sc – single crochet
- hdc – half double crochet
- dc – double crochet
- tr – treble crochet
- sp – space
- st(s) – stitch(es)
- BLO – back loop only
- Rnd – round
- RS – right side
Special stitch – picot: Ch 3, then sl st into the front loop and side strand of the sc just made.
Gauge and Checkpoints
Gauge: 20 sc and 18 rows = 4 in (10.2 cm) in sc worked in rows with the 4 mm hook.
Before starting the batch, make one complete motif and block it. It should measure 6 in (15.2 cm) square, with a tolerance of ±0.25 in (0.6 cm). With 112 motifs, a difference of only 0.25 in per motif adds up to 2 in (5.1 cm) across the width and 3.5 in (8.9 cm) down the length.
Checkpoints while you make the motif (measured flat, unblocked):
- After Rnd 3: the flower measures about 2.4 in (6.1 cm) across.
- After Rnd 4: about 3 in (7.6 cm) from tip to tip.
- After Rnd 5: about 4.25 in (10.8 cm) across.
- After Rnd 6: about 5.5 in (14 cm) across, measured side to side.
- After Rnd 7: 6 in (15.2 cm) square.
If your motif is too big, go down to a 3.75 mm hook. If it is too small, go up to a 4.5 mm hook. Change the hook, not the stitch counts, because the joining and border math depends on 30 stitches per side.
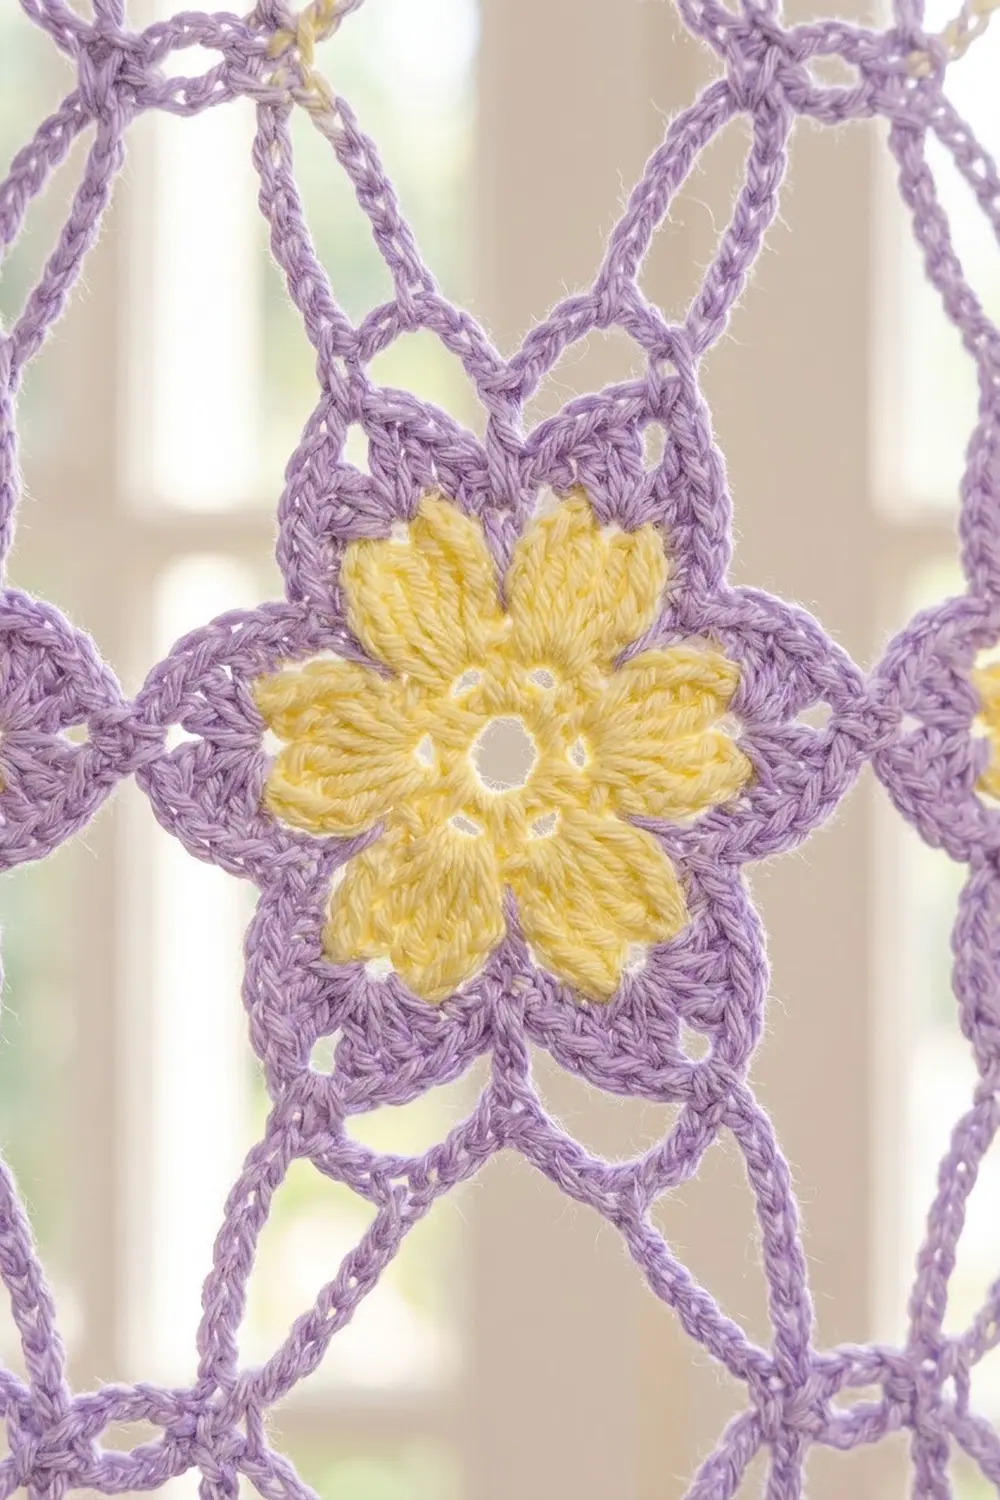
Flower Motif (Make 112)
Rnds 1–3: Yellow Flower
Rnd 1: With yellow, make a magic ring. Ch 1, work 10 sc into the ring, then sl st to the first sc. Pull the ring snug, but leave a small hole in the center. (10 sts)
Rnd 2: Ch 1. [Sc in next st, ch 3, skip next st] 5 times. Sl st to the first sc. (5 sc, 5 ch-3 sps)
Rnd 3: Sl st into the first ch-3 sp. In each ch-3 sp work (sc, hdc, 3 dc, hdc, sc). Sl st to the first sc. Fasten off yellow. (5 petals of 7 sts = 35 sts)
The middle dc of each 3-dc group is that petal’s center dc.
Rnd 4: Lilac Outline
Rnd 4: Join lilac in the first sc of any petal. Ch 1.
Work across one petal as follows: sc in sc, sc in hdc, sc in dc, (sc, ch 3, sc) in center dc, sc in dc, sc in hdc, sc in sc. Then ch 2 over the valley between petals.
Repeat from * to * 4 more times. Sl st to the first sc.
(40 sc, 5 ch-3 tips, 5 ch-2 valley sps)
The ch-3 tip at the center dc gives each petal its pointed lilac outline. To make the next round easier to follow, number the 8 sc on each petal sc1 to sc8. The tip sits between sc4 and sc5.
Rnd 5: Chain-Loop Round
Rnd 5: Sl st in the next 3 sc and into the first ch-3 tip. Ch 1 and sc in the same tip. Then work the following around:
- Ch 5, skip sc5 and sc6, sc in sc7.
- Ch 5, skip sc8, sc in the ch-2 valley sp.
- Ch 5, skip sc1 of the next petal, sc in sc2.
- Ch 5, skip sc3 and sc4, sc in the next ch-3 tip.
Repeat 5 times in total. On the last repeat, replace the final sc with a sl st to the first sc.
(20 sc, 20 ch-5 loops)
Rnd 6: Squaring Round
Rnd 6: Sl st in the next 3 ch to reach the center of the first loop. This loop is a corner.
Ch 4 (counts as tr). Work (tr, ch 5, 2 tr) in the same loop.
[Ch 5, sc in next loop] 4 times, ch 5, then (2 tr, ch 5, 2 tr) in the next loop.
Repeat from * to * 2 more times. Then work [ch 5, sc in next loop] 4 times, ch 5, and sl st to the top of the beginning ch 4.
(16 tr, 16 sc, 4 corner ch-5 sps, 20 side ch-5 sps; each side has 5 side ch-5 sps)
Rnd 7: Frame Round
Rnd 7: Sl st in the next tr and into the corner ch-5 sp. Ch 1.
Work 5 sc in the corner sp. The 3rd of these 5 sc is the corner st; mark it. Then sc in each of the next 2 tr, work 4 sc in each of the next 5 side ch-5 sps (20 sc), and sc in each of the next 2 tr.
Repeat from * to * 3 more times. Sl st to the first sc. Fasten off and weave in the ends.
(Each corner: 5 sc. Each side between corner groups: 2 + 20 + 2 = 24 sc. Total: 4 × 5 + 4 × 24 = 116 sts.)
Per-side count: From one corner st to the next, including both of them, each side has 30 sts (1 + 2 + 24 + 2 + 1). Check: 4 sides × 30 − 4 shared corners = 116. ✓
Make All Pieces
Make 112 motifs in total. Each motif uses yellow for Rnds 1–3 and lilac for Rnds 4–7.
- Yellow flower centers: 112
- Lilac frames: 112
Block every motif to 6 in (15.2 cm) square before joining. Layout (M = one motif):
Row 1:  M M M M M M M M   (top, tabs go here)
Row 2:  M M M M M M M M
Row 3:  M M M M M M M M
Row 4:  M M M M M M M M
Row 5:  M M M M M M M M
Row 6:  M M M M M M M M
Row 7:  M M M M M M M M
Row 8:  M M M M M M M M
Row 9:  M M M M M M M M
Row 10: M M M M M M M M
Row 11: M M M M M M M M
Row 12: M M M M M M M M
Row 13: M M M M M M M M
Row 14: M M M M M M M M   (bottom, picot edge)
Joining
Method: Slip stitch seam through the BLO, worked on the RS.
- Join the rows. Lay two motifs RS up with the edges to be joined side by side. Start with the corner sts. Work 1 sl st through the back loop of the facing st on each motif, matching stitch to stitch along the whole side, corner st to corner st. That is 30 sl sts per seam. Continue until you have 8 motifs in a row. Make 14 rows.
- Join the rows to each other. Place two rows edge to edge and work one long seam across the full width. That is 8 × 30 = 240 sl sts, again matching stitch to stitch. Make 13 of these seams.
The seams use existing stitches only, so no stitches are added at any seam. Where four motifs meet, the four corner sts meet at a single point. Work through each pair as you reach it.
Tension: Keep your slip stitches as loose as the sc they are worked into. If you have trouble keeping them loose, go up one hook size for joining. Tight seams make the curtain pucker and pull the lattice out of square.
Size checkpoint: One joined row should measure 48 in (121.9 cm). The finished grid should measure 48 in × 84 in (121.9 cm × 213.4 cm).
Border
Border gauge: The border keeps the motif gauge of 5 sc per inch (2.5 cm), worked 1 sc into each edge st.
Starting counts:
- Top and bottom: 8 motifs × 30 sts = 240 sts
- Each side: 14 motifs × 30 sts = 420 sts
These counts already include each motif’s corner sts, so nothing is added at the seams. The 4 outer corner sts each belong to two edges.
Rnd 1: With RS facing, join lilac in any st. Sc in each st around, working 3 sc in each of the 4 outer corner sts. Sl st to the first sc.
- Top and bottom: 238 sc between corner groups
- Each side: 418 sc between corner groups
- Total: 2 × 238 + 2 × 418 + 4 × 3 = 1,324 sts
Rnd 2: Ch 1. Sc in each st around, working 3 sc in the center st of each corner group. Sl st to the first sc and fasten off.
- Top and bottom: 240 sc between corner groups
- Each side: 420 sc between corner groups
- Total: 1,332 sts
Tabs (Make 10)
There are 240 top sts between the corner groups. They divide into 10 equal units of 24 sts. Each unit is: skip 6 sts, work a tab over 12 sts, skip 6 sts.
The result is 10 tabs, each 12 sts or 2.4 in (6.1 cm) wide, set 2.4 in (6.1 cm) apart. The outer tabs sit 1.2 in (3 cm) from each corner.
Row 1: With RS facing, count 6 sts in from the right end of the top edge and join lilac in the 7th st. Ch 1, then sc in this st and the next 11 sts. Turn. (12 sc)
Rows 2–22: Ch 1, sc in each st across, turn. (12 sc)
The tab should measure about 4.9 in (12.4 cm). Fold it to the wrong side and whipstitch the last row to the back of Rnd 1. This makes a loop that stands about 2.25 in (5.7 cm) high and fits a rod up to 1.25 in (3.2 cm) across.
Skip 12 sts and make the next tab. Make 10 tabs in total.
Picot Edge (Sides and Bottom)
Rnd 3: Join lilac in the center st of the top-left corner group. Sc in that st and in the next st.
- Left side: [Sc in each of the next 2 sts, picot] 210 times.
- Bottom-left corner: Sc in the first st, (sc, picot, sc) in the center st, sc in the last st.
- Bottom: [Sc in each of the next 2 sts, picot] 120 times.
- Bottom-right corner: Work the same as the bottom-left corner.
- Right side: [Sc in each of the next 2 sts, picot] 210 times.
- Top-right corner: Sc in the first st of the corner group and in its center st. Fasten off.
(1,092 sc, 542 picots)
Why the math works: Each edge count is even: 420 = 2 × 210 and 240 = 2 × 120. So the 2-st picot repeat fits exactly, with no half repeats. The top count of 240 = 10 × 24, so the tabs space evenly. Two sc rounds on the sides plus the picots add 0.75 in (1.9 cm) per side: 48 + 0.75 + 0.75 = 49.5 in (125.7 cm) wide. The length is 84 + 0.5 + 0.75 = 85.25 in (216.5 cm).
Final Blocking
- Weave in all remaining ends, following the stitch direction.
- Lay the curtain flat on blocking mats or a clean sheet on the floor.
- Spray it evenly until damp, but not soaking wet.
- Pin the corners first, so the panel measures 49.5 in × 85.25 in (125.7 cm × 216.5 cm).
- Pin along each edge every 4 in (10.2 cm), keeping the edges straight.
- Open up each flower. Pin the petal tips so that the lilac points are crisp and the yellow petals lie flat.
- Let it dry completely, which usually takes 24–48 hours, before you unpin it.
- Hang it, then check after a day that the bottom edge is still level.
Final Quality-Control Checklist
- [ ] All 112 motifs measure 6 in (15.2 cm) square, ±0.25 in (0.6 cm)
- [ ] Every motif has 5 petals, 5 lilac tips, and 30 sts per side
- [ ] All seams match stitch to stitch, with no gaps at the four-way corners
- [ ] The grid measures 48 in × 84 in (121.9 cm × 213.4 cm) before the border
- [ ] Border Rnd 2 has 240 sts on the top and bottom and 420 sts on each side
- [ ] There are 10 tabs, evenly spaced and all the same length
- [ ] The picot edge lies flat without ruffling
- [ ] All ends are woven in and secure
Troubleshooting
- Flower cups: The magic ring is pulled too tight, or Rnd 2’s ch-3 is too short. Try ch 4 if you work tightly.
- Motif won’t sit square: Count Rnd 6. Each side needs exactly 5 ch-5 sps between the corner groups.
- Motif sides bow inward: Work 5 sc instead of 4 into only the center side sp. Do not change the other sps. Keep the 30-st side count by working 1 fewer sc in the corner group (4 sc, with the 2nd as the corner st).
- Seams pucker: Rework them with a larger hook.
- Border ruffles: Your border tension is too loose, so go down one hook size. Do not skip stitches.
- Curtain stretches when hung: This is normal for cotton. Re-block it and let it hang for a few days before you hem or adjust anything.
Care
Hand wash in cool water with mild detergent, gently squeeze out the water, and dry flat, re-pinning if needed. Keep the curtain out of strong all-day sun to slow down fading.
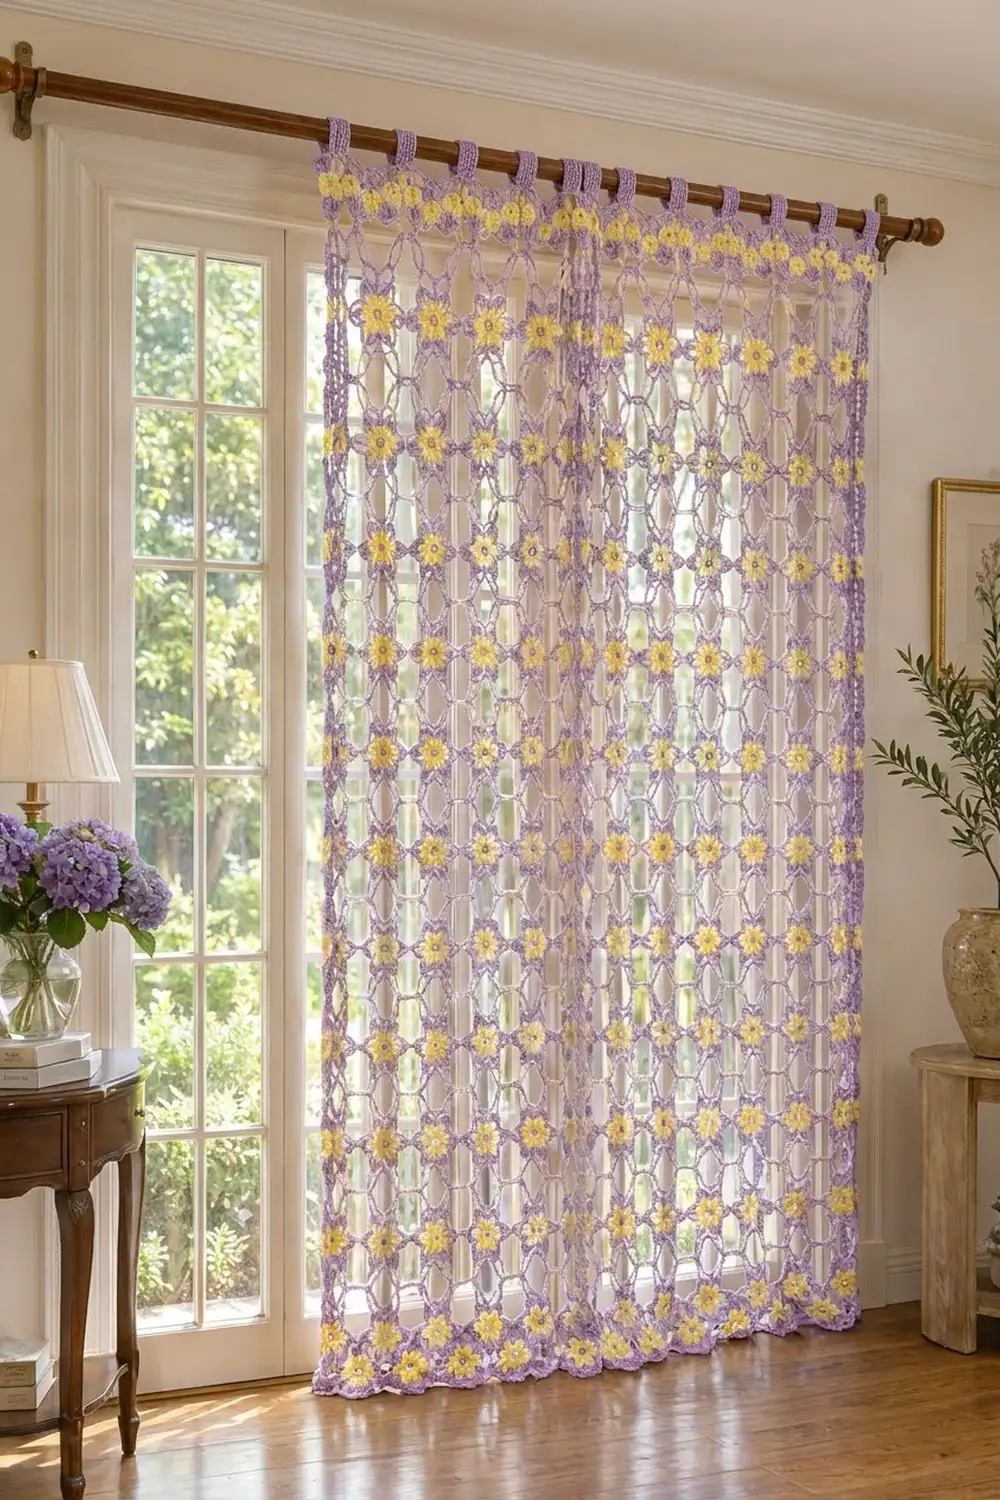
Final Notes
The whole curtain depends on one number: 30 stitches per motif side at 5 sc per inch, which gives a 6 in (15.2 cm) square. Eight motifs across gives 240 sts, or 48 in (121.9 cm). Fourteen motifs down gives 420 sts, or 84 in (213.4 cm). The border carries those same counts through to ten evenly spaced tabs and a picot edge that fits exactly. If your first motif measures correctly, the rest of the curtain will follow.
Happy crocheting!